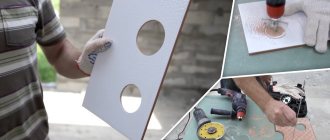
Features and advantages of the fastener
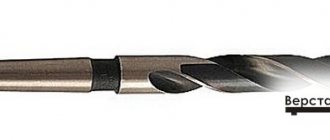
The confirmat shape resembles a regular screw with a cone-shaped (thickened) part under the head. A mandatory element of their structure is a protective coating (brass, zinc or nickel). The material used for making screws is carbon-based steel. This specificity of their structure allows the products to have flexible properties.
In order for the products to have a neat appearance, they have to be hidden using special plugs or plastic covers.
The size of furniture confirmations can be as follows:
- 5x40 and 5x50;
- 6x50, 6.3 by 40 (by 50);
- 7x40, 7x50, 7x70, etc.
The sizes of confirmations are as follows: 5x40, 5x50, 6.3x40, 6.3x50, 7x40, 7x50, 7x60, 7x70 mm.
The advantages of the product can be identified as follows:
- Functionality. The carving for step-by-step cutting is beautifully crafted.
- Plastic. The Euroscrew has the ability to bend, but does not break like regular screws. It is easy to install again if it was installed incorrectly the first time.
- When working with fasteners, you can use many tools: drill, wrench, screwdrivers, etc.
- Reliability of structures mounted with these parts. Fastening fittings and frame materials.
- Widely used for the following materials: wood, plywood, particle board, fiberboard, MDF, etc.
- The ability to use caps on screws, which completely hides the appearance of metal from view. This gives the furniture an aesthetic appearance.
- Easy to install. Working with these parts significantly speeds up the work.
The most common are single-element ties with a thread diameter of 7 mm and a length of 50-70 mm.
As a rule, the simplicity of the design also makes this product affordable for most consumers.
Advantages and disadvantages
Advantages of using a furniture euroscrew:
- Low cost;
- Fast and reliable connection of parts;
- Possibility of fastening different types of parts;
- High withstand bending and tearing loads;
- Easy to install, does not require additional special devices;
- Does not destroy mounting holes, thus interior items can be assembled and disassembled.
The disadvantages of Euroscrews include the fact that they are not hidden fasteners. In order for the products to have a neat appearance, they have to be hidden using special plugs or plastic covers. Another disadvantage of using fasteners is the limitation of furniture assembly. The Euroscrew does not allow the process to be carried out more than 3-4 times. This is due to the fact that with frequent disassembly of furniture, the threads can wear out or break off.
Design Features
Euroscrews for connecting furniture parts are a single-element tie. In essence, they are the same screws, only their body is more massive. The confirmation threads have a wide pitch, the head is elongated, and the head has a hidden design. The slots for the tool are different. Some are suitable for a curved screwdriver, others for a hex key. Unlike other hardware, the ends of Euroscrews have a straight cut with a round cross-section.
Using a confirmed hexagon is considered more practical and reliable. After connecting the parts together, you can further tighten them using a hex bit, screwdriver, drill or special wrench. Fasteners for a Phillips screwdriver cannot provide such secure fastening, since it will not be possible to tighten the parts tightly. Subsequently, this will affect the strength of the structure; it may become loose and lose stability.
Confirmats are used to connect parts made from:
- MDF;
- chipboard;
- wood;
- plywood.
Euroscrews can replace standard angles. They easily withstand all bending loads. This feature allows the confirmata to perform not only a fastening function, but also a frame-forming function. To disguise the fasteners, plastic plugs (diameter 12 mm) are used, similar to the general color of the interior items. They are made of plastic. There are also special round stickers on sale. The thickness of the plugs does not exceed 0.4 mm. They can be chosen in the same shade as the furniture itself. Interior items take on a finished look, and the Euroscrews on them become invisible. Self-adhesive elements are more common; they are convenient and easy to use.
Main settings
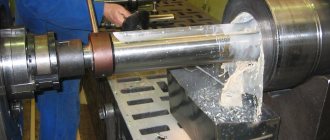
The Euroscrew has the ability to connect furniture parts whose thickness does not exceed 16 mm. To make a mounting hole, the easiest way is to use a special confirmation drill, and to secure the hardware, use a key designed for a Euroscrew. Connecting furniture structures requires care and a certain skill in work. An important step is the correct selection of the size of hardware and calculation of their quantity.
Description
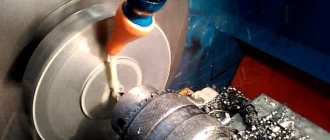
The drill is intended for drilling holes with hand-held power tools for furniture screed (confirmat) in chipboard, MDF, wood, plywood, soft plastics and other materials. Allows you to drill holes in parts fixed to each other in different positions using corner clamps, vices, etc. Available for all types of furniture screeds 5 x 50, 6.4 x 50, 7 x 50, 7 x 70. Each type of drill clearly corresponds the size of the confirmat used. The drill is made of high quality high speed steel HSS. The rotation speed of the drill during drilling is 2500-4000 rpm.
DRILL DESIGN FEATURES
Drill bits for furniture ties (confirmata)
- » data-page=»»>
- home
- Drilling screwing
- Drill
- Drill bits for furniture ties (confirmata)
- Drill bits for furniture ties (confirmata)
Titebond II Premium wood glue, moisture-resistant
Titebond II Premium adhesive is a moisture-resistant carpentry adhesive for wood for exterior work, terrace furniture, exterior windows and doors. Viscosity – 4,000 mPa*s. Consumption – 180g/m2. Water resistance class – D3. Volume – 237ml, 473ml and 3.8l. Working time – from 10 to 20 minutes. Not abrasive. Manufactured by Franklin International (USA) To select the glue container of the required volume, click on the product name
Recommendations
There are a number of important rules and recommendations that need to be taken into account
- To prevent the drill from moving sideways from the very first minutes of the drilling process, it is necessary to make a notch in the middle of the planned hole. This is done with an awl, although other sharpened objects will also work: a self-tapping screw, a nail, and the like.
- Reduce speed. Drilling wood should be carried out at low speeds with an electric drill.
- You can reduce or minimize the formation of chips on the bottom surface of the product when drilling through it by performing the work using one of the following methods:
- we create a through-type hole with a small diameter, then drill through it to the center on both sides with a cutting tool of the required diameter;
- To the side where the drill should come out, use clamps to firmly press a flat backing made of wood or fiberboard, drill a hole, and remove the backing.
4. The verticality of the drill is ensured by using a guide for an electric drill; for workpieces that have a cylindrical shape, you can use a special jig, which ensures both centering of the drill and vertical drilling.
If the drilled hole is too large in diameter, you have the opportunity to restore it in the following way: drill the hole to a larger diameter, then insert a wooden dowel (wooden dowel) of a suitable diameter into it and place it on the adhesive. Allow the adhesive to harden and align the top edge of the chopstick flush with the plane using a chisel, then drill the hole again in the same place.
How to make a hole for confirmation, see below.
Installation rules
Before installing the fastener, you must make the appropriate markings. For these purposes, there are special conductors or templates. They significantly speed up the process and make the work more accurate. Conductors eliminate marking errors and are used mainly for large volumes of work. If you need simple markup, you can do without templates. If all stages of the work are done correctly, connecting parts in this way will be the most reliable, durable and at the same time convenient.
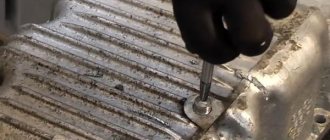
In order to correctly install the confirmat, you need to know some nuances regarding the material of furniture and the design features of the fastening element. It is necessary to drill three holes: for the threaded part, for the smooth head and for the cap. For each of them, drills of different diameters are selected. Drilling multiple holes significantly increases the time required to connect elements. In this case, a special drill designed specifically for the Euroscrew comes to the rescue. It is manufactured in such a way that a hole is drilled at one time to fit all three parts of a single-piece screed.
Installation process:
- The first step is to drill a hole for a single-element screed. To do this, use a drill with a diameter of 4 mm to 7 mm;
- Step cutters will make it easier to make holes intended for placing the head in it. The cutters are attached to the drill. Using this particular method facilitates the simultaneous formation of the correct hole in two elements at once. The diameter of the hole for the Euroscrew, or more precisely for the threaded part, is 5 mm, for the head - 7 mm;
- A through hole is made on the first part where the smooth head and Euroscrew head will be placed;
- A blind hole is drilled in another part, in which an internal thread is formed by drilling the threaded part of the confirmat at the end;
- For a more precise connection and to prevent shifting, the elements are firmly fixed with special devices (furniture vices, clamping machines, etc.).
Euroscrew is a reliable modern hardware that greatly simplifies the process of assembling hull structures. At the same time, you can abandon unsightly corners and other usual fasteners. Correct installation ensures the stability and durability of furniture elements and extends their service life.
Making the markings
Making a hole at the end
Drilling the front part
Installing fasteners
Installation nuances
Euroscrews are quite simple and easy to use, but basic skills in furniture assembly are required. Inept actions when drilling can ruin the workpiece. Not everyone can choose the correct drill diameter or determine by eye the perpendicularity of the tool during operation. A slight deviation will cause the hole to come out.
For drilling, nozzles of different diameters are usually used to make three holes: for thread, head and countersunk. The use of several tools is justified only when performing small-scale work. Professional furniture makers use a special drill with a step cutter, which is capable of performing all three operations simultaneously. When removing the tool, minor chips are possible, which are easily covered by the wide cap.
To speed up installation work, high-speed power tools are required. Drilling at high speeds is especially important to keep chips from getting into the holes. Furniture parts are mainly attached at an angle of 90 degrees. First you need to make a hole in the plane of one part, and then in the end of the other. After this, a screwdriver is used, although it is better for beginners to use hand tools at first.
When working, it is important to install the parts perfectly evenly, avoiding displacement.
Incorrectly combined parts spoil the aesthetic perception of a piece of furniture and disrupt the functions of moving elements. To avoid such troubles, you should pay attention to some nuances:
- Having prepared the hole for the euroscrew, you do not need to completely tighten it the first time. It is better to stop at the level of the head entering the part, adjust the workpiece, press firmly and tighten the tie.
- When working with loose or porous materials, it is recommended to apply glue to the threads.
- In pieces of furniture that have drawers, you should not completely tighten the sides without checking the operation of the moving parts.
For a more reliable screed, you need to use the marking method. In production conditions, special machines do this. For an amateur, it is enough to have a few simple things: a marker, a square, a tape measure, an awl. Make marks last so that the drill does not slip on a smooth surface. They are placed approximately 50 mm from the edge.
It is convenient to make markings using special templates (conductors) . These are blanks with ready-made holes that are superimposed on the parts so as not to have to measure the same distances again. Templates can be made with your own hands or purchased.
Step-by-step installation work can be shown using the example of assembling a drawer for a closet or bedside table. Four chipboard boards are taken as blanks. Installation proceeds as follows:
- First you need to carefully examine the details of the future box. The ends connecting to the plane of the board should not have a decorative layer. It would be a good idea to check for chips and scratches on the front sides of the workpieces so that the damaged parts do not end up on the outside. Having decided on the correct arrangement of the boards, you need to connect them.
- To achieve perfectly even joints, it is advisable to use special clamps. The fastening of this device should not be rigid, as this may damage the edges. Corners must be clamped and aligned separately.
- The hole for the euroscrew must be made using a drill. It should go through the middle of the end board strictly perpendicularly. The drill at the base is wider in diameter, to accommodate the thicker part of the screw without thread.
- Using a screwdriver with a hexagonal bit, install the confirmat. It is not advisable to tighten the hardware all the way with an electric tool; it is safer to do it manually. The hat should be recessed a little.
Using this fastening method, you can assemble and install furniture yourself. This will save money in the family budget. Russians have always been distinguished by their ingenuity and skill in making products with their own hands. Now that people have the opportunity to use such universal fastening material in their work, there are even more people who like to make their own furniture. Moreover, many companies provide services for the production of blanks to specified sizes. All that remains is to order and assemble the product to your liking.
Euroscrew installation
Marking using a template (jig) It is important to choose the correct diameter of the step drill
Hole drilling pattern
Connecting parts
Installation Rules
Many who come across confirmations for the first time have a logical question regarding which holes to drill for the Euroscrew being used and how this procedure is generally performed.
There shouldn’t be any problems with how to drill holes if you have previously worked with a drill and understand the principle of its operation.
Before installing the confirmation in the furniture body, it is necessary to make the appropriate markings. To apply it you will need a jig or a template. With their help, you can significantly speed up the work and also achieve a high level of accuracy. If you are doing simple markings, you will not need a jig (template).
For proper installation of the confirmat, it is recommended to find out in advance about the material of the furniture itself, as well as about the design features of the euroscrew. A total of 3 holes are needed:
A drill of the appropriate diameter is used for each hole. It is the time required to create several holes that makes you spend much more time assembling furniture.
But there is a solution. It is presented in the form of a special drill, which is intended specifically for confirmations. Finding it in Leroy Merlin or in any other furniture fittings store will not be difficult. The peculiarity of a special drill is that it allows you to prepare 3 different holes simultaneously in one go. This is due to the design of the drill itself.
Drilling and installation
We will step by step consider the procedure for drilling a hole and then installing a confirmat into it.
To assemble furniture using Euroscrews, you need to prepare special holes. The process involves performing the following steps:
- First, a hole is drilled for the tie (confirmation). Drills with a diameter of 4 to 7 millimeters are often used here;
- Thanks to a stepped cutter or just a special drill for confirmation, the procedure can be significantly simplified;
- The cutter is fixed on the drill. This makes it possible to correctly form a hole in two components simultaneously;
- For the threaded part of the confirmation, the diameter should be 5 millimeters, and the diameter of the hole for the head itself is already 7 millimeters;
- On the first furniture element, a hole is made of the through type, since the smooth part of the special head and the cap itself will be located there;
- In the second part, a blind hole is made, where an internal thread is formed by drilling the threaded part of the Euroscrew in the end part;
- To ensure the most accurate connection, furniture elements can be fixed using machines, furniture vices and other devices. This prevents possible shifts.
When drilling, try to use a drill or screwdriver that can rotate at the highest possible adjustable speed. This will ensure the creation of the most accurate, even and high-quality holes.
It is difficult to imagine assembling modern cabinet furniture without the use of confirmats. This is the most modern type of hardware, which can significantly speed up and simplify the furniture assembly process.
The use of confirmats allows you to avoid corners, self-tapping screws and other fasteners, which do not have the most attractive appearance, and are also inferior to the Euroscrew in terms of reliability.
Confirmation is not just a fad or fashion. This is a truly universal and effective solution in furniture production. And we are fortunate in many ways that we now have the opportunity to assemble furniture using such fasteners.
What do you think about confirmations and have you ever worked with them? Who assembled ready-made furniture and used such fastenings? And who had to make the holes for the confirmation themselves? Share your experience and your opinion.
Thanks everyone for your attention! Subscribe, leave comments and ask relevant questions!
Watch this video on YouTube
Description and characteristics of the drill for confirmat
instrument.guru > Equipment > Description and characteristics of the confirmat drill
Recently, the confirmat screw, or as it is often called, the Euroscrew, has become a common furniture fastening. This is a simple but fairly reliable type of fastener that can significantly speed up the furniture assembly process. However, despite their simplicity, there are certain subtleties when working with Euroscrews regarding the preparation of holes for them.
- Description of confirmation
- Drill bit for furniture euroscrew
- Basic markings
- Device Manufacturers
- Drilling rules
Description of confirmation
It's a cross between a screw and a screw..
- The confirmat has a blunt end of the rod, and not a sharp one, like a screw.
- As a rule, the head of a Euroscrew has a hole for a hexagon, which is rare for screws, but is often found in screws.
- Confirm thread with a special profile and increased pitch is designed, like screws, for cutting internal threads in a hole and securely fixing it in a wooden part.
The blunt tip prevents this fastener from being screwed directly into the wood. Therefore, it is necessary to first mark and drill holes for fasteners. But the problem is that in order to make them with ordinary tools, you will need three drills for each hole.
A special feature of the Euroscrew is that its rod consists of two parts - threaded and smooth.
Accordingly, it becomes necessary to first drill a hole of a smaller diameter for the threaded part, then partially enlarge the hole with a drill of a larger diameter for the cylindrical part adjacent to the head of the confirmat.
The third operation is countersinking to fit the head itself. Thus, the confirmation hole consists of three sections, requiring the use of three different drills.
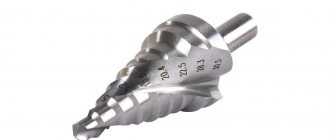
Drill bit for furniture euroscrew
In order to reduce the number of operations and speed up assembly, a special drill for confirmat has been developed. The instrument consists of three parts. The first is intended for drilling part of the hole for threading. The second is for the smooth part of the Euroscrew . The third is for countersinking a cone-shaped recess under the head.
The diameter of the drill for confirmation is determined by the most popular sizes of Euroscrews .
Basic markings
Drills of the following markings are common:
- HSS 5x50;
- HSS 6.3×50;
- HSS 7x50;
- HSS 7x70.
Main Dimensions
There are no GOST standards for Euroscrews - they are manufactured following European standards such as 3E122 and 3E120. They have a very extensive list of sizes: 5x40, 5x50, 6.2x50, 6.4x50, 7x40, 7x48, 7x50, 7x60, 7x70 mm.
When working with other confirmations, the following principle is observed: proportionality between the diameter of the hole for the area with protrusions and the diameter of the rod, while the height of the thread is not taken into account. In other words:
- Euroscrew 5 mm – drill 3.5 mm;
- Euroscrew 7 mm – drill 5.0 mm.
The assortment of Euroscrews is not limited to the list presented. There are even such unusual sizes as 4x13, 6.3x13 mm.
Using confirmations without taking into account their characteristics will certainly lead to trouble. Without much effort, you can ruin a large part by choosing the wrong fastener
The choice of thread diameter is particularly important. Thick fastener components tear soft materials, this often happens when working with chipboard
The length must guarantee the strength of the end attachment.
Scope of application
The use of Euroscrew is directly related to the manufacture and assembly of furniture and carpentry. Simplicity, reliability and high speed when working using familiar tools made this confirmation a leader among analogues . It is necessary to distinguish several areas of work where this fastening element is widely used:
- production of furniture in production;
- repair;
- making cabinet interior items with your own hands;
- assembly of finished products.
The design features of the European furniture screw allow it to be used with materials of different compositions:
- wooden sheets and boards;
- chipboard;
- laminated chipboard;
- Fiberboard;
- plywood.
Before starting furniture manufacturing or assembly, the craftsman should take care of purchasing plugs. They completely cover the caps and give the product a finished look. There are two types of plugs: self-adhesive and plastic. Both can be matched to the color of the furniture. Due to convenience, self-adhesive options are more used. The cost of the plugs is almost the same.
laminated chipboard
Tree
Fiberboard
Repair
Industrial furniture assembly
Manufacturing of cabinet objects
Making furniture yourself
Wood style plugs
How to drill a hole for placing a confirmat
The confirmat is screwed into a previously prepared hole, so the question of how to drill such a hole is quite relevant. To do this you will need the following tools and materials:
- screwdriver or electric drill;
- bit of the appropriate size;
- drill for confirmation;
- a measuring tool, which can be a ruler (or a construction tape);
- pencil;
- awl.
To facilitate marking and maintain a strictly perpendicular position of the drill, use a template for drilling holes for confirmat
Hole dimensions for Euroscrew
For furniture assembly, Euro screws are usually used, the dimensions of which are 6.4x50 mm. To make holes for such a confirmat, the outer thread diameter of which is 6.4 mm, and the cross-sectional size of the screw body is 4.4 mm, a drill with a diameter of 4.5–5 mm is used. Drilling holes for confirmation of this type should be performed to a depth of at least 50 mm. If the diameter of the hole is larger than the specified value, then the Euroscrew simply will not hold; if it is smaller, it can tear the furniture element into which it is screwed.
The step drill is selected based on the dimensions of the specific Euroscrew model
The drill used to make holes for the confirmation must be equipped with a special working head. On the one hand, she prepares an expanded hole for the neck of the screw, on the other hand, she countersinks the place where the screw head will be placed. To place the confirmat, you can also use a regular drill, but in this case it is necessary to prepare places for the neck of the fastener and its head.
Marking drilling locations
The reliability and quality of connections made using confirmats largely depend on the accuracy of marking future holes for them. On the element that will overlap the end of another element of the furniture structure, two types of markings are made:
- drilling depth (5–10 cm);
- the center of the future hole (if the thickness of the joining part is 16 mm, it should be at a distance of 8 mm from the edge of the slab).
Drilling diagram for Euro screws
To mark the drilling locations as accurately as possible, you can use the following simple technique: after preliminary marking, a through hole is made in the applied part, through which, by attaching the first part to the second, a rotating drill is used to mark the location of the second hole for the European screw.
Making holes
In order to make the holes for placing confirmations as efficiently as possible, it is advisable to follow the recommendations below.
- Before drilling a part, you need to place a piece of unnecessary chipboard under it: this will prevent chips from appearing at the exit of the hole being created.
- The formation of places for the neck and cap of the confirmat in an already made hole can be done by holding the workpiece in weight.
- When drilling both in the layer of the part and at its end, the drill is positioned strictly perpendicularly. This will allow you to get a high-quality result and not damage the part.
- When drilling two parts simultaneously, they must be securely fixed in the required position, for which you can use clamps and other clamping devices. This is the most accurate and fastest way to create confirmation holes.
- When drilling holes for dowels, it is advisable to equip the tool used with a depth limiter, which will prevent damage to the workpiece by drilling through them.
Design features and advantages of use
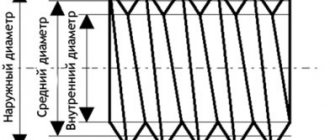
Confirmats are screws equipped with a countersunk head, which has two types of slots. Thanks to the presence of these slots, Euroscrews can be tightened with either a four- or hexagonal screwdriver. The rod of such a screw has a blunt end, and its working part has a widely protruding thread. Bottom threads are designed to cut threads into a pre-prepared hole, so they are conical and serrated. Under the head, the Euroscrews have a smooth (no thread) surface.
Significant parts of the confirmation
All confirmats have a protective coating of zinc, brass or nickel, and are made from high-quality carbon steel. The use of such steel makes it possible to give Euroscrews high ductility, due to which they bend but do not break. The high plasticity of confirmats ensures their easy removal from furniture even if their installation is carried out incorrectly.
The use of confirmata allows you to connect furniture elements made not only from natural wood, but also from its processed products - MDF and chipboard. Based on the ratio of the outer diameter of the thread and the length of the screw, fasteners of this type are presented on the modern market in the following standard sizes: 5x40, 5x50, 6.3x40, 6.3x50, 7x40, 7x50, 7x60 and 7x70 mm. The most popular are Euroscrews, the length of which is 50 and 70 mm, and the thread diameter is 7 mm.
Sizes of common confirmations
There are varieties of confirmations produced with a regular cap. When using them, additional information is required. Certain categories of confirmats are made with a special tooth located under the cap. The purpose of such a tooth is to form a chamfer in which its head will be located when installing the fastener.
If the confirmation cap is on the front side of the furniture product, it can be disguised using a decorative plug or sticker, which any hardware store offers in a large assortment today. When choosing such decorative elements, you should take into account not only the size of the Euroscrew head, but also the texture and color of the furniture structural elements that are connected with it.
The diameter of the securing decorative protrusion of the plug must match the size of the recess in the confirmation cap
Hole diameter for Euroscrew – Furniture Confirmat (Euroscrew, Euroscrew): dimensions, application
Hi all! If you have ever assembled cabinet furniture purchased in a store, or were interested in it, then you probably know about such a fastening as a furniture euroscrew. He is a confirmat.
Confirmat is called one of the most popular furniture fastenings in our time, which is widely used in assembling cabinet-type furniture. These fasteners became widespread back in the 90s of the last century, and since then they have not lost their relevance.
In everyday life, you often come across such names as furniture euroscrew, euroscrew, eurok, etc. But in reality, it is correct to call this element nothing more than a single-element tie. This designation seemed too complicated and lengthy to the people. Therefore, all sorts of alternative designations appeared.
As for the name Confirmat, it comes purely from the name of the Confirmat trademark. It belongs to the Hafele company from Germany and was used specifically in the production of new types of fasteners.
Design features of new hardware
In the furniture industry, reliable confirmations are used to fasten parts, replacing weak self-tapping screws. The design of these parts has several characteristic differences. The main ones are:
- High class products.
- The confirmat screw is made of high quality carbon steel.
- Excellent anti-corrosion coating.
- The diameter of the rod is equal to the diameter of the smooth surface. The result is tight contact and strong tightening. Alignment of parts is carried out with an ordinary mallet.
- The rod surface of the device and its threaded part are large in size, so the load on the parts being tightened becomes minimal.
- This design is highly resistant to mechanical stress.
- The massive thread protrudes above the surface of the rod. The coils are located at the bottom of the part.
- In appearance, the part resembles a small rod. It has a slightly flattened head. The lower part is completely blunt.
Advantages of rod fittings
After the advent of Euroscrews, furniture assembly became more reliable and of higher quality. Unlike previously installed screws, these parts have several positive characteristics:
- Tightly tighten all parts.
- Easy installation.
- High-quality coupling of parts.
- The screws can be connected to each other.
- The design on such screws is capable of withstanding heavy loads throughout the entire period of operation. To secure the bookshelf, a dowel is installed together with the confirmation.
Unfortunately, such devices also have a number of characteristic disadvantages. These include:
- Assembling furniture with such screws can only be done once. This design is not intended for frequent disassembly.
- The screw head does not belong to the group of “hidden” systems. Therefore, in order to hide it, you have to install plastic plugs, the color of which is selected according to the shade of the furniture.
Characteristic structural differences
These screws have a countersunk head equipped with various slots. This allows you to tighten parts with screwdrivers with four and six edges. The working part of the rod with a blunt end has a protruding thread. Its lower turns must cut a thread, so they are made of a conical shape with notches. There are no threads on the surface under the head, it looks absolutely smooth.
To create anti-corrosion protection, parts are galvanized. In most cases, a zinc surface is found. Special carbon steel gives such products high ductility. That's why they never break, they can only be bent. Thanks to this plasticity, the Euroscrew is easy to remove from the product, even if its installation was done incorrectly.
The design of confirmations has several differences. Parts with a regular head are installed after preliminary countersinking of the hole. Some screws have a special tooth right under the head. It forms a chamfer to position the cap.
Plugs for Euroscrews
When the confirmation cap is located on the outside of the product, decorative plugs are used to disguise it. They completely cover the cap, and a well-chosen color creates a complete look for the structure.
The industry produces several types of plugs. The most popular and in demand are:
When selecting the appropriate type of cap, the shade of the chipboard must be taken into account. True, choosing the exact color is very difficult. Therefore, self-adhesive products have become the most popular. They are colorless and made from melamine. The thickness of this film is 0.4 mm, so it becomes invisible on the furniture surface.
Plastic plugs are made of durable plastic. They have a round shape with a diameter of 1.2 cm. The products are fixed by the hexagonal protrusion left by the screw when tightened.
Types of confirmations and holes for them
Externally, the Euroscrew resembles a screw, from which it fundamentally differs in the diameter and shape of the cut tooth. This design feature allows you to increase the area of contact with the body of the fastened part several times. As a result, connection reliability increases significantly.
One confirmat replaces 3-4 screws of the same length. For furniture made from chipboard, the figures are even more impressive. The middle of the sheet is the loosest part of the material. A thin screw is not able to securely fix itself. Due to its larger diameter, the Euroscrew captures harder layers of chipboard and it is no coincidence that manufacturers clearly prefer it.
Manufacturers offer a line of products with different sizes for different types of connections. Not all models can be found in the store. Some are used only for special purposes. They can be ordered or purchased at specialized retail outlets.
| Model | 5x40 | 5x50 | 7x40 | 7x50 | 7x60 | 7x70 |
| Overall length, mm | 38,5-40,0 | 48,5-50,0 | 35,5-40,0 | 48,5-50,0 | 58,5-60,0 | 68,5-70,0 |
| Cap diameter, mm | 7- 7,5 | 7- 7,5 | 9,5-10 | 9,5-10 | 9,5-10 | 9,5-10 |
| Head length, mm | 6 | 6 | 10 | 10 | 10 | 10 |
| External thread diameter, mm | 4,7-5 | 4,7-5 | 6,3-7 | 6,3-7 | 6,3-7 | 6,3-7 |
| Diameter at the bottom point of the thread, mm | 3,4 | 3,4 | 4,7 | 4,7 | 4,7 | 4,7 |
The method of twisting the confirmat depends on the shape of the head. It can be hexagonal or cross-shaped. For euroscrews of small diameter (5 mm) a 3 mm wrench is used, and for large products (7 mm) a 4 mm wrench is used.
The drill dimensions are determined in accordance with the table. Depending on the material, the hole for the thread is made either 3.5 mm or 4.5-5 mm. The confirmatory head requires a diameter of 5 mm and 7 mm, respectively, depending on the brand.
Dimensions and materials of manufacture
The sizes of confirmations are as follows: 5x40, 5x50, 6.3x40, 6.3x50, 7x40, 7x50, 7x60, 7x70 mm. The most common are single-element ties with a thread diameter of 7 mm and a length of 50-70 mm.
| Designation | Europrop 7x40 | Europrop 7x50 | Europrop 7x60 | Europrop 7x70 |
| Head height, mm | 10 | 10 | 10 | 10 |
| Length, mm | 35,5-40 | 48,5-50 | 58,5-60 | 68,5-70 |
| Key size, mm | 4,02-4,12 | 4,02 | 4,12 | 4,02 |
| Flange diameter, mm | 9,5-10 | 9,5 | 10 | 9,5 |
Fasteners are made from high quality materials, often carbon steel. They are coated to prevent corrosion. The coatings are:
- Brass;
- Nickel;
- Zinc.
Euroscrews made of aluminum alloy are quite flexible; they do not break during furniture assembly. Thanks to these properties, the fastener can bend; if installed correctly, it can also be easily removed.
Galvanized
Nickel
Brass
Device Manufacturers
The correct name for a fastener is a single-piece fastener. This term is used to fill in data when ordering and to draw up reporting documentation at specialized enterprises. In everyday life, it is more common to hear other names, for example, “euroscrew”, “euroscrew”.
The word confirmat appeared thanks to the trade name of the Hafele company from Germany Confirmat. This category of fasteners appeared back in the 70s of the last century, but they gained real popularity in the 90s. Since then, products have been produced by many domestic and foreign manufacturers, including the Hafele company, which is successfully operating to this day.
The demand for products in large quantities is covered by Russian enterprises. These are ZAO Izhevsk Furniture Accessories Plant FMS, JSC Metalist and many others. Products from Chinese manufacturers are widely represented on the market, the quality of which is not always at the proper level. But one of the oldest enterprises in China, Haining Yicheng Hardware Co., Ltd. you can trust.
Design features
To understand even better what it is and what furniture confirmations look like, you can look at the photo and get acquainted with the design features.
Before us is a screw that has a countersunk head with a hole (slots) for a hexagon and a tetrahedron. With its help, the Euroscrew is tightened and unscrewed when assembling and disassembling furniture. This combination of splines allows you to simultaneously use a hexagon and a tetrahedron when fastening furniture elements.
The rod has a blunt end, and a wide pitch thread is used on the working surface. The lower turns of the existing thread are used to cut threads in pre-prepared holes. Because of this, their shape is conical and there are sharp serrations.
Under the head itself there is a smooth and fairly wide surface, devoid of threads. That is, the head, cap and threaded part can be distinguished structurally.
All confirmations have a zinc, nickel or brass protective coating. The euroscrews themselves are made on the basis of high-quality high-carbon steel. This provides the structure with a high level of elasticity. As a result, the Euroscrew bends but does not break. Plasticity is beneficial when removing screws in situations where installation was carried out incorrectly.
Confirmats are widely used when joining furniture components made of wood, chipboard, MDF, etc.
There are several standard sizes of these elements. Namely:
- 5x40;
- 5x50;
- 6x50;
- 6.3x40;
- 6.3x50;
- 7x40;
- 7x50;
- 7x70.
But these are not all the sizes that are available for sale. The price largely depends on the size characteristics.
At the same time, you can find products with dimensions of 6.3x13, 4x13, etc. The most popular and common sizes are Euro screws with a length of 50-70 millimeters and a thread diameter of 7 mm.
How to choose a drill?
Before you start assembling furniture, you need to prepare all the tools. Information about the Euroscrew itself will help you choose which drill to use for the confirmation. If you have a ready-made device of the right brand, then there will be no problems.
However, often in the practice of home craftsmen there is a situation when they have to work with what is available. It is strongly not recommended to use drills of a smaller diameter - for confirmations 5x40, 5x50 this size is 3.4 mm, and for products 7x40, 7x50, 7x60, 7x70 - 4.5 mm.
The fastening element does not screw into a hole that is not large enough in size and becomes jammed. If you work with furniture parts made of chipboard or LMDF, then at best they will swell, and at worst they will crack.
The head of the confirmat is measured, the part that is inside the product but does not have a thread. It may vary slightly between different manufacturers. The diameter ranges from 6.3mm to 7mm. Which confirm drill should I choose in these cases? The factory device is designed for a diameter of 7 mm.
It is universal because the size of the head does not play any role in ensuring the reliability of the connection. This part of the Euroscrew is located in the upper, pressing part. The load falls on the confirmation cap, which centers the fastener and tightens the structural elements.
A little play is sometimes even convenient. If there are minor errors, you can loosen the connection, adjust the position of the part, and tighten the screw again. Even a hole a millimeter larger than 8 mm will not impair the reliability of the fastener.
Features of drills for confirmations
When working with a confirmatory fastening, it is important to correctly determine which holes to drill for the Euroscrew. Looking at the appearance of a standard Euroscrew, and taking into account the fact that it goes completely deep into the body of the part, we can conclude that it is necessary to drill a hole with two different diameters and tapered sections
Of course, you can use a drill of constant cross-section for a Euroscrew. Rather, you will need two spiral drills of different diameters and two countersinks. It is quite difficult to select such a diverse set of tools for each standard size of confirmat, so it is better to use a special drill for a Euroscrew.
A confirmation drill produces a hole of the required configuration in one operation. This tool consists of two detachable parts. It consists of a regular twist drill bit for wood of a certain diameter. Using this drill, a hole is made in the wooden part into which the threaded part of the fastener will be screwed.
The second part of the cutting tool is a cutter, which cuts a hole in the wood for a smooth cylindrical part with a transition, as well as a conical recess for a countersunk head. The twist drill fits into the central hole of the cutter and is fixed in it using a special mounting bolt. The bolt is screwed in with a hex wrench.
A compound drill for furniture joints is convenient because when the central spiral drill for wood wears out, it can be replaced. You can take a regular drill from a set of suitable diameter, insert it into the cutter and secure it with a fixing screw. When using a suitable confirmatory drill, the Euroscrew is screwed into such a hole without unnecessary effort and does not destroy the structure of the part.
A high-quality drill for a Euroscrew is made of high-speed steel and is marked with the letters HSS. Also, the marking on the shank of a drill or cutter should indicate its diameter and working length. The kit should preferably include a hex wrench for tightening the fixing bolt. The shank of a cutter is usually cylindrical in shape and can be installed in the chuck of a conventional drill or screwdriver. Drills for laminated chipboards should have increased strength, reliability and good sharpening of cutting edges.
Drill for furniture euroscrew (confirmed): main characteristics and selection rules
A single-element screed is a fastener loved by professional furniture makers and ordinary DIYers. Widely known since the 90s under different names: “Euroscrew”, “Confirmat” and others. The German company Hafele was one of the first to produce products. The brand name was Confirmat. To insert fasteners, a special drill for confirmat .
A hole is required for the euroscrew. The difficulty lies in the fact that its design is heterogeneous: the outer diameter of the thread and the size of the head are different. There is also a hat. All this must be taken into account for reliable fastening. You can do the following:
- Drill a hole corresponding to the length of the confirmat. Its diameter is made slightly smaller than that of the external thread.
- The head of the European screw is slightly wider. It should fit tightly into the hole, but not too tightly, otherwise cracks may appear. The upper part of the hole already made will have to be expanded with a drill of the required diameter.
- In order for the hat to fit well, you need to make room for it . To obtain the desired socket, additional processing is carried out using a countersink. Although some masters omit this step: it is enough to twist the confirmation a little more tightly.
That is, in order to insert one euroscrew, you need to have two suitable drills and, preferably, a countersink. You will need to perform several operations, each of which may end in failure, especially for a beginner:
- the position of the hole and its angle may be taken incorrectly, which will affect the reliability of the connection;
- When countersinking, chips are possible.
A special confirmation drill can significantly simplify the process and save time and nerves. Usually it replaces all the tools described above and allows you to make a hole quickly, in one motion. Good examples do not damage the edges of the hole or do so only slightly. A small defect can usually be closed with a cap or plug. Products fit:
- for hard and soft wood;
- for chipboards with and without coating;
- for plastic.
Design Features
The hole should be stepped, since the confirmat has parts of different diameters. Therefore, special drills for it should follow the shape of the fastener. This can be achieved with the help of an appropriate design.
The fastening part is connected to the drill chuck. It has a hole (blind) for a removable drill. The latter has a sliding fit and is made with a slight gap. This prevents bending and breakage. The cutting part is stepped, allowing you to make a hole with several diameters at a time. The design may not be dismountable.
The Euroscrew drill has the following structural features:
- The front part is made at an acute angle. This is necessary for better fit and ensures centering of the hole.
- The angle of the helical groove is the same as that of the thread in the confirmation. The fastener fits well and holds more securely.
- The position of the thrust part can be adjusted. This helps to avoid over-drilling: there is no need to additionally monitor the depth of the hole.
- Polishing the surface of feathers is given special importance. This reduces friction and improves chip removal. The latter is removed through the holes in the end of the stop.
- The contact area of the stop is made as small as possible so as not to crush the side surfaces of the hole. The drill life remains within acceptable limits.
- The stop not only centers, but also performs countersinking, which is necessary for better fit of the head. That is, the hole is turnkey, you can immediately insert the confirmation.
Main characteristics
A high-quality drill bit for a furniture euroscrew should have the following characteristics:
- impact strength (kc): 150−165;
- temperature resistance 120−150 °C;
- hardness: 61−64;
- resistance to bending at a given level.
These parameters are required:
- for quickly creating the desired hole;
- to prevent the formation of defects, such as chips;
- for long service.
Choosing the right drill
When choosing a drill for a furniture euroscrew, you need to pay attention first of all:
- for sizes;
- to the manufacturer;
- for the cost.
There are a lot of Chinese products on sale. It usually has a very attractive price, but the quality leaves much to be desired. The lack of reliability is usually explained by the following:
- the steel used is not suitable for the working conditions;
- the material has not been processed correctly.
Manufacturers from the Middle Kingdom often use any tool steel. As a result, the hardness quickly decreases and the drill becomes dull. When working, the master has to increase the pressing force. The material often breaks down and crumbles.
If the heat treatment of the drill is carried out incorrectly, it will be subject to bending. This usually occurs when you need to make several holes in succession.
Much more reliable are Russian confirmed drills made by:
- LLC "Tula Tool Plant";
- LLC "BSI-instrument"
From foreign ones , for example:
- Archimedes (Switzerland);
- DeWalt (USA).
Foreign products are at least twice as expensive. It is important to immediately determine some characteristics when purchasing:
- The size of the smooth part of the confirmat and the depth of the drill seat must be the same.
- It is desirable that there are as few roughnesses on the feathers as possible.
- Part of the countersink stop is at an angle of 45°, the transition to the thread is smooth.
- The quality of the holes in non-demountable and collapsible designs is the same. However, the last option is more convenient. It is suitable in different cases, since the confirmation varies.
Only a tool with high power is suitable for the job. Euroscrews can also be tightened “according to the old-fashioned method” described at the beginning of the article. However, this will require significantly more effort, time and skill. Therefore, many people opt for confirmed drills. From the variety of products you can always choose something suitable.
Source: https://tokar.guru/instrumenty/sverla/osobennosti-sverla-pod-mebelnyy-evrovint-konfirmat.html
Drilling technology
The holes for the mounting screws in question should be drilled in strict accordance with the rules and strictly according to the instructions.
Prepare the wood parts, clean their surface from dirt and shavings. Perform preliminary marking of the drilling area. One of the most important conditions is that holes must be drilled strictly at an angle of ninety degrees.
This is especially important for holes that are created in the transverse edges of the chipboard. Nowadays panels made of laminated chipboard 16 mm thick are often used
In this case, if there is any deviation from the vertical, there is a possibility of simply scratching or even breaking the workpiece. To prevent this from happening, in practice a template is used, through which the cutting tool will stably enter the product at a specified angle. Check whether the selected drill fits the standard size of the Euro screed used. Drill for the Euroscrew.
Into the details layer
Make a marking (0.8 cm from the edge and 5–11 cm along the product), then make a notch at the marked point using an awl; this is necessary so that the cutting tools do not “walk” in the first seconds of drilling.
Before drilling, you need to make a backing for the part from scraps of unnecessary chipboard. This will make it possible to prevent chips from occurring at the exit of the hole being made.
When the product is drilled through, replace the underlying piece of particle board and substitute something higher in its place so that the workpiece is suspended, and continue working.
At the end
As in all the cases described above, the main principle here is that the drill must be positioned strictly at a right angle to the workpiece. Everything is much more complicated if you need to drill the end of the workpiece
The work must be done very carefully, otherwise the drill may “slip” to the side and thereby damage the product
When working with the end of an element made of chipboard, you need to remove the cutting tool so that it does not become clogged with chips.
In two at the same time
This method is especially accurate, and it is also the fastest. However, in order to drill a hole in several elements at the same time, they need to be securely fastened before work, for which you can use specialized clamps, clamps and other devices.