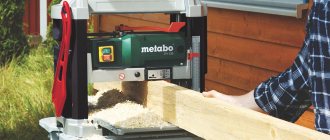
How to make a motor drill with your own hands
Before starting the process of manufacturing a motor drill, it is recommended to listen to the recommendations:
Before manufacturing, it is better to make a drawing of the installation in order to clearly represent the location of all components of the unit. It is necessary to calculate the power and dimensions of the tool: when manufacturing a powerful device, a durable frame should be provided, possibly a trolley for moving. When choosing a gearbox, you should pay attention to its coincidence with the required number of revolutions. If the number of revolutions is too high, it will be difficult to operate the motor drill. When working with the equipment, you must follow safety precautions, protect your face and hands from stones, rock fragments, and dust
When working with equipment, you must observe safety precautions, protect your face and hands from stones, rock fragments, and dust.
From a chainsaw
You can make a drill with your own hands from a chainsaw. An old model that is no longer suitable for performing its functions is suitable for this. The best option would be an old saw “Friendship”, “Calm” or “Partner”. The engine from the chainsaw is fixed on a structure made of frames, while the fuel supply system and emergency stop of the unit are installed on the top of them.
To secure the drill, it is connected to the gearbox using a pipe. If necessary, it can be replaced in the future. You can make a motor drill from a chainsaw with your own hands with the possibility of vertical drilling. This is achieved by welding metal rings to the frame, which are placed on a vertical metal pipe. This design is put on a pipe with a drill, after which you can work.
From the trimmer
To make a mechanism for drilling the earth, you can take a motor from a trimmer. To reduce the rotation speed, it is recommended to use several gears combined in a single housing with the desired gear ratio. The RPM can be reduced by making the input shaft gear smaller and the gear that attaches to the output shaft being larger.
To create a stable motor drill from a trimmer, you will need a strong frame to which the motor and gearbox are attached. Handles are attached to the same frame to hold the tool. The auger is made of hardened steel, and the drill has a pointed tip.
From a drill
A motorized drill can be made from a drill or hammer drill. It is preferable to make a motor drill based on a hammer drill, since it has a reverse, which prevents the appearance of reverse force in the event of the tool jamming in the soil. To make a drill hole from a drill with a power and torque of at least 2 kW, you must perform the following steps:
- Purchase a worm gearbox with a ratio of 1 to 25.
- Make an auger or purchase a ready-made one.
- Connect all nodes together.
The unit, made on the basis of a drill, operates from the electrical network, which narrows the scope of application. However, such a tool is able to work at any temperature, unlike a chainsaw.
If you use your skills correctly, you can make productive and powerful equipment that will come in handy more than once during construction or when performing landscaping work.
When using a motor drill, it is important not to forget about safety precautions and familiarize yourself with any available materials regarding its proper operation.
Making a motor drill from a trimmer is much easier than it might seem at first glance. All work can be done independently using available materials by purchasing a certain number of spare parts. Let's study the procedure for making a unit at home in more detail.
Self-production
Many craftsmen ask the question: how to make a motor drill so that it is not inferior to industrial designs? If you have some skills and the necessary tools, creating a drill hole is quite feasible. Before manufacturing equipment, you need to take into account the criteria that a good motor drill must meet:
- If you plan to make a compact, lightweight model, the power can be 3 hp. If you need a more powerful motor drill, you should choose an engine up to 6 hp.
- The larger the engine displacement, the more productive the unit. Considering the type of soil, you should choose one or another engine size.
- You should also take into account the diameter of the screw and the possibility of replacing it if necessary.
In order to build a tool, certain skills are simply necessary. If there are none, you should enlist the help of a locksmith.
Gearbox
Selecting a gearbox for a homemade drill is an important stage in the process of assembling this tool, since this element is one of the main components of the mechanism. According to the type of output speed, gearboxes are divided into step-up and step-down gearboxes. To be able to regulate the speed, the second type is chosen for the motor drill.
The direction of rotation of the gearbox must be reversible in order to easily unscrew the tool from the hole when it gets jammed in hard ground. The gearbox device includes several elements:
- Output and worm shaft
- Two gears (bevel type)
- Bearings
- Frame.
The gearbox must have holes for filling lubricants.
Auger
If you need a standard-diameter auger, you can purchase it at the store. To make it yourself, you will need a metal pipe core, a screw blade and a tip. Hard soil types will require a strong steel core to prevent deformation. To make the blade you will need hard alloy steel. The tip is also made of carbide metal. Its shape should contain grooves, and the second end should be a shank on which the gearbox or coupling will be placed.
Racks for motor drills
When doing a large amount of work, a motor drill is very inconvenient to hold in your hands. In this case, you can make a special frame to hang the equipment you have made. Experienced craftsmen implement different types of racks:
- Lifting mechanism: uses a chain drive, which is installed inside the central pillar. The mechanism can be raised and lowered using an electric motor or mechanically using a handle.
- Moving the frame on wheels: two wheels are attached to the lower support to change the position by simply tilting.
The material for making the racks must be durable: usually a profile pipe, a section of channel and metal corners are used.
Guide to assembling a homemade drilling rig
To assemble a drilling rig yourself, it is enough to have minimal experience working with a welding unit, an electric drill and an angle grinder.
Prepare the required equipment in advance. You will need:
- tool for creating external inch threads;
- Bulgarian;
- adjustable wrench;
- half-inch galvanized pipe, as well as a pipe of a similar size;
- plumbing cross.
Prepare everything you need and proceed to perform the work in accordance with the step-by-step guide.
First step
DIY drilling rig
Prepare lengths of pipe to make the main part of the drilling jig. The pipes will need to be fastened into a bracket and a cross. To do this, prepare a two-centimeter thread at the ends of the segments.
Weld pointed metal plates to the ends of several sections. They will serve as tips.
This installation involves drilling with a constant supply of water, thanks to which the actual construction of the deepening and soil removal will be easier.
DIY drilling rig
To supply water, connect a water supply or pump hose to any hole in the cross blank. Make the connection using a suitable adapter.
Second step
Proceed to connect the structural parts to the threaded connections. Connect a piece of workpiece with a fitted tip to the lower end of your working pipe. Make the connection using a squeegee.
Drilling itself will be carried out by deepening the pointed tip and rotating the working installation. Blanks with tips must have different lengths. You use the shortest jig first. Once the approximately meter deep hole is complete, replace the short tip with a slightly longer one.
DIY drilling rig
Third step
Assemble the base of the drilling structure from a square section profile. In this case, the base will be a rack with supporting components of the structure. The supports are connected to the main post by means of a transition pad using welding.
Attach the platform and motor to the square profile. Fix the profile itself to the rack so that it can move along the rack. The dimensions of the profile used should be slightly larger than the dimensions of the rack.
DIY drilling rig
When choosing an electric motor, be sure to pay attention to its power rating. To ensure optimal drilling conditions, a 0.5 horsepower motor will be sufficient
DIY drilling rigDIY drilling rigDIY drilling rigDIY drilling rig
Power regulation is carried out using a gearbox. A flange must be attached to the gearbox shaft. Attach another flange to the flange using bolts. There should be a rubber washer between these two flanges. Thanks to the rubber gasket, shock loads that appear when passing through different types of soil will be smoothed out.
Fourth step
Connect the water. The liquid must be continuously supplied to the main working tool through a drill. Without a properly organized water supply, the quality of equipment operation will decrease.
The problem mentioned above can be solved by installing a special device made from a steel pipe below the flanges. Prepare 2 holes in the pipe section with some shift in relation to each other.
Next, you need to make a groove on both ends of the pipe to accommodate ball bearings. You must also prepare an inch thread. At one end the pipe is connected to the flange, and at the other end the working elements will be installed.
In order to create additional moisture insulation for the created device, place it in a special polypropylene tee. Connect an adapter to the middle of this tee to connect the water supply hose.
How to assemble a homemade walk-behind tractor from a Druzhba chainsaw
How to make a unit from a scooter
Let's look at how to assemble a walk-behind tractor from a scooter. For this assembly we use:
- scooter motor (4 hp is quite enough);
- pre-shortened rear axle from a Zhiguli car;
- gearbox (from a combine or other machine).
Instead of a gearbox, you can install two chain sprockets that connect the engine to the gearbox, and the gearbox to the axle. The variator from a scooter can be installed on the engine. The battery is installed above the gearbox.
Since the scooter engine has its own exhaust system and starter, the machine will be quiet. You can install a headlight in the front of the walk-behind tractor using a switch. This will make it easier to work in the dark, especially if the device is adapted for transporting goods.
How to make a walk-behind tractor with your own hands from a chainsaw
We make the frame in the form of a cube using 32x32 corners. The engine is attached to the transverse corners of the upper part of the frame. A little lower, the fuel tank is mounted on brackets. The intermediate shaft supports are installed on the front vertical struts. To attach the running shaft bearings, you need to attach the supports to the longitudinal angles.
As a result, we obtain a walk-behind tractor, the center of gravity of which is above the supporting surface of the wheel. A metal weight is used at the front of the frame, if necessary. Manual controls can be made in the form of a crossbar from pipes with a diameter of 30 mm. An excellent material for making wheels would be a rubberized roller.
A homemade walk-behind tractor uses two sprockets: a drive sprocket and one on the intermediate shaft. Depending on the units used and operating conditions, it is necessary to select the gear ratio between the intermediate and drive shafts.
Motoblock from chainsaw Friendship and Ural
Let's look at how to assemble a walk-behind tractor from a Druzhba chainsaw. Assembling a unit from a Druzhba chainsaw engine is very simple. The motor is light and compact, so the frame can be assembled from a pipe. In addition to the engine, a reverse gearbox and a fuel tank are attached to it. The pipe curved at the top serves as a holder for controlling the device. A speed knob is installed on it.
Let's figure out how to make a walk-behind tractor from a chainsaw with your own hands. Step-by-step instruction:
- A drawing is created. This is a very important stage in creating a unit, without which it will not be possible to produce reliable equipment. All spare parts with mounting points must be clearly marked and all dimensions must be indicated.
- Creating a frame. It is a cube whose corners are 32x32 mm. The motor is installed on the upper corners of the frame, and below it is the fuel tank. For intermediate support of the shaft, vertical posts are installed at the front. And in order to mount the bearings, you will need supports for the longitudinal angles.
You can create a homemade walk-behind tractor from a motorcycle. This will be a more powerful device; it uses a motorcycle engine. For example, an IZh motorcycle engine is suitable.
The easiest way is to install a fan. And to ensure that the air is directed to the cylinder, a protective coating is used. They can use an old motorcycle fuel tank. Mopeds are also suitable for making the unit.
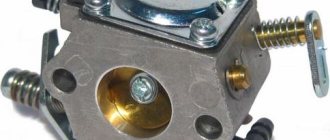
They also make a walk-behind tractor from a Ural chainsaw. The agricultural unit can be assembled not only from the Urals, but also from Taiga, as well as any chainsaw of domestic and foreign production. The main advantage of such an engine is that the chainsaw motor has a diaphragm carburetor, which allows it to operate in any position. Carbs on all chainsaws work the same.
How to choose wheels for a walk-behind tractor? Usually you have to choose from two types of wheels:
- rubber (with deep treads), which are suitable for moving on dirt roads;
- metal (with lugs), which are designed for work in the field.
Wheels can be selected from any vehicle if they are the right size.
With an engine from a walk-behind tractor, you can assemble universal equipment needed in agriculture. Some add additional equipment to the walk-behind tractor to perform various jobs. In this case, the homemade product allows you to modify the walk-behind tractor at your discretion.
How to make a walk-behind tractor from a chainsaw
A walk-behind tractor differs from a multi-cultivator; the former can be turned into a mini-tractor. If motor cultivators are only suitable for loosening the soil, then improved walk-behind tractors even replace vehicles when transporting various cargo (hay, logs, livestock feed, etc.).
Let's look at how to make a walk-behind tractor with your own hands from a chainsaw. To do this, you need to spend time studying the circuit diagram of this equipment and purchasing all the necessary spare parts. Having drawings of a homemade frame, you can assemble very powerful equipment. When assembling the unit, spare parts from scooters, cars, Druzhba chainsaws, Ural motorcycles, etc. are used. Manufacturing will require metalworking skills, since all work is done manually.
The design of a homemade unit looks something like this: motor - intermediate shaft - wheel. A homemade walk-behind tractor made from a chainsaw is mounted on a frame to which the engine and gearbox are attached. The fuel tank is mounted on a bracket. The entire emphasis of the unit falls on the wheels. A working tool is installed at the rear of the mechanism.
Rules of use and care
To ensure that the tool you make or purchase serves for many years, adhere to the following recommendations:
- Before drilling, loosen the top layer of soil with a shovel.
- Sharpen the blades in a timely manner with a whetstone or sandpaper.
- After making your own drill, coat it with an anti-corrosion compound or paint it to prevent rust from forming.
- After use, thoroughly clean the working part from any remaining soil.
- Store the drill in a dry, ventilated area.
- Repair any damage promptly and restore cracked paintwork.
What garden auger do you use?
ScrewDisk
When used skillfully, a hand garden auger is an indispensable assistant in working on a country plot.
- Motorized drill for excavation work: what is it, what is it for, types, criteria for choosing the optimal one, review of the best models, their pros and cons, advice from owners
- How to choose the best planting cone for your garden: types, material, review of 7 popular models, their pros and cons
- How to choose the best garden rake: their types, design, important parameters, main varieties, selection criteria
- A miracle shovel for the garden - we dig the soil in the country without effort: the principle and rules of operation of a manual cultivator based on combined forks
Making a pen
If you decide to make an ice screw yourself, you need to know exactly how to make it. Thus, the design still needs to be supplemented with a handle. You need to select it or make it yourself. In addition, after that you need to think about how it will be attached. To make the ice screw more convenient to use, you can attach the handle from different sides. But you need to get rid of the excess plywood. The handle should be sealed with sealing material.
If you are thinking about how to make an ice screw from a chainsaw, then you should definitely know that the handle can be strengthened with self-tapping screws. Once again, the plywood must be processed using a jigsaw. Such work must be carried out carefully, and it is carried out in order to get rid of everything unnecessary.
Safety
For operational safety, all models of gas drills have an automatic clutch. The auger remains stationary during engine startup and begins to rotate only as engine speed increases. Most models also have a function to automatically block the engine in case of incorrect operation of the tool or loss of control over it.
When working with any motor drill, you should strictly follow the safety rules specified in the operating manual. It is recommended to work in protective gloves, glasses and headphones. And of course, don’t wear long clothes for obvious reasons.
It is also important to use the drilling tool exclusively for its intended purpose - to work only with the material for which it is intended.
How to make an electric hole drill
Electric drilling rig design
In this case, the rotation of the drill will be carried out using a cardan drive. To increase the safety of working with such a tool, you can install a coupling.
To make this unit more transportable, it is recommended to mount the main working units on a trolley. It is best to install the motor at one end of the support frame, and place the bracket at the other. Using this solution, it is possible to easily make a vertical stand, making all work easier.
Video on the topic: Buroyam from a walk-behind tractor
Publications on the topic
Making a mini excavator with your own hands
Making a receiver for a compressor with your own hands
How to make a trailer for a walk-behind tractor with your own hands
Trimmer based
Purchasing such a motor drill is not always justified. For several holes or other small jobs, you may not need a bulky motor drill, which will then gather dust in the pantry or garage.
If you have certain knowledge, you can make a tool with your own hands. This approach will allow you to save on the purchase of an expensive unit and automate complex work as much as possible.
And yet, how to make a motor drill from a trimmer without resorting to outside help? In order to create an idea of the future unit, you need to remember what a trimmer is. This device is quite lightweight and easy to use.
Its design includes a long handle, a control panel and a small motor that transmits torque to the head into which the fishing line is inserted.
In order to make a motor drill yourself without the help of others, you will need: a trimmer motor, a drill, as well as additional tools that will allow you to connect all the structural elements together.
Having connected all the elements and fastened them securely, we get a low-power motor drill with an electric motor from a simple trimmer. Such a tool will become a faithful assistant in the production of depressions in soft soil.
If you decide to build a foundation on soft soil, then it will be useful to know the specifics of choosing a foundation; for more details, follow the link: strojkarkas.com/fundament/na-glinistoj-pochve.html.
If there is a need to use a motor drill once a year for seasonal work, then such equipment is ideal.
Features of the spoon-type drill device
In soils that are resistant to crumbling (loam, wet sand, etc.), it is more convenient to use spoon drills. A homemade spoon drill for wells is made in the form of a cylinder, in the side surface of which a longitudinal slot is made. Sometimes the shape of this slot takes on a spiral shape. The length of the spoon drill is usually no more than 700 mm. The extracted rock is held in the cylinder cavity due to its compression and adhesion. The looser the soil, the narrower the slot in the tool should be. To obtain a cylinder, you can take sheet steel and roll it to a given diameter. The easiest way is to select a suitable piece of pipe, which initially has a cylindrical shape.
A homemade hand-made spoon drill is made from a piece of pipe of a suitable cross-section, in the side surface of which a longitudinal or spiral slot is made for excavating soil from the side walls of the well
The spoon drill excavates soil not only with its horizontally located lower edges, but also with its vertical edge. In this case, soil accumulates in the cylinder cavity. In some cases, a regular metal drill is welded to the bottom of the structure, which must be positioned strictly along the axis of the rod.
The main feature of the spoon drill lies in the fact that the axes of the drill and the rod coincide, while the axis line of the body of a hand drill, together with the cutting longitudinal edge, is shifted by a millimeter and a half relative to the central center line. Thanks to this relative arrangement of the axes, the tool manages to drill a hole with a larger diameter than the drill itself. This is possible by removing soil from the side walls of the shaft using a longitudinal cutting edge. To clean the tool from the removed soil, the drill is periodically raised upward.
It is important to note that the spoon drill quietly passes inside the casing pipes, which are installed to prevent the collapse of the well shaft
Modifications
Before making your own, you need to consider various models of hand-held eartheners. Taking a suitable design as a basis, one should determine its characteristics: productivity, cutting force, ability to work with hard soil. Perhaps for individual use you will have to make a combined device that combines successful solutions from several models.
Basic diagrams of auger tools
The basis of the earth rotor is the screw part - the auger. It is made welded from thin-walled steel disks. The latter are cut from the center to the outer diameter and bent. As a rule, from 1 to 4 rings are taken to make a screw. The volume of soil that can be extracted in one pass depends on their quantity. However, with a larger number of rings, the drill is more difficult to rotate and remove from the ground. The soil is cut by the auger itself or additional blades. In the first case, the working edge quickly dulls on plant roots or stones. And the blades are made of durable steel and do not require periodic sharpening.
Types of motor drills
- lungs;
- heavy.
The former are more compact and cheaper. One operator is enough to control them. They are equipped with an engine with a power of up to 3 liters. With. The most common engines are 1.5 -2 liters. With. and a working volume of 33−40 cubic meters. cm.
Their work is limited to loose sandy soils, loam and black soil. The maximum depth of the hole is 1.5−2 m.
When working with heavy soils, clays, and rocky soils, heavy motor drills . They are equipped with engines with power starting from 3.5 liters. With. and they require two operators to operate them. Some heavy motor drills are mounted not on a frame, but on a trolley. Then one manager is enough.
Heavy motor drills can be equipped with a hydraulic drive, which is completed with:
- hydraulic pump providing hydraulic fluid pressure;
- hydraulic motor , providing low-speed rotation of the shaft and drill with auger;
- distribution system providing reverse by switching hydraulic fluid supply valves.
The hydraulic drive is an extremely reliable system, as it does not contain a large number of moving moving parts and provides sufficient power and torque to operate large diameter augers on heavy soils. However, such systems are very expensive for non-industrial use without constant work. Heavy motor drills with hydraulic drive can handle drilling to a depth of up to 5 m.
The presence of reverse and several gears are extremely useful properties for motor drills, as they allow you to avoid jamming of the drill with the auger and select the optimal operating mode.
Recent Entries
Chainsaw or electric saw - what to choose for the garden? 4 mistakes when growing tomatoes in pots that almost all housewives make Secrets of growing seedlings from the Japanese, who are very sensitive to the soil
This is interesting: Which car compressor is better - selection criteria
How to make a cable impact drill
The mechanism of the impact drill is quite simple in design. To manufacture and assemble it, you will need the following material resources and equipment: a thick-walled pipe of the required dimensions, angles, sheet steel, a tape measure, an angle grinder, a welding machine and a manual or automatic winch. To make and assemble an impact drill, you should perform some steps in the following sequence:
- A tripod is assembled with a height of no lower than 2 meters.
- The top of the tripod is equipped with a special unit that allows you to install a manual or automatic winch.
- A percussion instrument is being made.
To do this, you need a pipe with an outer diameter that matches the diameter of the future well. A piece of thick sheet steel is welded onto one end. Then a hole is made in it in order to fix the cable. And at the impact end of the pipe, sharpening is made around the entire circumference. To ensure the strength of these elements, they need to be hardened. The instrument should also be equipped with additional weights.
The basis for placing the working tool is being prepared. A shallow hole is cut in the ground. The wireline drill is then mounted on a tripod and positioned so that it can be completely immersed in the prepared area under its own weight.
Types of motorized drill
Gasoline drills are divided into hand-held and wheeled. The former are considered household appliances, the latter are closer to professional ones. A manual gas auger is preferred by most users as it is much cheaper. The efficiency of its operation suits many; the installation helps to drill holes with a diameter of up to 300 mm. According to the method of transmitting rotation, gas drills are divided into:
- hydraulic;
- mechanical.
The hydraulic structure of the rotation transmission from the engine to the gearbox and auger is considered more reliable and durable. In this case, the load is distributed more evenly, the parts of the device do not wear out so quickly and function longer. If you need to carry out a large amount of work, a hydraulic portable drilling rig is best suited.
Wheel motor drill
Wheeled devices are heavy because they are equipped with a powerful engine, which is difficult to carry manually. A wheeled motor drill can make a hole with a diameter of up to half a meter; the drilling depth reaches two meters. Due to its considerable cost, such equipment is more popular among professional builders. A wheel drill can be:
- Single-frame
, when the engine and gearbox are one unit within an integral structure on one trolley. - Modular
- the motor and gearbox are located on different trolleys.
Hand motor drill
Manual gas drills are characterized by low weight, compact dimensions and low power. They are made for one or two operators. For example, it is advisable to use a manual motor drill for a water well if you need to make a hole with a diameter of no more than 250 mm. One person can handle this task. But it still depends on the density of the soil. If the ground is hard, it is better to purchase weighted equipment for two operators.
Making a compact drill from a chainsaw: instructions and step-by-step description of the work
Many of us at our dacha used a simple hand auger.
What if the hole in the ground needs to be made deeper, and the soil is very dense? Or do you need to drill a lot of holes for posts to build a fence? Just for such situations, to save effort and time, we suggest you make a compact drill from a chainsaw. It is necessary to combine two units - a gasoline-powered rotary drive and an auger.
What materials and tools are needed?
To make a chainsaw drill we will need:
- gasoline engine from a chainsaw
- gearbox for changing gear ratio and torque
- auger drill
- metal pipe
- circular saw "grinder"
- drill
- welding machine
Calculation of the future gas drill
A calculation must be made to check the compatibility of the parameters of the gasoline engine and gearbox. The motor shaft rotates at very high speed. The gearbox's task is to reduce this speed, while increasing the power, which is exactly what is needed for drilling dense and viscous earth. If you do not have experience in carrying out such calculations, then contact a specialist.
As a result of the calculations obtained, it will be possible to select the most efficient gearbox for the engine. If you have engineering knowledge and experience in this area, then you can not only calculate the compliance of the engine with the gearbox, but also make the gearbox yourself.
But given the loads and the importance of stable operation, it is still safer to purchase an industrial-made gearbox.
Assembly: connect the drill to the chainsaw
Having checked by calculation the theoretical compatibility of the engine with the gearbox, we begin assembling the product - connecting the auger drill to the chainsaw. To securely fasten the gas drill elements, you need to make a strong frame housing. For this purpose we use a metal pipe. We make transverse cuts on the pipe with a depth slightly greater than the radius of the pipe.
To make the pipe bend easily, you need to make about 5 cuts at a distance of 5 mm from each other. If a right angle cannot be obtained due to too wide pipe fragments, bore the slots with a grinder. We bend the pipe along the resulting cuts. You need to get a rectangle measuring 35x45 cm. Use the same method to make a frame measuring 10x10 cm.
We weld the corners on both frames to increase the strength of both structures.
motor drill frame with gearbox
Two metal frames must be connected one above the other so that a figure resembling a truncated pyramid is obtained, the distance between the frames should be 30 cm. We connect the corners of the frames by welding four pieces of metal pipe. The center of the resulting structure will house the engine and gearbox.
The above dimensions, angles and relative positions of structural elements may differ in each specific case, since we do not know the dimensions of the units that you will use.
We mount the engine
Before fixing the engine in a welded frame structure, you need to decide whether it will be removable or stationary. If you have plans to use the gasoline engine somewhere else - for example, in the same chainsaw, then the engine should be quickly and easily removed.
To temporarily but securely fix the engine, you can use different methods - bolts and nuts, a clamping frame, clamps, staples, etc. If you were able to make a welded mounting frame from metal pipes, then choosing a way to securely mount the engine with the ability to quickly dismantle it will not be a problem.
As in the case of the frame, we cannot give the exact dimensions of the fastening elements; all such structures are individual with some external similarity.
general view of the motor drill
In general, we can only draw attention to the fact that the bodies of gasoline saws are made of plastic. The softness of this material complicates the organization of a reliable collapsible system for fixing the engine and gearbox in the frame, taking into account the strong vibration of the product in operating mode. Be sure to place the throttle control assembly comfortably.
Are old chainsaws still needed today?
Probably, many people have old chainsaws of the “Friendship” type lying in their sheds and storage rooms. For a long time it was a pity to throw away the saw, but it came in handy for making a drill. This saw has a fairly powerful and, importantly, low-speed engine. There should be no difficulties with mounting such an engine.
We install the fuel supply control handle on the upper (smaller) frame. The soil is very uneven in its structure - layers of varying density and viscosity, stones, roots, etc.
The drill can jump off, suddenly increase speed, or move to the side, so we strongly recommend placing an emergency engine shutdown system next to the fuel supply control mechanism.
old chainsaw “Friendship”
Some old Soviet saws are quite large, which requires an increase in the size of the gas drill. Before starting work, consider whether it will be convenient to operate such a structure. Otherwise, the Druzhba, Ural and similar chainsaws are quite suitable for our task.
Torque transmission: chain or shaft?
To transmit torque from the motor to the gearbox, experts and practitioners do not recommend using a chain drive. This solution is not very reliable and unsafe. It is best to use an intermediate shaft to transfer force from the engine to the gearbox. This part is not very complicated, and if you cannot find it, you can order it from a familiar turner.
The question often arises about using a flexible shaft. The convenience of such a part is obvious - you do not need to precisely adjust the location of the engine and gearbox, you can place them at your discretion. However, unlike rigid metal parts, any flexible products have reduced mechanical strength and reliability.
In principle, a flexible shaft can be used in a homemade drill on a gasoline engine. The only question is what the rotation speed will be and what maximum force will be applied to the shaft. And what will happen to the entire structure if this force is applied.
In any case, the flexible shaft must be separated from the operator by a durable protective cover.
motor drill gear chain
The design will be simpler if the flexible shaft must transmit rotation not from the engine to the gearbox, but from the gearbox to the drill.
In this case, the shaft can be hidden in a pipe, which simultaneously plays the role of a structural structural element and a protective casing. Rotation speeds with this option are lower.
Considering the flexibility of the shaft, it is possible, if necessary, to create a non-standard design where the drill and drive are not coaxial.
We attach the auger drill
The auger drill must be secured very securely. This is easier to do than fixing the engine in the frame. A metal pipe most often serves as a durable structural element.
The drill is not permanently attached to the shaft, but so that it can be removed and replaced with a product of a different configuration - a coil, a chisel, a spoon drill, etc.
To removably fasten the drill, you can use studs and dowels.
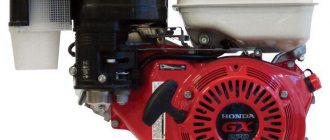
Not just a chainsaw!
drill bit
Let's add a little to our story: a gasoline engine can be taken not only from a chainsaw, but also from a lawn mower, trimmer, etc. You can use any rotary drive - for example, electric. The main thing is to carry out calculations for pairing with the gearbox, check whether the received power is enough for you for soil of one density or another.
How to do it yourself?
The device is so simple that a special drawing is not needed for any trained people. The guide elements are pipes with thin walls with a cross-section of 5 cm. The length of such pipes is 1.3 m. A steel corner, the length of which is 0.57 m, is suitable as a base for a homemade rack, and the size of the shelf should be 5 cm. The carriage is prepared at based on two-inch pipes, their length is 0.25 m.
Important: the carriage must slide freely along the guide elements. A motor drill for drilling wells is attached to both the upper and lower segments of the carriage
In the first case, a fragment of a 20/20 profile is used, and in the second, a ¾-inch pipe cut in the longitudinal plane. On top of a square piece of rolled metal, braces made from a strip of steel are attached. This allows you to firmly fix the frame: one edge is held by a bed of a piece of pipe and bolts, and the bracing elements provide grip in two additional places - also with bolts.
We can say that the carriage is mounted on a chain. However, the chain itself is also firmly fixed. At the installation point, the plates are additionally tightened with M8 bolts. The first plate is welded onto the back of the carriage. The second one is used to press the chain there.
It is worth taking care to adjust the tilt of the tool. For this purpose, take two profiles and form a jib. The angle of deflection of the rack is determined by the length of the jib. As a result, you can even drill an inclined well. Moreover, it makes it easier to transport and carry the tool.
The movement of the sprocket, and then the drive shaft, is provided by a special handle. Any master can easily figure out how to make it himself. The drive shaft can be taken from domestic motorcycle engines (together with splines). A motorcycle chain can also be used, but usually it has to be extended to 2.5 m. A driven sprocket is placed on the bottom of the rack, supplemented by a bracket and an adjustment bolt. A pair of removable paws will prevent turning over.
Recommendations for making a handle
The design will be supplemented with elements, including a handle, which can be made from scrap materials. For example, in such cases a metal tube is often used. But in order for the tool to be convenient to use, the handle must be sealed, so it will not cause unpleasant sensations, and you won’t be able to burn your wet hands on it. So, you have to prepare any suitable insulation material for this. You will also need a tube whose length is 25 cm; you must choose one with thick walls. The example will consider the case where a former ISTANA boot lid shock absorber is used. It is worth noting that we also have to prepare a metal plumbing pipe 15 x 15 cm.
The final stage of production
To make a high-quality hole drill with your own hands, you need to pay due attention to the process of making a knife. It should be at the end of the hole drill
Therefore, this part will take on the entire load from cutting the soil. In order for it to serve for a long time and be able to effectively perform its functions, spring steel is used for its manufacture. This material is durable, wear-resistant, and does not require frequent sharpening.
The dimensions of the knife must correspond to the dimensions of the auger. A rotating sandpaper is used to sharpen it, and a welding machine is used to connect it to the base.
Dimensions of drill knives
We make a walk-behind tractor with our own hands, from a chainsaw description, photo, video
The chainsaw is very popular among home craftsmen. It can be used as a universal drive to make a walk-behind tractor with your own hands from a chainsaw. Solid power and light weight go well with its compact size. Thanks to this, the chainsaw can be combined with a bicycle, winch, ice auger, sawmill and walk-behind tractor.
Everyone can make interesting homemade structures using a chainsaw with their own hands. To do this, you will need knowledge of the basics of drawing and design, since the main conditions for the normal operation of the unit are the quality of the assembly and the accuracy of all dimensions.
How to easily make a walk-behind tractor from a chainsaw.
How to make a walk-behind tractor from a Friendship chainsaw? A homemade walk-behind tractor made from a chainsaw is a reliable household assistant that is different.
Motor drill from a drill
It is much easier to build a similar device from a drill. High power is a mandatory characteristic of a drill. It is better to use a hammer drill.
The process will be less labor-intensive, because there is no need to look for a gearbox - it is included in the design of the hammer drill. In addition, drills are those devices that are assembled with a drill without additional parts.
The safety clutch is installed between the output shaft and the shaft of the driven drill. It prevents additional load from being placed on the gearbox and auger, so it doesn't get stuck.
Rotary hammers are always equipped with reverse, unlike drills.
Making a motor drill with your own hands from a drill is a little more difficult:
- You need to select a drill with a power of at least 2 kW and a receiver. The brand and year of manufacture do not matter.
- Buy a worm gearbox (used) with a gear ratio of 1:25. You can purchase a coaxial one, but using it can be inconvenient.
- A screw - either buy it or weld it yourself.
- Fasten all elements into a technologically complete structure. You may have to ask for help at this stage, although if you have the tools, materials and logic, you can design the fastener yourself. The main thing is that it is durable, neat and does not interfere with the normal operation of the motor drill.
The advantage of a chainsaw over a drill is its autonomy. The drill is powered by the mains, which narrows its scope of application, and a “chainsaw” motor drill can be used in winter fishing conditions.
The advantage of the drill: it does not contain a fuel mixture, nor does it contain oil. A drill can work at sub-zero temperatures, but a chainsaw freezes. You have to spend time warming it up.
Characteristics of motorized drills
If you're wondering whether a homemade tool is worth the time and effort, then you don't know how much small excavation work can be done in literally an hour.
You can drill holes for poles, lanterns, for planting trees, build foundations, and design the site in accordance with your aesthetic taste and needs, without resorting to renting special equipment or manual digging.
Do you know how much the largest tractor in the world weighs and how much gasoline is needed to maintain it? And here you can find out the main technical characteristics of the KamAZ-6520 dump truck.
If an earth drill can handle some hard types of soil, it can also handle ice more than a meter thick. On winter fishing, you will be fishing, and not drilling ice holes.
Criteria for a good self-made motor drill:
- Power .
For household needs, at least 3 horsepower is enough. The engine power of some modifications reaches 6 liters. pp., but it all depends on the operating conditions. You can operate a compact and lightweight drill yourself; a more powerful one will require the presence of another operator. - Engine size plays the same role as power.
The more cubic centimeters of fuel mixture the engine holds, the wider the capabilities of the power tool. The main guideline when choosing volume is the nature of the soil. Alumina, sand, frozen soil require different engine characteristics. - Functionality , drilling ability.
Which auger will the engine “pull”? What will be the diameter of the screw in millimeters? Is it easy to pick up an auger in a store, or are there difficulties with delivery? Does the auger package include an extension, and is it provided for a specific model? By answering these questions, the user will be able to determine which tool he needs.
If you are interested in making a high-quality motor drill yourself, you need to add that the fruit of your efforts will not depend on your talent. The process will require knowledge of turning and awareness of the principles of operation of simple mechanisms.
There is nothing difficult about making a motor drill with your own hands. If you know about gearboxes, you can bore a bushing of the required diameter and build a high-quality mount.
You can't do without some abilities here. Enlist the help of a familiar locksmith if you do not have practical skills in working with parts.
Rules of operation and care
In order for a homemade fishing drill to serve properly and remain a fisherman’s assistant for a long time, you must adhere to some rules:
- After each use, wipe the drill dry, even though it has a protective coating.
- Store the equipment in a specially designed case made of thick fabric with holes for ventilation.
- During seasonal storage, lubricate the knives with machine oil. If the drill is made of several parts, lubricate all joints.
- Clean knives that have ice or snow stuck to them with a brush. Do not knock the coating off the knives, as this can lead to their dulling.
- Immediately secure all loose parts.
- Paint over areas where scratches have appeared to prevent rust from appearing.
When drilling holes, do not allow uneven load distribution
You should drill very carefully, paying attention to the thickness of the ice. The speed of drilling holes depends on the quality and reliability of the screwdriver
The manufacture of this design requires special attention. After all, the holes will be drilled not by someone, but by the fisherman himself. The easier and faster the drill is to drill, the more enjoyable the fishing process itself will be. After all, it should be organized in such a way that you can relax and have fun, and not exhaust yourself with hard work.
Drill - purpose, types and features of operation
A motor drill is a type of equipment designed for making holes in hard and clay soil, as well as in ice. Depending on their design features and purpose, drills are divided into:
- household - small-sized tools, distinguished by relatively low power and traction characteristics. Devices of this type are well suited for short and irregular use. They consume a minimum of fuel and do not require regular specialized care;
- semi-professional - medium-power equipment, which in size is not much different from household models. The main task of tools of this type is regular operation to make small and medium-diameter holes in loose soil and in ice with a layer thickness of up to 10 cm;
- professional – devices of this type have solid power and traction reserve. They do a good job of making holes in hard soil and ice up to 15–18 cm thick.
Industrial drills are considered the most powerful on the market. These rigs are designed exclusively for oil and gas drilling work. They require a team of several experienced employees to operate and maintain them.
In addition to specialized branded devices, there are small-sized attachments on the market that are easy to install and maintain. The most popular of them is a chainsaw attachment for drilling ice and soil. This device allows you to combine the working parts of the nozzle and the power of the factory engine of the garden tool. Thus, the user gets the opportunity to drill holes without difficulty without the need to purchase specialized equipment.
An attachment in the form of a drill for a household chainsaw does not require any special skills from the operator. All that is needed is to install it instead of the cutting parts of the saw, thread the tool and place it motionless with the working parts down. After this, you can start the saw engine and start making holes.
Ice drill from a chainsaw - manufacturing, drawing, attachment
A motorcycle ice drill will become a reliable assistant in cases where its owner needs to make holes in the soil or ice.
Quite often, for self-assembly of this device, an engine from a household chainsaw is used.
Provided the correct sequence during assembly, the manufacturer will receive a reliable unit that can easily cope with drilling holes in hard, dry soil or a thick layer of ice.
Preparing for the manufacture of a motorized ice drill
Before you start making a drill, you need to carefully prepare. First, you need to find detailed drawings that should tell you how and in what sequence to install the elements into the overall structure of the device. The diagram should also indicate the dimensions of all parts used.
Then you can start preparing the parts for your homemade project.
Their list includes:
- a fully operational and ready-to-use household chainsaw with an internal combustion engine power of at least 2.5 liters. With.;
- all-metal gearbox;
- 2 mm sheet of plywood or sheet steel;
- bolts, screws and other fasteners;
- all-metal tube of small diameter;
- 1 steel pipe, the diameter of which is 15 cm;
- 1 metal pipe, the length of which is 25 cm;
- metal screw;
- rubber insulation for mounting on handles.
All metal parts should not show signs of corrosion, as they will quickly become unusable.
The list of equipment required for work includes:
- key head No. 27;
- manual grinder with disc;
- screwdriver;
- jigsaw;
- manual grinding machine;
- electric welding machine.
Some parts for a homemade drill can only be made on a lathe. If the manufacturer does not have experience in working with it, then it is best to order ready-made spare parts.
Which gearbox is suitable for assembly?
The chainsaw drill must be equipped with a suitable gearbox. Often, a mechanism from old unnecessary electrical equipment is used for this. The selected gearbox for a drill chainsaw must meet certain characteristics.
These include:
- ability for direct rotation;
- gear ratio in the ranges 1:25–1:50;
- both the shaft and the shank of the element must rotate continuously in one specific direction.
It is best to initially equip a homemade motor drill from a chainsaw with a gearbox that creates a gear ratio of 1:30. In this case, the shaft of the mechanism must be a direct continuation of the rotor of the gasoline engine.
Chainsaw attachment for drilling ice - operating instructions
If the owner of a garden tool does not have the time to independently assemble a drill from a chainsaw for earth and ice, then you can take the easier route and buy a ready-made attachment.
It has all the necessary fastenings for its smooth installation on a chainsaw.
In addition, the nozzle is made of pre-hardened metals, which allows it to make holes in a thick layer of ice or in dry, hard ground.
Installing and using a ready-made drill is quite simple. To do this, you must first remove the saw set of the chainsaw and screw a standard auger with blades into the resulting hole. Then the lower part of the drill needs to be installed above the place where it is necessary to make a hole, and the engine of the household chainsaw should be started.
In order for the attachment for a household chainsaw to serve properly and for as long as possible, it must be properly cared for. To do this, after each use the auger must be wiped, removing any remaining ice and soil from its surface and blades. If during work rust was found on the surface of the metal parts of the drill, it will need to be repainted.
The drill should be stored in a clean, dry room. There should be no drafts, high humidity and sudden temperature changes. Otherwise, pockets of corrosion will form on the drill.
Chainsaw hole drill - how to make it at home
Before making a motor drill from a chainsaw, you should carefully study the drawings. The diagram will help you determine the correct procedure and avoid mistakes.
If you do not find plywood of the required thickness, then instead you can take two thinner sheets and glue them together. Having received a product of suitable thickness, mark it to make the required holes for fasteners. Using a drill, you will need to make 2 additional holes - one of them should be located opposite the sprocket of the chainsaw drill, and the second - next to the first - is intended for mounting the nuts.
The further procedure for making a motor drill from a chainsaw is as follows:
- Make an indentation in the top of the plywood piece using a sander. After this, attach the gearbox to the treated area to find out where it is installed in the chainsaw drill. In this case, be sure to take into account the features of the household tool that is used to make the structure. If the saw device has a sprocket with 6 beams, then use a 27 mm gearbox;
- Next, secure the gearbox, center it, and securely fasten it to the bottom of the plywood. Then attach a chainsaw to the top of the plywood. After this, start its engine and check the reliability of the design;
- At the next stage, you need to attach an auger to a homemade ice auger made from a chainsaw. To do this, take a pipe with thick walls and attach it to the gearbox with two bolts. The auger is attached to the gearbox in a chainsaw drill using an adapter that acts as a shock absorber. It can be made from a 15-centimeter steel pipe onto which rings are welded. Next, process the adapter on a lathe;
- To make it more convenient to work with a chainsaw motor drill, the unit must be equipped with handles. To make them, a curved steel pipe is taken, onto the edges of which rubber seals are placed. You can attach the handle to a chainsaw drill using self-tapping screws or other available fasteners;
- Excess parts of plywood are cut off using a chainsaw motor drill, and the edges of the remaining sheet are processed with an electric jigsaw;
- Next, the finished chainsaw motor drill should be equipped with cutting knives. To do this, cut the steel sheets and weld them to the pipe that was used as the auger. In this case, the steel sheets should bend around the screw in the form of a spiral. The edges of the sheets must be sharpened carefully.
Types of drills
Different types of drills are used for different construction jobs. Each of them has a special design:
- Auger drill. Its peculiarity lies in the elongated cutting part. Used for making holes for posts. Since the structure is longer, it can be removed much less often, so the work is done faster when compared with a garden auger.
- Garden. As a rule, these are 2 blades welded to opposite sides of the pipe. They are placed at different angles. The drill is mainly used to make holes for planting plants. Hence the specific name “garden”. But it can also be used when building gazebos, installing fence posts, etc.
- For TISE piles. It is somewhat reminiscent of a garden one, but additionally has a blade that folds down at the bottom of the hole for expansion.
The easiest to make are garden spindles. The design may have variations, depending on the soil with which this tool will be used. This is the advantage of self-made tools. It can be made for specific needs. The point is not even the diameter of the blades themselves, but the fact that they can be made removable, bolted, etc.
In this video we will look at a homemade earth drill:
Although the price of the simplest drills in stores is low, such tools position themselves as “universal.” For light soil they will be useful, but on harder soil they are ineffective.
Preparing for self-assembly of the drill
Before you begin making your own equipment, it is important to study the detailed drawings. The finished diagram should tell the manufacturer exactly how to install the elements of the drill, in what sequence to do this, and what sizes all the components used should be.
Next you need to start looking for parts.
The manufacturer should have at hand:
- a working body that can be taken from an old motor drill. If it is not possible to find a ready-made tip, then it can be made from a round solid metal pipe;
- engine from a working chainsaw;
- gearbox - its task is to convert and transmit rotational force from the motor to the working element;
- metal pipe and ties - needed to assemble the protective housing.
The operator will need a welding machine, a drill, a grinder and a grinder.
How to make a spiral drill for a well with your own hands
A drill of this type is designed for drilling small wells, but if it is possible to lengthen the barrel, then you can drill a well up to 20 meters.
A hand drill consists of a drill pipe, a handle with which it is convenient to rotate it, and the drill itself. To make such a drill at home, you need to have some skills in working with metal, as well as a welding machine.
We will need:
- Pipe with a diameter of 500 mm;
- Two disks with a diameter of 100-150 mm;
- Tip (a drill of at least 20 mm is suitable).
A drill or any other sharp tip is welded to the edge of the pipe. Alternatively, the pipe needs to be flattened on one edge, and then cut off the edges with a grinder to create a sharp peak.
The discs are cut in half, the edges of their edges in the place where the cut occurred are sharpened. The ease of rotation of the drill and the speed of working with it will depend on this.
After this, weld the halves of the circle no lower than 20 cm from the tip. The angle between them is no more than 40 degrees, 35 would be ideal.
After 20 centimeters, weld the second 2 halves of the circle. On the second side of the pipe, we weld another piece of pipe perpendicularly, so that it is convenient to twist. If you are going to drill deep, you should make the handle long so that two people can turn it.
How does a motor drill work and how does it work?
Motor drills differ in drives:
- gasoline;
- electrical;
- hydraulic.
The motor drill consists of the following elements:
- drive (gasoline engine, electric motor, hydraulic drive);
- transmission (worm or cylindrical coaxial);
- drill (head, knives) connected to an auger;
- extension;
- frame.
The drive is necessary to create torque, causing the auger with the drill to rotate. Electric engines are quiet and operate without exhaust gases, but have less power and torque compared to gasoline engines and are limited in autonomy by the cord for supplying electricity. Recently, electric drives powered by batteries have appeared.
Gasoline and electric engines are high-speed and in order to transfer sufficient power to the auger drill, it is necessary to reduce the speed using the transmission. The transmission can be worm or cylindrical coaxial. During operation, you need to ensure that the transmission is filled with oil. Transmission ratio from 1:25 to 1:50.
The walls of the hole are the outer walls of the screw device. The diameter of the drill head is 30−50 mm, while the diameter of the auger ranges from 150 to 250 or more. The larger the diameter of the auger, the larger the diameter of the dug hole, but the greater the power and torque required from the drive. Augers are available in various lengths from 1-2 turns to 10 and a length of about 70 cm. If it is necessary to drill a hole more than 1 m, an extension is used.
Drilling tool
As a drilling tool in hand motorized drills, auger drills with a spiral (flange) are used, along which the excavated soil, destroyed by the cutting knives of the drilling auger, rises to the surface. Very rarely, core drilling tools are used when drilling with hand-held motor drills. Sometimes, during geological soil sampling, sampling tools are installed on hand-held motorized drills. Depending on the type of soil and season of use, different types of cutting knives are installed on drilling augers to facilitate drilling under different drilling conditions. The auger drilling method using a motor drill is intended for the development of soft soils of categories 1, 2, 3 and partially soils of category 4 (depending on the development conditions and the motor drill used).
The main idea is an earth drill
The motor auger is descended from its predecessor, the hand-held earth auger, which was claimed as an invention in the United States back in 1890 as a machine “for drilling holes for the installation of mailboxes.” Even then, the basic operating principle was laid down:
- a post drill that crushes the soil;
- an auger that feeds it upward from the hole.
An auger, a device well known to us from a mechanical meat grinder, is a screw rotating in a pipe close to its walls, pushing the mass entering the pipe along its axis.
A manual drilling rig consists of the drilling part itself (knives, drill), an auger mechanism for lifting soil, and handles for creating torque with muscle force. The motor drill replaced the muscular force with the torque created by the drive.
Which gearbox is suitable for assembly?
The chainsaw drill must be equipped with a suitable gearbox. Often, a mechanism from old unnecessary electrical equipment is used for this. The selected gearbox for a drill chainsaw must meet certain characteristics.
These include:
- ability for direct rotation;
- gear ratio in the ranges 1:25–1:50;
- both the shaft and the shank of the element must rotate continuously in one specific direction.
It is best to initially equip a homemade motor drill from a chainsaw with a gearbox that creates a gear ratio of 1:30. In this case, the shaft of the mechanism must be a direct continuation of the rotor of the gasoline engine.
Preparation of equipment and materials
Before making a drill from a chainsaw, you should carefully prepare the materials and tools necessary for the work. For materials you will need:
- A working household chainsaw;
- Gearbox;
- Solid steel sheet, or plywood, 2 cm thick;
- Set of various fasteners;
- Metal tube;
- Steel pipe, diameter 15 cm;
- Metal tube, 25 cm long;
- Steel auger;
- Rubberized insulation for the handle.
Do-it-yourself motorized ice drill for the Stihl and Druzhba chainsaw (Ural)
To work on making a motor drill from a chainsaw, be sure to prepare the following tools:
- Head for 27;
- Screwdriver;
- Bulgarian;
- Electric jigsaw;
- Grinding machine;
- Welding machine;
- A set of nozzles for working with metal.
To create some parts for a motor drill from a chainsaw, you will need a lathe, so you need to agree in advance with a specialist in the manufacture of metal parts.