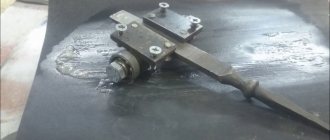
Equipment for sharpening knives at home
Sharpening knives using a whetstone
To sharpen a knife with a whetstone, you need to remember the main steps of the process, which include:
- Choosing an angle. This was written above;
- Performing work with smooth movements, excluding the abrupt slipping of the bar from the blade;
- Periodically wetting the bar with water for an effective process.
Tip: the plane of the block must be within the predetermined angle parameters relative to the knife blade.
Sharpening knives using musat
The process is more complicated than using a block, and looks like this:
- The musat is installed on the surface in a vertical plane.
- The edge of the knife is aligned with the top of the musat, and then the blade moves along the rod in an arcuate motion. The process starts at the top and smoothly moves down.
- The movement is repeated a certain number of times until the blade is sharp on one side. After which this procedure is repeated with the second side of the blade.
Important: it is necessary to provide a flat surface for firm support of the musat
Sharpening knives using an electric machine
The most important thing when working on an electric machine is to ensure complete safety of the process. Otherwise, the requirements do not differ from the method of sharpening described above with a whetstone or whetstone.
The only thing worth noting is some features that distinguish this process from others.
- firstly, in this case, it is not the block fixed in the machine that is wetted with water, but the blade of the knife.
- secondly, during the process you should not allow the blade to become very hot. Otherwise, deformation will occur.
- thirdly, it is necessary to ensure a fixed angle. This can be done using special devices installed on the surface of the housing.
- Finally, when working, it is necessary to purchase personal protective equipment to avoid accidents.
When do you need to adjust or replace electric planer knives?
The knives on an electric planer wear out over time. They need to be removed and sharpened or replaced altogether, and then installed back on the drum. Newly installed cutting attachments need to be adjusted in order to process lumber as efficiently as possible. The blades of new power tools also need to be pre-adjusted before use.
The following signs indicate that adjustment is necessary:
- change in sound when processing workpieces;
- vibration of the tool during operation;
- deterioration in the quality of planing lumber (formation of waves, chips, grooves, protruding fibers and other defects);
- increase in effort spent on work.
The change in sound is not typical for all models. This symptom may also indicate a number of other problems.
If, after adjusting the blade blades, the symptoms discussed above do not disappear, then more serious repairs to the power tool will be required.
Setting the correct position of the cutting attachments is carried out according to the following parameters:
- the height of the part of the blade that protrudes above the sole of the power tool;
- the size of the side protrusion of the knife intended for picking out quarters.
By correctly adjusting the position of the knife blades on the drum, high final quality of lumber processing is achieved.
Manufacturing process
You can make the device yourself. The instructions are as follows:
- To begin with, an abrasive of the required grain size is selected.
- The next step is to create a template at the required angle. A wooden block is ideal for this, from which the material is removed at the required angle.
It is quite difficult to create a full-fledged machine driven by an electric motor. This is due to the fact that accurate calculations need to be made.
In conclusion, we note that a plane with timely sharpening of knives can last for a very long period. In the manufacture of the blade, tool steel is used, which is characterized by increased resistance to mechanical stress.
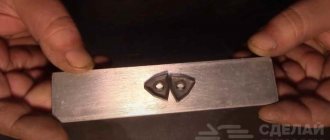
Sharpener "Domik"
A good tool for sharpening knives. Despite its simple design, the sharpener does its job well. This structure consists of a rectangular block, the upper edge of which is made in the form of a gable roof. The angle of inclination of one face is 20 - 25 degrees, which is optimal. The product must be installed with a blade close to one of the roof ridges, then take an abrasive wheel or a block with emery and move along a horizontal line. This ensures a constant angle of inclination, which leads to uniform sharpening of the blade.
There are also complex designs for a homemade sharpening machine. For manufacturing you will need the following materials:
- A piece of board measuring 500x150x20 mm.
- A metal pin with a thread that will serve as a guide for the bar.
- M8 bolts and nuts and wood screws.
- Clamping nuts or wing nuts.
- Ordinary PCB or plexiglass, which will serve as a substrate for the knife and a kind of movable frame.
- To attach the knife, use a neodymium magnet. The usual one will not work, since its downforce is quite low.
The board must be cleaned, processed, and then made into a rectangle. Another board should be made rectangular in shape, which will serve as a stand or support. Its height should be such that the slope of the main board is 20 degrees. You can fasten them together with wood screws. Then attach the resulting structure to the workbench or cut out a tabletop in advance, to which one of the studs will be attached. After securely attaching the pin to the tabletop, you need to take a 200x100 block and make two holes in it: one for the main pin, on which the movable carriage with the sharpener will be attached, and the other for the pin, which is attached to the tabletop.
Now you can begin assembling the carriage with the sharpener holder. For the pin that will hold the carriage, you need to make two clamps from wood, plexiglass or metal. Drill holes in the clamps, put them on the stud and secure them on both sides with nuts. The carriage will rotate freely along its axis.
The next step is to install a neodymium magnet on a previously prepared plate. It is necessary to make a longitudinal groove in it so that the tripod can be moved up and down. Drill a hole in the middle of the frame and insert a bolt with a nut, which, in turn, will press the plate. You can simply glue a neodymium magnet to the end of the plate to hold the knife.
The homemade device is ready for use. It can be used to sharpen chisels and planes.
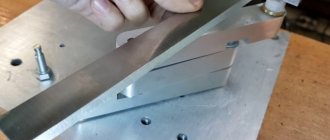
MACHINE FOR SHARPENING PLANE KNIVES
Many users of sawing machines periodically have problems sharpening their knives. A similar thing happened to my carpenter friend. An attempt to sharpen knives at the enterprises of our town was unsuccessful, since no one took on such a seemingly simple job. We looked at various designs for sharpening on the Internet and chose a scheme with a movable carriage of the emery stone. But pictures are one thing, making drawings and assembling a full-fledged machine is another...
Carriage with a fixed knife
The sharpening machine consists of a base frame with support plates for fastening to the workbench, a carriage on bearings, a movable feed platform on two guides and four bushings, a knife holder with an adjustable sharpening angle and an electric motor with an emery stone. To manufacture it, purchased components were required: bearing 6200 (8 pcs.), bolts M10x70 mm (10 pcs.) and M8x30 mm (14 pcs.), washers 10 mm (10 pcs.) and 8 mm (14 pcs.).
The fabrication work began with cutting parts for the base frame. For precision welding work, I used a cast iron plate measuring 400x800 mm from an old milling machine. I pressed rectangular pipes to a flat slab with clamps: two longitudinal 25x40 mm, one longitudinal 40x40 mm and two transverse 25x40 mm.
Then I used a caliper to check the accuracy of the dimensions and secured everything with electric arc welding. I immediately welded the support plates in the corners and the connecting strip in the center. After that, I turned the frame over and again pressed it to the stove with clamps, boiling everything completely.
In the same way, I welded the carriage frame and, having marked eight holes on it according to the drawing, drilled them with a hand-held electric drill. First with a diameter of 5 mm, then drilled to a diameter of 10.5 mm. I also made a hole with a diameter of 12 mm along the axis of symmetry for the feed screw. I supplemented the design with two M10 nuts for the bolts that press the bearings, and an M10×0.75 nut for the feed screw.
Meanwhile, a friend brought the parts ordered from the turner: two guides with a diameter of 20 mm with an internal M10 thread, four bushings for the guides, four bushings for installing support and four bushings for thrust bearings, a bushing and washer for the stone, and also a feed screw.
With the carriage assembled, the nuts and bolts were finally tightened after checking that all four support bearings were seated against the frame tubes. The thrust bearings were also aligned exactly to the longitudinal tube of the frame without gaps. Checking the movement of the carriage on the frame pleased me, but the main work lay ahead.
I cut a plate measuring 180x230 mm from sheet steel 3 mm thick. Then I marked the engine mounting holes and the welding holes for the guide bushings on it. I made holes with a diameter of 10 mm for the engine bolts. And for electric rivets - 12 mm in diameter with a countersink to the full depth.
For assembly accuracy (ensuring parallelism of the longitudinal frame pipes), I cut two spacers from a birch board, 60 mm and 92 mm long, respectively. With their help, I fixed the correct position of the bushings on the guides: the first pair is positioned all the way to the frame on the right, the second pair is 100 mm from the frame.
It should be noted that the flanges of the square tubes of the frame did not have any deflection, otherwise the bearings would touch it with their edges or fall through.
Then I placed the finished engine mounting plate on top of the bushings, leveled it and loaded it with cast iron.
One by one, I welded all the bushings along the holes with a countersink, installed the feed screw, and welded the thrust bracket to the engine platform. I secured the screw with a washer and a cotter pin and turned the feed screw left and right, making sure that the engine platform moved freely. Amazing! Machine for sharpening plane knives
Engine platform Carriage frame
Overall dimensions of the motor used (900 rpm, 300 W, 380 V)
Guide (2 pcs.) Feed screw Guide bushing (4 pcs.)
Stone washer Stone sleeve Clamp sleeve. subs. (4 pcs.) Support sleeve subs. (4 things.)
Feed Screw Bracket
Knife support Knife mounting base Knife clamping plate Knife mounting base cheek (2 pcs.)
Knife support shank (2 pcs.)
The engine with the cup stone was fastened with four M8 bolts with washers and nuts. Then I welded the motion control handle and the starter mounting plate to the platform near the engine. I installed a turned wooden handle, a starter, and a 380 V electrical cable with a plug. From a sheet of aluminum, I cut out and bent into place a protective casing for the emery stone and secured it to the platform with four M5 screws.
While working on the machine, I constantly had to consider various technical solutions: from choosing a knife mount in the desired position to a device for adjusting the sharpening angle. It was also important to decide on the choice of construction material and how to do without milling work.
A solution was found unexpectedly when a friend brought two channels 100 mm high and 330 mm long with straight shelves measuring 46x8 mm. After processing them in accordance with the drawings, a base, a knife support and a clamping bar were obtained. And from scrap channel bars I made two cheeks with a hole and a groove and two tails with M8 threads. I welded everything together and got a unit for installing a dull knife. In the base frame, I marked and drilled two holes for M10 bolts securing the knife holder assembly.
It was also necessary to adjust the position of the stone with the engine and the parallelism of movement along the knife holder assembly.
Electric motor and starter Carriage. Bottom view
Feed screw
Bearings mounted on the carriage
Machine base frame
To test the machine, the three most dull knives were used. The first of them was installed by pressing it with a bar with five M8 bolts. Turning on the engine and evenly moving the carriage back and forth with the feed screw, I brought the stone to the knife until the first spark. Then he smoothly brought the cutting edge of the knife to its sharpest state, spending only five minutes on this! And then they sharpened the second and third knives. I was pleased with the result.
The final stage of manufacturing the machine was painting the frame blue and the knife holder assembly red. And its rightful owner attached four rubber support legs to it.
The material was prepared by the site team:
Anatoly MATVEYCHUK,
Zavodoukhovsk,
Tyumen region
We recommend reading
- DISASSEMBLY WITH A SYRINGE! Medical disposable syringes used for injections, thanks to the efforts of technical enthusiasts, began to find further use. For example, in the amateur radio...
- ULTRA-QUICK CLAMPING It is designed for instant clamping of round parts - axles, rods, rollers and the like. It can be used for drilling end holes, milling flats, grooves...
Locking blade machines
Knife sharpening machines with locking blades will attract the attention of those people who want to sharpen a knife not only efficiently, but also quickly. A design that rigidly fixes the knife blade relative to a sharpening stone moving at a set angle allows you to accurately set the angle of inclination
To create such a homemade machine with your own hands you will need:
- The base is a rectangular wooden plate with dimensions 440*92 mm and a thickness of 18 mm.
- Wooden die 92*45*45 mm (for fixing the vertical threaded rod).
- A wooden block 245*92 mm and 18 mm thick (the plate to which the knife will be attached).
- Iron plate 200*65 mm and metal thickness 4 mm.
- Piano hinge, 92 mm long.
- M8 hairpin 325 mm long.
- Nuts and bolts with M8 thread.
- Drill 6.5 mm.
- M8 tap.
- Self-tapping screws 50 mm, 4 pcs.
The die intended for fixing the vertical threaded rod must be drilled through with a 6.5 mm drill. The hole should be located at a distance of 15 mm from the edge of the die, approximately in the center.
Layout of the hole in a wooden die
Next, in the resulting hole you need to cut a thread for an M8 stud. The wooden block prepared in this way must be screwed to the base at a distance of 265 mm from the edge using ordinary self-tapping screws 50 mm long, screwed into the back of the base.
After the block and the base are securely fastened, you need to insert an M8 pin into the hole in the block. The pin should run across the entire cross-section of the beam and the base; thus the risk of changing its position is minimized. The pin at the base of the block must be firmly fixed with an M8 nut, slightly recessed when twisting it into the wood of the block.
The second part of the work involves assembling a clamping device to fix the position of the knife. To do this, a piano loop is attached to a block of wood 245*92 mm with three self-tapping screws from the end of the wooden plate, with the help of which it will be attached to the base of the device.
Attaching the fixing bar to the base using a piano loop
After securing the wooden part of the holding device, you can begin to attach the iron plate. In the center of the 200*65 mm plate, you need to drill an oblong groove, 90 mm long and about 1 cm wide. The groove should be located from the edge of the clamping plate at a distance of 60 mm. Additionally, you need to drill a hole at a distance of 20 mm from the opposite edge and cut a thread in it for an M8 bolt. Then you need to attach the clamping plate to the previously prepared wooden base using this bolt. Using another bolt and a suitable washer, you need to fix the clamping plate in the center of the cut groove. The fixation should be clear, but at the same time neat, so as not to damage the surface of the blade.
Attaching the Iron Clamp Plate
The most difficult part of assembling this device is preparing the control device that will set the sharpening angle of the knife. For this you will need:
- metal square profile 40×40 mm;
- furniture bracket, 40 mm wide;
- a pair of rivets;
- a piece of plywood 42×25 and 18 mm thick;
- bolt and nut M5;
- a pair of M8 wing nuts;
- whetstone;
- steel bar with a diameter of 0.8 cm and a length of 40 cm.
It is necessary to drill a couple of holes on a piece of plywood: a through hole with a diameter of 8 mm along a cross-section of 42×18 mm (the distance from the edge on the 42 mm side should be set at 15 mm) and a through hole with a diameter of 5 mm along the side with a cross-section of 42×25 mm (the distance from edges 10 mm). The square pipe should be cut in half so that you get a “U”-shaped bracket with a width of 40 * 15 mm and ears of 20 mm. You need to drill 8 mm holes in the ears, into which an M8 pin will later be inserted. Connect the resulting bracket to a furniture hinge using rivets. Using the second part of the furniture bracket, attach a block of plywood to the resulting structure with an M5 bolt.
Location on the spoke of the guide mechanism
Connect the touchstone to a guide rod, which is a steel rod with a cross-section of 8 mm. When connecting the keystone and the guide rod, you should strictly ensure that their center lines coincide. If desired, for ease of use of the sharpener, a handle-holder can be attached to the whetstone on the reverse side. All that remains is to secure the whetstone in the guide mechanism, secure it with a thumb and the homemade device for sharpening knives is ready.
Sharpener assembly
How to make a sharpener for chisels and plane knives
Hello, dear readers and DIYers! Many of you are involved in carpentry, and you know very well that well-sharpened chisels and hand plane knives are the key to the quality and speed of processing workpieces.
It is quite simple to keep them in proper, sharp form, having in your arsenal aqueous sharpening stones and a special sharpening device.
In this article, the author of the YouTube channel “Cosmas Bauer” will tell you how to make a very simple and at the same time precise mandrel for these purposes.
Materials. — 16mm thick aluminum plate — Brass rod, aluminum tube, steel strip, plywood sheet — M8 bakelite wing nuts — Countersunk hex head screws, wing nuts, plastic wheels — M8 steel stud, lock nuts, washers — Two-component epoxy resin — Sandpaper, machine oil, double-sided tape.
Tools used by the author. — Clamps — Electric jigsaw — Hand-held circular saw — Mini-drilling machine 220 V 710 W, cobalt drills, tap, lever — Machine vice — Circular saw, carriage, pushers — Belt grinder, semi-automatic welding machine, chameleon mask — Vise, needle file , file - Automatic core, compass, screwdriver, hex key, scriber, ruler - Water sharpening stones. Manufacturing process. So, the main material for the sharpener body will be an aluminum plate 16 mm thick. First, the author marks on it the contours of two blanks for the side parts.
Next, two holes are drilled in the blanks at the edges of the future crescent-shaped adjustment groove. First, the author uses a thin drill, and later drills the holes to a diameter of 8 mm.
Using a compass, the author connects the edges of the holes with lines.
The plate is fixed on the workbench with clamps, under the clamps of which scraps of plywood are placed. Both pieces are cut from the plate using a hand-held circular saw or electric jigsaw.
The next operation to remove excess metal is performed on a jigsaw. Such a unit is very rarely found in workshops, and its price is steep. You can make a simple analogue of this machine yourself by reading the following article. Otherwise, you can use a hand jigsaw or Dremel.
Then the planes on the edges of the workpieces are leveled using a belt sander. To round corners and perform finishing grinding, the working part of the machine is rotated to a horizontal position.
A part for the adjustable sole is cut from the same aluminum plate. Its width should be about 100-120 mm, depending on the size of the stones you use. Using a circular saw, a slot 8 mm wide and 10 mm deep is made on one of the wide edges of the part. Having marked the centers at opposite ends, two coaxial holes are drilled to install brass pins. A couple of holes are also made for the M8 pressure plate screws. The stud is cut to fit the width of the body with extra space for nuts. It is threaded through the crescent-shaped grooves in the side parts, and an adjustable platform is installed between them.
Having cut out a jumper of the same width and pasted double-sided tape onto its ends, the master aligns it relative to the surface of the workbench, pressing it and the lower edges of the side parts to the table. All that remains is to carefully press the sidewalls to the edges of the jumper and tighten the wing nuts.
This design is fixed on the drill press table, and the master makes two holes for mounting screws on each side. Drilling is carried out through the side plates and in the bulk of the lintel using a drill designed for M6 threads. After this, the holes in the sides are drilled out to 6 mm, and countersinking is performed for countersunk.
Now the M6 thread is cut into the jumper.
After the glue has polymerized, a hole is drilled in the center of the plate and an M12 thread is cut into it.
The author had to purchase a pair of plastic wheels and this ball handle with an M12 screw.
Also behind the scenes, a pressure plate was made from a steel strip, to which two pieces of an M8 stud were welded. In addition, he made two small bushings from aluminum tube.
By the way, the master borrowed the idea for this design from John Heisz, already known to local readers.
When assembling the sharpener, first one jumper is screwed to the side, then the platform pins are inserted into the holes, and the second side is screwed.
When fixing the jumper, you should align the geometry of the device by pressing it against a flat surface. Now a pin is inserted into the grooves so that it fits into the groove of the platform and secured with M8 wing nuts. The pressure plate screws are threaded through the underside of the platform.
Washers and bushings are put on them, and wing nuts are screwed on. The ball handle is screwed in last.
All that remains is to install the wheels and screw the lock nuts onto the ends of the axles.
On the back of the platform, the author marked two lines along which the tool to be sharpened is positioned. The position is secured with two wing nuts. You can glue a piece of leather to the surface of the pressure plate to prevent scratching polished tools.
I thank the author for the detailed instructions for making a simple, very accurate device for sharpening chisels and plane knives!
Good mood, good health, and interesting ideas to everyone!
The author's video can be found here.
Source
Become the author of the site, publish your own articles, descriptions of homemade products and pay for the text. Read more here.
How to sharpen a knife at home?
It is known that a sharp knife allows you to quickly cope with the cooking process in the kitchen, leaving time for other important matters. But not everyone knows how to sharpen a knife. First, you should familiarize yourself with the main rules that will help you cope with sharpening efficiently and quickly.
Corner
The angle at which the tool is held while sharpening is a significant factor. Different knives have different purposes and different characteristics.
Thus, their blades are also different, and therefore it is important to position the device at the correct angle while sharpening
Below is a list of optimal angles for different types of knives:
- 55-60 – for canteens;
- 40-45 – for hunting;
- 30-35 – for kitchen;
- 35 – for knives that are used for cutting vegetables;
- 25-30 – for knives that are used for slicing meat;
- 25 – for knives that are used for slicing fish.
The last three options were written by those who use professional tools in their work.
Why is hand sharpening necessary?
Hand plane sharpening is used exclusively for its intended purpose. Among the features of use, we note the following:
- The device is suitable for sharpening the cutting edge of a plane, as well as many other products.
- A similar mechanism can remove metal from the surface. The abrasive can have different grain sizes, which determines the amount of material removed in one pass.
In most cases, a manual device is used when it is necessary to process a complex surface. Unlike electrical equipment, the mechanism is quite simple and costs a small amount. Also, when using such a tool, a knife can be sharpened, which also has a cutting edge.
Geometry of a plane blade, chisel, chisel
The optimal profile of the cutting edge of a carpentry tool was formed experimentally. It is slightly different from the usual cross-section of a regular knife, described in the article on the rules for sharpening a blade.
Although the blade blade also has a rectangular shape.
A one-sided profile is created in the cross section of the carpentry tool blade.
We can say that the plane of the bevels is aligned with the approach, and the cutting edge is finally finished due to the formation of micro-approaches during polishing on the grinding belt.
The sharpening angle can vary from 25 to 45 degrees. It depends on the density of the wood being processed.
Tips for use
The plane requires taking into account the operating rules. The same procedure is required for sharpening a tool. Please note that processing knives should only be carried out using the following tools and materials:
- a bar whose surface is covered with small abrasive grains;
- emery;
- grinding wheels;
- leather belt;
- polishing paste.
Additionally, you need to prepare another belt, with which you can grind the surface. Sharpening ensures the sharpness of the cutting edge is restored.
If defects appear during processing, you must use a grinding wheel. It will help get rid of protruding burrs and also prevent the knife from bending. Effective sharpening involves using an emery machine equipped with two wheels:
- the first has an insert of large abrasive grain;
- the second is the insertion of smaller particles.
This combination provides the necessary effect and allows you to increase the sharpness of the blades. Sharpening requires a responsible approach, since ignoring the requirements and features can lead to breakage of the blade or tool. An important parameter that needs to be taken into account when using sharpening tools is the angle at which you need to sharpen the knife. Most often, this indicator should not be lower than 25 and higher than 45 degrees.
There are several recommendations that will help you achieve successful sharpening of planes.
- When carrying out work, it is better to avoid strong pressure if you do not want to remove a thick layer of material. Such an error also leads to breakage of the blade during use of the plane due to reduced strength and improper stress distribution.
- When the knife comes into contact with the circle, its surface will begin to heat up, which will lead to an increase in the ductility index. To prevent the blade from bending, it is recommended to cool the metal in a bucket of water more often.
- After the main sharpening, you should refine the surface of the blade, getting rid of obvious defects. This can be done using fine-grained timber.
The final step is to use a leather belt and sanding paste. With their help, you can make the blade as smooth and shiny as possible. Sharpening is difficult to do. However, it must be done regularly to prevent wear on the plane and improve performance.
In the case of electric tool blades, it is better to contact specialists for sharpening. This is explained by the fact that even a minor defect that may arise during processing can damage the structure. And such planes are expensive.
Types of knives for electric planers
Knives on an electric planer are consumables. With their help, wood surfaces are processed.
Often knives come complete with power tools in the amount of 2 pieces.
Electric planer knives are classified according to the following criteria:
- opportunities for practical reuse;
- blade shape;
- knife blade sizes;
- cost.
When buying an electric planer, in addition to checking its performance and configuration, you should pay attention to the quality of the knives installed on the drum and their sharpening. The blades should be sharp, with a straight edge and no bends or gouges. Spare knives should also be checked. The final quality of lumber processing depends on the correct selection of cutting attachments.
Disposable knives
Knives intended for disposable use are made of steel-based hard alloys in the form of plates sharp on both sides. Such cutting parts cannot be sharpened. After the edge being used is completely worn out, the blade is turned over and placed on the drum with the other side. At the same time, the tool continues to work. If the second cutting edge becomes dull, then the blade is simply thrown away.
Disposable knives are intended only for performing work that does not require high precision and quality of workpiece processing. But they are convenient for practical use: during installation they do not need to be precisely adjusted and balanced.
The shapes of disposable products are:
- straight;
- wavy;
- straight, but rounded at the ends.
The first type of product has a straight cutting part. It is convenient to use such consumables to process parts that have a smaller width than the length of the installed blade, and to select quarters. Wavy knives are used when it is necessary to carry out rough processing of lumber. With their help, you can give a wooden surface a different texture, for example, to simulate “aging.” Straight cutting edges, rounded at the edges, are good because they do not leave marks (grooves, steps) on the surface of the wood being processed. This is a suitable option if you need to work with wide wooden pieces.
Disposable blades have a longer service life, but can break quite easily if they accidentally collide with metal (for example, a nail, bolt). They are the best option for attachments when it is necessary to work with hard wood workpieces.
Reusable cutting attachments
Products that are intended for reusable use differ in both their shape and size from disposable cutting attachments. They are made using high quality steel, which ensures ease and quality of processing of wooden surfaces.
Using reusable knives, you can achieve such a smooth surface of the workpiece that grinding is not required. They are marked HSS (fully High-Speed Steel, which translates as high-speed steel). These blades are considered professional. Their installation is accompanied by high-precision balancing and adjustment. The sharpening must also be of excellent quality. In this case, tool high-speed steel can be sharpened so that it is very sharp.
It is more profitable to buy reusable cutting attachments because they can be sharpened multiple times. But high-speed steel products do not allow processing hardwood (for example, larch or oak).
The working drums of most models of electric planes can be equipped with both disposable and reusable cutting attachments. But there are also devices that can only be equipped with blades that are not intended for sharpening. For this reason, when purchasing an electric planer, it is recommended to give preference to universal power tools.
Classification by size
Knives for electric planers can be standard or non-standard sizes. Products of the first type, called “plates,” have a length of 82 mm, a width of 5.5 mm, and a thickness of 1.2 mm. Such cutting attachments are suitable for most models of electric planes from foreign companies Makita, Skil, Bosch, Black&Dekker.
Straight knives for electric planers Bosch, SKIL
Non-standard cutting attachments with larger blade widths and thicknesses are typical for electric planers from Baikal and Interskol. Due to their parameters, they are stronger and better than standard plates. When they come into contact with metal, such knives do not break. They can be sharpened using sandpaper. The width of the nozzles is about 1 cm. The length can be 82 mm, 102 mm, and for products from the Rebir company it reaches 110 mm.
Straight knives for electric planer Rebir IE-5709
The price of the cutting attachment depends on the manufacturer. Also, this factor often determines the quality of the product. If you purchase knives from well-known companies (for example, Bosch), you can count on their long service life.
Some models of electric planers are equipped with cutting attachments of unusual shape and design. In order not to be mistaken with the dimensions, it is recommended to take the old blade with you for comparison before purchasing.
Peculiarities
Today there are several devices for processing blades. They are classified according to different criteria. The most common are the following.
- Devices are classified by type of use. There are manual and mechanized machines. The first option is easy to use and also low cost. The advantage of the second is the high processing speed of steel material, which is why such tools are more popular.
- The second classification involves dividing devices according to the grain size of the abrasive material. Large grains lead to rapid removal of steel from the blade, and reducing abrasive stones helps to reduce the thickness of the metal layer.
- The third classification option is homemade or purchased devices. If required, you can assemble the machine yourself, and this option will be even cheaper.
Today, many companies are engaged in the production of sharpening devices. However, you should not give up manual sharpening. This device has a number of advantages:
- it is suitable for processing the cutting edge and can be used for sharpening other knives;
- the mechanism removes a small amount of metal; several abrasive elements of different grain sizes can be used in the process.
Types of equipment for sharpening knives
The device used for sharpening planer knives can be classified according to a fairly large number of different characteristics. Among the features of the classification, we note the following points:
- There are manual and mechanized devices. The first option is easier to use and much cheaper, while the second allows you to significantly increase processing speed. Electric tools have become quite common these days.
- When considering the device for sharpening planer knives, you should pay attention to the grain size of the abrasive. Too large grains cause rapid material removal; reducing their size allows you to reduce the thickness of the removed layer in one pass.
- There are homemade and purchased devices. A homemade sharpener copes with the task.
A large number of different companies are engaged in the production of sharpening devices. In many ways, the popularity of the brand determines the cost of the mechanism.
Device for sharpening from wooden blocks
A simple device for sharpening knives is a tool consisting of a pair of wooden slats and a pair of abrasive bars with the same geometric dimensions.
Wooden slats should be thoroughly sanded with abrasive sandpaper. Then, after applying auxiliary markings, depending on the sharpening angle of the knife, make cuts to a depth of 15 mm. Insert sanding blocks into the resulting holes so that each groove matches, then secure them with bolts. To give the sharpening device greater stability, the lower part of the surface can be padded with a piece of rubber.
The types of devices for sharpening cutting tools are different and each master will be able to choose the manual machine that will fully satisfy his needs.
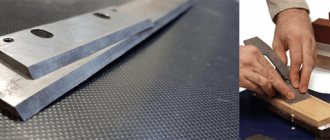
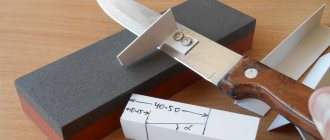
Rules for sharpening knives
Experts recommend following a number of rules in order to obtain high-quality knife sharpening at home, which in turn will reduce the number of blade sharpenings.
If you are a supporter of using an abrasive-coated whetstone, start working with the sharpest part of the blade, and end with the duller part, namely the one that is little involved in the process of slicing products. Often the process starts from the middle, moving towards the tip of the blade with a slight turn. The shape of the knife and its thickness affect the sharpening angle of the blade. A sharpening machine for kitchen knives performs sharpening at an angle of 25°, the blade is tilted above the block by 12 - 13°.
The type of sharpening machine for thicknesser knives and the material from which it is made also affects the quality of the work.
On various Internet resources, you can find special videos that clearly show the process of sharpening a knife blade.
Note.
Knives are produced mainly from alloy and carbon steel. Hardened steel needs to be sharpened with an abrasive stone, stainless steel with a triangular file. This is due to the fact that relatively soft metals, during the sharpening process, the surface of the bar with the abrasive is forgotten. The forged blade is quite flexible, so it is advisable to fasten it and sharpen it with a whetstone using casual movements. Frequent use of abrasive stones contributes to the formation of a greasy film on the surface, which must be rubbed off.
Previously, table sharpening machines for knives were made from wedge-shaped bars and stained oak. The bars were placed on both sides of the wooden blade, so that the cutting edge was free. The structure was tied with rope and, using a whetstone, the blades were sharpened to extreme sharpness, thereby obtaining an excellent sharpening angle.
Sharpening knives that are used in planes is carried out as follows: on thick glass, apply sandpaper with a fine fraction, the beveled part of the cutting edge onto the abrasive and sharpen in a circular motion.
Planer knives: which ones can be sharpened
The main element of the mechanism in question are knives. Their cutting part can wear out quickly under certain conditions
When operating planes, attention should be paid to the fact that there are two types of devices:
- Manual ones are extremely common today. In the manufacture of the main part, plastic, metal or wood can be used. The blade is made using special steel, which is characterized by increased wear resistance.
- Electric planers are used when processing large quantities of material. Thanks to the built-in motor, you can significantly increase the speed and efficiency of the process.
It is necessary to take into account the fact that an electric tool can have several incisors at once. Due to this, the efficiency of the process is significantly increased. The main part is made of tool steel or tungsten. It is worth considering that the tungsten cutting part cannot be sharpened; after severe wear, it must be replaced. In this case, the surface may differ in shape and some other parameters.
How can you tell if your plane knives need sharpening?
It is important to determine in a timely manner when the surface needs to be sharpened. A device for sharpening plane knives can be purchased or assembled yourself. Among the features we note the following:
- The condition of the cutter can be determined by visually examining the chamfer edge. If upon inspection it turns out that there is a thin shiny tape, then you need to start sharpening.
- Some products are equipped with double-sided knives. If the blade is severely worn, it is rotated, due to this the required performance can be ensured.
A device for sharpening plane knives can be used in accordance with certain recommendations. Do not forget that if you make a mistake, there is a possibility that a serious defect will appear, due to which it will not be possible to remove the material.
Sharpening profiles
The profile of a knife blade is linked to the properties of the material and the structure of the blade, as well as to the properties of the materials for which the tool is intended to process. Sharpening with a simple blunt wedge (item 1 in the figure) gives a stable but rough blade: the cutting resistance is high, and the knife tears quite viscous materials. A sharp wedge (item 2) quickly dulls or chips; on viscous and/or fibrous materials, the cutting resistance may be greater than with a blunt wedge due to the friction of what is being cut against the blade.
Knife blade sharpening profiles
Ideal in all respects is the ogival (smoothly sloping) profile, pos. 3. Experts are still arguing which generator is better - an involute, a hyperbola or an exponential. But one thing is certain - making an ogival blade in production conditions is difficult and expensive, and it is impossible to direct it yourself. Therefore, ogival sharpened knives are used only in special equipment, e.g. microtomes - biological devices for obtaining the thinnest tissue sections.
For disposable blades, e.g. safety razor blades, faceted sharpening is used, pos. 4, i.e. The ogive generatrix, as mathematicians say, is approximated by straight segments. The number of sharpening edges is indicated in the certificate or on the manufacturer’s website. For thick, coarse bristles, 3-4-sided bristles are better; for delicate hair not on the face - 8-sided. The 6-sided one is considered universal.
Angle α
The sharpening angle is always given in half the value α, because Many tools and, for example, bayonet knives are sharpened on one side. For knives for various purposes, the angle α is maintained as follows. within:
- 10-15 degrees – medical scalpels, straight razors, knives for artistic carving.
- 15-20 degrees – pastry knives (for cakes) and vegetable knives.
- 20-25 degrees – bread and fillet knives.
- 25-30 degrees – hunting, hiking, survival knives.
- 30-35 degrees – general purpose household knives.
- 35-40 degrees – carpentry tools, shoe knives, axes.
One and a half
Sharpening knives, except for special ones, is done almost exclusively with a one-and-a-half profile, on the left in Fig. One-and-a-half sharpening is so named because the flat edge of the blade (descent) is formed during the manufacturing process of the blade and cannot be sharpened. In fact, sharpening a knife with one and a half sharpening is no more difficult than sharpening it with a simple wedge. One-and-a-half sharpening is optimal for a knife that works with a variety of materials, and making a knife sharpener with one-and-a-half sharpening is much easier than using a faceted sharpening.
Sharpening the blade of a household or camping knife
In the center and on the right in Fig. The stages of blade sharpening and the numbers of abrasives used on them are shown. The abrasive number corresponds to the number of its grains per 1 square meter. mm surface. The finishing stage has some features:
- Hunting and camping knives are not supplied. This makes it easier for them to cut hard things (for example, bones) with broaching (with filing). In addition, if you accidentally cut yourself, the slightly lacerated wound stops bleeding faster, heals more easily, and there is less danger of infection getting into it.
- After abrading, the blades of straight razors, shoemaker's knives and for artistic carving are brought to mirror smoothness on a leather whetstone with GOI paste.
- Guiding and finishing the blades of kitchen knives can be reduced to one operation with abrasive No. 800-1100.
Sharpening knives for hand planes
The working edge of the knife is an edge, which still has a slight radius of curvature. Before sharpening, visually check the integrity of the edge: there should be no local metal tears on it. If they are present, the planer knives will have to be shortened.
To minimize the radius of curvature on the edge, sharpening is recommended to be carried out in two stages. First, primary sharpening is carried out: the dull knife from the chamfer side is brought to the periphery of the sharpening wheel and pressed firmly. The speed of the sharpener should not exceed 600...700 min-1, otherwise the metal removal will be significant. It is important not to overdo it with the pressing force, since blue-violet tarnish may appear on the steel - an unpleasant sign of tempering of the metal. In this case, the hardness of the plane knife will decrease, and it will be necessary to restore the strength characteristics of the material through rather complex heat treatment (annealing + hardening + tempering).
If there is no sharpener, proceed as follows. Sharpening a knife for a hand plane is done with a coarse-grained sharpening stone, which must be fixed on a workbench (both hands must remain free). Sharpening is performed by circular movements of the chamfer along the surface of the block. In this case, it is advisable to periodically moisten the knife with water or soap solution. This not only cleans the sharpened surface from the smallest particles of the knife metal, but also allows the tool to be cooled evenly.
The appearance of a thin burr on the blade along its entire length is a sign of transition to the second stage of sharpening. Here the tool is sharpened using a finer-grained stone that will remove the burr. The generally accepted gradation of bars according to their grain size is as follows:
- High grain size (30...180 microns): whetstones/sharpening stones made of silicon carbide or corundum. Used to remove large defects on knives, change the chamfer angle, etc.
- Medium grain size (7...20 microns): whetstones/sharpening stones made of electrocorundum or chromium dioxide. Suitable for pre-sharpening.
- Fine grain size (3...5 µm). The materials are the same, the tool is used for final sharpening of knives.
After sharpening is completed, the knife blade is passed along a piece of hardwood, which will finally remove the burr fragments.
Main types of homemade devices
The main condition for homemade knife blades is not to distort the angle between the edges of the blades specified in production. It is not easy to hold it by hand without a trained hand and skill.
The device fixes the sharpening angle, so sharpening a knife with a special tool is much easier than with a whetstone.
The simplest and most popular sharpeners are listed below, each of which you can make yourself:
- Selecting a quality stone. If you have a sharpening stone in the shape of a roof with two slopes, you can easily restore the sharpness of a dull instrument. This “house” is easy to work with: the blade is attached to one roof slope, and its other side is sharpened with an abrasive stone, making horizontal movements. Then the knife is turned over and the second surface of the blade is processed. The convenience and effectiveness of the method is that you do not need to maintain the angle between the blades with your hands; it is fixed by the shape and angle of the bar.
- A simple home sharpening device can be made from two wooden triangles.
They are placed parallel to each other and connected with wing screws. The sharpening stone is fixed between wooden supports at an angle, which can be changed if desired. The required inclination of the abrasive can be easily set using a protractor or a program on a tablet. When processing blades on triangles, the knife must be held 100% vertically. If such a design is used for a long time, the ties may weaken and the set degree of the beam will change, and with it the sharpening angle. - Instead of vertical triangles, you can make a reliable horizontal base from wood, plastic or metal. It must have movable mechanisms for fixing the sharpening stones. The idea is that it should be possible to set different angles of inclination of the bars. Abrasive stones are inserted into holes in the base and fastened. The knife “walks” vertically. Such a device must be held by hand so that it does not move on the table or secured with clamps.
- You can make a sharpener from a stable block that is attached to a rolling cart with wheels. The knife is sharpened by moving the hand back and forth. The sharpening angle is determined by the height of the block in relation to the working surface. This device is used for working with kitchen knives and only on a flat plane. It happens that the sharpening angle during movement deviates slightly from the specified one. For greater accuracy, the structure should stand still in place.
- A more complex device, the manufacture of which will require time and effort, involves not only fixing the beam, but also the ability to adjust its position. The peculiarity of the system is as follows: the knife blade is securely fixed on a horizontal support, the sharpening stone is attached to the guide, and a slotted bar is made on the vertical stand. Thanks to the hole in the vertical support, the guide with a fixed abrasive surface can be moved and the angle of the blade can be adjusted. With this method, maximum accuracy is achieved.
A sharpening (abrasive) bar or stone is a necessary element of any factory or homemade device for sharpening a knife. It is convenient when it has the shape of a rectangle (it should be longer than the blade), it makes it easier to sharpen the tool.
Stones come in different grain sizes: coarse, medium and fine.
It is determined by the number of grains per unit area and is expressed as a number; the smaller it is, the rougher the stone.
To sharpen knives, you will need stones with medium and fine grain.
To sharpen knives, abrasives with a grain size of 200-350 are not used. Such grains can deform the blade. Knives are sharpened on bars with medium grain - from 600. After the main processing, the blade is ground and brought to a shine with sandpaper of 1000-1200 grains.
A double-sided whetstone, with a rough abrasive surface on one side and a more refined one on the other, is doubly convenient, since it can be used for basic knife sharpening and finishing work.
Stones also differ in the material from which they are made. Natural - from shale and corundum rocks. These stones have a large grain and are quickly ground down because they are moistened with water or oil during operation. There are diamond and ceramic bars, which are more wear-resistant and will last longer than natural ones.
Additional information about the TS 150 (MS 6000, WT-650)
| The machine can sharpen flat knives with a length of 600 mm, and planer knives up to 120 mm. The machine is easy to use and has an effective system for attaching knives to the table. | |
| The knife itself is mounted on a special movable work table, the guides of which are adjusted to a certain inclined angle for sharpening the knife. | |
| The angle of inclination and position of the knife are securely fixed with special handles and screws | |
| Machine for sharpening knives for planes up to 150 mm long, chisels, chisels, chisels, complete with holder for a knife up to 120 mm | |
| The machine is equipped with a chuck for sharpening drills from 3 to 16 mm | |
| The upper part of the grinding wheel is covered with a protective cover for safer operation. | |
| The longitudinal feeding of the planing knife along the length is carried out by 2 handles of the work table along the guides manually | |
| The massive, vibration-resistant design ensures stability and optimal sharpening results; - The machine has a cast base. For reliable installation of the structure, special “eyes” with holes are provided in the lower part |
Why do you need a sharpener?
A living relic of our days is the Finnish hunting knife. Not a gangster Finnish knife, sometimes of a bizarre shape, but a Finnish-type hunting knife, on the left in the figure. Traditional hunting knives (center and left) are similar in shape, but the difference between them is very large.
Finnish knife and classic hunting knives
The blade of a Finnish knife is forged from cast iron, which can be smelted right in your yard from swamp ore in a furnace-furnace, without resorting to the blast furnace process, puddling, and other methods of converting cast iron into iron and steel. The viscosity of crinkly iron is excellent; it is very difficult to break a blade made from it. But the hardness is also low, somewhere around HRS55, the knife becomes dull quite quickly. Finnish hunters did not care about this: a blade of such hardness can be sharpened (sharpened) by beating on many natural stones, and there were always enough smoothed moraine boulders in Fennoscandia.
They sharpen a knife by beating it in much the same way as beating a scythe, only the whetstone is motionless and the blade is moved. First, they pull it along the whetstone with the butt away from you, then they turn it over and pull it with the butt towards you. The position of the cutting edge (CR) on the whetstone is always dragging; quick movements: shirk-shirk! During each movement, you need to keep the contact patch of the blade with the touchstone (see below), but the requirements for maintaining the angle of inclination are not so strict. Learning to sharpen a knife by beating is not very difficult, and with some skill you can create a smoothly running profile on the blade, see below. However, the Finnish knife is, in general, a dead end in the evolution of a cutting tool, surviving in special natural conditions.
A good knife has never been cheap, and in extreme situations, the durability of the blade, combined with the toughness of the blade, became vital factors. Therefore, even in ancient times, they learned to harden knife blades from the surface and cement them: the core remained viscous, not brittle, and a hard, red-hot crust formed on the outside, see next. rice.:
Structure of a knife blade with surface hardening and carburization
It is still possible to sharpen a knife with a cemented blade, but you need a skill that is not given to everyone. And the abrasive is already needed from a special type of stone - lithographic grunstein slate. There is little of it in nature; Grünstein is still considered a strategic raw material. There is no artificial grenstein and it is not expected. It’s as easy as shelling pears to ruin a cemented knife with inept beating - a little somewhere the cementation bark will be stripped down to raw metal (this is not visible to the eye), the knife will only have to be thrown away, the blade will immediately become dull and begin to crumble.
Service knives do not require the same durability and toughness as hunting and hiking knives, and they should cost much less. As a result, special steels and powder metallurgy are widely used in the production of utility knives. The blade of an “eternal” kitchen knife is structured like a rodent’s incisor: in longitudinal layers, the hardness of which decreases from the core outward. In any case, you have to sharpen the knife less often, but chipping is definitely ruled out - the blade immediately becomes discolored.
Types and their structure
Knives are the main element of the plane, so it is worth taking a closer look at their design, structure and features. The cutting part of the blades is subject to wear during operation, so the material must be sharpened periodically. Today there are two types of planes that use special blades.
Mechanized
They are electric tools. Designed for processing large quantities of wood, the blades are thick and made of stronger steel. Due to the motor provided in the design of the carriage, the speed of work increases, and the wear of the cutting elements also increases.
Manual
A fairly common type of tool that can be made at home if desired. To make the body of the plane trolley, use:
- metal;
- tree;
- plastic.
The blade is thin and is created using special steel. A distinctive characteristic of the knife is its resistance to wear. The difference between the two tools is not only the presence or absence of a motor.
Electric planers are distinguished by the presence of several cutters and the ability to use double-sided blades. All this increases work efficiency, which is why power tools are popular.
During operation, it is not immediately possible to determine that the plane knives require sharpening. However, there are several sure signs that will help you understand the need for sharpening.
- Appearance of the chamfer. If, during inspection, a shiny tape of small thickness is found on its surface, then sharpening is necessary.
- Appearance of a double-sided knife. In this case, it is easy to determine the need for sharpening - just look at the metal after turning the element twice in the plane.