A knife handle can be made of wood, birch bark, acrylic, plastic and other materials. The simplest thing is to wrap the tail of the blade with synthetic fibers, and even with them you can make the product unique, you just need to use multi-colored cords and an interesting weaving technique. It’s easy to do the work, all the raw materials are freely available, and you’ll need a minimal set of tools.
It is believed that the length of a knife handle ranges from 10-13 cm, but its thickness should be selected individually.
Knife handle: characteristics and properties
Structurally, any knife is a simple device that consists of a blade and a handle. For a knife, according to many, it is the quality of the blade that plays a big role, but it is the handle that makes it convenient to use. When choosing, you need to take into account various factors - size, what material it is made of, weight, and so on.
It is important to remember about the shape of the knife handle, and it can be:
- Conical . It has an extension forward or backward; the first option is more common because it is considered more convenient to use. Experienced craftsmen claim that the conical handle has ideal ergonomics and does not slip out of your hands.
- Oval . The most practical for long-term use - the handle is held freely, without straining the muscles of the hand or fingers. Oval handles are installed not only on “working” and hunting knives, but also on standard table knives.
- Straight . A distinctive feature of this handle is the absence of any thickening or narrowing. Most often, straight handles are installed on kitchen knives, but a tool of this type is absolutely not suitable for hunting - the hand will quickly get tired, and the knife will not be held firmly.
In addition to the listed standard shapes, there are handles of concave or convex shape. These are installed on Japanese blades; hunters generally prefer knives with convex handles.
We recommend reading the article on the best switchblades. From it you will learn about the main characteristics of switchblades, their types, and handmade switchblades. And here is more information on how to make a knife yourself.
Characteristics of a hunting knife
In order to make a hunting knife, you need to figure out how it differs from other types.
So, in addition to performing regular cuts, it must cope with the following tasks:
- finish off a wounded animal;
- skin;
- cut up the carcass.
Based on this, we can highlight the characteristic design features:
- Straight butt for a powerful blow during finishing. For finishing, a separate blade with a central tip is often used; it is also called a hunting dagger.
- Blade length 100-150 mm.
- Use of harder steel grades.
- Handle made of wood, birch bark or non-slip artificial materials, with moderate relief. It should be comfortable for cutting towards and away from you, as well as piercing movements.
- Lack of additional devices in the design.
So, how to make a hunting knife?
What types of knife handles are there: size, thickness
The handle for a knife should have an individual size; the thickness, for example, should be selected personally: it should fit comfortably in the hand and not be too thick or too thin. In the first case, the knife will fall out of the hand, in the second, the fingers and the entire hand will be constantly under tension and it will not be possible to work with the tool for a long time.
As for the length of the handle, the most convenient/practical parameters are 11-13 cm.
Team, combined
Prefabricated, combined knife handles are the most popular options. In their production, the same material is used, but of different types - for example, on one handle there may be 3-4 species of trees, they are sometimes even delivered from different continents.
When such a handle is made, first a set of combined materials is made, then they are dried/glued, and only after that they begin to be processed - the master will shape the already assembled handle.
Knife handle pommel
The uppermost part of the handle, its top is called the pommel of the knife handle. It can be made of metal - brass, copper, steel and be of various shapes - from a regular ball to an imitation of a lion or owl head.
It is important that the pommel is not too heavy and massive - the knife will literally become “unliftable”; even a successful choice of material and shape of the tool’s handle will not allow it to work for a long time.
The pommel is always an independent unit from the point of view of the entire structure; it can be used to connect parts of the handle (for example, with a combined type), serve solely as decoration, or be installed to correct the balance of the product.
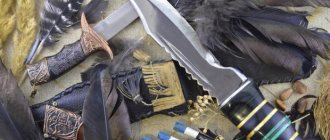
For edged weapons
Edged weapons are knives with handles made of any material; among modern ones, acrylic and plastic are popular because they have the following properties:
- are not exposed to aggressive external factors;
- do not rot, do not mold;
- do not absorb moisture and do not slip in the palm;
- do not absorb odors;
- easy to clean.
Melee weapons are often selected based on the blade/blade and, according to experts, this is correct. Moreover, the handle can always be replaced - plastic and acrylic are repairable.
For hunting knives
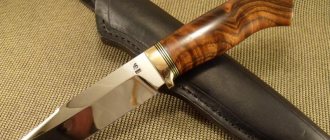
For hunting knives, wooden handles are most often made, onto which various patterns are applied. Usually the handle has a convex shape, its thickness is selected according to the size of the palm of the future owner, the length rarely exceeds 13 cm.
If it is possible to find tusks, horns or bones, then it is better to make a handle for a hunting knife from these materials - they do not absorb odors, do not slip in the hand, and do not withstand the aggressive effects of water. And you can also make patterns on bone handles.
Large hunting knife Pike-perch Small hunting knife Skinner
Form
In addition to the three standard types, the shape of the knife handle can be:
- Convex . This is the most convenient option, which is suitable for knives of various types - from hunting to professional kitchen. They may have a thickening in the middle part of the handle or a narrowing - the second option is not very practical, but many people get used to it.
- Concave . Very easy to use, they always have grooves for your fingers, a knife with such a handle always fits comfortably in your hand. The only drawback is that such handles are not suitable for all types of knives: for example, they are never used for cutting knives.
- Persistent . Their shape resembles brass knuckles, they are considered non-functional and often serve as decoration for the instrument. However, knives with persistent handles are often used for cutting large pieces of meat.
- Flat . They are never used for long work, because the edges of the handle dig into the palm, cause discomfort and force the hand to be constantly in a state of tension. But such knives take up little space and are compact.
Mounting type: mounted, overhead
The handle can be attached to the blade in two ways - mounted and overhead.
Horseback
This type has the following advantages:
- has an attractive appearance;
- using this method, any type of handle, any shape of it, is attached to the blade;
- the weight of the riding handles is low;
- they can be repaired and completely replaced;
- has a low level of heat/electrical conductivity.
With the mounting type, the handle can be attached using two-component glue, a pommel, or a pin. Professionals note that this mount has a significant drawback - it is not as strong as an overhead one.
Overhead
A knife with an overhead type of handle attachment has a long shank, which must be completely identical to the shape of the handle. Plates (linings) are attached to this shank (an extension of the metal blade) and secured with screws or rivets.
Advantages of overhead handles:
- simplicity of production;
- maximum strength of the entire structure.
This type of knife handle attachment has some disadvantages:
- the weight of the product is quite large (due to the presence of a shank);
- limited choice of handle shape and size;
- the level of thermal and electrical conductivity is very high.
It is believed that it is unlikely that you will be able to work with a knife with an attached handle for a long time, for example, in the cold - your hand will quickly freeze and get tired. But the strength of such a tool is so high that it outweighs all its disadvantages.
Why do you need a kumara on a knife handle?
Often plates made of kumaru are used on the handle of a knife, which are considered not only decoration, but also material for creating an almost eternal tool. This tree grows in South America, its second name is “iron tree”. The plant is not subject to any destruction: it does not rot, is not destroyed by insects, and is not susceptible to the negative influence of mold and mildew.
Kumara is very difficult to process due to its incredible hardness/density, so when making handles, plates that have already been pre-processed on professional machines are used. Such additional pads will protect the main material of the handle from damage.
If you believe the legends of some peoples in South America, then it is this tree that protects a person from evil spirits and negative energy. If you study any instrument with handles in these tribes, then on each you can find linings and inserts made of coumarin.
Various interesting shapes
You can also find interesting forms that are distinguished by non-standard execution.
| Knife handle shape options | Appearance |
| Convex with slots for fingers (a la brass knuckles) | |
| With a pommel in the form of an eagle's head | |
| With finger grooves | |
| With curly edges |
Handle mounting type
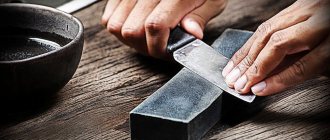
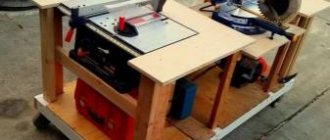
Convenient device for sharpening jointer or planer knives
There are two types of attachment of the handle to the shank - push-on and overhead. Except for the cast metal handles. Having serious differences in the design features of installation, all methods are good in their own way. They are used depending on the purpose of the blade. The template manufacturing method does not interfere with the craftsmen.
Everyone gives their own reasons for the pros and cons of various methods. Let's get to know them better.
Surface mounting
Overhead handle.
It is easy to manufacture. Two plates are attached to the wide shank. Their material is different, most often wood. Fastening is done using rivets or screws. But it is necessary to take into account the availability of special equipment for installation.
Accuracy in drilling holes and reliability in fastening rivets are key manipulations. Otherwise the plates will dangle. Negative points include: restrictions on the shape of the handle, the weight of the finished product and high thermal conductivity. The latter will limit the time you work in the cold.
Mounting
Mounted handle.
An equally common type of installation and no less scandalous and controversial in terms of effectiveness. Its principle is to place material on a narrow shank and glue them together.
The handle is then processed on a grinding machine. It is allowed to use material of a homogeneous or combined type.
In this case, the production has a high aesthetic component, using different types of wood with leather or plastic - the result will be interesting. The ability to extend the shank by adding an additional rod by electric welding allows you to make a handle of various lengths. But the rigidity of the product in this case is questionable.
Low thermal conductivity and easy to achieve on a grinder of various shapes. It is a definite plus.
How to make a knife handle
You can make a handle for a knife yourself and, in principle, from any material, the stages of the process are as follows:
- Selecting material for the handle. It can be standard wood or something more interesting - for example, plastic or bone.
- Drawing drawings. This is a mandatory procedure that allows you to determine the size of the knife handle, its shape and calculate labor and material costs.
- The actual production of the handle. The most critical stage, but if the previous two are completed, then this one will not become a problem.
- Attaching the finished handle to the existing blade.
At the end of the work, you can use your imagination and decorate the finished product, for example: wrap the handle with strips of leather, make curly notches on the handle, and so on.
Watch the video on how to make a knife handle with your own hands:
DIY Tools
To make a knife handle with your own hands, you will need the following tool:
- for working with wood - chisel, rasp, grinder, cutter;
- when manufactured from metal - fastening vices, stones with an abrasive surface;
- for processing materials of excessively high strength - jigsaws, chisels, drills.
Additionally, to make a wooden handle, you will definitely need to impregnate the material - this can be linseed oil or professional liquids to protect the wood from the negative influence of environmental factors and moisture.
Knife handle drawing
What to make from, materials
You can make a knife handle from a variety of materials - acrylic and leather, bone mass and birch bark, plastic and rubberized plastic. But most often wood is used for such work. By the way, it can also be different and the distinctive quality characteristics should be taken into account when choosing a specific plant.
Advantages of wooden knife handles:
- attractive appearance;
- light weight (you can work with the tool for a long time);
- does not slip even in a wet hand;
- perfectly absorbs moisture, including sweat;
- Processing/manufacturing of this part of the knife is easy; even an absolute beginner can handle the job.
Most often, wood is chosen for a knife handle.
There are also disadvantages to such handles - for example, most types of wood are characterized by low impact resistance, and impregnation with protective agents is required.
What wood is it made from and how is it made?
Making a wooden handle for a knife begins with choosing a specific material, and similar products are made from dense woods - cherry, apple, pear, heather, and so on.
If you want something exotic, then you should pay attention to the following representatives of the flora:
- Amaranth . Grows in South and Central America, the wood has a purple hue and straight or slightly curved lines. The plant is highly resistant to rot and damage from insects. It is quite difficult to process and requires a certain skill - working too slowly with amaranth leads to an abundance of resin, which clogs tools.
Amaranth wood
It is worth paying attention to one feature of amaranth: when processing it, it is possible to develop an allergy, which is manifested by profuse lacrimation, itchy skin and eye irritation.
- Bubinga . The tree grows in Africa and is distinguished by its pink tint to the wood. There are annual rings, they sometimes take on bizarre shapes, and the fibers can be located in different directions. The material is distinguished by its durability, resistance to the negative effects of moisture and insects. Bubinga is easy to process; it must be impregnated with specific materials.
Bubingo wood
After finishing work, this material can be polished and even varnished - its decorative effect will be maximized. It is important to dry the material properly - this may take several weeks. But at the end of the process, the wood becomes very durable and even shock-resistant.
- Karelian birch . Known throughout the world as a durable and decorative tree. The appearance is very beautiful - it gives off a mother-of-pearl appearance, has a marble texture and an amber tint. The quality of Karelian birch is so high that it is compared with tropical trees, and when selling them they are calculated not by cubic meters, but by kilograms - they are so valuable.
Karelian birch
Karelian birch is very difficult to process because the wood is very dense and hard. But this material lends itself well to polishing and varnishing. Some types of Karelian birch when cut have a yellowish color with dark inclusions - this is normal and does not indicate damage to the material.
- Walnut . We are talking about walnuts, which are distinguished by their high density. This material lends itself well to processing, can be polished, varnished, and painted. The structure of the wood is dense, the lines of the fibers are often located in curved directions, so the product looks quite interesting.
Walnut is the most affordable material option. It should be taken into account that when dried, wood is highly deformable, but in its finished form the material can even undergo excessive exposure to moisture.
Wood Walnut
In addition to the listed wood species, when making a knife handle, you can use ebony or wenge - tropical plants that are distinguished by their high density, pink, red and brown shades. This material is very expensive because it is resistant to moisture, insects, and mold/mildew.
How to make a handle from wood
Stages of making a wooden knife handle:
- Sawing wooden blocks, the thickness of which varies within 1 cm. You can make several different bars and place them on the handle alternately - this will diversify and make the appearance more beautiful.
- Sanding the workpiece. This is done with grinding machines, and the work is brought to perfection with sandpaper. The stage begins only after the future handle has been given the desired shape.
- Product impregnation. Usually, the wooden handle is first impregnated with linseed oil; for this you can use mineral oil or varnish intended for processing utensils.
- Handle polishing. After the handle has completely dried, you need to rub it with zero-grit sandpaper, then lubricate the surface with wax and polish it with a piece of felt or felt.
Watch the video on how to make a knife handle with your own hands:
From bone
Bone knife handles are distinguished by their beautiful appearance, durability and lack of ability to absorb foreign odors. Most often, horns, tusks, shells and skeletal bones of animals are used to make such a product. Disadvantages of handles for knives made from the following materials:
- excessive softness (easily scratched);
- low resistance to cracking;
- if the handle has come into contact with blood or fat, then it becomes very slippery;
- heavy weight - it’s inconvenient to work with a knife for a long time, your hand gets tired too quickly.
Most often, deer or elk antlers are used to make a handle; their surface resembles tree bark. The material does not require lengthy processing; light sanding of the surface is sufficient. The bone handle does not have any metal inclusions, because this material itself is a decoration of the instrument.
You can make not a full-fledged handle for a knife, but decorative linings. For this purpose, bones and horns of domestic animals are often used - for example, rams. If you choose natural tusks and bones for work, then you can also make a shaped handle for a knife - various images can be cut perfectly on them.
Experts believe that bone handles serve a decorative role and are not practical to use..
Acrylic
Acrylic knife handles are easy to manufacture, have a large selection of colors, and are easy to use. There are ready-made acrylic bars on sale for making similar products, which are available in different colors and can be used to make solid (mounted) handles or applied (riveted) handles.
You can prepare an acrylic blank yourself, for which you first make a template for the future pen - it repeats its shape and size. You will need 2 of these templates, because the handle will be overhead. Next, epoxy resin and acrylic glue are mixed in equal proportions, the mixture is poured into the workpiece and left for 48-72 hours to completely dry/harden.
When mixing two components, you can add dye to them. If you stir the mixture thoroughly, the shade will be uniform. If you limit yourself to a short stirring, then the “output” will be a pen with original marks.
Birch bark
The simplest and most affordable material for making a handle is birch bark, because to work with it you will need a minimal set of tools. The biggest advantage of birch bark handles is the presence of birch tar in the material; it protects the entire product from rotting and mold. This material has very low thermal conductivity, so a knife with a birch bark handle will work comfortably both during the heat and during winter frosts.
A birch bark handle is made from the topmost layer of birch - it is cut into small fragments, coated with epoxy resin and the bundle is clamped in a vice until completely dry. Next, all that remains is to shape the handle, sand it and coat it with varnish or impregnation. The entire manufacturing process will take no more than 1 day.
Cut out wooden blocks Make several different plates from birch bark String the plates, wash with epoxy glue The bars are removed and pressed in a vice Grinding the workpiece Polishing and the birch bark handle is ready
The only but very significant drawback of such a pen is its ability to absorb all foreign odors. That is, after cutting fish or meat, getting rid of the “aroma” will be very difficult, almost impossible.
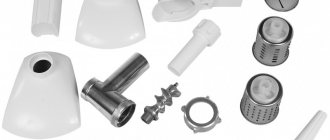
Plastics
High-quality modern plastic has the following characteristics:
- long service life;
- does not absorb odors;
- does not rot, delaminate or crack;
- withstands even prolonged exposure to water;
- has low thermal conductivity.
Knives with plastic handles fit very comfortably in the hand and are light in weight, so you can work with them for a long time without signs of stress or fatigue.
Making a handle for a knife out of plastic yourself will be very problematic - you will need a specific tool, and the fastening of the handle will have to be carefully thought out. Experts do not recommend experimenting; it is advisable to use ready-made solutions from stores.
Rubber plastics
Rubber plastic is a synthetic fiber that is lightweight, practical and low cost. This material can be combined with wood or leather, which allows you to make knife handles of different designs.
The material does not absorb moisture, does not slip in the hand, does not conduct electric current, does not absorb odors and can be used for a long time even at the lowest air temperatures.
Making a handle from rubberized plastic is simple: you need to cut out blanks of the desired shape and size from a piece of material, then connect them to the tail of the blade and fix them with glue. You will need to clamp the finished handle in a vice and leave it until completely dry (about 24-36 hours).
Synthetic fibers
If you have a ready-made knife handle, but you need to make it more convenient to use, then synthetic fibers such as Kevlar, Dacron or Cordura are suitable for the job.
Advantages of synthetic fiber winding:
- are on free sale;
- are characterized by low cost;
- resistance to external aggressive influences;
- It is possible to replace the winding with a new one. Cordur Kevlar
Textolite also belongs to such materials - it does not absorb odors, moisture, does not crack under the influence of ultraviolet rays, and does not slip in the palm of the hand during the work process. The textolite is attached to the tail of the blade with rivets. The only drawback is the lack of aesthetics in a handle made of such material, but the level of practicality is as high as possible.
Blueprints
You can make drawings for a knife handle yourself, but it is much easier to find ready-made solutions - for example, a universal handle is made according to a classic drawing.
Knife handle drawing
Attachment to blade
After all the work steps described above are completed, you will need to attach the handle to the blade. And it is better to do this with the help of rivets - they are practically invisible, will not spoil the appearance of the finished product, and their reliability is at a high level.
The handle is attached to the shank of the blade; for reliability, you can treat the edges of the workpieces with glue and connect them. Only after this can you begin to decorate the handle - for example, work with a burner or apply a design by cutting. You can get by with regular winding using multi-colored threads made of synthetic fibers.
How to properly wrap a knife handle
Correct wrapping of a knife handle using paracord (synthetic rope):
- Place the cord on one side of the handle, secure it near the knife blade and along the entire handle. The cord (its short end) should extend slightly beyond the handle. The tape should hold it tightly to the handle.
- Perform movements with paracord, making loops. They should fit snugly not only to the handle, but also to each other. Each loop begins and ends at the section of the cord where it is secured with tape.
- Tie the loose ends of the cord. This is done after the paracord has completely wrapped around the handle. If there are holes on the handle, then the ends of the cord are passed through it and then only tied. But you can do this without a hole - it is important to make the strongest possible knot.
You can wrap it in a cross pattern - in this case, both ends of the cord are used, so after fixing the paracord with tape, there should be a long free end (at least 30 cm). When finishing the work, you can make a loop when tying a knot - the knife can be hung on your hand.
Handle decoration
Handle decoration can be very diverse:
| Name | Description | Photo |
| Pyrography | this is painting with fire, in simple terms - burning | |
| Thread | quite delicate work that requires certain skills, allowing you to apply a variety of patterns to a wooden handle | |
| Scrimshaw | burning is carried out “blindly”, the design will appear only after applying a layer of varnish to the product. |
Decorating a knife handle can also be complex - for example, from precious/semi-precious stones, made in several different techniques. But at home, the most affordable types of jewelry are braided, notched, and leather decor.
Leather
The simplest way to decorate a leather knife handle is to wrap it with a thin leather strap and secure it to the base with glue. The result is an original relief, and the tool itself lies very comfortably in the hand and allows you to work for a long time without fatigue.
It is important to fulfill the following conditions:
- the handle is degreased before decorating;
- then regular shoe glue is applied to the prepared surface (it must dry completely);
- leather strips are wrapped around the handle with an overlap.
After wrapping the leather is finished, you need to bring the handle to the fire (above it) and warm it up slightly - the glue will “float”, it will be possible to move the decor to the side of the handle. The pen is then dried again.
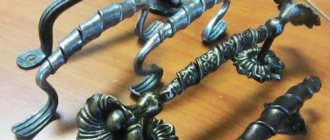
Braid
Braiding is the wrapping of synthetic materials and cords around the handle. The material is chosen at your own discretion, but experts do not recommend using cords that are too thick. If you select multi-colored material, then you need to ensure that each cord is of the same thickness.
The braid can be classic or made with a cross or a spike. The use of multi-colored fibers allows you to create unique designs on the knife handle.
Notch
Notches on the handle of a knife are made only on wood and before the material is treated with impregnation and varnish. Notches can be made in different directions and even different depths.
You will need to work either with special wood cutters or a thin file. It is highly advisable to first draw future notches on paper in the full scale of the handle and only then apply them directly to the product.
The notches must be processed with zero-grit sandpaper and only after that they are covered with drying oil and varnish.
Making a knife from a file
As you know, a good blade made of excellent steel can cost a lot of money. In such cases, the question arises: how to make a knife with your own hands from scrap materials? An old, unnecessary file will come to the rescue, from which you can make a hunting knife with your own hands.
Tools and materials
Making a hunting knife with your own hands from a file must begin with the selection of the starting material, or simply a “blank”. It is best if it is a Soviet file, since at that time they were made of very high quality steel. The shape of the file should be flat, rectangular, or better yet diamond-shaped, about 30-40 mm wide.
It is necessary to decide what the handle of the future knife will be made of and prepare materials for it. In addition, you will also need:
- epoxy resin;
- brass or aluminum rivets;
- vice;
- sharpening machine;
- sander;
- sandpaper of different grain sizes;
- magnet (necessary for hardening);
- ferric chloride (for etching).
Step-by-step instruction
- First of all, to make a knife with your own hands from a file, we draw a sketch of
the future knife. - Annealing.
We heat the workpiece to approximately 700 degrees. When you have to make a knife with your own hands at home, you can use a gas stove. To determine the heating, use coarse table salt, pour it onto the heated area, when it begins to melt, it means the heating is sufficient. After the metal has acquired an even color, it is necessary to keep it in this state for 4 hours. Then the metal should cool slowly. - Blade formation.
We cut off all the excess with a grinder and shape the future blade. Next, using circles of different grain sizes, they form a trigger on the knife with their own hands, a butt, and a shank for attaching the handle. - We harden
and temper the product. - We grind and polish the knife
to a finished state. We use sandpaper, gradually reducing its grain size, and for polishing we use a felt wheel and Goya paste. - We attach the handle
and bring it to the final state by grinding and sanding. - Etching.
An important step that is necessary to prevent rust on the blade.
How to attach a blade to a knife handle
It will be necessary to attach the blade to the handle of the knife if the latter was made from a single piece of material. In this case, you need to perform the following manipulations:
- Mark the handle and drill a hole in the middle. It is advisable to make it a “wedge”, that is, perform several forward-reciprocal movements with a drill.
- Clean the hole with a thin file and blow out any remaining dust.
If the blade shank is not narrow/thin, but wide, then you will need to drill several holes in the wooden handle as close to each other as possible (the width of all holes corresponds to the width of the blade tail), then use a drill to remove the remaining partitions and clean the hole from dust and shavings.
All that remains is to insert the blade into the handle of the knife (into the prepared hole) and fix it there with wedges so that the metal is stationary. The voids are filled with epoxy glue mixed with sawdust and left to dry - from 1 to 24 hours (according to the instructions).
How to harden steel at home
In fact, steel hardening can be done not only in a forge. It is quite possible to build a small oven in the fresh air or get by with a gas stove. It is only necessary to create conditions to retain the maximum amount of heat near the knife. For this, heat shields are used, or, more simply put, metal plates.
The metal must be heated until it acquires a uniform bright red color. At the edge of the blade, the metal is thinner, so it heats up more strongly and can have an almost white color. A magnet will help determine the optimal degree of heat. If the magnet stops reacting to metal, it needs to be cooled. It is necessary to cool sharply, take it with pincers or pliers and dip it in a bucket of water, and some craftsmen advise dipping it in used machine oil.
After the hardening process, the metal remains “stressed” and there is a danger of crumbling. In order to prevent this, metal tempering is carried out. Place the knife in an oven heated to 200 degrees and leave for 2 hours, then turn off the oven and let the metal cool along with the oven.
Making a knife with your own hands is quite a labor-intensive task. Even using ready-made drawings for making knives and detailed instructions, on the way to success you can spoil more than one workpiece, get more than one callus, and get more than one cut. But you shouldn’t stop there, because everyone can make a blade with their own hands.
The independent manufacturing process gives rise to a special attitude towards your blade and makes you appreciate the work put into it.