Tips for builders | 06/29/2017
A drill chuck for a machine tool or for a conventional electric drill is a mandatory device that ensures reliable fixation of the equipment when it performs a technological operation. A number of cartridge designs have been developed and are used, which are standardized by domestic GOSTs, as well as DIN standards.
How to remove and disassemble a Morse taper cartridge
Cartridges with a cone are extremely rare, but if you have one of these, you probably want to know how they are removed. Often, old electric drills and drilling machines have a conical type of fastening, so if the chuck on the tool fails, then to replace it you will need to perform the following steps:
- Move the jaws apart and unscrew the locking screw with a right-hand thread (conical ones have screws with regular threads)
- Secure the tool, and taking a hammer in your hands, apply light blows to the back of the device
- After each impact, rotate the outer clutch clockwise
- If the internal mechanism is rusty, then before carrying out work you should use WD-40 lubricant.
- There are times when even lubricant does not solve the problem, so you should use a blowtorch, heating the part until red hot.
- If in this case the cartridge cannot be disassembled, then the last option remains is to disassemble the drill and grind off the side parts of the device using sandpaper. Some craftsmen prefer to saw the executive body directly on the instrument with a grinder
https://youtube.com/watch?v=OPf8FcMD7ag%3F
With a barbaric approach to disassembly, the element can no longer be repaired, and after dismantling, it is necessary to install a cartridge of a similar design. To install a threaded chuck on a drill, you will need to make changes to the design of the drill, which is also quite possible to do with your own hands.
Now let's look at the method of disassembling a part for the purpose of its subsequent repair. The disassembly method is simple and does not require the use of a sledgehammer or grinder. In this case, the main condition must be met - the absence of corrosion processes on the threads. The principle of dismantling a cone chuck from an impact drill is as follows:
- Bring the jaws inside the part
- Place the tool on a flat surface (table)
- Press a piece of polystyrene foam to the end of the tool (high-density foam can be used)
- Press a piece of dense material - a board or metal - onto the polystyrene foam
- Set the drill to impact mode. If the drill does not have an impact mode, then to disassemble the chuck, it must first be secured to the hammer drill
- Press the structure firmly against the chuck and press the start button
- Literally after 10 seconds, the cartridge with the type of fastening in the form of a cone will unwind on its own
The chucks on a drill with a Morse taper are classified as collapsible, so if one of the jaws fails, they can be replaced. This is the only type of drill chuck that can be disassembled, and if the jaws or clamping coupling fail, it can be repaired. If you need to assemble a cartridge, this is also easy to do. To do this, it is necessary to press the outer race onto the clamping sleeve and then install it on the tool axis. The video below shows how to disassemble a drill chuck using a hammer.
https://youtube.com/watch?v=dWkehVsr4Sg%3F
Disassembling the cartridge
Like any tool, in order to continue its normal operation, the cartridge may require cleaning , for which it will be necessary to disassemble . Disassembly can be done in several ways.
If the cartridge is not a monolithic part consisting of a single piece of any metal or alloy, then disassembly can be carried out using the impact method by tapping a hammer on its back side (the outer ring in this case slides off the internal gear rim, which allows for complete disassemble the part).
The thermal method involves a step-by-step disassembly process.
- 1. it is imperative to remove the holding cams inside (so that they are flush with the surface of the cartridge itself),
- 2. then install the chuck with a rotating ring in a vice
- 3. Then you should heat with a hair dryer (or some kind of burner) to 250°C , after carefully placing a cold, damp bandage (or gauze) inside.
- 4. After the ring has warmed up well, the base of the chuck must be knocked out (the ring itself will remain in the vice) towards the jaws.
You should pay attention to the thickness of the metal so that upon impact the part does not deform.
Replacing and disassembling the chuck on a drill
There is nothing complicated about the question of how to replace a worn-out cartridge in a drill. To do this, it is enough to purchase the appropriate clamping device, remove the old one from the drill and install a new one on it. It should be borne in mind that two types of chucks can be installed on both a regular and a mini drill:
- with cone connection;
- threaded.
Chucks that use a thread for installation on a drill are removed and fixed according to the scheme described above.
When replacing such a device, it is not enough to know that it is threaded; it is also important to take into account the markings that are necessarily applied to it. Such chucks may be marked as follows:
- 1.5–13 M12x1.25;
- 1.5–13 1/2 – 20UNF.
The interval 1.5–13 present in the designation data indicates the minimum and maximum diameters of the cutting tool being installed. The rules for replacing a chuck on a drill suggest that the new clamping device must have a marking that is completely identical to the designation of the old one.
With the question of how to replace a conical chuck on a drill, everything is somewhat simpler. Devices of this type can also be marked with various markings, namely:
To replace a chuck of this type with a drill, you simply need to select a clamping device with the appropriate marking and insert its seat into the conical hole of the drilling equipment. It is quite simple to navigate this marking: the letter “B” means that this is a cone-type cartridge, and the number indicates the diameter of the lower part of the mounting hole.
Removing a cone-type chuck from a drill is as easy as installing it. In order to perform this procedure, you simply need to knock out the clamping device from the mounting hole of the drill, for which you use a regular hammer. You can also get acquainted with the details of installing and removing the conical chuck of an electric drill by watching the corresponding video.
Any home craftsman's tools must include a drill. True, sometimes it becomes necessary to remove the cartridge from it. As a rule, this problem occurs when the device breaks down.
Any craftsman who understands at least a little technology can complete this task. But for a person who has never encountered this, it can become a big problem. To easily remove a part from a drill, you first need to study the principles of its fastening, and only then proceed to replacement.
- Quick-clamping types;
- Collet SDS devices;
- Cam types.
With quick-release elements, you can change a bit or drill in seconds, without using any additional tools. They are divided into single and double coupling types.
In the latter option, to attach the drill, you have to hold the coupling with one hand and screw the other with the other. Single-sleeve chucks have a shaft locking system that is activated when the equipment is replaced. The disadvantage of such products is low fixation strength
drills In addition, the use of plastic parts significantly increases the risk of damage to the cartridge.
It is better to use jaw chucks on impact drills and rotary hammers. They are stronger, so they are often used to work in difficult conditions. In such products, plastic elements are not installed, and the equipment is fastened with a special key.
There are also collet SDS chucks that were created in the 70s of the last century. The shank of this design contains two grooves, the size of which is 10 mm.
In this system, part of the drill has to be screwed into the chuck by 40 mm. It is fixed with locking balls. In addition, the design has 4 grooves
, 2 of them are fixing, and the rest are used for guide wedges. The spindle of a device equipped with this design is automatically locked immediately after installation.
Criterias of choice
We choose a drill at the market or hardware store according to the following criteria:
- Rated power. You need to know this indicator in order not to accidentally overload the home electrical network and to understand how the device will cope with its work.
- Rotational speed. This indicator is calculated in the number of revolutions per minute. The resulting figure indicates the capabilities of the drill with different attachments when working with materials of different hardness.
- Speed adjustment. It is very convenient to use. With a special regulator you can set or smoothly change the required speed depending on the density of the material.
- Maximum drilling diameter. You need to know this figure so that immediately after purchase you do not render the device unusable by exceeding the permissible limit (ranges from 6 to 250 mm).
- Power mode. Cordless cordless drills are leading the market. They are easy and convenient to work with, they weigh little and have a wide range of functions. Network devices are tied to power supply.
Specifications
Many people are interested in how to choose a drill for the home. First you need to familiarize yourself with the technical parameters indicated in the device passport.
The power of the tool varies from 300-400 to 1400 W. The greater the power, the wider the capabilities of the device (you can easily drill wide and deep holes in strong materials). If you buy a drill to work with wood, the power of 400 W is enough. It must be remembered that the higher the power ratings, the heavier the weight of the device.
Rotation speeds in conventional models reach 3 thousand revolutions per minute, but in professional equipment they can exceed this figure. The more revolutions per minute, the more additional possibilities there are. High speed results in a smoother surface on the walls of the drilled holes. When polishing or grinding with attachments, high rotation speed plays a major role.
When choosing a cordless drill, you need to pay attention to the minimum battery capacity. The higher the number, the longer the battery holds a charge.
Depending on the purpose of the device (for professional or household use), the charging time ranges from 1 hour to 6-7. Often two chargers are included with the drill to avoid downtime: while one battery is working, the other is connected to the network.
The difference between a professional drill and a household one
Professional models differ from household models in terms of load limits (this is the time that the drill can operate without significant damage to the engine). Professional drills:
- designed for intensive use every day;
- have high performance;
- little wear;
- made from high quality materials;
- are expensive.
Such models are suitable for facilitating the work of construction professionals, since they have a rather narrow scope of application. Household appliances have the following differences:
- compactness and ergonomics;
- little weight;
- low productivity;
- versatility and multifunctionality;
- reasonable price.
Such models are great for home work, but you need to remember that during work you need to take short (but regular) breaks of a quarter of an hour. The total amount of work hours is no more than 4.
Design features
The design features of the handle also play an important role. Basically, the drill has a “pistol” handle at the back, but in this position the hand quickly gets tired. If the handles are located strictly at the center of gravity, then less effort will be required, and the accuracy of the work will increase.
Ammo
Modern models are equipped with two types of cartridges:
- Serrated. These are traditional cartridges. Their design is such that the drill is secured for some time with a special key, and this key can be lost at any time. But they clamp tightly.
- Quick-clamping. There are two types: single-sleeve (very easy to use) and double-sleeve (have a clamping and loosening ring). The drill is secured in such a chuck with one movement of the hand. True, their service life is shorter.
Adviсe
Before purchasing, it is advisable to hold the drill in your hands and check whether it is comfortable to work with. The material and location of the handle, the weight of the tool, and the smoothness of switching buttons also matter. It is better to purchase a drill immediately with accessories (drills, chucks, stops).
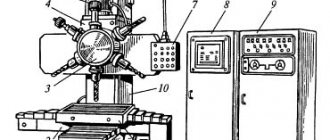
General information
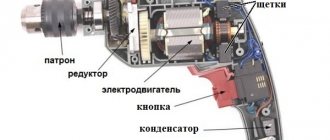
The use of drilling machines necessitates the creation of holes of the desired size in workpieces of various sizes. This filigree work is produced by drilling. The structure of a drilling machine is simple, but even the configured equipment cannot function without a drilling machine chuck. Its task is to securely secure the drill itself and uniformly transfer the engine force to it.
The products are used not only on stationary drilling equipment, especially large ones; craftsmen encounter them in conventional drills; even a miniature screwdriver is equipped with this fastener. According to the standards, before work, the selection of a product is carried out by comparing its properties with the following points:
- choose the correct rigidity of the product, this will ensure reliable fastening of the drill;
- check whether the standard size corresponds to the radial runout;
- the thickness of the drill used largely determines the choice of chuck;
- The drill and chuck used must be suitable for the workpiece material.
If you neglect the rigidity of the material, the load on the drill during operation will increase, this will lead to its breakage, overheating and damage to the integrity of the chuck. In the worst case, this will lead to a malfunction of the device itself.
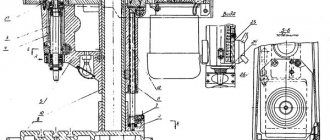
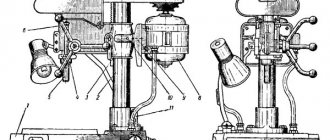
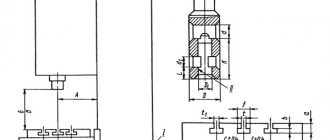
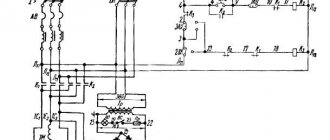
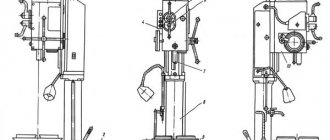
Drilling machine device
DISASSEMBLY AND REPAIR OF THE DRILL CHUCK
Currently, I am intensively engaged in repair and maintenance work around the house. There's a lot of drilling to do. Using one electric drill is more than difficult because you constantly have to change drills. Therefore, at work there were always two electric drills and a brace for delicate drilling of holes to large diameters. And so I decided to add a hand drill to this arsenal for countersinking holes, even if it is old, but it works. But the cartridge needs to be put in order - it rotates heavily, and there is a fair amount of runout.
So, the cartridge needs to be disassembled. I looked at what the virtual space of the Internet offers in such cases - everything is very clear but somewhat complicated, because for example, it is proposed to perform the disassembly operation using an electric hammer drill. What if you just pick up the cartridge and use a hammer and metal striker to disassemble it?
Video
Believe that successful disassembly is always guaranteed in the end, and damage to the cartridge components is excluded. The convenient metal striker has a cylindrical shape with flat ends with a diameter corresponding to the largest diameter of the drill for this chuck. Hammer 150 - 200 gr.
We have a cartridge body, three threaded jaws, a clip and two halves which I know as a “cracker”. Now scrape off all the rust, wash it with kerosene, wipe it dry and remove all burrs and dents with a file.
These are the cams, they are the ones that hold the drill while working. They must be exactly the same in shape and size, like twin brothers. But this is not visible in the photo.
I used a small electric sharpener connected to the speed controller, this is the only way to try to do something. And not in a hurry.
And as far as possible “by eye”, I brought the cams to the sameness possible in such cases. Do not grind off excess - they will hang around the installation site.
Reassemble in reverse order. Since everything has already been processed with a file, the cartridge is assembled much easier than disassembled. There is no need to lubricate yet.
Since a round file is inserted into the chuck to complete the repair, the cams are slightly pressed against it and the file is rotated several times in the cams using pliers. The main thing here is not to overdo it, otherwise the cams may become irreparably unusable.
As a result, the sharpened inner edges become completely uniform, and the resulting transverse cuts help to better hold the drill. Now is the time to drop a few drops of thick oil inside the cartridge. Now the drill chuck rotates easily even by hand, there is some runout, but it is acceptable, not the same as before. Babay, Barnaul, shared a way out of a difficult situation.
Forum
Discuss the article DISASSEMBLY AND REPAIR OF A DRILL CHUCK
radioskot.ru
What else is useful to know about drill chucks - what does the marking of all types mean?
Before changing the chuck on a drill, you need to decide on the design of the seat. In addition to the fact that devices are divided into threaded and cone connectors, they also differ in thread diameter. If you are going to buy a new cartridge, then before doing so it is recommended to remove the old one and buy a new one in its likeness. There is another way that will help make it easier to select a new element - this is labeling.
The markings make it clear what the cartridge is intended for, as well as what power tools it is suitable for. Knowing the markings, which you can photograph before going to the store, you can purchase a similar clamping element for an electric drill. What is indicated in the markings of cartridges, we will find out further.
This is interesting!
Markings are indicated on all types of drill chucks, both quick-release and key-type.
The only difference is the location of this marking. Let's take two types of markings, having the following form:
- 1.5-13 mm M12x1.25
- 0.8-10 mm 3.8-24 UNF
According to the first option, everything is clear, but to avoid any questions, let’s consider what each number and letter in the marking of drill cartridges means.
- The interval from 1.5 to 13 mm and 0.8 to 10 mm are the minimum and maximum diameters of the shanks of working attachments that can be fixed in chucks. It is worth noting that the above markings are found on both types of chucks, both key and quick-release chucks. When purchasing a new device for a drill or screwdriver, the first marking values must be taken into account, otherwise it will no longer be possible to drill a hole with a drill over 11 mm, as in the second case.
- In the first case, the second part of the designation M12x1.25 is the metric thread diameter of 12 mm, as well as the pitch, which is 1.25. This means that the tool uses metric threads, and we can say that this is a chuck from a Soviet drill
- In the third case, the marking is very different from the first option. The designation 3.8 means a 3/8 inch thread. The designation 24UNF is the value of the fine thread pitch according to the unified nomenclature. The letter designation indicates that the cartridge uses a fine thread. The number 24 indicates that this is the number of threads per inch. Below is a table with all sizes, as well as their explanation
As a brief conclusion, it should be noted that it will not be possible to screw a chuck with markings onto the shaft of a Soviet drill, as in the second case. Not only does it not fit in size, but also in thread.
The markings for threaded types of connections on cartridges are described above. To avoid having to think about which device connection method is used on a particular drill model, you should look at the markings. Cone types of connectors differ from threaded ones. Let's look at an example of the designation of a conical cartridge: 1-13 mm B16 2015.
From the value “1-13 mm” it is clear that these are the minimum and maximum diameters of the shanks of the nozzles that can be fixed in the tool chuck. Marking B16 is the designation of the conical cartridge. The letter “B” means that the cartridge has a conical type of fastening, but the number 16 is the diameter of the lower part of the mounting hole. It should be noted that cone devices are of the following types:
- B10
- B12
- B16
- B18
The last numbers “2015” are the year of manufacture of the cartridge, which are not always indicated.
Mounting methods
The chuck is attached to the shaft of an electric or manual drill in two ways - a cone connection and a thread, so there are a minimum of varieties here. In practice, there are devices with metric or inch threads, and on the body of the product, even the smallest one, there is always a marking.
For example, a designation of this type 1.5-15M13x1.2 is deciphered as follows:
- 1.5-15 is the diameter of the tail part of the cutting tool in millimeters;
- M13 - metric thread with a diameter of 13 mm;
- 1.2 - thread pitch.
When using a thread in inches - UNF and the diameter is indicated: 1/2”. This type of connection is considered international and is used in all instruments from foreign manufacturers. For special reliability, a stopper is placed on the shaft, in the form of a screw on the left thread - this must be taken into account when you are confused about how to disassemble the chuck of an imported drill. It only needs to be unscrewed clockwise.
The second method uses a Morse cone, which today is more often called an instrumental cone. The shaft has a conical part at the end onto which the device is mounted, and a small force must be applied for a tight connection. The marking is as follows: B10, where the letter indicates the use of a cone, and the number indicates the diameter of the tail of the cutting tool. This type of fastening is common with screwdrivers.
How to remove a chuck from an electric drill
The chuck can be attached to the spindle as follows:
- Cone mount. When a Morse taper (instrumental taper) is used. In this case, the shaft is made in the form of a cone, well polished and minimal effort is required to fit it. Example of marking: B10, where B is the symbol of the cone, and the number 10 is the diameter of the cutting tool shank. This type of fastening is most often found in screwdrivers.
- Threaded fastening. Threads can be metric or inch. If the M13 marking is stamped on the cartridge body, then the thread is metric, 13 mm. If it is inch - UNF indicating a diameter of ½ inch.
However, in order to protect the user 100%, the manufacturer of imported drills also fixes the chuck with a screw, which serves as a stopper and securely fastens it to the shaft.
The screw has a left-hand thread, and very often, when a drill is repaired by inexperienced people, the slot on the screw for the screwdriver is torn off out of ignorance, believing that it has a standard right-hand thread - so you need to unscrew it clockwise.
Knowing the design features of your own drill, removing the chuck does not seem to be a big problem.
In order to change this element, you need to prepare the following tools:
- Pipe wrench No. 2.
- Medium sized hammer. Approximately 400−500 gr.
- Spanners.
- Caliper No. 1, 2 or 3.
- A screwdriver with the required blade shape and section.
- Personal or velvet file.
- Sandpaper.
This list shows the minimum set of tools. It is very possible that during the work you will need something additional.
Threaded connection
Procedure for dismantling:
- Unscrew the locking screw counterclockwise.
- Unscrew the cartridge in the same direction. If there are grooves on the shaft, use a wrench to fix it.
- If the drill is jammed, then you should tap the cams from top to bottom with precise and light blows of the hammer.
- Installation of the device is carried out in the reverse order.
Having fixed the part of the equipment on which the cams are held with a pipe (gas) wrench No. 2, you need to rotate the shaft. The cartridge should unscrew easily after such “persistent” intervention.
Connection with a tool cone: dismantling step by step
Such dismantling is carried out using a hammer and a drift made of non-ferrous metal: brass, bronze, aluminum, copper. However, hammers of this type are still found.
Soft metal will not cause damage to the equipment in the form of nicks and deformations.
You need to do the following:
- Hold the drill with the handle up.
- Gently tap the back of the cartridge around the entire circumference with a hammer.
- After the device is dismantled, you need to clean the cone with fine sandpaper. Remove large nicks, if any, using a file.
- The new cartridge is inserted into its regular place and fixed with a blow from a wooden hammer (mallet).
For old drills made during the Soviet period, we can use another method. In them, on the shaft, between the tool body and the chuck, there is a fairly large gap, and there are flats on the shaft.
Locksmiths, as a rule, acted as follows:
- We inserted the key into these grooves.
- The clamping tool was dismantled by hitting the open-end wrench with a hammer.
The method, of course, is not the safest, given that the key can fly off along a trajectory unplanned by the locksmith and cause injury. There is also a type of drill where a slot is made in the body into which a wedge is inserted to knock out the chuck. Such drills may have two cones: one in the chuck and the other in the drill. These instruments are impressive in size and weight.
Taper drills are considered more accurate in critical drilling because the Morse taper is manufactured to a high degree of precision.
In addition, the conical chuck can be removed with a puller, since each such drill, which does not even have a threaded hole for a locking screw, has a through hole. And if you use a puller with a central pin and rest it against this hole, then by securing it to its counterpart, which has hooks in the form of powerful hooks, you can also remove the firmly attached cartridge. These pullers are used to remove, for example, bearings.
How to choose a collet chuck
The first thing to consider when choosing such a chuck is its attachment to the spindle. You can install it directly on the spindle, using a suitable adapter or by screwing it onto the thread.
Then we look at the dimensions of the flange. The diameter of the connection band or the parameters of the Morse taper will help here. If you do not know these indicators, then you will not be able to select the required cartridge, and therefore, there will be no opportunity for high-quality operation of your tools
And, finally, the number of jaws in the tool. Depending on the purpose of the tools, they can have from two to six jaws in a set. You can also choose a tool made of hard or soft alloy, for certain types of work, with different technical characteristics.
How to replace the chuck in a drill with your own hands?
To attach the chuck to the drive shaft of the drill, a threaded connection or Morse taper is used. A visual inspection of an electric drill will not always help indicate how to secure the drill chuck. This can be indicated by the marking on the cartridge: it is stamped on its surface.
Replacing the conical type of part
The standard size of the Morse cone (according to GOST 9953–82) consists of 9 values: from B7 to B45. The larger the number after the letter B, the larger the diameter of the cone.
The marking on the cartridge indicates the type of fastening
Thus, having found the marking “B” on the surface of the cartridge, we can conclude that this is a device with a conical mounting base. With this method of attachment, the cartridge can be easily removed. It is enough to use a drift and a plumber's hammer.
Video: how to remove a chuck with a cone from an electric drill?
Replacing the reversible threaded chuck
To secure the drill clamp to an electric household drill using a threaded joint, two types of threads are used:
- inch (for foreign models);
- metric (from Russian manufacturers).
On an electric household drill, two types of threads are used using a threaded joint
The following marking is applied to the surface of the threaded clamping chuck body: 1.5–13 1/2 – 20UNF or 1.5–13 M12x1.25.
The reversible threaded cartridge for fixation has a screw with a left-hand thread. You need to know this nuance when removing a broken cartridge. In order to get to the screw head, it is necessary to recess the cams into the collet completely. As soon as the head of the screw is visible, use a hardened Phillips screwdriver to unscrew it to the right clockwise. Then hold the hex key in your fists and hit it sharply in a counterclockwise direction. After the cartridge is torn from its place, it can be easily unscrewed.
Classification
- The quick change drill chuck is used with a replaceable sleeve for taper shank drills;
- The safety chuck for cutting threads in blind and through holes has a more complex structure. It consists of clutch cams, driven coupling halves, main clutch cam, spring and adjusting nut. It is used as a holder for notes.
- A collet drill chuck consists of a shank connected to a cylindrical part. There is a split sleeve between the clamp and the shank inside the chuck.
- The double-jaw drill chuck clamps the drill using internal hooks at the top of the chuck, secured by a spring. This explains its peculiarity of use for thin drills and use with low loads on the drill.
Only drill chucks with a key that have a Morse taper have the corresponding requirements in accordance with GOST 8522-79; having met the GOST indication, the compliance with the size of the Morse taper used for a given size can be determined from the table. The quick-clamp does not have a cone, but unlike its counterpart with a key, it has an internal thread, the range of which must be indicated in the marking.
Three-jaw
The marking most often looks like this (on products from Russian manufacturers):
- PSK 3-16 indicates the range of drill diameters in mm;
- KM B12; B16; B18 – which indicates the Morse cone of the connecting hole;
- GOST 8522-79 - this designation in the marking clearly indicates compliance with all parameters in the table compiled in 1979.
Download GOST 8522-79 “Three-jaw drill chucks”
The marking on the quick-clamping tool only indicates the size of the internal thread and the range of diameters of the clamped drills.
A three-jaw chuck for a drilling machine, with a key to fix the drill, complies not only with GOST 8522-79, but its Morse taper meets the CMEA 148-75 standards. What makes drill chucks manufactured in Russia in accordance with GOST 8522-79 suitable for drilling machines from foreign manufacturers working according to international standards.
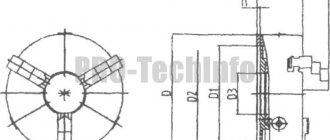
Dimensions according to GOST 8522-79 are a strict indication of compliance with the standard size in terms of clamping range and permissible radial runout. At the same time, compliance with the basic parameters is not an indication of a specific design. Drill chucks can look different:
- according to the shape and length of the working part;
- the presence or absence of a plastic protective casing;
- the method of attaching the main parts of the cartridge to each other,
- alloy color.
The Morse taper changes upward as the size number increases. The radial runout tolerances change with the size.
For example, Morse taper B16 has drill chucks of sizes 10 and 13. These numbers correspond to the upper parameter of the drill clamp, the lower one is set by GOST 8522-79. With a Morse taper B18, cartridge No. 16 is made according to the same table. Its minimum clamp is 3 mm, maximum - 16 mm.
The keyless chuck must be selected in accordance with the dimensions of the mounting hole and thread of the machine. Key cartridges, thanks to the Morse taper, have an advantage. Cone adapters allow you to install chucks with a smaller or larger Morse taper on the machine, expanding the capabilities of the machine.