The most suitable fruit grape varieties
It is worth paying special attention to the selection of grapes for the arch, since they require not only berries, but also shade. Basic requirements for arch grapes: resistance to various diseases and pests, not needing shelter for the winter and being vigorous. The following varieties meet these requirements and are very suitable: Light and Original.
Grape varieties that can be used for arches, arbors, high wall trellises, etc.
| Very early | Early varieties | Early-medium varieties | Mid-season canteens |
| Elegant Muscat Pleven Super-Extra Ruby | Delight Kesha Augustine | Talisman Gift to Zaporozhye Shakhtar | Frumoasa albe Anthony the Great |
Types of trellises for grapes
There are a large number of varieties of trellises for grapes. The most popular types of supports include:
- single-plane design;
- two-plane design;
- U-shaped trellis, in which the planes are located parallel to each other;
- V- or Y-shaped designs;
- single-row two-plane supports;
- pergola (L-shaped support);
- arched structure or gazebo.
Single-plane trellis
The grape bushes will need to be planted in straight rows running parallel. The trellises should also be located at the edges of the rows. Single-plane trellises for grapes are designs that involve the installation of one row of posts with a wire stretched in one plane. When installing the structure, it is important to place the supports at a short distance from each other.
If the distance between the bushes is 250-300 cm, supports should also be installed between the bushes. It is advisable to place columns for single-plane trellises at a distance of 30 cm from the plants. This will make it possible to easily care for the crop and prepare the bushes for the winter cold. A simple grape trellis is often used by winegrowers.
It is better to install single-plane supports a little further from the grape bushes
Two-plane trellises
On a two-plane structure, the vine, together with green shoots, is located on two planes of wire. This type of support simplifies the process of caring for plants and helps increase productivity due to the fact that shoot growth increases. A similar design is often used when growing vigorous grape varieties.
Important! Two-plane supports can be used exclusively for gartering grape bushes, which are located in the direction from north to south. Any other orientation of the plants will cause severe shading of one row of grapes by another.
The distance between grape trellises should be within 55-80 cm.
Two-plane supports are widely used by winegrowers due to their stability
U-shaped trellis
On one row of bushes, a couple of rows of vertically arranged columns with wire are installed. Both supports will need to be placed on both sides of the plants at the same distance, which should be equal to 50-65 cm. A shorter distance will not make it possible to fully treat the bushes with chemicals.
The recommended height of the U-shaped support reaches 200 cm
V- or Y-shaped designs
On one row of grape plantings, you will need to install a couple of rows of supports at an angle with the presence of wire. The angle does not affect the degree of illumination of the sheet plates by sunlight. It is very important to connect the columns with jumpers to prevent them from falling under a heavy crop. The free hanging of bunches of grapes under the leaf blades due to the tilt of the structure has a positive effect on the growth and development of the crop. The sizes of the grape trellis are selected depending on your own preferences.
V- or Y-shaped structures make it possible to easily cultivate the soil where the grapes are planted
Single-row two-plane supports
For each row of grape bushes, one row of supports is installed, on which strips are welded to secure the wire. The wire is fixed in the extreme parts of the strips. Unfortunately, this design is not convenient, since it is almost impossible to spray inside the trellises.
Single-row two-plane supports are used extremely rarely due to the fact that they are inconvenient
Pergola
Planes with wire and green shoots are arranged horizontally. The recommended pergola height reaches 200-250 cm. The shoots of the crop will need to be placed parallel to each other. When growing grapes on such a structure, a significant increase in vine productivity can be noted. The leaf plates are illuminated by sunlight throughout the day, which has a positive effect on the growth and development of the crop. The bunches are well ventilated. The main disadvantage of a pergola is its height, which makes caring for the plant a little more difficult.
The design effectively decorates the territory of the local area. The grape vine will be able to reach the top of the support in a short period of time, creating an amazing landscape. A pergola should be used not only as a supporting structure, but also as a relaxation area. It will be enough to decorate this place with benches, cozy armchairs and a table. This will create a cozy meeting area in the yard. You can plant bushes with roses near the vineyard.
When growing grapes on pergolas, it is worth considering that treating the bushes with chemicals will be difficult
Arches and gazebos
The arch and gazebo are used for growing only those varieties of grapes that are resistant to diseases and do not need to be prepared for winter cold. Winegrowers often use arched structures to grow table varieties. Large berries delight with juiciness.
An arch for grapes will effectively decorate the area
Types of trellises with photos
There are three main types of decorative supports for tall grapes: arch, gazebo and pergola.
Canopy
The arch perfectly holds the vine, and also decorates the site and in hot weather creates a shadow in which it is so pleasant to hide from the scorching rays of the sun.
Arched structures come in 2 types:
Semi-arch type canopy
- Semi-arched canopy. Most often, this option is used in areas where there is not much space. Here the plantings are combined with a recreation area, and the canopy provides protection from the sun. Grape bushes are planted in one row.
- Arched option. This type of arch is suitable for spacious areas with sufficient free space. In this case, the grape bushes are planted in two rows.
Alcove
A gazebo fits best in a small area. With its help, a vineyard and a cozy place to relax are connected in a small area. Often gazebos are placed in an open, well-lit place, which is perfect for growing heat-loving grapes.
Pergola
A pergola is a structure of arches that are connected to each other by a lattice ceiling.
Pergolas fit perfectly into landscape design and do not take up much space. Most often they are installed above a bench, thus creating a cozy corner in the shade. All these trellises provide good lighting for the grape bushes, thanks to which they produce a bountiful harvest.
Build process
Let's look at two types that can be easily built at home.
Assembling a single-plane trellis
It is easiest to make such a system. The hardest part is installing the posts into the ground. It is more reliable to make it using formwork - pipes and a mixture of sand, crushed stone or broken bricks filled with cement.
Installing pillars
- The posts are inserted into holes up to 50 cm deep.
- Install the pipe - formwork.
- The empty space is filled with a mixture of sand and crushed stone and spilled with water to compact it.
- Then the stand is filled with cement mortar.
After installing the pillars, you can begin to stretch the horizontal supports. To do this, use copper or aluminum wire with a diameter of 3-4 mm.
We stretch the supports
- The bottom row is stretched at a height of 50 cm - 80 cm above the ground. A cordon is attached to it.
- The distance between the rows of wire is at least 30 cm.
- The top row can be replaced with fittings or pipes - they will serve as a kind of spacers and strengthen the entire system.
- Also a mandatory element of the system is a spacer on the outer poles in each row so that they do not sag or deform under the weight of the plant.
Instagram @zavodgefest
Instagram @oootvornica
Two-plane support structures are produced according to the same principle. The main difference is the presence of pillars and a visor on top.
The video below provides tips on how to properly make an L-shaped trellis for grapes.
Making a decorative trellis
If your goal is to decorate the area or highlight a recreation area, you can plant a beautiful decorative variety, for example, girlish grapes. Then he will need an appropriate grille.
It can be made according to the principle of an arch or pergola, or even simpler - a wall. How to make such a trellis for grapes?
Necessary materials:
- 4 beams 1.5 - 2 meters long (at your discretion).
- Thin slats to create a lattice
- Screws and screwdriver
- Sandpaper
- Building level
- Varnish for coating the finished product.
You can begin installation either by installing the support rails in the ground or by assembling the product. In this case, you will install the entire system at once. Choose the method that seems more convenient to you.
Assembling a decorative trellis
- A square is made from 4 support rails - this is the basis of the system. They are fixed with screws.
- The longitudinal slats are installed at a distance of approximately 10-15 cm from each other. Next, the product is turned over, and perpendicular slats are attached to them at the same distance.
- The finished wall is painted with 1-2 layers of varnish.
- If you plan to install it next to the wall of the house, do not press it tightly. The plant needs a gap to weave the trellis on both sides.
Instagram @svekla_2207
Instagram @svekla_2207
Instagram @svekla_2207
Instagram @svekla_2207
Instagram @svekla_2207
How to do it yourself?
Metal structures are the strongest and most durable. They are resistant to negative factors and are resistant to wind and mechanical damage. To work with metal, you need a welding machine and the ability to use it.
Manufacturing instructions:
- Make a drawing or choose a ready-made one. The drawing will simplify the work and help avoid mistakes.
- Select materials: metal rods, pipes, wire threads.
- Treat materials with anti-corrosion and moisture-resistant impregnations.
- Prepare grooves:
- Dig holes 60 cm in diameter and 80 cm in depth.
- Pour sand about 20 cm thick into the bottom of the holes.
- Prepare holes for the posts, in the form of an inverted trapezoid.
- The distance between the recesses should be in the range of 40-50 cm.
- Install support pillars or pipes in the hole, cover with small stones or crushed stone, and fill with cement. The supports must be well fixed based on the weight of each element. To maximize the adhesion of supports and soil, it is recommended to use thrust bearings.
- While the base dries, you need to weld or twist the upper part of the arch. It is made from a profile pipe, rods or fittings.
- After 3-4 days, when the cement has hardened, a horizontal beam is attached to each support. It must be fixed by welding.
- Next, the upper curved part of the arch and the wire threads along which the grapes will cling are fixed.
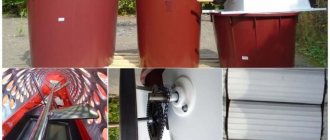
DIY grapes from bearings
| How to make a forged grapevine |
Forged products that have a decorative texture that imitates floral patterns are of particular artistic value. Let's consider methods for forming the texture of a forged grapevine.
Before twisting the rod, its surface is prepared. On forging machines they are rolled through rollers, and under normal conditions the relief is applied to the rod using crimping. After this crimping, depressions and cracks imitating bark are formed on the rods. And then twist it however you want.
If you want to apply a relief (any) to a rod using a hammer, you first need to make a crimp (like a stamp). Take 2 pieces of spring (to fit on the striker), these will be the upper and lower stamps. Apply the desired relief (with a chisel or embossing) to the plates heated to forging temperature. Well, between these plates, stretch (turning and moving) your rod (heated again to a temperature of 900-1000 degrees), naturally under the hammer. All.
This is the working surface of the crimp. You need 2 of these.
if the two halves are connected with an elastic handle, then the “tongs” will come out.
I treat the welding area with a grinder as a continuation of the overall pattern.
If you do it carefully, you won't find any traces after painting.
I took reinforcement bars of different diameters and twisted them in different directions to ruin the pattern. Whether it worked or not - see for yourself.
The texture of the bark can be applied to a thin-bodied pipe using plasma (if available, of course). We set the regulator to 20-30 A and went to scrape; almost no additional processing is required. This is how I applied veins to forged leaves.
If we hold the nozzle at an angle of 40 degrees and the amperage is 30-40, everything will be OK, plus forward movement. And almost no sanding is required.
Like, elm, there is such a shrub in Central Asia, round timber d-22. First we go through it with tongs, then we twist it.
Instead of tongs, you can make a hammer, it won't break as easily
This is how scrolling is done after applying the texture (bark in this case). True, I scroll only if I really have to. The bark itself is decorative.
These are the different methods for making decorative forged bark on grapes Source: Forging of grapevines
Possible errors during construction
When building an arch for grapes, gardeners often make mistakes that greatly affect the quality of operation and service life of the structure.
Possible mistakes:
- Work without a drawing. If you assemble an arch without a drawing, “by eye,” the result can be very disappointing. To get a beautiful and functional design, it is recommended to choose a suitable drawing or make it yourself.
- Insufficient depth of holes. The metal structure obtained at the end of the work is quite heavy. Therefore, if the depth of the grooves is not sufficient, the arch may tilt or completely fall.
- Use of raw material. If you do not treat the arch parts with an anti-corrosion coating and paint them, then its service life will be significantly reduced, and rust will look unattractive and ruin the whole appearance.
- Work alone. Due to its heavy weight, it is difficult to assemble such a structure alone. Therefore, at least two people are required to make it.
Arch for grapes
How to care for a plant on a structure?
In order for the arch to be attractive and thick, it is important to provide proper care for grapes grown on the arch:
- Perform annual pruning of the vine, during which old, broken and diseased branches are removed.
- In autumn, remove fallen leaves.
- Tie up young shoots and shoots so that they grow in the right direction.
- Treat grape bushes against diseases and pests.
- Form the number of bunches to reduce the load on the vine.
The design of an arch for grapes must be approached responsibly. The decorative appearance of the arch and how long it will serve you depend on the availability of the drawing, the choice of material and its processing. Choose disease-resistant, cover-free grape varieties. Not only the appearance, but also the volume and quality of the berries depends on the care of the vine.
Location and dimensions of the trellis for grapes
The maximum height of the support column is about 3 m. However, be prepared for the fact that you will have to collect the crop from above on a ladder. So, poles are often selected in such a way that they are only slightly higher than a person’s height: approximately 180-200 cm. Then there will definitely be no problems with picking berries.
As for the location, the traditional option is from north to south. This way the bush will be illuminated best.
The width of planting and installation of support pillars depends on their height and the area where the dacha is located. The further north the site, the wider the rows should be. There is no point in saving money here: dense rows will obscure the sunlight. And this, in turn, has a detrimental effect on the yield and the condition of the plant as a whole.
Instagram @zavodgefest
Instagram @sbt_slavyansk
Useful video
This view shows a gazebo made alone, without assistants or craftsmen. Using this principle, a covered canopy is made using polycarbonate and metal profiles.
The cultivation of vineyards, popular in the Southern regions, is accompanied by the creation of favorable conditions for growing crops. Winegrowers build special supports for growing vines to support them. Viticulture spread widely throughout all regions where decorative forms of the plant began to be grown.
Effectively combining a decorative function, an arch for grapes fits into the garden interior. Unlike simply growing grapes on trellises (specialized stands for supporting the plant during the fruiting period), a grape arch creates pleasant shading on a hot day, both for people and for plants growing nearby.
Before starting the construction of the arch, you should decide on the variety to be grown and carefully select the installation location.
The benefits of growing grapes on a trellis
Among the main advantages of growing grapes on supports are:
- Correct formation of the skeletal basis of bushes from the first years of life and maintaining their certain shape.
- Thanks to the uniform arrangement of grape shoots in the plane of the supports, the vines will not shade each other. The leaf plates receive maximum illumination from the sun's rays.
- Ease of harvesting and the ability to simply care for the cultivated plant.
- Reducing the risk of fungal infections due to sufficient lighting of the bushes with sunlight and proper circulation
The recommended height of trellises is in the range of 100-300 cm
Arch design options
The choice of location for the arch directly depends on the size of the structure. The size of the structure is usually chosen 1 meter above human height. At the same time, the appearance of the site should be harmonious. The arch can be installed at the exit from the site, when approaching the house or along the paths, you can also create a canopy over the gazebo.
The choice of material is based on the further functions of the structure. If you plan to grow decorative grapes, you can use lightweight materials such as plastic. If, however, for the purpose of growing varietal grapes, plastic ceilings are unsuitable; they will bend under the weight of the ripening bunches. In this case, attention should be paid to wooden or metal supports.
Arch for grapes
Wooden beams should be used when choosing varietal grapes that bring a bountiful harvest every season. Erecting a structure from wood is one of the simplest methods. No special skills are required to work with wood. The tree also has a more attractive appearance, looking organically in the garden.
Important! All wooden materials should be treated with stain and moisture-resistant varnish before construction.
To give greater stability, arched supports should be compacted into recesses at least 60 cm deep, while being wrapped in roofing felt to prevent rotting.
Plastic pipes are lightweight, do not rot or corrode, are strong and durable. Important factors are the low cost and lightness of such pipes. However, they can therefore sag under the heavy weight of fruit-bearing vines. To create an arch, it is optimal to use a water pipe with a diameter of 20 mm. When erecting a structure made of plastic pipes, you can do without special equipment such as a welding machine, using glue as a fastening material. This quality makes the material attractive to beginners.
At the dacha, arches made from plastic bottles inserted into each other look interesting. Such arches are used exclusively for decorative purposes or to create shading, since their strength is low.
The use of metal profile pipes with anti-corrosion coating and fittings has a number of advantages. This is high strength, stability, reliability and durability. When constructing an arch from such materials, you should carefully prepare your tools. To fasten the parts together, you will need either a welding machine or mounting bolts inserted into pre-drilled holes. A noticeable point is the high cost of consumables.
Attention! Metal products are heavy; therefore, the structure should not be further burdened with additional elements.
Beginner's Guide
Creating an arch for grapes with your own hands is a creative and interesting process.
Regardless of the choice of material for building a grape arch, the first step to creating it will be to competently draw up a drawing. With self-preparation, you can get a completely unique appearance of the product. It is necessary to accurately measure the installation location and calculate the required amount of materials. You can also use ready-made drawings, in this case there is no question of originality. After drawing up and approving the construction plan, you can begin assembly.
Note! Before work, regardless of the materials chosen, they should be prepared. Treat the wooden beams with stain and varnish. Treat metal pipes and profiles with an anti-corrosion agent.
Having marked the territory, dig holes with the following depth:
- for wooden beams - 100-120 cm, with a diameter 7-10 cm larger than the pillar;
- for metal pipes – 80 cm, diameter 60 cm;
- for plastic pipes – 40-50 cm.
Pour a 10-15 cm thick layer of gravel onto the bottom, then compact it well.
- For wooden posts - treat the bottom with solid oil, wrap tightly with roofing material in 1-2 layers;
- For plastic pipes, pour sand into the cavity to give stability and seal the end with a plug.
Place the support pillars strictly in the center of the formwork and fill it with crushed stone. After this, pour in a liquid concrete solution that can seep between individual pebbles.
At the same time, it is necessary to ensure that all pillars are at the correct level. The uneven installation of the beams should be corrected by driving in pegs and creating tension. If the frame is skewed, make additional stops and insert wedges.
Important information! To create a more reliable foundation, you can raise the pouring level above the soil. To do this, the formwork should be reinforced with steel wire or mesh.
Leave the pipes for 3-4 days to allow the concrete to harden better.
After this period, you can begin to build the top of the arch and install the wire threads. The top serves mainly for the growth of the vine. In this case, a frame is initially created, connected to ready-made supports, which serves as the final stage of installation of the pillars. It is important to check the level of the pillars to avoid distortion of the entire structure.
Final works
As soon as the main part of the arch for grapes is installed with your own hands, you need to think about additional details. In this case we are talking about a rail that will hold the vine. To do this, you can use decorative elements that act as a design.
The frame can be partially covered with roofing material so that the arch can provide shelter from rain and wind. Ondulin, slate or polycarbonate can be used as a covering material. If you are wondering how to make an arch for grapes, then you should also think about what additional work on the interior arrangement may involve. A rather important step in this case is the application of fire and bioprotection agents. But instead, you can use drying oil and coat the surface with varnish.
Peculiarities
A grape arch is a non-permanent lightweight structure made in the form of arched supports, fastened together and fixed at the base. The most complex models are open gazebos, in which the role of walls and roof is played by vines. The choice of structure configuration largely depends on the grape variety that is planned to be grown, as well as on the style in which the site is decorated. So, for heavy varieties, a wooden arch made of solid natural wood is suitable. This design, unlike metal and plastic models, will provide reliable support for fleshy bunches and will look organic with a large amount of green mass.
In addition to wood, reinforcement, profiles and plastic pipes are used to make grape arches. But perhaps the most spectacular and aesthetic arches are made from wrought iron. The choice of material depends on many factors, the main one of which is the functionality of the future structure. If you intend to grow varietal grapes, and the arch will play the role of a vineyard, then wood and metal are suitable as materials for the frame. If the arch is intended to support decorative grapes, you can use plastic and metal rods. Such a structure, entwined with vines, will harmoniously fit into the landscape and, in addition to decorating the site, will provide good shading.
When calculating the height of an arched structure, you must remember that if the arch is located next to the house, it is not recommended to make it too high. Otherwise, the overall composition of the site, the center of which is the house, will be disrupted. The optimal height is considered to be equal to the height of the ceilings of an average apartment, and is 265-280 cm.
If the arch is being erected only to shade the house, then you can get by with a semi-arch, the end of the arc of which will be fixed to the wall or roof.
Wooden structures
Wood is the most popular material for the construction of arches, and is widely used both for the design of grape compositions and as a working support for the vine. Wooden arches fit perfectly into the garden landscape and are a worthy decoration of the yard. The advantages of the material are also its relatively low cost and wide consumer availability. In addition, a wooden structure, unlike, for example, a forged one, can be made with your own hands, without resorting to the services of professional craftsmen. Another advantage of such products is their natural origin. Natural materials add harmony to the garden decoration and look very natural.
The only drawback of wooden arches is their not very long service life, compared to metal and plastic products. However, with proper processing of wood and compliance with construction technology, the service life of the structure can be significantly increased. This will require pre-treatment of wooden blanks with antiseptics and stain, as well as coating with moisture-resistant types of varnish.
Those areas of the structure that will be immersed in the ground should be wrapped in roofing material and buried 60-70 cm. This will prevent rotting of the wood and give the structure greater stability.
In the process of burying wooden supports, compaction of the soil should be done every 10 cm, and the distance between two adjacent elements of the arch should not exceed 60 cm. This applies to both longitudinal and transverse parts of the structure, and helps to avoid sagging of the vine under its own weight. Structurally, wooden arches come in several types.
- Arch gazebo. It is perhaps the most sophisticated and practical structure. It is a decorative building, furnished with items necessary for a good rest. Wicker furniture is often installed inside the gazebo, lighting is provided and decorative items are placed. More expensive buildings are equipped with stoves or barbecue areas. The role of the walls and roof in the gazebo arches is played by the vine, which grows together with other climbing plants. However, only species that are fully compatible with grapes can be planted.
Forging grape leaves and bunches with your own hands
Home page » Do-it-yourself » How to make » Forging grape leaves and bunches with your own hands
Forged grape leaf. Photo by EHK
Floral patterns and ornaments are the most popular motifs used to decorate various metal products. Forged elements of this type include flowers, shoots, leaves, and fruits.
A common technique for decorating and adding originality is the use of bunches and leaves of grapes. The versatility, beauty and variety of forms of such details attracts attention and gives the item sophistication.
Plastic models
When making arches, plastic water pipes are often used. Such designs are characterized by long service life, strength and low weight. In addition, plastic is one of the few materials that is not at risk of corrosion or rotting. Assembling a plastic arch is also not particularly difficult. Due to the presence of a huge number of connecting elements used to form the pipeline, the frame can be given any configuration and size.
You can bend pipes using an electric soldering iron or a gas torch. To prevent kinks, it is recommended to pour dry sand inside the pipe. The structure must be secured in the ground by concreting or forming pillars. In the first case, it is enough to dig a hole, fill it with concrete and insert the lower part of the pipe.
When constructing pillars, it should be remembered that their bases must go into the ground at least 40 cm. The ground part of the pillars is formed by erecting formwork and pouring concrete mixture into it. The arch frame is installed in the solution that has not yet hardened and, until the concrete has hardened, it is leveled using a building level.
After the composition has dried, the ground part of the pillars can be covered with tiles or decorated in any other way.
Metal structures
Metal arches are highly durable and have a long service life. The use of metal profiles in the construction of structures allows the frame to withstand significant weight loads resulting from the impact of heavy grape varieties. In addition to weight, metal arches can withstand wind loads well and are highly resistant to mechanical damage. The disadvantages of metal structures are susceptibility to corrosion and the risk of sagging reinforcement bars.
Making a metal arch is quite simple even if you do not have the skills to use a welding machine. There are several ways to build a structure without using welding. The first stage in the construction of such an arch should be digging holes for supports. Their depth must be at least 50 cm. This requirement is dictated by the large weight of the structure, which requires serious strengthening to ensure stability. After the holes have been dug, it is necessary to pour a concrete solution into them, and, after waiting for the composition to set a little, insert supports into it.
As supports, you can use metal hollow pipes or metal profiles, so that reinforcement can be inserted into them. The cross-sectional diameter of the rods is chosen independently, and depends on the load the frame will experience. If you intend to grow decorative varieties, you can take lighter and thinner reinforcement with a cross-sectional diameter of 12-15 mm, while for large-fruited species you will need rods with a diameter of up to 18 mm. After the concrete has completely hardened and the supports are securely fixed, you can begin installing the reinforcement.
In this case, it is recommended to use two methods:
- the first is that the rods are bent to the desired radius and inserted from above into the support pipes;
- the second method is to drill horizontal holes in the supports and secure the reinforcement in them using wire or bolts.
If fastening is planned to be done using bolts, then the reinforcement must first be riveted and drilled at the ends so that the bolts can be screwed in there. The distance between adjacent rods should be no more than 60 cm.
Upon completion of installation, the structure must be treated with an anti-corrosion compound and painted in the chosen color.
Welded canopy
Making a welded frame for a canopy is a more labor-intensive task than in the previous version.
At the same time, the welded frame has greater strength and durability. For its manufacture, round and square pipes, corners and strips are used. Often frame elements are forged before assembly. The construction of a welded structure is very similar to the production of a wire frame, the difference is that the horizontal lintels are made from a profile and attached to the supports by welding.
Adviсe
Whatever material the arch is built from, you should know that when choosing a place for its construction, the insolation and airflow of the selected area should be taken into account. Grapes are a very sun-loving plant, so it is recommended to place the arched structure in the brightest place in the yard or garden. Care for the vine growing on the arch should be carried out throughout the season.
It is recommended to regularly trim processes growing to the side or redirect them in the right direction. To do this, the technique of tying and pinching is used. Control over the state of the green mass is due to the decorative function of grapes growing on arched structures.
The grape arch is a practical and multifunctional structure, thanks to which you can stylishly decorate your summer cottage, organize a comfortable relaxation area and at the same time provide excellent conditions for the growth and ripening of grapes.
You will learn more about arches for grapes in the following video.