Basic digital markings and diagram
The main thing you need to find out from the seller is which country manufactured the products. The fact is that the accepted norms and standards of Russian and foreign manufacturers differ. For the former, a domestic quality mark is prescribed - GOST 3189-89. It is always observed, this is strictly monitored by supervisory services, since failure to comply with production requirements threatens not only a discrepancy between the order (and it may be a state order) and the final result, but also emergency situations in production.
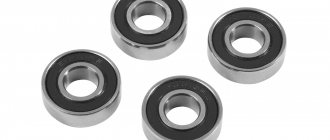
This part is one of the very important components in virtually every device where mechanical rotational movements are important. Significant damage is usually associated with its deformation. Therefore, you can be sure that when you buy bearings with numbering, you can completely rely on it.
First, we will consider domestic products, since they are more accessible and quite reliable, therefore they are used more often. They look something like this:
Y – XXXXXX – Z
Any number has three components:
- Core (X). Located in the center, it represents a database with basic data about the part. Expressed only in numbers. Six characters represent five indicators. There are hyphens on both sides.
- Prefix (Y). From the name it is clear that this is a preposition, that is, there is an identification mark at the very beginning. Can combine various sign systems. Expresses three interrelated meanings.
- Suffix (Z). Completes the combination and contains a lot of information. Consists mainly of letters of the Cyrillic alphabet (according to Russian GOST), but can be specified with numbers.
Here is a diagram with a breakdown of the markings of rolling bearings (its core)
Х(5) ХХ(4) Х(3) 0Х(2) Х(1)
where by numbers we mean:
- hole diameter - about this in more detail below;
- series size, that is, dimensions - multiplied coordinates and their values;
- node type - from 0 to 9, but the entire list below will be presented in the form of a table, because without it it is difficult to remember this classification;
- product design - a lot of codes are given for this category, up to 99 pieces, we will not list them in detail, but we will point out that the full list is in the document GOST 3395-89;
- dimensional category - the very initial number is responsible for a series of widths or heights, highly depends on the radii and cannot always be entered, especially when this indicator is non-standard.
The main difficulties arise when we talk about the size of the inner ring. What if it is larger than 9 mm? After all, only one figure is allocated for this indicator. But what if, on the contrary, the radius is so small that multiplied by 2 it does not even reach the minimum unit to fill the indicated cell of the number? Let's look at it below.
Types of bearings
A bearing is a prefabricated (i.e., consisting of several elements that are connected into one) part that supports another structure in the desired position and ensures its movement.
There are 3 types of bearings commonly used in cars:
- telescopic ones provide linear (in a straight line) movement. Such a part can be found in the supporting struts of the hood or trunk;
- Sliding bearings consist of a cylindrical housing and a liner. To reduce friction, the working surfaces of these parts are polished, and the space between them is filled with a suitable lubricant. Sliding bearings are made from various metal alloys (for example, bronze), polymers and ceramics;
- Rolling bearings in their most general form consist of 2 metal rings inserted into each other, separated by a cage - several polished balls. Depending on the operating conditions, the design of the separator can be very different. So, in some cases several parallel rows of balls are installed, in others rollers are used, in others there is no outer ring, and the balls are pressed into one side of the inner ring, etc. In some models of the device, the space between the inner and outer ring is covered with a polymer gasket (boot) to prevent lubricant from leaking out and foreign objects getting inside the bearing.
Attention! The vast majority of sliding and rolling bearings are not interchangeable. The units in which they are installed are designed for a certain type, direction, rotation speed, load level, temperature conditions, etc. A bearing of a different brand will, at best, quickly break, and at worst, it will lead to serious damage to other components of the car.
Designation system according to GOST
We have provided a detailed explanation about the internal size and symbols of rolling bearings. But in marking ball parts, the 2nd recording position plays an important role - a series of diameters. They are indicated according to the table:
| 0 | zero |
| 7 | ultra-light |
| 8 | ultra-light |
| 9 | especially light |
| 1 | especially light |
| 2 | light |
| 5 | light wide |
| 3 | average |
| 6 | medium wide |
| 4 | heavy |
But if there is no indication of the tire series, then 0 will also appear here. Additional characteristics are indicated by the following signs in this place:
- 7 – non-standard external size;
- 8 – non-classical width;
- 9 – non-normalized radius of the inner circle.
But in addition to the main core, according to GOST requirements, there are also designations given in the extreme right and left parts of the marking of sealed bearings. Let's look at these rules.
What does a caliper look like?
Universal and irreplaceable, tested by more than one generation of home craftsmen, the metric device looks a little like a hammer crossed with a ruler. Before choosing a caliper, you should know the following: there are several modifications, but they all consist of the same set of design features.
- A rod or measuring ruler with a marking scale on it. The standard length is 150 mm, which also determines the maximum measurement value. For measurements with larger values, there are special calipers with a longer measuring ruler.
- The moving part of the caliper is the measuring frame. It moves along the measuring ruler. Due to the spring inside, the frame is pressed tightly against the rod, and a special screw fixes it in the desired position. On the frame itself there is a vernier scale; tenths and hundredths of a millimeter are determined on it.
- The fixed jaws of the caliper are rigidly fixed to the rod. This part is intended for determining external dimensions; its working surface is located inside.
- Movable jaws are located on the other side of the rod and are designed to measure the internal size. The working surface is located outside.
- A retractable bar is rigidly connected to the moving frame, with the help of which the depth is determined.
Additional designations
There are two categories:
- prefix;
- suffix.
Let's start with the console. It is located in front of the digital code and is compiled according to the rules:
- recording starts on the right;
- missing positions are discarded, and if there is absolutely nothing to write in the addition, then there is no need for dashes separating parts of the encoding.
Let's look at the components from right to left:
- Accuracy class. The highest abbreviations include “5”, “4”, “T” and “2”. A little worse – “0”, “6”, “6X”, the rest show that the indicator is very bad. Then the product can be considered low quality. This happens when the ratio of all elements is not precisely adjusted. Since bearings are marked after they are manufactured, if an error is found, a bad prefix is indicated.
- Radial clearance. Classified on a scale from 0 to 9, measured in tenths of a millimeter and shows the distance between the balls, that is, between the rolling elements. Median values are considered optimal. The normal indicator may not appear in any way in the recording.
- Friction moment series. The main, frequently used group includes 1, 4 and 7. The rest must be verified according to the document RD VNIPP.021-01.
- Category A, B or C. The latter is standard, it has no special requirements, so it is often not even indicated. But if you are dealing with A or B, then there will be digital values next to them indicating the class.
On the right, in the suffix, there is optional but important information about additional instructions. It is usually needed by those who deal with non-standard models. Indicated in Cyrillic letters. The request can be made in a whole system of standardized lists: GOSTs 5721, 24696, 24850 and 7872.
Bearing parameters
In addition to their design, bearings differ in:
- landing dimensions. For rolling and sliding bearings this is the internal, external diameter and width;
Attention! If you use a bearing of the wrong size, the corresponding part of the unit will not move, or play, vibration, or extraneous noise will appear, which can cause another malfunction.
- maximum loads. The indicator is calculated separately for the movement and static position of the part. Exceeding the permissible load increases wear or immediately leads to bearing failure;
We measure the dimensions of bearings using a ruler or caliper
- the noise level that accompanies the sliding of the moving parts of the bearing. Determines the comfort and overall experience of using the car;
- accuracy class and vibration level. If the bearing parts are fitted with some play, they vibrate during intense movement. In some cases, this does not matter much, while in others, exceeding a certain level of vibration leads to a decrease in performance or breakdown of the unit;
- type of lubricant. During operation, some units are filled with lubricating fluid, which is not always compatible with certain bearing designs and materials.
Designation of imported bearings - is there a foreign GOST for marking components?
If with domestic products everything is clear and each manufacturing company is obliged to adhere to the established numbering requirements for years, then abroad each manufacturer himself comes up with a system convenient for him. Usually it is less detailed and detailed than in Russia, and also has the following drawback - without detailed instructions, and for a Russian person translated into his native language, nothing is clear. You can trust the seller, but he himself often does not know the smallest details that make up the code.
How to determine the bearing series - instructions
There are four main categories. Extra light (number 1), light (2 or 5), medium (3 or 6) and heavy – 4.
To determine which of them the model belongs to, you should find the core of the marking; it is located between two dashes. If there is no suffix or postfix, then the number may stand alone. There are two situations. If there is a slash, then the indicator we need is the first one to the left of it. If there is no slash, then it is third.
How to find out the hole diameter - instructions
These are the very first (right) numbers of the kernel.
If the entry contains the ending - 0X, then this X is a number from 1 to 9 in millimeters. If the entry is 05X, then X is a rounded number, but not more than 10 mm.
The signs 00, 01, 02 and 02 indicate a range from 10 to 20; the code can be converted into exact values using the table above. If they are followed by 9 (i.e. 900 or 901), then again rounding has occurred.
If there is any two-digit value, it should be multiplied by 5. The rule with “nine” in third place remains appropriate here.
And if there is a slash in the marking, then either this is an exception, or the large diameter is more than 50 centimeters.
How to determine its external dimensions by the bearing number - instructions
This is the last kernel value. It stands on the edge, to the left. These are the dimensions, that is, the multiplied width and height. If the inner ring remains the same, then the outer one increases according to the following markings: 0, 8, 9, 1, 7, 2, 3, 4, 5. The ratio of the values can be determined using the table.
How to find out the number
The easiest way is to use electronic catalogs containing all dozens of values. Numbering is easier to master if you first measure the main parameters - outer and inner radius, width, height.
12-point measurement technique
Use linear dimensions measuring instruments with an accuracy of 2 microns. It is preferable (if possible) to use measuring instruments with an accuracy exceeding 10 times the required tolerance, which will provide a measurement resolution of 0.2 microns.
Measure the shaft at four points, starting at 0° and moving around the circle at 45°, 90° and 135° (see picture below). Repeat the procedure in three different planes in the shaft along the surface mating with the bearing. These three planes should be as equidistant from each other as possible and evenly distributed over the entire length of the contact area between the shaft and the bearing. In any case, the outermost plane must be more than 5 mm away from the edge of the shaft.
Record the obtained data in a data recording table. Make sure all values are entered and measurement angles are correct. After this, calculate the arithmetic mean in each plane.
Estimation of diameter (size)
Comparison of the obtained average values for planes A, B and C with the required tolerances. Each size must be within tolerance. The mating shaft diameter is not in tolerance if at least one of the values lies above or below the tolerance limits.
Ovality (shape) assessment
Also compare the diameter values obtained in each plane at different angles (0°, 45°, 90° and 135°). If any of the diameters is larger or smaller by an amount exceeding half of the tolerance, we can conclude that the shaft has unacceptable ovality.
12-point measurement log
Functionality of bearing selection services
The choice of bearing is carried out according to several parameters. Before going to the store, take all the necessary measurements and determine the installation locations. Here's what information needs to be disclosed:
- rolling type - rollers, balls, sliding;
- shape or type - standard/non-standard, cone-shaped;
- separator type - metal, plastic, brass;
- design - with or without seals;
- number of rows - 1 or 2;
- structural differences - bushing, limiter, collar.
It is also important to know the name of the machine unit in which it is installed. This information will help save search time. For example, in field conditions, when the necessary tool for taking measurements is not at hand, and the element number has worn out.
If the dimensions are known, it is easier to select a bearing. Various online services on the Internet will quickly find the part; just enter known values into the calculator, as well as additional weight (optional). Automatic calculations provide valuable information:
- article number of the required part;
- price;
- variants of analogues and modifications.
The standard interface of an online store selling bearings provides users with 2 or more tools. There must be a calculator - an application that in 5-10 seconds will select the necessary products from a huge assortment (50-100 thousand items) according to technical parameters.
Another useful tool is a cross-cutting table or interactive list. Here the products are presented by serial number, according to geometric dimensions, weight, name, as well as other information in the electronic catalog. The search in this case takes more time, but it finds not only the bearing of the required size, but also its analogues.
If you follow the instructions, all ball bearings in the catalog are scanned in a shorter time:
- first select the type of element for its intended purpose - for example, industrial;
- then in the list that opens, enter the type - roller or spindle;
- indicate brand or sort by size BxdxD;
- go to the specified page, where all the data and a cross-sectional diagram of the product will be presented.
At the bottom of the page there are phone numbers or the ability to enter an online chat. If you don’t have time to search online, call (write) the consultants and get all the information you need.
Popular brands:
BMW X5
How does a digital caliper work?
There are three modifications of calipers, they are divided according to the method of taking dimensions.
- The simplest vernier models can be used for home needs. Integer values are taken from the bar, the fractions are determined by the vernier - these are the basic rules for how to use a vernier caliper.
- The mechanical measuring principle is used in dial models. Through a gear transmission, fractions of a millimeter are transferred from the rod scale to the dial, and whole values are taken from the rod.
- The most convenient and accurate is the digital option, where all results are obtained from the display screen. The electronic part itself can be customized, making it even more convenient to use.
To understand how to use it, you need to understand how a digital caliper works. The work is based on a digital capacitive vernier: inside the device there is a capacitive matrix, several plates, the main ones being the stator and the slider. When taking calculations, they are displayed on the display, the stator is located on a mechanical ruler, and the rotor is located under the display itself.
Pros and cons of using
The design features of parts directly affect their useful properties and disadvantages. Let's look at them separately.
Rolling
Among the undoubted advantages of this type of device are:
- • Low cost. This factor is especially relevant given that in some complex mechanisms up to several hundred support units can be used simultaneously.
- • Low friction does not lead to serious losses and strong heating. And in general, the supports behave equally well both at the start of operation and in an already established stable operating mode.
- • A wide variety does not exclude the interchangeability of parts, and easy installation allows you to make repairs quickly and efficiently.
- • For normal operation, virtually no lubricants are needed.
- • Overall, much less care and attention is required to the parts in which these products are installed.
On the downside, rolling devices are quite susceptible to shock and vibration loads due to their rigid design. This precludes their use in some machines. In terms of their dimensions, the products that provide rocking are large, and the work takes place in quite a lot of noise.
Slip
Among the advantages of use are:
- • Small size.
- • The design can be either detachable or prefabricated.
- • Performance in high-speed mechanisms is significantly better than that of other devices.
- • They are resistant to shock waves and vibrations, which increases the possibility of operation.
- • Works in the most adverse environmental conditions.
Among the disadvantages are:
- • The need for constant monitoring of the lubricant level, since without it the technical characteristics deteriorate significantly.
- • During start-up, large losses occur.
- • Efficiency is lower than in rolling bearings.
- • Expensive raw materials are used for production, which increases the overall price.
- • Components are produced unevenly, which complicates the maintenance of the entire machine as a whole.
You can search for a bearing by size online, but many other key parameters will still have to be determined additionally. With the right choice, you can ensure stable operation of the machine and reduce the need for maintenance. Sometimes it is better to seek help from professionals who will answer your questions and advise which option to choose.
A wide range of assemblies are found in stores and factories. Each of them is designed for its own task, meets a number of requirements, and is also suitable in size for the specified spare parts. In the article we will give a breakdown of the symbols and bearing numbers.
