All auto repair shops use spot welding machines that are involved in eliminating dents, deflections, and other defects on the car body. If you have to repair the geometry frequently, then you need a real spotter, which you can buy or make yourself. Its design includes: two transformers, a diode bridge, a thyristor, a capacitor and other elements. But if you only need to fix a couple of dents, and you don’t want to go to a workshop, then you can make a spotter from a battery. This product will allow you to perform all the work on the car and save money both on your own production and on the cost of repairs.
Briefly about spotters
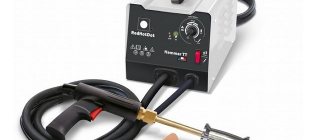
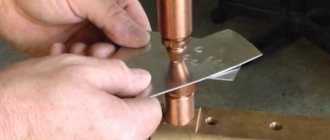
A spotter is a small welding machine, where a point discharge of an electric arc allows you to weld to a section of body iron and pull it back with a back blow to the desired level relative to the general plane of the surface. Such devices are widely used in large service stations and small private workshops.
Any spotter must have a current source that produces a certain voltage for a point discharge, and a working tool with which straightening is directly carried out. Welding from such equipment does not leave deep marks, and after leveling it is easily removed with flap-type grinding wheels on an angle grinder. This way you can correct deformations on: car doors, roof, hood, fenders, trunk, sills. But store-bought copies are as expensive as other full-fledged welding machines. Moreover, their purchase is not advisable for short-term work. Therefore, the solution would be a homemade spotter from a battery and a retractor relay.
Bodywork spotter - what is it?
During body work, it is often necessary to straighten a dent, and there is no access to this area of the body from the reverse side. Using a spotter for body repair, you can avoid expensive car disassembly and fix a dent in half an hour .
Using a contact welding machine, a mounting washer or pin is welded to the surface area requiring repair. You can then pull on it and correct the damage. After straightening, the washers or studs are easily cut off with an angle grinder and sanded. In addition, the device is used for soldering, heating, heat treatment and upsetting of workpieces.
Design and principle of operation
The device includes such main components as:
- current source (inverter or transformer);
- welding wires with connectors;
- pistol grip with start button;
- reverse hammer.
The wires are connected to the workpiece and to the welding gun with an electrode. The welding area is cleaned and degreased, and a mounting washer or pin is placed on it. The “Start” button delivers a short but powerful impulse. The washer and the metal underneath are instantly heated to the melting point and welded together. Next, tie rods are attached to the washer and the damage is corrected.
You can straighten the depression without welding the washer . To do this, use an electrode with a reverse hammer . It is a spring-loaded mass running along a massive electrode rod. The electrode is welded at the end to the site of damage to the housing and the dent is straightened. The sharp tip of the electrode is broken off, the welding area is ground and painted.
Advantages of a battery spotter
By creating a spotter with your own hands, you can get a number of benefits, namely:
- significant cost savings compared to purchasing store-bought equipment or making a version from a transformer;
- speed of assembly, which can be about 30 minutes, if all components are available;
- no electrical engineering skills are required, and all work is done at home;
- the battery spotter will be able to work in places where there is no electricity (in a forest house, on the side of the road, in a common yard);
- with such a device you can perform the same work as a classic spotter;
- Quiet operation due to the absence of a transformer;
- easy transportation to another place.
Schematic diagram of the spotter operation
In order to assemble a spotter for straightening a car with your own hands, you need to understand the existing schemes. First, let's talk about the power supply.
Spotter power supply diagram
The power supply consists of a transformer and a diode bridge. Diodes help charge capacitors C1. After pressing the button, in our case it is marked S3, the capacitor opens the thyristor V9. The thyristor is located diagonally in the bridge, from which the primary winding of transformer T2 is powered. When the thyristor is open, the welding process occurs, and after the capacity has exhausted its charge, the thyristor closes. After releasing button S3, capacitor C1 begins to charge again. The pulse duration is controlled by variable resistor R1. The transformer must be powerful.
Do-it-yourself thyristor circuit with auto start for a spotter
The PTL 50 thyristor can be replaced with a PM 40, as well as a PM 80. You can create another circuit in which a triac is used instead of a PTL 50 that powers the transformer winding. The triac is controlled by an optocoupler, and the diode bridge is replaced with a stabilizer using the LM317 chip. Any power supply that provides at least 10 Volts can be used as a stabilizer. Variable resistor RP1 is installed in the microcircuit wire circuit, and it can be used to adjust the voltage to charge the capacitor. This manipulation regulates the duration of the welding pulse. In case of short welding duration, increase capacity C4.
What you need for assembly
You can assemble your battery spotter in a very short time, but for this you will need to prepare the necessary elements:
- battery;
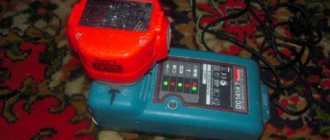
- Charger;
- solenoid relay;
- copper wires;
- reverse hammer.
The first thing you need to find is a suitable battery. The essence of the successful implementation of a homemade project lies in a current source that can initiate an electric arc in a short time and fuse the working element of the gun and body metal. The second indicator of a battery is its capacity. It should be sufficient to perform spotter work for an hour or more. A simple dent cannot be corrected with one weld, so the device must be able to support a cyclic alignment function up to several dozen times.
The most suitable battery models will be with a capacity of 75 amperes per hour or more. This is enough for long-term operation, even if there is no possibility of recharging. Such batteries produce from 500 to 750 amperes. The higher the current, the shorter the time it is necessary to hold the arc for good welding to the body metal. It is advisable to find an old battery, because buying a new one will significantly increase the final cost of the spotter. After active equalization work (short circuit cycle), the battery quickly becomes unusable, which once again emphasizes the importance of finding a used element.
When carrying out geometry restoration work in the garage, a discharged battery can be recharged again. So, you can edit all day and complete a significant amount of work. When leveling the body on the road, the temporary length of operation of the homemade device will be limited by the battery capacity.
What can spotters be made from?
To make a spotter, old welding machines, batteries and even used microwave ovens are used.
DIY spotter from an inverter welding machine
However, most often among home-made devices there is a spotter made from an inverter welding machine - it already has the “stuffing” we need. All that remains is to prepare a transformer to create the required current and make a gun. We discussed in detail above how to modify a transformer. The main thing is to properly prepare and clean the old welding machine and all its elements from dust and rust. For a detailed video on how to make a spotter from a semi-automatic machine with your own hands, watch here:
Making from a microwave - nuances
The diagram and procedure for assembling a spotter from a microwave with your own hands is practically no different from the previous ones. The only thing is that it is necessary to achieve a pulsed operating mode. To do this, you will need a large capacitor with a control system. The pulse time should be minimal - up to 0.5 seconds. Otherwise, instead of resistance welding, there will be a hole in the metal.
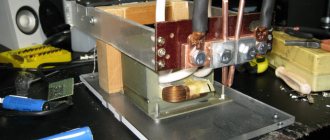
The first stage - we free the most valuable thing for us, this is the transformer, we disassemble it along the welding seam. To do this, you can use a grinder or a hacksaw. It is important not to damage the primary winding, because we will need it later.
This is what your transformer looks like at this stage
Next, we wind the secondary winding with a thick copper cable in two turns.
It looks quite unaesthetic, but this procedure must be carried out
After winding the cable, you need to glue the transformer core and base. To do this, we use regular 2-component epoxy resin.
We choose a wooden base. It must be impregnated with a special composition
After the resin has hardened, you can check the functionality of the weld using special equipment.
After this, all elements can be placed in the housing
Do-it-yourself spotter from a battery - nuances
To correct minor damage to the body, you can make a device based on a battery. This device is convenient because you don’t need to look for a way to connect to an outlet. For manufacturing you will need the following components:
- standard 12 V battery;
- solenoid relay, can be from the car starter;
- on/off button;
- wires with terminals,
- electrode holder.
The design of a battery spotter is quite simple.
To assemble a spotter with your own hands from a battery, any solenoid relay will do.
Connection procedure: place the positive wire of the battery over the solenoid relay. From the place where the starter is hooked up to the relay, throw a one and a half meter cable with a cross section of at least 100 mm² to the gun. With one wire, the gun button is secured to the solenoid relay where the positive battery cable is already installed. Connect the second wire to the relay contact so that it operates. Connect the ground wire to the part to be straightened. The main thing is not to forget to install the electrode.
Connection diagram
For proper operation, the battery and retractor spotter must have the correct connection diagram. It looks like this:
- A terminal leading to the relay body is attached to the negative contact of the battery. The second wire from the same contact goes to the product (car body) and is ground. It is advisable to make all terminals and contact parts from copper tubes, flattened until the lumen is completely pressed. This will ensure minimal resistance.
- The positive contact from the battery is connected by a cable to the relay terminal. This is done with a bolt and washer and nut. The second terminal with the relay is connected to the gun or return hammer. This wire should not be longer than 150 cm, so as not to create additional resistance and not reduce the current strength.
- Another wire from the positive contact of the battery is connected to the control button. The length of the wires to this element does not matter.
The solenoid relay can be used from the vehicle's starter unit. The model doesn't really matter. If you can find a used relay in your own or a friend’s garage, the cost of the final design will drop even more. It is better to secure the battery and relay to one another with tape. Since no housing is provided in such an installation, this will give it integrity and compactness. Naturally, opposite current-carrying parts should not touch. If the internal container becomes clogged, the relay can always be removed and cleaned.
How to make a spotter from a battery and a retractor relay with your own hands
If your activity is, in one way or another, related to correcting the geometry of parts on car bodies, a spotter will be your best assistant in this matter. This machine, which is used for spot welding, will help you return the original condition to such body parts as:
- doors;
- rear or front wing;
- thresholds, arches.
The main advantage of using a spotter for body repair is the ability of the device to level the surface, having access only to its outer part. This allows you to repair any structural part. This device is equipped with a reverse hammer.
The principle of operation of the device is as follows: it is welded to the metal surface of the car and, using a point action, pulls out the metal centimeter by centimeter.
Straightening the body with a homemade spotter from a battery
All work happens quickly and does not require drilling technological holes that are intended for straightening metal. In addition, there is no need to attach additional components to the car body.
If you are a car repair business, you most likely have a large influx of customers. To speed up the work of straightening out dents, you need:
- buy a spotter;
- make it yourself.
Making a spotter with your own hands is quite realistic, using the right diagram.
Moreover, a homemade spotter will be in no way inferior to a purchased one, but it will only cost you several times less. All you need is an old high-power battery.
Battery for a homemade spotter
Required material
You can often hear from familiar car service workers that a battery spotter is in no way inferior to a regular one. It is advisable to take an old battery for it: firstly, you won’t mind it, and secondly, it will operate at a current close to the short circuit current. Of course, the service life of such a product will be shorter than the operation of an ordinary spotter, but the money spent on the purchase will be more than covered by the reduced costs of car repairs.
To make a battery spotter, you will need:
- battery. A model with 75A/h and higher is suitable;
- solenoid relay. Use the component from the car starter;
- battery charger;
- copper wire with a cross-section of more than 100 m2;
- reverse hammer. It can be replaced by a gun that welds washers.
Spotter electrical circuit
The spotter from the battery and the solenoid relay is connected as shown in the diagram, namely:
- the relay body is connected to the negative terminal, as well as a wire no more than 1.5 m long. At the end of the wire there is a contact intended for the body of the part that will be pulled. It is good if you use a copper thread contact to ensure minimal resistance in the place in contact with the part;
- The positive terminal is connected to the relay with your own hands using a bolt. The second bolt from the relay attaches the wire to it that goes to the recoil hammer or gun. The positive cable should not be longer than 2.5 m. This will reduce the voltage drop in the cable;
- From the positive terminal also connect the wire to the control contact. Complete the wire with a button that will control the battery spotter. The length of the conductor for the button is not strictly fixed.
A solenoid relay is installed on the battery to connect multiple contacts. If you have the opportunity, install a detachable relay that you can remove and clean at any time. If the inner part can be pulled out, it needs to be shortened and rolled. This prevents stem loss. This is where all relay transformations end.
In addition, you will need to install a button yourself to control the impulse.
It is mounted either on the wire itself or on the gun. The part is connected from a positively charged wire (in a car, the cable from the ignition switch goes to this contact). There are no specific requirements for the properties of a homemade button - it needs to withstand 5-7 A of current.
Solenoid relay for battery spotter
Also pay attention to the wires. Working with them will be effective when you take a short and thick cable. Its length should be less than 1.5 m and limited by losses in the product itself, because welding is characterized by high currents.
You can even build a gun for welding parts with your own hands from wood, and a holder for washers can be made from brass or copper. You can use an air conditioner tube and make a slit at the end of the small tube. This will make it possible to conveniently insert the washer into place.
Before starting work, charge the battery. Accordingly, after work, put the device back on charge.
Set of consumables for spotter
Advantages and disadvantages
A self-made spotter has the following advantages compared to a purchased analogue:
- low level of costs in the production of the device;
- the ability to make a device at home even if you have no experience working with electronics;
- the ability to work in a place where there are power outages (garage).
Principle of operation
The operation of a homemade spotter based on a rechargeable battery and a pull-in relay is that a charged battery is ready to produce a current of significant power. When the start button is closed, the voltage passes through the channels on the relay, in which an electromagnetic field is created, and the internal core begins to move to the extreme side. This closes the nickels and supplies current to the holding winding. When an electric arc is excited, the core returns to its place and breaks the contact.
In this process, the solenoid relay acts as a microprocessor that regulates the length of the welding pulse. Only in the case of the starter element does this happen more roughly. When the button starts the current and the relay produces a short arc, the copper tip of the reverse hammer is welded to the car body. After performing several blows to pull out the dented part, you need to turn the working tool around to disconnect it from the surface. After which the procedure is repeated until the geometry is completely restored.
Components for a homemade spotter
Of course, such areas of the body can be straightened using a semi-automatic machine, by welding hinges or washers, but in this case thin metal will fall out. On the front part of the straightened area, lumps of deposited metal remain, which then have to be removed for a long time using a grinding machine. Such difficulties can be avoided if you use a spotter (even one you make yourself from a battery will do).
In order not to spend money on purchasing expensive factory equipment, but to make an inexpensive but effective battery spotter, you will need the following components:
- power source – battery;
- pull-in type relay;
- power button;
- connecting wires;
- interchangeable attachments, lifter, reverse hammer and a number of other devices.
Diagram of a spotter consisting of a battery and a pull-in relay
The battery for a homemade spotter must have a capacity of at least 60 Ah. To do this, you can even use an old device that can no longer cope with starting the car. In general, the higher the battery capacity, the more efficient your spotter will work.
The solenoid relay, which must be removable, is necessary to ensure that a current pulse is supplied to the electrode when the power button is pressed. As such an element, you can use a relay from a car starter (for example, from a VAZ). Such a device must be collapsible so that nickels can be cleaned in it regularly. Before equipping your spotter with such a relay, you need to disassemble it and shorten its internal part. Then you need to roll the inside of the relay, paying attention that the rod does not fly out of it. After this, the solenoid relay for your spotter is ready for use.
The button that controls the supply of a pulse to the electrode of the device can be installed on the gun or fixed on the cable. As for the handle for the spotter, you can also make it yourself by cutting it out of thick plywood. Such a handle will be convenient to manipulate while performing work.
» data-lazy-type=»iframe» src=»data:image/gif;base64,R0lGODlhAQABAIAAAAAAAP///yH5BAEAAAAALAAAAAABAAEAAAIBRAA7″>
The button is connected to a circuit that connects the positive contact of the battery to the control contact of the solenoid relay. For information: in a car, such a contact is connected to the ignition switch. When choosing a button for a homemade spotter, it is important to pay attention to the fact that it can withstand a current of up to 5–7 A.
Features of operating a battery spotter and safety measures
When working, you must remember that shock loads are detrimental to the battery. The moment the nozzle sticks to the metal, a short circuit actually occurs. The current flowing through the battery can reach 1000-1500 amperes. A typical starter battery with a capacity of 60 A/h is designed for a current of no more than 500-600 amperes.
Consequently, the battery plates overheat and sulfation occurs. In addition, the electrolyte may boil due to excessive currents. Therefore, during intensive work, it is necessary to take breaks to cool the battery. Periodically monitor the battery temperature and residual charge voltage.
IMPORTANT! The maximum permissible minimum voltage on a lead battery is 10.5 volts.
When this level decreases, irreversible plate degradation processes occur in the battery. Therefore, before starting work, the battery must be fully charged.
For control, it is advisable to equip the battery with a voltmeter to monitor the voltage during operation. As you approach the maximum permissible value, the battery should be charged. The use of fuses in this design is impractical due to high operating currents.
Therefore, the operator must ensure fire safety in the workplace. When the contacts are closed for a long time, the working cable can heat up to the point where the insulation ignites. In addition, if high currents flow for a long time, the battery case may burst, which will lead to leakage and splashing of the electrolyte.
Prolonged “burning” of contacts to the surface of the workpiece leads to damage to the metal, right down to the through hole, as well as fire to the paintwork. Tackling should be done in short impulses, no more than 1 second.

