All types of work with wood or other materials are in one way or another connected with the process of cutting them to specified sizes and contours. Carrying out these steps manually is tedious and unproductive work, so various mechanized devices have been created to make this procedure easier.
Initially, only large stationary machines were created that were capable of cutting large objects - logs, stones. Later, devices were developed to make it easier to work with small fragments of building or finishing material. Finally, hand-held power tools were developed, which significantly changed the approach to work and the productivity of the individual craftsman.
The modern market is replete with similar tools, a bright and unique representative of which is the jigsaw. Let's take a closer look at its features.
What is an electric jigsaw?
Figure 1 – Electric jigsaw.
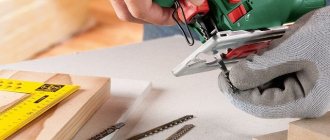
A jigsaw is a hand-held power tool designed for cutting sheet materials or boards along the intended contour.
A special feature of the tool is its focus on curved cuts - it does not require the installation of guides, and control over the direction and accuracy of cutting is carried out exclusively visually.
The use of guides or templates is not excluded, but the main purpose of the tool is precisely cutting curved shapes of complex configurations along both an external and internal closed contour.
The quality and result of the work largely depends on the level of skill and skills of the user.
The design of the jigsaw consists of an electric motor and a crank mechanism installed in a housing with a handle equipped with a start button. Unlike a conventional tool, a jigsaw has a file that is attached at only one end and is held in a given position only due to its own rigidity and elasticity. Outwardly, it resembles an iron, from the working surface of which a file protrudes in a perpendicular direction. The tool is convenient for performing openwork cutting, as it does not require permanent fastening of the second end of the file, which is typical for a regular jigsaw.
Briefly about the jigsaw
The tool is a smaller copy of a power-driven saw. The principle of operation is similar to that of a manual jigsaw, familiar from childhood, - moving the file in a vertical plane. Difference from the analogue, different cutting tool.
One of the critical components is the saw blade fastening mechanism. There are a number of tools on the market equipped with different latches:
- Side threaded clamp. Fastening is carried out by means of a screw that clamps the shank of the file into the slot of the mechanism. It is characterized by ease of installation of the saw blade and reliable fixation.
- Block fastening. Used in inexpensive household-grade tools. The threaded tool is placed in the slot. Fixation is carried out with two screws with an internal hole in the head for a hex key. The main advantage is the ability to work with all types of shanks, different sizes and regardless of the purpose of the file.
- Quick-release mechanism. The most convenient of the presented methods. No additional wrench or tool required.
Jigsaw files: basic recommendations for selection and operation
The skill and skill of the user are worthless if an unusable file is installed on the jigsaw. A properly selected cutting tool ensures high cleanliness and speed of processing, allowing you to saw materials with maximum accuracy and without errors. With regular and intensive work, the file wears out quite quickly, so the retail chain has a huge selection of different types and types of cutting tools.
They are distinguished by several characteristics:
- shank type;
- tooth pitch and size;
- purpose (type of material to be cut);
- canvas length.
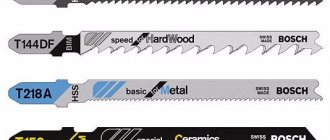
Figure 2 – Jigsaw files.
There are 4 common types of shank, which are designated by corresponding letters:
- T is the most common T-shaped (or, otherwise, cross-shaped) shank type. May have one or two stops (European type);
- U is a straight shank with a recess (notch) at the end. It is otherwise called “American shank” because this type of file is made for tools made in the USA;
- M - shank for Makita files;
- F - jigsaw file from Fein.
The shank type is the first letter of the standard file marking. This is followed by the length in millimeters. It can range from 50 to 150 mm, after which the size of the teeth is indicated, which is marked with the Latin letters A, B, C or D (in ascending order). The last letter indicates additional information:
- F - bimetallic sheet;
- O - narrow rear part of the blade, convenient for cutting out curved shapes with a small turning radius;
- P - precise cut;
- X - progressive distance between teeth;
- R - reverse shaped teeth.
Important! The above classification is common, but not mandatory. Some manufacturers use their own labeling system. Other designations are also possible indicating the metal of the blade or the material to be processed.
The selection of the most suitable file is made based on the results of the analysis of the material being processed and the expected results. Experienced craftsmen are guided by the type of teeth - the finer they are, the cleaner the cut will be and the denser the material available to them. In addition, the nature of the edge will be influenced by the size of the divorce - the larger it is, the stronger the edges will be chipped.
How to insert a file into a jigsaw
Over more than 30 years of active existence on the tool market, the electric jigsaw has undergone many changes, which have not spared the clamping structure. Modern and outdated models of devices have an identical structure but enormous differences in details. Today, the fastening of a file in a jigsaw can be presented in 3 variations: block, screw and quick-clamping. The first 2 types can be classified into one group, and the last one can be divided into 3 common mechanisms. Let's figure out what each type of fastening is and how to use it.
One of the most common types of saw blade clamps. It consists of a block and two screws that tighten it to the movable rod. One of the advantages of this element is its versatility. The screws for fastening the jigsaw file have a decent tightening reserve, which allows you to install blades with different types of shanks into the device. A negative point when using such a clamp may be the skew of the file during installation, which can complicate the work and cause the tool to break.
Replacing a file in a block mount is quite simple. The screw heads are usually sharpened to fit a small hexagon, which comes with the device and is located on the body or cable. First of all, you need to loosen the screws one by one (without unscrewing completely) and remove the old file. When the fastening element is free, insert a new saw blade into it (teeth first) and alternately, evenly tighten the bolts. It is better to twist it smoothly, half a turn once, and the same for the second. When doing this, make sure that the file is at an angle of exactly 90° relative to the jigsaw sole. Having tightened the canvas with sufficient force, you can begin to work.
Attaching the file
Figure 3 – Attaching the file.
There are two options for attaching the file:
- auto;
- manual.
Automatic clamping is easier to operate and does not require the use of additional tools.
Usually it is a ring with a lever mounted on the jigsaw rod.
By pressing the lever, the ring rotates and the clamp is loosened; when the lever is released, the clamp is locked again with force.
Automatic clamps are convenient to use, but they often fail and require replacement.
The manual clamp is simpler in design. The file is fixed in the socket using a regular bolt. A hex wrench is usually included in the package. The installation process is a little more complicated, but not so much that all users will prefer tools with automatic clamps.
Installing a blade into a jigsaw machine
When cutting on a stationary jigsaw tool, thin files with pins at the ends, similar to blades for a manual jigsaw, are suitable. Rarely, there is an adapter function for working with blades without pins. If you find it difficult to install the blade into a stationary jigsaw, we offer our guide below.
The advantage of pin files is their ease of installation, when you do not need to unscrew or tighten the clamps. In any type of jigsaw there are specific recesses in which the ends of the file are fixed. First install the blade in the lower fastening element, then in the upper one. The teeth of the installed saw blade should point downwards and point towards the operator. If the cutting side is installed correctly, you need to tighten it using a special lever located on the opposite side of the device, on top. To check the tension, lightly click on the file with your fingernail, like you would on a guitar string. A specific click will make it clear that the device is ready for use.
The installation of blades without pins in each jigsaw machine is implemented differently, but everywhere, without exception, it goes through adapters. First you need to tighten the tails of the saw into the adapter, then fix the assembled structure in the fasteners of the machine.
How to change and install the canvas correctly?
The saw blade must be changed periodically. This can be caused by its failure, the need to change the type of file, and other considerations. The replacement procedure is not difficult at all, but for novice craftsmen it will be useful to once again clarify the procedure:
- Loosen the clamping screw using the supplied hex key.
- Remove the file.
- Insert/pull the new blade into the socket, teeth first.
- Secure the blade with a clamping key.
To install a file using an automatic clamp, you simply loosen the grip by pressing the lever in the appropriate direction, remove the file, insert another one and turn the lever again. There is no fundamental difference in the procedure.
Most craftsmen prefer to use tools with a hand clamp. To store the key, there is a plastic socket on the wire, allowing you to always have the key at hand. If the clamping screw fails, installing a new one will be without problems, and if the thread wears out, you can cut another one and continue to use the tool.
With automatic clamping, as a rule, there are continuous problems - the workshops do not have replacement parts, and there is nowhere to order a ready-made unit or it is out of production. Therefore, it is recommended to choose a jigsaw with a manual clamp - it will allow you to work with the tool for a long time (for example, Bison or Makita).
Attention! When changing the blade, you must disconnect the tool from the power supply to avoid accidental starting of the engine and serious injury.
Inserting a blade into a manual jigsaw
We have already said above that the simplest and most cost-effective type of jigsaw is a manual one; in addition, it is much less hassle than its modern competitor, a jigsaw.
To quickly complete the task and not waste time, let's figure out how to properly install a file in a manual jigsaw. First, pay attention to the location of the file at the fastening points. The tails of the file must be clamped not at the edge or behind the screw, but 1-2 mm in front of it. It is worth noting for yourself that the teeth of the blade are always directed towards the handle, since sawing occurs when the tool moves downwards.
Fix the edge of the file to the handle. Next you need to lightly squeeze the edges of the arc and tighten the other end of the fabric in the opposite fastening. To do this, rest the jigsaw against the edge of the workbench and press it with your chest. At the same time, insert the blade into the recesses with one hand, and tighten the thumb fastening with the other. If the size of the fasteners does not allow them to be securely fixed by hand, lightly tighten them with pliers. We recommend calculating the force in advance so as not to break the thread.
For jigsaws with a tubular arc, there is a special device, which, in most cases, is part of the sawing table. This product consists of two round holes located on the edge of the board. The tool is inserted into the recesses, after which the file is tightened in the clamps without any problems.
How to extend blade life?
The main way to extend the service life of the canvas is to use it strictly for its intended purpose and in normal mode. The purpose of the file is marked with a corresponding inscription on the side surface. It is not recommended to saw materials that are too thick. This is especially true for raw wood, which jams and overheats the blade, causing it to quickly become dull. Some users, in an effort to optimize work, combine several sheets of chipboard into a pack and saw them at a time. This also places excessive stress on the blade, leading to overheating and failure.
It is important to use the pendulum mechanism correctly. If the sawing process is too slow and slow, you need to look at the position of the rod pendulum. There are usually three positions in total, the minimum provides a clean cut, and the maximum provides the greatest efficiency. If the pendulum is turned on when cutting soft or fragile materials, the cut line will be sloppy and shaggy. At the same time, when sawing hard and dense wood or thick chipboard, the pendulum will help maintain the sharpening of the teeth and limit excessive heating of the tool.
Sawing
How to use a hand jigsaw
In this lesson we will show you the basics of working with a regular hand jigsaw. Of course, there are also electric jigsaws, but they cost a lot of money, and working with them is a pursuit of speed, and not a calm, moderate creation of beauty.
For work we will need: a hand jigsaw, a file, a table stand, a clamp for attaching the stand to the table, an awl, a pencil, two paper clips, a sheet of tracing paper, a sheet of copy paper, sandpaper and of course a piece of plywood of the required size. We will cut out a Christmas tree; in this work, in addition to the cutting technique, we will also master the technique of assembling plywood parts into a three-dimensional Christmas tree shape and the easiest way to finish the finished product, using ordinary watercolor paint.
The size of the plywood should correspond to the pattern you have chosen; try to arrange the cut parts more compactly, closer to each other, since everything that remains after cutting, as a rule, can no longer be used in further work due to its fragility. And so we clean the selected piece of plywood with sandpaper, trying to move it along the fibers, since transverse scratches will be very visible on the finished product and are very difficult to remove later, and the treated plywood looks velvety and soft.
The sandpaper should be medium-grit to reduce scratching of the plywood.
Secure the sheet of tracing paper and the drawing using clamps, then use a pencil to copy the drawing onto the tracing paper. This operation is necessary in order not to damage the original drawing when transferring it to plywood.
It should be noted right away that with the current level of distribution and availability of copying machines, for large-scale and complex drawings, it is good to use a copying machine for cutting and the required drawing simply needs to be copied onto a blank sheet of paper and then transferred from there to the plywood. The advantage of this method is that it is quite easy to enlarge or reduce the pattern chosen for work. We put tracing paper with a design on the plywood and use a pencil to transfer it through carbon paper to the front side of it.
Having transferred the entire drawing to plywood, we carefully check whether all the lines of the drawing are clearly visible on the plywood.
At the next stage, it is very important to check the future joints of the herringbone parts. To do this, a piece of plywood of the same thickness as we are using needs to be attached to the drawn groove of the Christmas tree part and make sure that it fits exactly within the drawn boundaries. If the dimensions of the groove and the thickness of the plywood do not match, the width of the groove is adjusted - it is drawn equal to the thickness of the plywood used. Otherwise, when assembling finished parts, they will hang out or simply not fit into each other. This way all grooves in all part drawings are checked.
We take the stand and insert its clamp into the central hole.
We fasten the stand with a clamp to the edge of a table, window sill or workbench.
If your file is not inserted into the jigsaw, then we do this in the following sequence. We loosen the thumb of the lower clamp of the jigsaw (after turning the handle down to the working position). Insert the file into the lower clamp.
The direction of the saw teeth should be as in figure “b” - this is very important.
Then, having loosened the knob of the upper clamp, insert the upper end of the file into it and placing the jigsaw on the stand, press it firmly and screw the knob tightly. The file should be taut. But excessively strong tension can lead to breakage of the file when cutting shapes, and weak tension on the file will also lead to the same. So everything should be in moderation.
The position of the body when cutting should be as in the figure.
When cutting with a jigsaw, you need to smoothly move your hand up and down, up and down, monitoring the position of the file so that it does not tilt from the vertical position. When cutting along a curved line, turn the plywood rather than the jigsaw during the sawing process - this will reduce the likelihood of breaking the file.
When cutting sharp corners, make movements of the saw in place, gradually turning the plywood.
You should have a free space - a hole in which the file will turn, now continue sawing in the desired direction.
Make free space for turning the saw on the part of the plywood that will be thrown away and you will get sharp corners without much difficulty.
After you have cut out the entire outline of the design, the sawn part will be freely removed from the plywood.
Now, in order not to break the file, insert it into the cut from which you started cutting out the part and smoothly moving the jigsaw up and down, but only pull it out of the plywood with the back of the file.
Similarly, cut out the second part of the Christmas tree.
Sand the resulting parts with sandpaper.
Now we have two Christmas tree parts ready for assembly.
We collect them into one structure.
Now let's paint the Christmas tree with watercolors or gouache.
Our Christmas tree is ready.
And at the end of the lesson, we will show you the sequence of cutting out internal holes in parts. Let's say we need to cut out part of a circle.
In the middle of the part to be removed, use an awl to make a hole. Do not try to make the hole close to the drawn line, this may cause the plywood to chip, which will be quite unsightly.
Having loosened the upper clamp of the jigsaw and freed the file, we insert its upper end from below into the punctured hole.
We clamp the file into the upper clamp of the jigsaw and cut out the part of the pattern to be removed.
Then release the file from the upper clamp again. And we repeat this operation with each internal hole in the pattern.
The Christmas tree turned out to be stable and quite strong; for greater stability, the joining parts of the parts can be coated with some kind of glue that does not leave marks on the wood - this is PVA, carpentry or casein glue.
Classification of jigsaw files by type of material being processed
Initially, when jigsaws were not yet electric, this equipment was used only for wood processing. But modern devices allow you to cut metal, plastic and any type of wood surface. Therefore, before purchasing a jigsaw (Bosch, Makita or similar models), you need to decide on the material to be processed. After all, depending on the purpose, you will have to look for a specific cutting blade.
For wood and wood materials
Files for wood processing are divided into several groups:
- Quick cut Sometimes the quality of processing of wood material is not as important as the speed of the process itself. For such work, a long blade (from 60 mm) with large teeth (up to 6 mm) is suitable. If the master is going to make a longitudinal cut, then it is advisable to buy files with oblique teeth. And for a cross cut, a straight “tooth” is used.
- Clean cut (average tooth size not exceeding 3 mm, as well as a slight gap). Such files are usually used in furniture assembly plants.
- Figured cut. It is difficult to make a curved cut with a small radius, so special shaped files are used that have a very narrow blade, not exceeding 4 mm. The canvas is also characterized by small teeth (up to 2 mm) and short length (40 mm).
Important! If you choose the wrong file, there is a risk of overheating the motor of the jigsaw (models Dexter, Whirlwind and others).
For metal
Cutting metal is not the most obvious solution when working with a jigsaw, but this is possible thanks to a special blade. But, it should be borne in mind that the process will be very slow, and you will have to change a lot of files, as they become dull.
Experts recommend keeping three types of metal cutters with you at once if the master often works with this material:
- for aluminum;
- for non-ferrous metals;
- for steel.
If these blades are rarely used, you don’t have to spend money on buying additional ones, but choose only one - for processing steel. It will cope with non-ferrous metals and aluminum, but will become dull very quickly.
Attention! Metal files are made of durable steel; they have very small teeth (up to 1 mm), which are arranged in a wave-like manner.
Types of jigsaw blades
For polymer materials
To process PVC pipes or other similar materials, it is necessary to use blades with large teeth. Small ones will also work, but you will have to use the maximum speed of the jigsaw, otherwise the melted plastic will begin to clog the cutter.
If you have to work with thin sheets of plastic or plexiglass, experts advise using blades for metal processing. To cut thick plastic, you can take wood saws, but work at low speeds.
For specific tasks
There are special blades for processing ceramics and glass. They are coated with diamond coating or tungsten carbide.
It is advisable to use an electric jigsaw (Dexter, Diold and other models) for processing ceramic tiles or glass only if it is necessary to make very complex shaped elements. For straight cuts, it is advisable to use tools designed specifically for this purpose.
When sawing cement or plaster with a jigsaw, you will have to buy special files with carbide tips on the cutting edge.
In stores you can also find files that are suitable for processing rubber, cardboard and other soft materials. There are practically no teeth on them, and the cutting edge is a polished wave.
Universal
These types of blades are made from high-speed steel. They are suitable for processing different materials: plastic, wood, metal.
You shouldn’t expect high-quality cuts from such tools precisely because of their versatility - a specific material requires the use of a special blade (this is the key to a high-quality cut).
