A number of measuring instruments include a laser level. This is a modern device that can quickly and, most importantly, accurately project planes. Now builders and craftsmen do not need to carry rulers and levels to mark a plane on the surface of a wall, ceiling or floor. Just before you pick up a measuring device, you need to figure out how to use a laser level correctly. To learn this, you do not need to undergo additional training in construction, since even a beginner can master the use of the tool.
What is the level for?
If anyone doesn’t know, a level is a synonym for a laser level. The material is specifically about a laser level, since there are also optical devices. The tool itself is designed to implement the following tasks:
- Alignment of walls
- Laying tiles and tiles on walls and floors
- Installation of windows and interior doors
- Hang a picture, shelf or furniture on the wall evenly
- Align wall-mounted outlets and switches
The use of a laser level is quite wide, and it is in demand not only among builders and craftsmen. If you plan to renovate a house or apartment, then without such a tool it will be difficult to cover the walls with plasterboard or plaster them evenly. In scientific terms, a level is a device that detects and records the exact location of different objects in height. The main task is to measure the difference in height between the marks of the future structure.
Many experienced builders do not understand why a laser level is needed until they try the tool in action. After all, an alternative option for leveling surfaces, which is used not only by home craftsmen, but also by experienced specialists, is a water level. However, such a tool has large errors and also requires a lot of time to cut a plane on the surface. The level does not have such disadvantages, so it is simply necessary for those who build, repair, lay tiles and lay communications.
This is interesting!
The disadvantage of levels is their high cost; only such financial costs are paid off very quickly, for example, by high-quality and fast repairs or construction of a house.
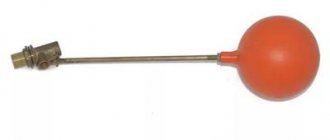
Measuring rod
This device is used to mark several parallel lines at a constant pitch. This need arises when laying tiles, ceramic or plastic tiles. Using the rack, you can also raise or lower the device mounted on a tripod by a certain amount.
For a deeper understanding of how to use a laser level, it will be useful to consider them using a specific example. Let it be laying laminate flooring in one of the rooms. For high-quality installation, you need to prepare an absolutely flat floor surface. To solve this problem using a laser level, you should:
- Unfold the tripod, place it in the middle of the room and secure the device to it.
- Align the device relative to the ground using the bubble level indicators.
- Turn on the laser pointer and mark horizontal lines on the wall of the room using a tapping cord. Before doing this, the cord must be impregnated with dry blue or chalk.
- Rotate the device 90° and repeat the operation for all walls.
Measuring rod
If you have a rotary level, it is even more convenient to use: for the last operation you do not need to turn it around, it can produce all four lines from one position.
Now we have level markings on all the walls. You can start pouring the leveling solution and, based on the markings, achieve a perfectly flat surface of the screed under the laminate.
Where to start using the tool - preparation for work
The accuracy of the device's readings depends on its correct installation. The level must be leveled by placing it in a vertical position, and only after that can you begin leveling. To level the device, its design includes a special tripod, presented in the form of a tripod. Each leg of the tripod has the ability to be adjusted - it is implemented through sliding sliders, so there are no difficulties with leveling the laser level.
This is interesting!
Expensive models of laser levels have a built-in option for self-leveling or self-adjustment.
This is achieved due to the fact that the device is fixed at one point, and with deviations of up to 5 degrees, self-leveling is performed. For this purpose, the instrument mechanism is equipped with a gyroscope. You can make sure that the device is installed correctly by looking for air bubbles in the water flask. These are similar flasks that are used in water levels to detect deviations from a flat plane. Once the device is installed, you can begin to use it. If you use an expensive laser level equipped with a self-leveling option, then the instructions for setting it up are slightly different:
- Level the device using a tripod
- Turn it on and wait until additional adjustment or adjustment occurs, which ensures high accuracy of readings
- When self-leveling, the level emits corresponding signals (flashing or beeping), and as soon as they stop, the device is ready for use
- If the level cannot perform the self-adjustment option for a long time, this means that the deviation angle is more than 5 degrees, and it is necessary to make more precise adjustments to the tripod
If measurements are carried out in an open area and the device is installed on the ground, then the legs of the tripod should be firmly fixed in the ground. To do this, each leg has special protrusions for digging them in. The device is connected to the tripod using a special threaded connection. If the diameters of the threaded connections on the instrument body and the tripod are different, then you need to use an adapter.
What to do before starting work
Before you start using the device, you must clearly understand what type of laser levels you will be working with. Although if you bought this device yourself, then you should have known about it at the stage of choosing a laser level.
All laser levels can be divided into:
Static line builders (other names are crossliner or multiprism builder).
Rotary line builders (other names: multi-prism line builder, level).
Static axis builders (other names: pointer, point laser).
In principle, most manufacturers write in the instructions (usually included in the kit) how to prepare the device for operation. As a rule, no special “dancing with a tambourine” is required - everything is simple and clear.
- If the level model is a battery type, then before using it you need to charge the battery.
- If the device runs on batteries, then insert them into the power compartment.
- We check the functionality of the level by turning it on. If a laser beam appears, then everything is in order. You can begin installing the device.
Checking the device for correct installation
Much depends on the accuracy of the measurement results carried out by the device. If the plane for laying tiles is knocked off, then the evenness of the installation of the tool will affect the interior design. If the plane is checked during the construction of a house, then the installation of the level will affect the quality of construction and the reliability of this structure.
Each device (depending on the model and its cost) has corresponding error indicators. The permissible error values are indicated directly in the instructions for the equipment, which should be taken into account when purchasing a tool. Acceptable error values are indicated in the appropriate units of measurement, which are mm/m. Errors are not so important when using the device indoors, but they are extremely necessary when carrying out external work on beating a plane and leveling walls.
The error is one of the main technical parameters of the instrument, and some manufacturers indicate the magnitude of deviations not only in the technical documentation, but also on the body of the device. If the magnitude of the error is known, then the permissible deviation from the norm can be calculated. If the deviation value is higher than permissible, it is recommended to use a level with a smaller error value.
It doesn't matter if the laser level is being used to level a floor, wall or ceiling, but before taking the corresponding measurements, you will need to check the accuracy. The check is quite simple, for which the following steps are performed:
- First you need to put marks on two parallel walls in the room, according to which the check will be carried out
- One mark is placed on the wall that is closer to the device (at a distance of up to 1 meter)
- The second mark is placed on the opposite wall, located at a distance of more than 2 meters. The further the distance between the walls, the more accurately device deviations can be identified
- After marking with a marker or pencil on the wall, you need to move the level directly to the wall, which was further from the level
- Align the directional laser beam with the point that was marked. Then project the beam onto the opposite side and see if it matches the mark
- If it matches, then the instrument has an insignificant error (note that the greater the distance between the walls, the higher the error, and the smaller the gap between them, the correspondingly lower the error)
- If the laser beam does not coincide with the mark, then there is an error, and its magnitude is quite high. There are special adjustment screws in the device body, which also allow you to adjust the level, reducing deviations from the norm
Before using a laser level to level walls, you need to make sure that there are no large deviations, otherwise the indicators will not correspond to reality. Below is a video instruction and training on how to properly check the level for measurement accuracy.
Additional options and features
In addition to the main parameters, there are also some additional ones. They make things easier, so it's more about usability. After all, additional functions affect the final result only indirectly or partially.
Self-leveling
In order for the measurements to be correct, the level must be installed vertically upward. In simple models, their position is checked with simpler devices, usually a bubble level. In some models it is built into the body, in others it is not. Then you have to resort to ordinary construction, which is not entirely convenient. In addition, incorrect readings are possible - if during operation it changes position and you do not see it, the work will be performed incorrectly. To avoid such a situation, you have to double-check the position of the device several times.
Self-leveling (self-compensation of a small angle of inclination)
Some laser levels have a self-leveling or self-leveling feature. When deviating from the vertical by a small angle (usually up to 4°), they adjust the position of the mirrors and prisms so that all readings are correct. If the tilt exceeds the maximum permissible, they either make a sound/give a light signal, or turn off the beams. Operation is restored when returning to normal.
Having a laser level with this function makes it easy to set up the device at the very beginning of work. Also, during its use, you don’t have to worry that it has changed position - it will give a signal.
However, sometimes the level needs to be set at a certain angle. The presence of a self-leveling function will not allow this to be done. Therefore, it is advisable to purchase a model in which this function can be blocked.
Self-shutdown
This function allows you to save battery power. If the device does not move for 10-15 minutes, it turns off. On the one hand, this is useful, on the other hand, some jobs require more than 15 minutes and shutting down can be annoying. Whether you need this feature or not is up to you.
Automatic shutdown is not always good
Operating temperature
If you plan to work in the warm season or only indoors, the temperature does not matter. Basically, a laser level can be operated at temperatures from +5°C to +40°C, that is, they are only suitable for heated rooms or work in the warm season.
Most laser levels are designed to work in a heated room
If you need to choose a laser level for working outdoors with the possibility of operation in the cold season, there are “frost-resistant” models that can withstand temperatures down to -10°C. Even more frost-resistant ones must be looked for specifically; there are very few of them.
Mounting type
In addition to the standard installation of the laser level on a horizontal plane, there may be several additional options for mounting it:
On a special tripod. Most often needed for outdoor work, but some work (drawing horizontal lines on walls when hanging furniture, for example) is also easier to do with a tripod. A tripod is sometimes included, sometimes purchased separately
When purchasing, pay attention to the diameter of the thread on the body of the level - the tripod must have the same one. On magnets. Magnets are soldered into the body of some models
This makes it possible to attach it to any metal surface/part. The type of fastening affects the ease of use. On a special magnetic stand. Some models of laser levels come with a small plastic pad into which magnets are soldered. A platform is installed on a metal surface, and a level is placed on it. Self-tapping screw/nail. A special hole is made in the body of the level into which the head of a nail or self-tapping screw is threaded. Not the most convenient way of fastening, but still.
Everything is clear with these options. You can, of course, do without them, come up with your own way. These are simply opportunities for more comfortable operation.
Shockproof housing and the possibility of self-adjustment (adjustment)
It is very useful if the laser level has a shockproof housing. Construction or repair is a high-risk area for any tool, so it often falls. If the case is shockproof, there is a high probability that even after a fall it will survive.
A shockproof case wouldn't hurt
If dropped or carelessly transported, the level's settings may be lost and it may begin to lie. To eliminate this “phenomenon”, some devices provide the ability to independently configure
For this you will need to carry out certain manipulations described in the instructions.
How to use a laser level, learning how to work
If you manage to install and check the accuracy of the tool, then using it to level the surface of the walls will not be difficult. How to operate this device correctly is indicated in the instructions. However, few people read the instructions, and refer to them only after discrepancies arise. Working with a laser level should be carried out in a calm environment, since this device is the foundation for subsequent actions. If possible, ask someone with experience to advise you, or better yet, show you how to use a laser level correctly. If this is not possible, then training is carried out independently.
Before using a laser level, you need to know that there are devices that have different functions. Almost all models are capable of building not only horizontal, but also vertical planes. There is also an option such as constructing two parallel vertical planes, however, the more additional functions, the more expensive the tool itself. In addition to the built-in options, additional devices will help expand the functionality and simplify the use of the tool, which are also useful to know about.
This is interesting!
When using a laser level, it will be useful to know that the device has three modes - vertical and horizontal plane construction, as well as a plumb line. A plumb line allows you to project points in two directions - onto the floor and ceiling, which is very convenient when you have to build a partition.
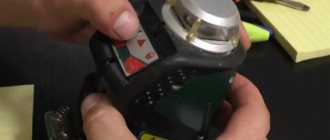
Device setup
The device should be configured in accordance with the user manual. On our budget models, everything will have to be done manually. They feature two separate bubble levels in which an air bubble moves through a viscous liquid in a small transparent tube. There are divisions on the tube. It is necessary, using three adjusting screws, to drive the bubbles onto the central divisions. This will correspond to the horizontal position of the base of the device relative to the surface of the earth. In some models, instead of two tubes, a small round reservoir covered with glass is installed. Concentric circles are marked on it. By rotating the coordinate screws, you need to ensure that the bubble moves under the central circle.
Professional laser level adjustment
Prism-type devices produce both horizontal and vertical lines simultaneously. If one of them is not necessary, such as a horizontal line when checking the verticality of a wall opening, it can be disabled.
Point-type devices, in addition to lines, also indicate reference points in space. The point of greatest elevation is called “zenith”, the opposite point at the bottom is called “nadir”. The display mode of these points is also switchable.
Models operating on the rotational principle have two additional parameters:
- scanning angle;
- beam rotation speed.
A single plane projection is usually available. Advanced devices have the ability to show both axes simultaneously.
Auxiliary options for laser levels
Levels are classified into two types: household and professional. Professional ones are also called construction ones, since they are mainly used in construction, electrical installation and geodesy. When carrying out repair work, household laser levels are used, which differ from their professional counterparts not only in price, but also in additional capabilities. As a rule, household levels have a primitive set of functions that allows them to satisfy the needs of the master when carrying out interior finishing repairs. To expand the functionality of the tool, additional equipment is used:
- A laser beam receiver is a special device that allows you to increase the range of the beam (increase its visibility over long distances). This equipment is very convenient when there is a need to use it outdoors. The receiver allows you to observe the projection of the beam not only over long distances, but also in sunlight. The receiver allows you to double the beam distance. When choosing such equipment, you need to take into account that they work clearly in conjunction with only one manufacturer, for example, Bosch. You also need to know that not all models of laser levels can work with receivers. If this is not possible, then you can increase the beam range using a reflective plate
- The target is another additional accessory that comes with many level models. The target is a plate on which markings are applied. Using such an auxiliary device, you can set the accuracy of measurements. An example of using a target is quite simple - instead of an inconspicuous point on the wall, you need to hang this plate, which is much easier and easier to navigate, especially when the distance is 20-30 meters
- The optical sight is another accessory that allows you to track the range of the beam even at a distance of up to 100 meters
- Rail - used in cases where several parallel lines must be drawn on the surface of a wall or other object, while maintaining the same distance. The staff also measures the height of the level attached to the tripod.
All these auxiliary devices make it easier to manipulate the operating device. Professional models of devices have the option of rotating the laser at an angle of 360 degrees. Such devices are especially valuable, since with their help you can make a projection not only on one wall, but throughout the entire room, which simplifies marking work. When all the nuances are known, it is necessary to move on to direct training in using laser levels.
Marking the zero floor level
After the horizon level has been marked using a hydraulic level, a conventional or rotary laser, at a height of 1.0-1.5 meters from the existing floors, you can make a zero mark to perform concrete pouring. To do this, in all rooms it is necessary to measure the height from the base to the line previously drawn on the wall.
Where the height is the smallest, you should step back from the surface by 30 mm, measure the distance to the horizon line and remember it. In the corner, measure a reference height from the horizon line and screw a self-tapping screw into the wall. Repeat this operation in another corner. Pull a cord over the screws, which will show the zero level of the floor.
After this, you should check whether there are any places under the tensioned cord where the distance to the floor is less than 30 mm. If such places exist, then an error was made during the work and must be corrected.
How to use the level, instructions and lessons with examples
The capabilities of a laser level are great, and today many craftsmen do not even know what can be done with this device. Most specialists use the tool to perform certain jobs, not realizing that the laser level is also used to implement the following tasks:
- For leveling walls
- To level the floor and foundation
- To level the ceiling
- When plastering walls
- When laying tiles
- When erecting a fence
- When installing switches and sockets
Using the example of all these actions, we will consider how to use the level correctly in order to obtain accurate results.
We set the level
Before starting marking, it is necessary to securely secure the level to avoid its fluctuations or movements. The smallest deviations at a distance of tens of meters can result in meter-long misses.
The following methods of attaching a laser level are usually used:
- On the floor, table, stand and any solid and stable surface
- On a standard tripod. The retractable rail allows you to raise the device to a height of up to three meters.
- On the spacer rod.
- On a flat wall using vacuum suction cups, sticky circles or magnetic holders.
It is not so much the method of fastening that is important, but its reliability and stability.
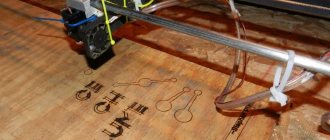
Instructions for use when laying tiles and tiles
When laying tiles on a wall, a laser level is used to ensure that the tiles are positioned strictly at right angles. This depends on the interior design of the room. When laying tiles, the device must be switched to the cross-plane construction mode. At the same time, the level builds two planes - horizontal and vertical, which allows you to immediately install the tiles at a right angle.
Work can be carried out in two ways: with the level turned on, which directs projection rays onto the wall, and also by marking with a mark or pencil. Points are marked along the projection planes of the laser beam with a marker or pencil, and then the tiles are laid on their basis. In a similar way, you can lay tiles not only on the wall, but also on the floor. After turning on the device, it must be aligned parallel to the wall. The center of the cross should be aligned with the seams of the tiles, and the sides of the tiles should be aligned along the guide lines created by the rays.
Tips for working with a hydraulic level
- Water does not move through the hydraulic level tube. In this case, you should rinse the instrument; perhaps there are some stagnant debris there, due to which the liquid does not move through the vessel. You can also blow out the hydraulic level so that unnecessary objects that interfere with the normal functioning of the device come out of it.
- The water is not at the same level. This problem may occur due to the formation of air bubbles. You can get rid of them by knocking on the hydraulic level tube or by re-filling with water under high pressure.
How to use a laser level when wallpapering
The tool is also useful when gluing wallpaper, when it is very difficult to focus on the evenness of the vertical line. In order for each subsequent sheet of wallpaper to be positioned evenly, it is necessary to turn on the laser level in the vertical plane projection mode. You can use this line as a guide when gluing wallpaper. If the wallpaper is glued in a horizontal direction, for example, then the horizontal projection mode is activated.
Using this useful measuring tool, you can check the quality of the work performed by the contractor. To do this, you need to turn on the tool and project the beam onto the wall. Deviations and unevenness in the arrangement of wallpaper sheets will be visible along the reference line. Based on such a check, you can achieve a reduction in the cost of services for the work performed or even come to the conclusion that the wallpaper will be re-glued, but at the expense of the contractor.
This is interesting!
When using the device, you must set it to zero. What does this term mean? Set the level to zero - this means the distance from the ground to the beam that the instrument projects. Setting the zero makes it easier to find the beam, especially when work is carried out outdoors over long distances. If, for example, the level zero point is 1 meter, and after 20 meters measurements show that the projection is at a level of 1.2 meters or 0.8 meters, then there are ground unevennesses. These deviations may be of smaller significance, which are almost impossible to visually identify.
How to set markings for installation of beacons: 2 ways
Before fixing the beacons on the rough wall, you need to mark the surface. Determine its depressions and convexities, and also calculate the blockage of the wall (if any). After the markings have been made, it will be clear how many beacons will be needed for plastering work.
To perform markings, 3 methods are used, differing in their specificity and time spent.
Method I is the usual one.
- Measure 30 cm from the corners of the wall being prepared. 15 cm from the floor and ceiling.
- Using the obtained points, lines are drawn horizontally and vertically.
- At the points where the lines intersect, you need to make a hole and fix the screw.
- From the marked vertical lines the surface is marked into vertical stripes. The distance between them is 1 meter, maximum 130 cm.
- On the extreme vertical stripes you need to find the middle and mark it. Connect the dots. You will get a horizontal stripe in the middle of the plane.
- Next, plumb lines are attached to the upper screws. Also, the self-tapping screws in the corners must be connected diagonally with thread.
This way, all the unevenness on the wall is revealed, as well as the percentage of surface obstruction.
Method II – “spider”. The name comes from its resemblance to a spider's web. To apply markings you need:
- Retreat from adjacent walls 15 cm, and from the floor and ceiling 5 cm.
- Self-tapping screws are fixed at the intersection points of the horizontal and vertical lines. The caps protrude 2 cm above the surface.
- Plumb lines are hung on these screws. They are fixed below. The location is marked and self-tapping screws are also screwed into these places.
- Pull 2 vertical threads.
- Horizontal ropes are tied to these threads; they should move freely up and down.
- By moving the horizontal lines, the unevenness of the wall is affected, they are marked with a marker, and the collapse of the wall is also determined.
When marking vertical lines for beacons, an equal distance is noted from the outermost vertical lines. Let's say 1 meter on one side and the other. The remaining surface is also divided into equal parts of 120.130 cm.
After the markings have been made, the number of required guides for the beacons is calculated. They are cut 30 cm less than the height of the room.
On gypsum putty
Lighthouses are placed in different ways according to markings. One of them is gypsum putty. This method is used most often due to the ease of dismantling the profiles after creating a single plane.
Materials and tools
To attach the guides to the solution you will need:
- guides - beacon profiles;
- gypsum putty;
- clean water at room temperature;
- container for mixing the solution;
- construction mixer;
- trowel, spatula;
- level, rule.
Sequence of work
First you need to mix the solution. To do this, follow the instructions on the bag with the dry mixture. You shouldn't make a lot of solution because it hardens within an hour. Before applying the solution, the wall is cleaned of dust and moistened with plain water.
Installation begins from the first line from the corner. Place patches of mortar in the place for the beacon every 15-20 cm. The greater the collapse of the wall (deviation from the plane), the larger the patch should be.
Afterwards, a guide bar is installed on the solution. Its evenness must be corrected using a level and a rule. If the solution is not enough, it must be added. And if there is too much, carefully remove it on the sides with a trowel.
In the same way, the beacon is installed on the other side along the extreme markings. Only after installing the outer profiles, install intermediate guides.
Upon completion of all work, the beacons must be removed, and the place where they are fixed is covered with a solution.
How to set using self-tapping screws
This method has the advantage of reducing operating time. There is no need to wait until the solution sets or the evenness of the installed guide is disrupted if it is accidentally touched. These facts are important for beginning craftsmen.
How to use when installing furniture
This device is also used for leveling furniture in a room. Moreover, this applies not only to hanging furniture - cabinets, shelves, etc., but also to those located on the floor. If you need to hang a cabinet or shelf on the wall, then using a regular water level is extremely inconvenient. By turning on the level and setting the cross projection mode, you can safely hang a shelf or cabinet on the wall in your home. High accuracy and evenness of furniture arrangement plays an important role in interior design.
How to use a level to level a sofa, bed, refrigerator or electric stove. Kitchen cabinets also require a straight line arrangement, and an indispensable level will also help in this matter. Of course, you can take a water level, since its error is acceptable, but with an optical device it will be much easier to cope with the task.
The meter is switched to the mode of constructing a horizontal plane, and then the furniture is configured. To do this, there are adjusting screws on the furniture legs, with which you can achieve a straight position.
How to level the floor
The main advantage of using a laser level is the ease of operation and clarity of all measurements. The device is placed vertically in the center of the room, turned on - and the device itself strikes a straight line along all the walls. It will also be carried out on every item left in the room. Therefore, you can, by placing a tape measure or ruler on the floor at any point in the room, see how much this point is below the set horizontal plane.
This feature makes it easy to spot where the highest hump and deepest depression are in the floor. Knowing these points, you can determine the type of screed that can be placed in the room:
- If the difference between the largest and smallest heights is no more than 20 mm, you can level the floor using a finishing mixture.
- If the difference exceeds 20 mm, you will need to first lay a cement-sand screed.
The level can be used not only when designing a screed, but also when monitoring the curvature of the resulting surface. By installing the device so that the beam goes strictly along the floor, you can see the location of all the bumps (at this place the laser marks will be interrupted or bent). Depressions can be found using a strip laid along the beam.
Instructions for leveling when installing partitions
Partitions in a house or apartment are constructed from plasterboard sheets. In order for the new wall to be level, it is necessary to take care of its alignment at the construction stage. Having chosen a suitable place where you want to build a wall, you need to position the device parallel to the wall, ceiling and floor, and then project a plane. Along the resulting lines, you should make marks with a pencil or marker every 20-40 cm, and then connect them with a ruler or rule.
To put it simply, the principle of leveling a plane from the floor to the ceiling is that the device is aligned with a mark on the floor and then transferred to the ceiling. Then the projection is transferred to the walls along these points, thereby obtaining a flat plane along which you can navigate when constructing partitions, walls, etc. A video lesson on how to properly use the matrix level is presented below.
Measurement process
We clean the surface from debris and, if possible, from construction dirt, so that the quality of measurements is at its best.
We install our self-leveling rotary laser level on a tripod approximately in the center of the room.
First we check that the installation is correct. Most often, this type of equipment has a bubble (works on the principle of a liquid level), which should be in the center of the scale. We adjust the legs of the tripod so that the bottle is in the desired position. And already during the work, the self-leveling system will take care of stabilizing the position.
We raise the device itself on a tripod by about 10-15 cm, since we will have to measure the floor level throughout the apartment and may need to lower the level.
Turn on and direct the beam along the wall. As soon as its position is established, we begin to draw horizontal lines. The beam will be projected onto the walls of not only this room, but also other rooms, if there are no obstacles. It is advisable to make markings within the permissible error of the device, in this case it is 5 m from the center point. This way we will mark the lines that we will use as a guide when taking measurements in other rooms.
Without changing the location of the device, we turn it 180 0 and again draw a horizontal line in this room along the rays.
Then we find the highest place, for this, in each of the corners (you can also in the center of the room) we take measurements with a tape measure from the drawn line to the floor plane, remember, this knowledge will be useful to us.
Now we need to take similar measurements and draw horizontal lines in other rooms. To do this, we start by moving our device to a new place, installing it (steps 2-3) and adjusting the height of the tripod, ensuring that the rays from the device coincide with the previously drawn horizontal lines (when measurements were taken in other rooms).
Next, we take measurements and find the highest place in this room.
As a result, we find the highest point in the apartment (let the distance from the horizontal to the floor in this place be equal to B and, for example, it will be 53 cm). This will be the guideline for determining the height of the finished floor.
Leveling a vertical surface or using a level when plastering walls
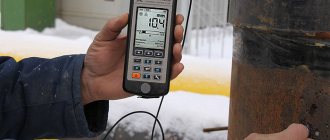
If you are working on plastering walls, then to achieve maximum evenness, you will need to use a laser level. For this, a device is used that is located along the surface of the wall. A laser beam is directed, which is a reference point for a straight surface. To find out if there are deviations from the norm, you will need a ruler to use for measurements.
The ruler is positioned perpendicular to the projected beam, and its scale indicates the level of deviation from the norm. Depending on the deviations, it is necessary to select the appropriate amount of plaster mixture for leveling. As you can see, checking the evenness of the walls in a house or apartment is not difficult if you have a good laser level at your disposal. The photo below shows the principle of determining deviations.
We're shooting
In order to mark holes in opposite walls on the same line, but at different heights, in a small room, you can use a ruler or tape measure. If the walls are tens of meters apart from each other, this method will be difficult. To solve such problems, most models are equipped with a so-called sighting target. This is a plastic plate with markings reminiscent of the pattern on targets for bullet shooting; the circles are spaced from each other at a certain distance, most often a centimeter or an inch. The vertical and horizontal axes that form the crosshairs of the sight are graduated in millimeters (or lines and dots). The plate has a hole for mounting on a vertical surface. With its help, you can mark the mixture by several centimeters without using the services of a helper.
Laser level with sighting target
The most advanced models are equipped with a sighting device for this purpose, which saves time on hanging the target.
How to use a level when building a foundation
If the principle of operation of the device is clear, then there will be no problems with projecting the surface for leveling. If a foundation is being built, then with the help of a level you can project a vertical line along which you can focus on the evenness of its pouring. It should be taken into account that it is necessary to focus on the vertical before constructing the frame on which the foundation is poured. If the frame is built according to the guideline, then the foundation will be poured correctly and evenly.
If the foundation has already been poured, then the sequence of actions will be as follows (vertical evenness is determined):
- First, the device is leveled, and it should be located in the center of the structure
- At the next step, you need to take a flat stick - a strip on which marks will be applied
- We measure the first corner of the finished foundation by making a notch on the strip used for marking. If the projected line is not visible, then the receiver should be used to identify the projected line
- Measure each corner of the constructed foundation in a similar way, making sure it is straight.
- Deviations in the evenness of the foundation should not be more than 3-5 cm. Discrepancies up to 2-3 cm are acceptable
If earlier simple tools such as a tape measure, ruler and water level were used to level planes, today a laser level can easily replace them. It allows you to simplify and speed up the work on projecting planes. The high cost of this device does not allow a complete transition to the use of such high-precision devices, and therefore they are used by construction teams who can afford to use equipment of this type. The estimated cost of the level in question is about 10-20 thousand rubles. This is a device that can be used to take measurements indoors and outdoors. There are cheaper and more expensive models, so when choosing them you need to understand for what purpose you plan to use them.
As a result, it should be noted that working with a laser level is not difficult, unlike outdated optical devices that are still used in geodesy. However, companies carrying out geodetic measurements are gradually switching from outdated devices to laser levels, which have become very popular in construction, geodesy and other areas where reliability and efficiency depend on accuracy and straightness.