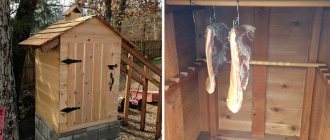
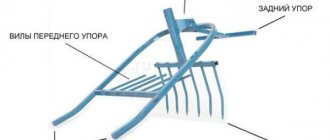
How to make a comb and washers
A spotter comb helps to impact a larger area at the same time.
It is used on long dents. The welding process consists of uniformly installing washers over the entire plane with a defect, and capturing all elements at once with a comb. Similar consumables for spotters are sold in specialized stores, but you can make them yourself. To do this you will need:
- a strip of iron 3 mm thick and 30 mm wide;
- metal tube with a diameter of 15 mm and a length of 40 mm;
- steel rod 13 mm in diameter;
- nut 22 mm;
- 8 mm bolt and nut.
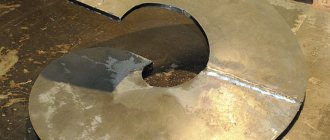
The iron strip is cut into pieces 100 mm long. Three 13 mm holes are drilled in each with a distance of 15 mm between each other. The last two are connected to each other by cutting them with a grinder. A single hole is cut for the hook thanks to an oblique cut. Sharp corners on this side should be sharpened for the convenience of future manipulations of inserting hooks into loops.
The mount for the return hammer and working elements is made of a tube in which a hole is drilled and an 8 mm nut is welded to secure the rod with the grips. A larger nut is welded on the opposite side of the tube to secure the hammer rod.
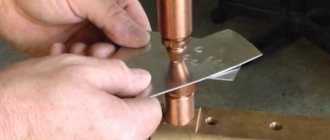
Homemade washers can be cut from copper strip with a wall of 2-3 mm. Holes suitable for hooks are drilled in it, and the corners are processed on a sharpening machine to smooth and smooth edges that do not interfere with the work process.
Homemade accessories for working with a spotter significantly save money and allow you to perform operations with the same quality in restoring the geometry of the body as store-bought accessories.
Necessary materials and equipment
How to make a simple voltage regulator with your own hands
The puller device is not complicated; almost all the components can be made independently at home. To manufacture it you will need the following materials and equipment:
- a silicone sealant gun used as a handle;
- a metal rod required to make a rod for a puller (you can also use a rod from a silicone gun);
- a small piece of metal about 2 mm thick, from which a cone-shaped nozzle is made with a ring placed at the bottom;
- welding machine;
- Bulgarian.
The puller is assembled from pre-machined bushings. A homemade tip is attached to the drive axle. It is designed to pull out dents in the car body, resting on the round base of the puller. To expand the functionality, you can make two or three nozzles with round bases of different diameters.
How to make a puller
DIY microwave spotter
Spotter welding is effective for recreating a flat surface on damaged car bodies. But this requires some accessories. One of them is the puller. This is an exhaust device that allows a small area of metal to be drawn out, leaving the surrounding part in place. If you simply weld the spotter tip to the dent and pull it back, then the entire area will give way along with the dent. You will get a bulge on the body. This accessory allows you to hold the surrounding surface and draw out only a point.
You can make your own homemade puller from a caulk gun. It can be purchased at a hardware store. When purchasing, you should choose a model with thicker handles, as this will affect subsequent operation and service life. Next, several manipulations are performed, clearly shown in the video, in the following steps:
- Disassembling the pistol. The sealant container is removed from it. The front stopper and the seals under the tube are unscrewed.
- Several rings of different diameters must be cut from sheet iron with a wall thickness of 3 mm. To save on material, they are drawn in one circle, in descending order. The width of the ring varies from 20 to 30 mm. The smallest ring should fit freely, but without unnecessary play, onto the receiving socket at the handle of the glue gun and pressed with the factory nut.
- Two squares of sheet iron with a wall thickness of 3 mm and side dimensions of 20 x 20 mm are welded to a small ring. One hole is pre-drilled in them.
- From circles of larger diameter, supports are made on the body for dents of various sizes. To connect them to the main structure, strips of metal with parameters 15 x 150 mm and a thickness of 3 mm (2 pieces) are taken. One of their edges is welded to the opposite sides of the large circle, and the second is bent at 90 degrees inward. Holes are drilled at these edges, identical to the fastening on the smallest circle. With a bolted connection, the structure is assembled together and resembles a cone.
- A homemade puller must be attached to a power source from the spotter. To do this, take a brass cylinder, in which the turner drills the middle to the exact diameter of the rod from the silicone gun. A hole is drilled in the side of the cylinder and a thread is cut to secure the contact.
- A welding tip is fixed at the end of the cylinder.
A puller can also be made from pliers. You will need a rod, a system of rings to create a stop, and a powerful narrow spring to return the compressed handle. The rod is welded to one of the working sides of the pliers, a spring is attached to it and a stop is attached. The current from the device can be supplied through the terminal on the top end or on the side of the brass cylinder. Such accessories for a spotter may not look very presentable, but they serve their purpose well.
Convenient puller for spotter: from a sealant gun
Using a puller (or, as it is also called, a lifter), you can eliminate various mechanical damage on the surface of car body parts.
Using this device, you can quickly and efficiently repair dents or creases.
Factory pullers are not cheap, so in this review the author offers a budget option for the device. To make it you will need a sealant gun.
Design Features
First of all, we disassemble the sealant gun, cutting off all excess. You only need to leave the handle with the trigger and the rod. The author installs the rod itself on the other side.
Next, you will need to make a nozzle, which we put on the rod and screw to the gun handle. The nozzle is a piece of a plate (a stop for a cone - another nozzle), to which the author welded a bushing.
The cone itself is very easy to make, it will take no more than one hour. A piece of steel pipe is welded in its upper part, which is put on the bushing.
A nut is screwed onto the end of the rod, and then an extended nut so that the contact can be tightened. An M8 pin is then screwed into the extended nut.
For details on how to make a convenient puller for a spotter from a sealant gun with your own hands, watch the video on our website.
Next post
Device for gluing wooden frames
Comments
Site headings
- Aviation
- Auto and motorcycle
- Army and Navy
- Archeology
- Animals
- Health
- Celebrities
- Games
- Interesting
- Internet and computers
- Story
- Space
- Cooking
- Culture and art
- Fashion & Style
- Music
- Science and technology
- News
- Society
- Hunting and fishing
- Policy
- Nature
- Incidents
- Psychology
- Travel and leisure
- Entertainment
- Religion
- Rodnoverie
- Needlework
- Garden
- Homemade products
- Sport
- Construction and design
- Secrets and myths
- Economy
- Humor, jokes
- Sandbox
latest comments
Afraid!? )))) So we are doing everything right.
I would advise buying a wardrobe whose frame is made of 18 mm thick chipboard. He would.
My sister always had low blood pressure, but somehow she didn’t really notice it. And one day L.
crest is a diagnosis.
When I play Topigr, I would like us to be completely free of problems, and not bess.
Now there is so much that is inexplicable in the world that mom, don’t worry.
Pindos, admit that you have not been to the moon and we will leave you behind.
Basque is the same banderlog as Rotaru! Basques, why aren’t you going to perform in Crimea and Donbass?
The so-called “truly great star” sponsored the genocide of Donbass! Let him speak.
Gaining popularity
How to adjust a plastic door
DIY oil filter puller
Decorating the garden with concrete cinder blocks
Homemade car battery charger
Mandula - how to make and fish with it
The information and entertainment site “Labuda” is daily, operational, relevant, interesting news and useful information from different spheres of life.
Full or partial copying of labuda.blog site materials is permitted only if an active and indexable hyperlink to the publication source is indicated.
legal information
Dear authors, remember that the publications you post must not violate the laws of the Russian Federation and the copyrights of third-party resources.
* Extremist and terrorist organizations banned in the Russian Federation and the Republics of Novorossiya: “Right Sector”, “Ukrainian Insurgent Army” (UPA), “ISIS”, “Jabhat Fatah al-Sham” (formerly “Jabhat al-Nusra”, “Jabhat al-Nusra"), National Bolshevik Party (NBP), Al-Qaeda, UNA-UNSO, Taliban, Majlis of the Crimean Tatar People, Jehovah's Witnesses, Misanthropic Division, Brotherhood "Korchinsky, "Art preparation", "Trident named after. Stepan Bandera", "NSO", "Slavic Union", "Format-18", "Hizb ut-Tahrir".
How the spotter works
DIY quick-release clamp
A puller for body work using a spotter is a device used for quick drawing. With its help, you can quickly and efficiently level car bodies and other deformed surfaces.
The extraction device straightens a small area of the metal surface, while the area of the part surrounding the dent remains in place. If the spotter tip is simply welded to the deformed area, then the adjacent space along with the hole will rise up, forming a bulge on the body. The puller holds the surrounding surface, pulling only the point to which it is attached.
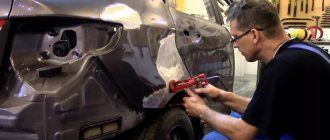
How to work as a spotter with metal
There is a technology for working with such a device, which has been used by craftsmen for a long time. It is used for car body work, eliminating deformed parts in hard-to-reach places. As a rule, such work is carried out on car doors and fenders in order not to completely remove such parts. The technology can be used wherever there is inward deformation of the surface.
Sometimes novice craftsmen are interested in how to make a homemade battery and spotter. Spot welding from a battery is performed by applying current to an electrode, welding it to the surface, leveling the surface with a gun, and tapping a perimeter around the damaged area with a hammer to fix it in place. Thanks to this method, the deformed part can be quickly aligned and returned to its original position. You need to pull it in carefully.
After leveling, the deformed surface is ground until the welding points from the fastening are removed and the surface becomes smooth. Do not forget about the mandatory grounding of the device. The negative terminal must also be removed from the battery.
The technology for working with a spotter looks like this:
- the damaged surface must be cleaned until the first appearance of “bare” metal;
- a negative contact is attached to the deformed surface;
- the electrode is welded to the working surface;
- pulling the damaged surface to the desired location;
- the welded electrode is removed from the surface with rotational movements;
- cleaning the surface from welding work and preparing it for putty.
To work with such a device, regardless of whether it is factory-made or home-made, you must have minimal experience with welding. It is important to follow the rules for working with such a device. This will allow you to straighten the damaged surface quickly, efficiently and, most importantly, safely. A spotter is an indispensable tool for deformed car surfaces that require spot repairs. You can assemble such a device yourself and not spend money on expensive factory models.
Making a spotter with your own hands
Such a device is very expensive, so many people make a spotter with their own hands.
Required materials for this:
- welding transformer;
- drive 12V;
- diode bridge;
- contactor 220 V;
- thyristor for voltage 200 V;
- relay 30 A;
- button.
Before you start making a spotter with your own hands, you should protect yourself from accidental electric shock, so use a rubber mat and follow safety rules.
The welding machine is the ideal basis for a DIY spotter
It is important to change it so that it supplies at least 1500 A at the output
The spotter is assembled as follows:
- The secondary layer is removed from the apparatus.
- After this, you need to find out how many turns may be required for 1 V. To do this, you need to wrap an insulated copper wire around the primary winding, and then measure the number of volts. The resulting figure is divided by the number of turns of wire. The final result determines the required number of turns.
- A bus is made from the removed secondary layer so that the cross-section is 160 mm2, no less, and the voltage is 6 V.
- If the cross-section is less than this value, it is divided into several parts and secured with fabric tape. The number of parts depends on the initial indicator. For example, if the cross-section is 40 mm2, then the tire should be divided into 4 parts.
- You will need 2 tires wrapped with masking tape and electrical tape. It is best to carry out insulation as follows: first there will be a layer of electrical tape, then adhesive tape and then again electrical tape. Open edges must be riveted.
- The resulting busbars are wound on a transformer. This is quite difficult, so you will need a helper and a hammer. It is not necessary to achieve a tight connection between the transformer and the primary. The main thing is that the tire is level and does not have any damage.
If there is enough power, then the device is almost ready with your own hands. All that remains is to make the starting device.
There is a button on the handle of the spotter through which the 12 V drive controls the relay. This relay is necessary to shut off a wire with a voltage of 220 V. With such a device, spot welding is carried out easily and safely.
The welding gun is made from a semi-automatic device, but small additions must be made to it, necessary for attachment to the straightening device. A brass axis is fixed inside the semi-automatic device.
Under the pliers, use a regular 20x20 mm pipe. The power wire connecting the transformer and the gun must have a cross-section that is identical to or larger than the cross-section of the bus. The operating cable connecting the transformer and the gun is usually made of thermally insulated commutating wire. Be sure to take into account the fact that when heated, this layer begins to shrink.
Scheme for assembling a homemade spotter
If you are going to make a spotter with your own hands, you need to understand the circuit diagram of such a device.
The most important element of the spotter is the welding transformer (T2), voltage is supplied to its primary winding passing through a diode bridge. In the electrical circuit of the second diagonal of such a bridge there is a thyristor, which is controlled by the voltage coming from another transformer (T1), which has a low power.
Schematic diagram of a spotter
This scheme works according to the following principle: when the spotter is turned on, voltage is supplied to transformer T1. It is converted and supplied from its secondary winding to the diode bridge, then passes through the closed contacts of the “Impulse” switch to capacitor C1, which begins to charge. Since the thyristor is closed at this time, no electric current is supplied to the welding transformer.
To start this transformer and receive welding current on its secondary winding, it is necessary to change the position of the “Impulse” switch, which will disconnect capacitor C1 from charging and connect it to the thyristor control circuit. The current generated as a result of the discharge of the capacitor first passes through the resistance (R1), which is responsible for the operating modes of the device, and enters the control electrode of the thyristor, which leads to its opening.
Spotter, its application and design
This tool is used to level out car dents when repairs from the outside are not possible. It can heat up part of the metal, and the damage to the body will be minor.
In particular, it is used for the following purposes:
- body straightening;
- leveling the surface of the body without the need to disassemble it.
The enormous and irreplaceable benefit of this device lies in its use for leveling body parts when access to certain parts is limited due to the specific structure of the car. When straightening damaged parts of the body, a special device fastener is welded to the deformed surface and then pulls it out. It should also be noted that the spotter is capable of heating the metal during operation, and this facilitates rapid leveling, obtaining rigidity and the desired shape.
The work of this design consists of point-by-point pulling of the damaged part according to the principle of a hammer.
It looks like this:
- the return hammer of the device is fixed to the body using a welding pulse;
- The handbrake of the device must be pulled along the guide towards you, while the support washer remains in place.
The simplest spotter has 2 modes:
- temporary, when a ring is fixed to the surface;
- welding - light welding of the electrode to the surface is used when the device is attached to the car.
How is the spotter used?
If the dent is located where it is impossible to squeeze out the metal from the back side, craftsmen use a spotter. This is a spot welding fixture. The electrode is welded to the surface of the metal and pulled. As a result of reverse deformation, the dent disappears. The device for creating pulling force is called a puller. Therefore, in order to independently level out dents on the car body, you need to make a puller and spotter with your own hands.
Spot welding occurs as a result of concentrated pulsed action of electrical energy. Its value, as is known from the Joule-Lenz law, is proportional to the voltage and current values. And the area that is heated is determined by the electrode. Therefore, a source of electrical energy is required, connected to the two electrodes. The first electrode is similar to grounding/grounding and is applied near the dent.
DIY puller assembly
The easiest way to make a homemade puller for body work is using a silicone sealant or glue gun. You can use an old device you have at home, or purchase a new one at any hardware store.
The main thing is when purchasing, choose a model with thick handles, since the thickness of the handles affects the ease of use and the duration of use of the puller together with the spotter.
The procedure for manufacturing parts and their subsequent assembly is as follows.
- Disassembling the pistol.
The balloon is removed from the device. The sealing elements of the tube and the front stop are dismantled.
- Making rings.
- Welding metal squares.
Two squares of metal sheet 3 mm thick and 20x20 mm in size are attached to a small ring by welding. A hole should be drilled in each of them in advance.
- Manufacturing of stops.
Stops of various sizes for installing the puller on deformed areas of the body are made from circles with large diameters. They are connected to the main structure using two metal strips 3 mm thick and 15x150 mm in size.
Each of the strips is welded at one end to the opposite sides of the largest ring, the other side is wrapped at an angle of 90° inside the structure. Along the edges it is necessary to drill holes with a diameter equal to the size of the mounting hole of the smallest circle. Using a bolted connection, all elements are assembled into a single cone-shaped structure.
- Connection of puller and spotter.
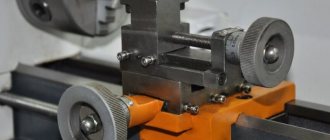
The manufactured puller is attached to the spotter. To do this, you will need a brass cylinder with the middle drilled out on a lathe. The diameter of the hole is set to be completely identical to the diameter of the rod of the glue gun used. A hole is drilled in the side of the cylinder and a thread is applied to secure the spotter contact.
- The welding tip is securely attached to the end of the cylinder.
You can also make a puller yourself to level the body using a spotter using pliers. For this you will need:
- stock;
- a set of three rings for making a stop;
- a narrow, powerful spring designed to ensure that the pressed handle returns to its original position.
A self-made exhaust device for a spotter differs in appearance from the factory one and does not look entirely presentable. But it performs its functions no worse, and in terms of strength and reliability it even surpasses the serial one.
What can spotters be made from?
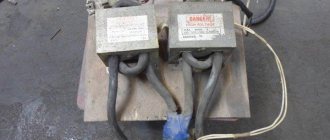
To make a spotter, old welding machines, batteries and even used microwave ovens are used.
DIY spotter from an inverter welding machine
However, most often among home-made devices there is a spotter made from an inverter welding machine - it already has the “stuffing” we need. All that remains is to prepare a transformer to create the required current and make a gun. We discussed in detail above how to modify a transformer. The main thing is to properly prepare and clean the old welding machine and all its elements from dust and rust. For a detailed video on how to make a spotter from a semi-automatic machine with your own hands, watch here:
Watch this video on YouTube
Making from a microwave - nuances
The diagram and procedure for assembling a spotter from a microwave with your own hands is practically no different from the previous ones. The only thing is that it is necessary to achieve a pulsed operating mode. To do this, you will need a large capacitor with a control system. The pulse time should be minimal - up to 0.5 seconds. Otherwise, instead of resistance welding, there will be a hole in the metal.
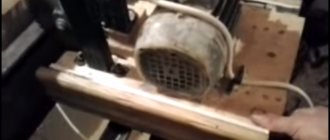
The first stage - we free the most valuable thing for us, this is the transformer, we disassemble it along the welding seam. To do this, you can use a grinder or a hacksaw.
It is important not to damage the primary winding, because we will need it later
This is what your transformer looks like at this stage
Next, we wind the secondary winding with a thick copper cable in two turns.
It looks quite unaesthetic, but this procedure must be carried out
After winding the cable, you need to glue the transformer core and base. To do this, we use regular 2-component epoxy resin.
We choose a wooden base. It must be impregnated with a special composition
After the resin has hardened, you can check the functionality of the weld using special equipment.
After this, all elements can be placed in the housing
Do-it-yourself spotter from a battery - nuances
To correct minor damage to the body, you can make a device based on a battery. This device is convenient because you don’t need to look for a way to connect to an outlet. For manufacturing you will need the following components:
- standard 12 V battery;
- solenoid relay, can be from the car starter;
- on/off button;
- wires with terminals,
- electrode holder.
The design of a battery spotter is quite simple.
To assemble a spotter with your own hands from a battery, any solenoid relay will do.
Connection procedure: place the positive wire of the battery over the solenoid relay. From the place where the starter is hooked up to the relay, throw a one and a half meter cable with a cross section of at least 100 mm² to the gun. With one wire, the gun button is secured to the solenoid relay where the positive battery cable is already installed. Connect the second wire to the relay contact so that it operates. Connect the ground wire to the part to be straightened. The main thing is not to forget to install the electrode.
How to make a shooting range in an ordinary city apartment?
Many owners of air guns would like to have a shooting range at home for training target shooting, but not everyone has enough money to purchase a ready-made device in a specialized store. That is why we decided to share the technology for making a simple shooting range at home, which can be made literally from scrap materials.
- Compact shooting range for pneumatics
- Falling targets-bullet catchers for pneumatic shooting
- How to make targets
What it is?
The device is based on the principle of spot or resistance welding. Its basis is the supply of electric current at one or several points of the connected elements .
For the described connection, two electrodes are used that supply current while simultaneously compressing the parts.
However, when repairing especially complex spatial structures, for example a car body, especially wing elements, this is not always possible.
The solution was a welding spotter capable of working only on one side of the elements being welded.
The name of the device itself comes from the English spot - point. In the English technical dictionary this is the name for all types of spot welding machines.
In the post-Soviet space, the name was assigned to equipment used for straightening cars.
Calculation and manufacture of a welding transformer
The principle of calculating the unit is specific, since often the standard method and diagram are not suitable. During the manufacturing process, the dimensions of the components must be adjusted to the materials that are available - often to the magnetic circuit.
The core differs according to the type of winding:
- Disk. The distance between the primary and secondary windings can be remote. A significant amount of the magnetic flux of the primary winding is free from the secondary. Characterized by strong electromagnetic radiation.
- Cylindrical. One winding is wound on top of the other. The magnetic flux of the turns of the primary winding adheres to the secondary one, since there is a small distance between them. This unit has a rigid characteristic.
Also, the transformer core is divided by shape into the following types: armored, rod, toroidal.
Armored
It has an W-shape, with windings on the central rod. The armor type is more difficult to use. If equipment identical to industrial versions is manufactured, the circuit can be calculated using standard methods.
Rod
Its shape resembles the letter P. It has higher efficiency. A high current density in the windings is possible. Therefore, the unit is often made of rod teak.
Toroidal
Has the best characteristics. It has the shape of a ring with a rectangular cross-section. The core is equipped with two or more windings that are wound directly onto it. It has a small size and light weight. It is easy to install and connect.
How does it work?
The main difference between a spotter and a transformer or inverter welding machine is of a pulse current of 1500 - 3000 A.
This is an advanced machine for spot (resistance) welding, featuring a large number of customizable parameters.
Among other things, components for a spotter make up a whole class of devices. This includes consumables, as well as tool attachments: straightening washer holders, copper and graphite electrodes, magnetic contacts.
If one contact creates the spotter electrode, then the second, grounding, is a special washer or simply “ground”. It is attached to the same part on which the spotter himself is working.
Grounding is located as close as possible to the place of impact by the spotter. It is not allowed to install it on an adjacent body element, even if connected by welding.
Let's look at how the spotter works. The design of the device is simple. A transformer is installed at the input, providing the current of the required strength and voltage. The alternating current from the transformer is rectified by the diode bridge and then applied to the capacitor, charging it.
Another welding transformer generates a welding pulse. Current is supplied to it by a control button that opens the thyristor. The pulse creates a discharge of the capacitor, and its strength is regulated by a variable resistor.
Pulse duration is adjustable from 0.01 sec to 1.8 sec (warm-up during annealing).
Moreover, if at the input of the device the current is 50A at a voltage of 160-230V, then at the output the pulse is 2500-3000A at a voltage of 50-60V.
The schematic diagram of the spotter is shown in the figure:
Final assembly
To break the contacts of the primary network, the jumpers must be connected correctly. To do this, cables and switches are inserted into the control unit at the start button. Then they are brought to the body base. If necessary, coolers are used.
Finally, it is advisable to use shellac to impregnate the resulting unit.
Choose
Repair by a spotter has a narrow specialization . Apart from the car service industry, it is practically not in demand, except in rare cases of repairing damage to the body of household appliances.
Today, the Russian spotter market includes more than a hundred models from different manufacturers, differing in power, price, and operating parameters. Of these, three main ones:
- Devices made in China, Japan, South Korea.
- Devices from Western European manufacturers.
- Domestic devices.
The lower and middle price groups are represented mainly by Chinese instruments. Their advantages include the tendency of increasing quality at a stable price . If relatively recently the purchase of a Chinese instrument was justified by its cheapness, today even professionals buy it. Among the domestic devices, there is the Russian “Spotter Pilot” line .
The company produces products in both the household and professional segments. Has a number of patents and supplies products to the markets of Canada, the USA and Europe. In the segment of professional models, European manufacturers are leading . In many respects, superior to similar Chinese and domestic models, the devices are distinguished by build quality and successful ergonomics.
A significant disadvantage is the high cost.
When choosing, pay attention to consumables. Typically, Chinese spotter models for spot welding are more fully equipped, however, as a rule, in order to save money, some of the electrodes are not copper, but copper-plated, which reduces the service life.
For serious professional body repair work, it is better to choose a model from European or domestic devices of the corresponding class.
Equipment Feature
The spotter is a device that has changed all previously existing ideas about the principle of removing dents. Its use helps eliminate defects from the outer surface of the vehicle.
The design of the device can have several different attachments, as well as operating modes. Its working elements can be called:
- Frame.
- Reverse hammer.
- Hook.
- Electrodes.
- Sucker.
- Adapters.
The basis of the spotter is an inverter welding machine, like a microwave oven, which is capable of producing two types of current:
- constant;
- variable.
Depending on the type of movement, equipment can be of two types:
- compact - have a small size, which makes it possible to carry them in your hands using a comfortable handle. These devices can be classified as non-professional;
- portable is professional equipment that is moved using a special stand with wheels.
On the front of the case there is a panel that is used to configure and adjust the workflow. Regardless of the spotter model, the master has the ability to set the required level of power and current of the device. To do this, there is a toggle switch on the panel with the possible operating modes indicated on it.
The welding process is carried out as a result of the closure of the electrical circuit. In this case, the master fixes the mass on the surface of the vehicle body. In addition, you must first remove the battery from the car.
The choice of attachment that is inserted into the end of the gun depends on the type of operation being performed. As a result of the supply of current, the working surface heats up, and after some time it melts. This area is small in area, but sufficient to be able to correct the existing defect. In this case, the surface does not overheat.
Puller or how to pump up your dog with two rings
Not every dog owner knows that their pet can chew furniture, show aggression and disobedience simply because it lacks quality physical activity. And not every owner knows how to give such a load to a dog. Therefore, experts came up with a puller.
This is not a toy!
Looking at the puller, which consists of two simple rings, you might think that this is an ordinary toy. But first impressions are deceiving. This is a simulator that has been developed for more than a decade! The person who came up with the idea of the puller - a professional dog handler and athlete - began its development in 1994, but it was only in 2010 that the puller was put into mass production.
Now this is a universal entertainment suitable for all breeds of dogs, which, in parallel with the game, puts a strain on all the muscles of the animal. Puller is rapidly gaining popularity among owners and their pets, and for good reason.
Take a look here too!
- Rat on a leash
- Hollywood stars walk their dogs in self-isolation
- Why do garden squirrels thank this Englishwoman?
- “And my groundhog is with me...”: Beethoven’s groundhog and his house
- Oh, possum! Learning to distinguish handsome marsupials
Puller and its secrets
The first advantage of the puller is what it is made of. This is not just rubber, but a specially developed polymer material that is absolutely safe and dogs really like it. An animal can bite through it without causing harm to itself. It is equally important that the puller does not lose its properties when bitten.
It does not sink in water (and when bitten too), which expands the possibilities of use. It is odorless and quite light.
The versatility of the puller is explained by the presence of a dimensional grid, that is, the simulator is available in different sizes, so it is suitable for both miniature dogs and puppies, and the largest breeds.
Add to cart
Quick view
Compare
Close
Training equipment for dogs PULLER Micro
359,00 ₽
Add to cart
Quick view
Compare
Close
Puller Midi training equipment for dogs
656,00 ₽
Add to cart
Quick view
Compare
Close
Training equipment for dogs PULLER Maxi, 30 cm
1 066,00 ₽
Close connection
The puller is not intended for independent dog play. This item works in conjunction with the owner and pet. By the way, this is also important. Such interactions help establish a close relationship with your pet.
The developers have created a whole range of exercises that can keep your pet engaged for a long time and with benefit. So, what can you do with a puller?
- Dogs love to run after the puller, which, thanks to its shape, rolls perfectly on the ground. It's much more fun than running after a stick.
- Another option for game load is jumping. In this case, the owner throws the puller, and the dog jumps after it. Moreover, it is no coincidence that there are two pullers in the set. With the help of the second, the animal learns to intercept, that is, lets go of the first ring and jumps after the next one.
- Pulling is an exercise in which the dog alternately pulls pullers from the hands of the owner or trainer. Don't forget to give in to your pet from time to time to maintain interest in the game.
- Well, swimming with a puller occupies a special place. This is an excellent complex exercise for any dog.
Believe me, your pet, just like humans, may lack psycho-emotional relief. Yes, it happens. And just as for a person, sports are a great way to relieve stress, and for a dog, such exercises are a way to calmness and good mood.
Dog - puller
The popularity of this simulator can be judged by the fact that there are dog competitions and even the International Dog Puller Federation has been created. In general, start mastering the exercises; by the way, they are described in the brochure included with the product. And in the next article I will tell you how to compete for the championship in this new and very exciting sport.
We will be grateful if you support our publications on the Zen Channel! Thanks friends!
If you find an error, please select a piece of text and press Ctrl+Enter.
Use of materials on other resources is possible only with the written consent of the editors and co-authors of the articles
Natalya Kocheganova
Author, employee of “My good one”. Writes, sings, dances, plays, sews, knits, travels. I am familiar firsthand with the beneficial work of gardening. Loves life in all its shades, sounds and textures. Loves creativity and creative people, regardless of the field of implementation.
Remaking a welding transformer
After reading the assembly instructions, you can learn how to make a spot welding machine from a transformer. Similar drawings can be found on the Internet in specialized forums.
It should be noted that the voltage of a conventional transformer is at least 70 V, and for spot applications this figure should not exceed 6-9 V.
In order to remake it to the required parameters, the transformer needs to make a new winding or remake the old one. If the old winding is removed, it can then be used in low-voltage devices.
Welding transformers can be of different types:
- w-shaped;
- o-shaped;
- toroidal.
The advantage of the latter is their low weight, but their alteration requires a lot of labor. The required winding cross-section is applied in relation to the current received. The spotter must have a voltage of at least a thousand amperes.
If the current density is 8 amperes per cubic millimeter, the cross-sectional area of the wire should not be less than 120 mm³. It is very difficult to work with such indicators, so if there is no long-term use of the device, the cross-section can be reduced by at least 80 mm³. It can be obtained by combining several wires of a smaller cross-section together. For ease of use, such wires should be secured together with electrical tape.
First you need to determine the number of turns. To do this, you need to make a test winding using a regular insulated wire. After this, the transformer is turned on and the voltage in the test winding is checked. The resulting voltage must be divided by the number of turns. This number will show the number of turns for a voltage of 1 V. Since the transformer should be converted to 6-9 V, this number must be multiplied by the desired voltage.
Depending on the obtained dimensions of the bus, the possibility of its placement on the transformer is determined. If the new winding does not fit, you must remove the old one. It must be installed carefully, taking care not to damage other parts of the transformer.
Making a spotter yourself is not difficult, the main thing is patience and desire. It is also necessary to carefully study the assembly and operating instructions. There are quite a lot of such materials on the Internet.
Originally posted 2018-04-18 12:28:06.
Making a reverse hammer and pistol
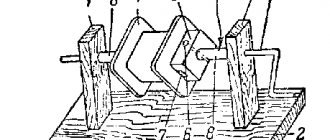
A homemade reverse hammer, made from handy materials, will help you level out any dent with blows. The simplest design requires a rod - a steel rod with a diameter of 8-10 mm. A handle is attached to one end. This is a handle from a bicycle or scooter. A bolt is welded in the same place for attaching the terminal and connecting the cable.
The reverse hammer on the other side of the rod must have a tip for welding. It can be welded or made removable through a slot and bolt fastening. A load is placed on the working axis, which will create an impact on the metal upon impact. It is turned from ordinary steel on a lathe. The inner hole should allow the stem to slide freely. Thick washers are welded along the edges of the latter for support. It is convenient when a homemade reverse hammer has a spring between the weight and the washer closest to the welding end. This helps to return the strike for the next action and speeds up the work.
If you place this rod in the body of a drill or toy gun, you can combine a reverse hammer and a welding gun into one design. But the latter is also manufactured separately. A short rod with a slot and a pressure hole for the bolt is mounted in one of the existing housings (an old drill or another). An electrode or washer is inserted into the slot. The cable is routed inside the housing.