Rules for ordering furniture additives
Drilling is the process of drilling holes in furniture parts. Among the main production operations - cutting, edge application and additives - the latter is the most labor-intensive, and the complexity of drilling parts for the same product can differ several times depending on the qualifications of the designer.
Orders with additives (drilling holes) are of little interest to our production; we accept them only if the documentation fully meets our requirements. Please note that checking and correcting drawings (sketches) is not our responsibility, all responsibility lies with the customer. If during the production process the documentation reveals inconsistencies with our requirements, we reserve the right to refuse to complete the order regarding additives (drilling holes) without refunding the price paid for this work.
In order to order an additive in the production of Chipboard Kit, you must send us by e-mail a correctly completed order form for chipboard parts (see the section “Price lists, forms”) and drawings of the parts - see detailed information below.
Video: how the additive is made
Drawings (sketches) for drilling holes in laminated chipboard parts (additives) must meet the following requirements:
- The center-to-center distance along the width of the part should be a multiple of 32 mm, the amount of indentation from the edge of the part is at your discretion (system 32). For more details, see below. The exception is holes for hinges.
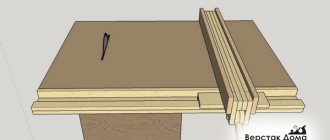
- There is one part on one A4 sheet. View of the holes.
- The image of the part should be as large as possible and occupy most of the A4 sheet.
- Directly on the sheet with the sketch the part number is indicated in accordance with the order form: instructions for more details
- The height of numbers when printed on A4 sheet is at least 4 mm.
- The thickness and method of drawing the lines must be such that the part and dimensions are clearly visible after printing on an A4 sheet from a distance of at least 1 meter.
- The main lines should be twice as thick as the dimension lines.
- The background is white, the color of lines and numbers is black.
- There is a minimum number of intersections of dimension lines.
- The overall dimensions of the part must be indicated.
- Dimensions are given in millimeters and are always rounded to the nearest whole millimeter. For example, instead of 93.45mm, you need to specify 93mm.
- On the sketch, all dimensions are indicated after applying the edge (unlike the order form - it contains “saw” dimensions). Specify dimensions for holes of the same type starting from one base side.
- If the part is not edged on all sides or a different edge is used, then the side and type of edge must be indicated on the sketch, and the edge must be indicated by letters and/or numbers. Marking edges with lines, incl. colored are not allowed.
- Tables with hole coordinates are not allowed, as well as specifying dimensions using the coordinate method.
- We only drill holes that are listed in our price list or on this page.
- A conventional image of the holes is allowed - the same for the entire order - see example below.
- There is no need to clutter the drawings with repeated dimensions.
- Please note that we do not accept orders with drawings that do not meet these requirements, regardless of who created them - a human hand, or a “program” under human control.
An example of a readable sketch:
An example of conventional images of holes in sketches:
Additive system 32
Furniture machines and furniture fittings are respectively designed in such a way that the distance between holes located on the same straight line is DIVIDED by 32 mm. Moreover, both in width and in length and at the end of the part. This standard is called "System 32".
According to this international standard, furniture dimensions are calculated based on DRILLING CONVENIENCE. Economy class furniture, which is sold in chain stores, is designed according to System 32.
System 32 highlights:
- Center-to-center distances between holes are divided by 32 mm - according to this rule, both drilling machines are manufactured (the distance between adjacent drills is exactly 32 mm) and fittings (the distance between the fastenings of handles, drawer guides, hinge fastening strips, etc.)
- The design of the parts is such that there are no “right” and “left” parts - they are interchangeable.
- The distance from the front side of the part to the first hole is 37 mm, the next ones are multiples of 32 mm.
- The main hole is 5mm in diameter in the plane of the part.
What is an additive?
People involved in the production of furniture, as well as those who have at least once assembled it themselves, are probably familiar with the concept of a furniture additive. However, no one knows how the word additive itself appeared. Even craftsmen who have worked at furniture manufacturing enterprises for decades cannot shed light on this issue. It is quite possible that this word was once considered slang and was used only by furniture makers. The additive is absolutely necessary when creating furniture from wood and its modern analogues. Today, furniture additive is the process of drilling blind or through holes for hinges or fasteners in furniture pieces. It is a high-quality additive that makes the final assembly of furniture convenient and less complicated. How the furniture will ultimately look also largely depends on the additive.
Non-standard drilling of holes in chipboard
However, individual furniture does not always fit into this system. Understanding this, we suggest you use the following types of holes:
Holes in the plane of the part
Diameter 5 mm depth 13 mm (D5x13) - for shelf supports, eccentric rods, hinge bushings, etc.
Diameter 8 mm through (D8) - for confirmat (euroscrews)
Diameter 8 mm depth 13 mm (D8x13) - for dowels, footers, etc.
Diameter 15 mm depth 13 mm (D15x13) from the edge of the part to the center of the hole 34 mm - for eccentrics with a long rod
Diameter 20 mm depth 13 mm (D20x13) from the edge of the part to the center of the hole 9.5 mm - for eccentrics with a short rod (so-called reinforced)
Diameter 35 mm depth 12 mm (D35x12) from the edge of the part to the center of the hole 22.5 mm - for hinges with a 35 mm cup. IMPORTANT: If the sketch does not indicate the depth of the hole, we consider it equal to 12 mm
Holes in the end of the part
Diameter 5 mm depth 34 mm (D5x34) – for confirmat 50 mm long
Diameter 8 mm depth 24 mm (D8x24) - for a dowel measuring 8x30 mm
Diameter 8 mm depth 34 mm (D8x34) - for a long eccentric rod
Additional holes in the plane of the part
Diameter 5 mm through (D5) - for attaching handles, intersection ties
Diameter 37 mm depth 13.5 mm (D37x13.5)
Diameter 60 mm through (D60) - for cable ducts
Diameter 50 mm depth 12 mm (D50x12) - for mortise handles
Please note that:
- The center-to-center distance in width should be a multiple of 32 mm, the amount of indentation from the edge of the part is at your discretion.
- Dimensions in the sketches include the edge and are indicated from one base side.
- The sketches indicate the part number in accordance with the form.
- The font size and sketch size should be such that everything, especially the DIMENSIONS and DIMENSION LINES, is CLEARLY visible when printed on an A4 sheet.
- For shelves with eccentrics - the same distance from the front and rear edges of the shelves to the center of the front and rear eccentric, respectively.
- The cost of drilling holes for an eccentric with a long rod is significantly higher than the cost of drilling holes for an eccentric with a short rod (the so-called “reinforced”), because there are more holes.
- Do not indicate edges using the method of multi-colored lines - when printing in black and white they are not visible; the background of the drawing must be white.
- There is no need to clutter the drawings with repeated dimensions.
- Dimensions must be rounded to the nearest whole number, for example, instead of 93.45 mm, indicate 93 mm.
As our experience shows, the most terrible drawings are from Basis-Furniture Maker and AutoCAD.
The main complaints about these drawings:
- Dimensions are printed in extremely small font
- Dimension lines are the same thickness as the main lines - it is often impossible to understand the shape of the part
- The drawings are littered with unnecessary information, so much so that the dimensions are not visible.
- Contradiction of sizes on sketches and form
Apparently this is because either the authors of these programs did not take drawing lessons, or the majority use an unconfigured hacked version.
Examples of sketches for the additive:
Source
Eccentric (eccentric tie for furniture assembly)
I decided to talk about eccentric couplers (eccentrics) used for assembling budget cabinet furniture. I made furniture in this way very rarely; usually all the furniture was made for gluing, that is, the elements of the product were made, painted, and then, after “painting”, glued into the product. Some products were assembled in the workshop, some were assembled on site, but in most cases with glue, using a screw where possible.
Types of additives. Individual and standard additives.
Modern furniture production uses two types of additives: individual additive and standard additive. They differ in the degree of customer participation in the creation of a specific product.
To perform individual additions to each piece of furniture, detailed marking drawings created by the customer are required. They must have all the markings and all the holes marked. Also, there must be type designations of holes (through or blind), dimensions for drilling depth and hole diameter. This type of additive can provide the creation of blind and through holes on a furniture piece that perfectly matches the customer’s markings. However, when performing individual additives, the functionality of the assembly of the entire product is not checked.
When creating drawings to perform an individual additive, the customer should remember that from one side of the furniture blank, the assembly size should not be more than 1500 millimeters. If the assembly size is larger, then it should be recalculated and indicated on the other side of the furniture piece. The size of the part placement must be indicated at the centers of the holes being created. If we take into account the edge, then this corresponds to the middle of the end sides of the combined furniture parts. And one more thing - if the thickness of the furniture piece is less than 16 millimeters, then making a blind hole on it is impossible.
To create a standard additive, the customer only needs to provide repair and assembly sketches of the furniture being created. To perform standard furniture
Additives The master does not need precise marking of holes, however, high-quality and reliable assembly of finished furniture when performing a standard additive is guaranteed.
A typical furniture additive is especially often used in creating frames for cabinet furniture and can be made in two versions. Option one is a standard furniture attachment for an eccentric tie rod with a dowel, where there are two dowels and two tie rods per connection. Option two is a standard furniture additive for a wooden dowel and a Euroscrew – confirmat. In the second version of the standard additive, two euroscrews and two ties are used per mating.
To order a standard additive, it is usually proposed to fill out an order form (additional), on which a dimensional and assembly sketch of the furniture being created will be applied. It is worth noting on it the desired type of fastener (eccentric tie or Euroscrew), dimensions of the arrangement of parts and their numbering according to the main form. It is also worth noting the additive locations.
Do-it-yourself chipboard markings, nuances and useful devices
Cabinet furniture made of laminated chipboard is assembled using confirmata (euro screws). Accessories in the form of hinges, guides, hinges and other retractable, rotary, swing mechanisms are installed on self-tapping screws. Dowels and shelf holders can also be used in the assembly. If you think in advance where which fasteners will be installed, and not “think as you go,” then the assembly will be simplified significantly. Errors are also minimized. Extra holes drilled in the wrong places are not uncommon even among experienced furniture assemblers.
What is the additive used for?
In the past, almost all furniture was made from wood. But wood is gradually being replaced by other materials that are just as reliable and aesthetic, but much cheaper. Plywood can serve as an excellent material for creating comfortable and reliable furniture. Very often, materials such as MDF, chipboard, and chipboard are used in the furniture industry.
MDF or, in other words, medium-density particle board. The material is created from dried wood fibers impregnated with a binding agent.
Chipboard, chipboard - is created from compressed shavings, after which it is lined with plastic.
Laminated chipboard is still the same chipboard, but unlike it, it is also covered with a laminating film. This allows not only to increase the wear resistance and reliability of furniture made from this material, but also to make its appearance more attractive. If conventional fasteners are used to assemble furniture from laminated chipboard, then the additive will include drilling the necessary holes (through or blind) and tapping (partial basting) to install the necessary fittings or mechanisms.
It is difficult to imagine today furniture assembled “without a single nail.” Assembling any piece of furniture, be it upholstered furniture or a kitchen set, will be extremely difficult without a high-quality additive.
There are many types of fittings. And for its convenient and correct use, an additive is simply necessary. Special additives are provided for tie rods, screws, eccentrics, and dowels. These are hidden mounting fittings, without which assembly into a finished product is simply impossible. There are also visible fittings, if possible hidden behind decorative overlays. It also requires an additive. Thus, additives are used for shelf supports and furniture hinges. And, of course, fastening decorative fittings, such as various handles and trims, is also impossible without preliminary additives.
Specially designed drilling and attachment machines used in furniture production are able to maintain hole diameter accuracy up to 0.1 millimeters, and linear dimension accuracy up to 0.5 millimeters. This ensures high quality of additive work. And a lot depends on this.
Preliminary application of the additive, both standard and individual, in full accordance with the customer’s sketches, on furniture made from chipboard, laminated chipboard, plywood and MDF, will make the assembly of the finished product faster and more convenient. Moreover, the impeccable appearance of furniture is also largely ensured by additives.
Source
Do-it-yourself furniture addition
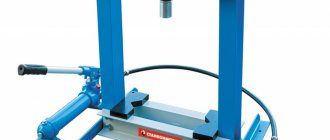
If you are already engaged in or just want to start producing furniture, then you will certainly need a drilling and attachment machine. It will help you accurately drill the required holes with which the elements will be connected.
If an additive machine for furniture produces parts according to pre-drawn drawings, then you will get a better result, the work will require less time and effort, and the manufactured furniture will be reliable and beautiful. Such a machine, of course, is expensive.
This is a high-tech unit; it is not needed for one stool or table, but for small production it is extremely necessary.
Scope of use
You need DIY additives to drill neat and precise holes at specific points. There will be no torn wood fibers or any chips.
High-quality equipment samples allow this process to be carried out as quickly as possible and almost completely eliminate the possibility of obtaining low-quality workpieces.
When designing furniture, any of its parts are calculated so that they are in a place previously intended for them; any deviations make it difficult to assemble the finished product, and sometimes make it impossible.
The operation of the additive machine occurs according to the aggregate principle. This means that several similar devices mounted on the head operate simultaneously.
The permissible error for this equipment is 0.4 mm at 64 cm.
Types of models
On an additive machine, several similar tools simultaneously perform their functions - drilling units, countersinks, which are mounted in a head with several spindles.
According to purpose, this equipment is divided into:
- Universal furniture machines;
- Specialized equipment;
- Special mechanisms.
Universal equipment - designed for complete hole preparation, from drilling to full processing with other devices. They are often used in the serial production of furniture; they are capable of performing many functions.
Small models with low energy consumption are suitable for beginner amateurs.
Specialized devices - designed for conveyor processing of necessary parts.
They are capable of processing a certain number of holes at the same time.
Can be customized for different operations. Most of the additive equipment falls into this category. Special mechanisms are intended only for processing workpieces of a certain configuration.
It is impossible to reconfigure them for other operations on your own.
The mechanisms are distinguished by the number of spindles and traverses:
- Drilling-filler and semi-automatic;
- Positional additives;
- Drilling and filler machines with programmable control;
- Additive mechanisms for hinges.
The best end result of using these mechanisms can only be obtained by understanding the features of its design and operation.
Special mechanisms
Universal
Specialized
Single head mechanisms
In such a machine, the workpiece is clamped with clamps on the tabletop in accordance with the indications of the guide ruler.
In this way, the workpiece is positioned correctly relative to the tools. When the motor is running, the head moves towards the workpiece.
The mechanism does its job, and the operator, using the remote control, releases the clamps and changes the workpiece.
The versatility of the installation is achieved by moving the spindles by 90 degrees. This feature is used for cutting grooves and processing beveled sides.
Voids are created in the tabletop for moving drills at the bottom of the workpiece. Such equipment is successfully used in small organizations with a small flow of processed parts.
Multi-head mechanisms
Among the working tools of this equipment, various devices are used - all kinds of heads for drilling material, and one for finishing the edge of the workpiece. The frame has a support necessary for securing the workpiece in the desired position.
The workpiece is placed on special strips and clamped with clamps. During engine operation, several heads operate simultaneously.
This is expensive equipment; it additionally contains control mechanisms, speed adjustment and part position controllers.
Differences between machines with multiple spindles and machines with a single spindle:
- The position of the heads is controlled by an electronic device, for this reason the parts are processed with high precision, additional adjustments are carried out quickly;
- You can process 2 planes at once, the work is done with great accuracy and faster. For another run of several similar workpieces, there is no need to readjust the unit;
- Vertical heads can make holes at the required angle;
- Additionally, the support table has devices for replacing parts, which free a person from manual work. This equipment belongs to position-through installations. They are often used in conveyor furniture production. In this case, the machines process the part as it moves along the conveyor; this application significantly saves time and completely eliminates the need to do the work manually.
The bulk of industrial equipment belongs to this type.
Drill head
Every filler machine has an element called a drill head. It contains spindles located at equal distances.
This is standard equipment for furniture making and is required by all filler machine manufacturers.
Differences can only be found in units for special purposes, for example, in those that prepare holes for attaching façade hinges. Drilling characteristics may vary depending on the properties of the hinges.
The movement from the electric motor to the head is transmitted through gears that are located in the head.
Depending on the number of spindles used, the head can be powered by 2 electric motors. This device is used to rotate spindles in opposite directions.
In this case, you can use drills with both left and right cutting.
How to make it yourself
The disadvantages of small drilling mechanisms are practically invisible, because in this case there is no need to make many parts.
And the simplest equipment can prepare precise and even holes, which allow you to make durable and high-quality furniture.
Do-it-yourself furniture making machines have their advantages and disadvantages.
They are good because:
- The devices are easy to use;
- They have a simple design; you do not need special knowledge to operate and maintain them;
- You can make holes without obvious defects;
- If necessary, you can increase their productivity;
- Low cost;
- To install and operate the unit, you do not need a lot of space; a small part of the desktop is enough.
However, homemade machines also have disadvantages:
- During operation, only one cutting tool is used;
- Low performance;
- You cannot perform many operations; additional mechanisms are required to process different parts;
- No automation;
- It is not possible to enable different modes.
A reasonable question arises - what versions of a homemade additive mechanism can be, and how to make it.
It is undoubtedly impossible to make this device at home using CNC, but it is possible to make a high-quality, albeit simple, furniture machine.
Photo enlarger as a machine
You can make a convenient homemade additive machine from an old household photo enlarger. Now this device is almost never used, for this reason its parts are often used for various homemade products.
The photo enlarger is used as the functional basis of the design.
The most important thing is that it has a comfortable desktop, with a securely fastened vertical stand, which is equipped with a special mechanism.
The casing is removed from the enlarger. Instead, an electric motor and a chuck for attaching the drill are attached.
Most often, the motor is mounted on the enlarger carriage plate using clamps.
You can use the motor from the mixer as an electric drive.
A chuck is attached to the motor axis, which can clamp drills up to 6 mm in diameter.
Such a machine for making furniture allows you to partially adjust it, changing the position of the vertical axis along which the chuck and the drill clamped in it move. And although it does not have the same characteristics as the factory models, it will cost almost nothing and will be able to perform simple tasks.
Making a machine from an electric drill
A homemade drilling machine can be made very quickly from a drill; you just need to select the appropriate parts. It is suitable for carpentry work; some craftsmen even connect CNC to it.
LDSP ADDITIVE (enterprise standard)
Additive for hidden pin-type shelf support (enterprise standard)
| Additive for hidden pin-type shelf support | |
| D , mm. | Depth, mm. |
| 8 | 100 |
| 12 | 140 |
- The making of holes for hidden shelf holders with other parameters is subject to agreement.
| Minimum internal rectangular cutout 50x50mm |
Internal cutouts have rounded right corners. The radius of the rounding depends on the diameter of the tool selected for this operation (R=8-10mm).
| Milling an internal closed cutout in a part can only be performed if the width of the material between the outer contour of the workpiece and the milling contour along the entire perimeter is at least 80 mm. |
Individual additive - drilling blind and through holes in furniture parts, according to the customer’s detailed marking drawings for each specific part, indicating the exact dimensions of the marking and designation of all required holes. It ensures accurate making of holes in furniture parts in accordance with marking sketches.
The internal cut-out is not edged
The size of the part to perform the additive. Production standard.
| Minimum part size for adding additives, mm. | M is the maximum size of the part to perform the additive, mm. |
| 300*80 | 2800*1100 |
- In case of deviation from the min and max dimensions, the possibility of manufacturing an additive is subject to agreement.
- Also, in case of deviation from the min and max dimensions, with a positive agreement, the cost of possible additional work is added to the total cost.
Marking and adding laminated chipboard when making furniture with your own hands
The manufacture of any furniture cannot be done without such a procedure as adding chipboard. Additive means drilling holes in furniture parts to install various fittings and place fasteners.
The company's specialists carry out various work on chipboard processing - chipboard cutting, edge cutting, additives. We guarantee high quality and short deadlines; the price of services will also pleasantly surprise you.
Adding chipboard in domestic conditions can lead to the fact that the holes may turn out to be sloppy, their sizes will differ from those planned, or the material may even be damaged.
It's all about the high density and heterogeneous texture of chipboard. When using non-professional tools, defects are observed in most cases.
And any deviation in the diameter or depth of the hole can render the part unusable.
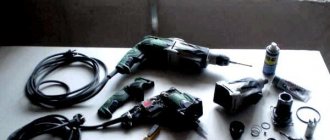
Additive Tools
First you need to prepare the tools and materials for work. The additive does not require much technology. It is enough to have a machine for adding furniture hinges, which will allow you to perform installation quickly and efficiently.
Additive Tools:
- Construction square for determining the ideal perpendicular;
- Marker for marking;
- Punch punch – a metalworking tool for marking;
- Fostner cutter - for standard hinges its size is 35 mm, and for compact hinges a diameter of 26 mm is used;
- A metal drill with a size of 2 mm, but this is an optional requirement;
- Electric drill.
For the additive, a Fostner machine is used. It allows you to make small indentations when working with soft materials. When choosing such a drill, several nuances need to be taken into account. It is important that the central needle is well centered, without noticeable runout. You also need to pay attention to the incisors. They must be made of hard alloys, otherwise they will soon become dull.
How is the addition of furniture hinges done?
When purchasing cabinets, you may come across the concept of adding furniture hinges. This is a fairly simple process that requires correct and accurate installation of fittings. Of course, the operation has its own characteristics, subtleties, and nuances. If you study all the rules and the sequence of steps, you can perform the additive at home yourself.
Characteristics of furniture additive
An additive for furniture hinges is the fastening of fittings to a cabinet door. The process consists of several successive stages. The additive necessarily involves drilling to secure the fasteners. This event determines the final appearance of the furniture.
Types of additives:
- Individual. The customer provides a separate drawing for each part. The required dimensions and drilling locations are indicated there. The drawing necessarily implies the designation of through and blind holes, and the parameters of the recesses. Thanks to the drawing, it is possible to perfectly fix the part. But with such an additive, functionality is not adjusted.
- Typical. It is carried out using an additional form. The document includes a sketch indicating the assembly diagram and required dimensions. On the form you need to note the type of fastener, additive locations, and dimensions of the parts.
The most common are hinges with 4 hinges. To secure the fittings, you need to make a small recess on the back of the doors. It will serve as a seat for the loop. You can make the additive yourself. This does not require a large set of tools. The main thing is to follow the sequence and rules for installing fasteners.
Sequential stages and sizes for additive
The additive scheme consists of several successive stages. First you need to do some preparation. The working surface must be flat and free of dirt.
You can place a rubber sheet, stretch film, or polyethylene foam under the door. To prevent the facade from changing position, you can use clamps. Before applying the additive, you should take care of safety precautions.
It is important to wear protective gloves and goggles.
Marking
Next comes the marking. This is an important event that determines the accuracy of installation and functionality of the door. You can take a ready-made drawing of the door for the hinges or independently calculate the position of the fittings.
If you calculate the dimensions for the additive yourself, you need to rely on several rules. So you need to retreat 1.1-1.2 cm from the edge. This is an important accuracy criterion that must be observed. The first and last fasteners should be located at a distance of 7-15 cm from the sides of the doors. The number of hinges is determined by the dimensions of the facade.
Installation
After marking is completed, they proceed to drilling. It is prohibited to use high speeds when performing manipulations. The optimal amount is 1500 rpm. Otherwise, the material will begin to burn and the cutter will become dull. If a hand drill is used, the movements should be smooth and of small amplitude. This will help improve sampling efficiency.
The depth of the hole can only be controlled manually. For this reason, you need to periodically stop the drilling process to measure the depth. The optimal depth is on average 1.2 cm.
Then they move on to the simplest stage - fixing the loops. The fastener is inserted into the prepared hole. Then the bowl is leveled using a square. Places for fastening are marked with a marker. Fixation is carried out with two self-tapping screws. It is necessary to perform core punching first.
If there are minor inaccuracies, you should not pay attention to them. The permissible error is up to 1 mm.
If you have experience with additives, you can screw on the fasteners without preliminary marking. An experienced craftsman can use a square for work.
This primitive, simple additive can be done with your own hands in a quiet home environment. Mechanized work requires special equipment and skills to work with professional tools.
You can make a special machine for additives yourself or purchase a cheap vertical type option. Working with such equipment will reduce time and labor costs.
It will be possible to perform the additive faster and better.
Additive sizes. Production standard.
| Hole type | The location of the additive relative to the plate | |||
| Additive on the surface, mm. | End additive, mm. | |||
| D, mm. | Max depth | D, mm. | Max depth | |
| Through | 5, 8, 10 | 55 max | No | No |
| Deaf | Tattoo (marking) | |||
5, 8, 10, 15, 20, 35
| slab thickness minus 3 mm/max 55 mm. | 5, 8, 10 | 35 mm. (except for additives for hidden shelf supports) |