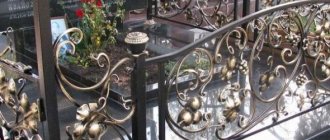
Features of canopies
A profile canopy is a structure that represents a covered area. It can have different shapes and sizes. This structure is used to protect against negative external influences.
A frame for a canopy made of metal profiles is a winning solution. This material is resistant to negative external influences, durable and able to withstand significant loads. Such structures are easy to design and install, which also has economic benefits.
The design of a canopy made from a profile pipe implies the presence of the following elements:
- Foundation . Usually columnar due to low cost and ease of installation.
- Supports . They are vertical load-bearing elements.
- Suspensions . The horizontal part of the frame is formed.
- Slopes . They are lateral connecting elements.
- Rafter system . It is formed from rafters, sheathing, and trusses.
- Roofing _ Made from polycarbonate sheets and profiled flooring.
A canopy made from corrugated pipe is formed from a different set of load-bearing and additional elements. It all depends on its functions, size, configuration, expected loads.
Construction of a covered area Source infotruby.ru
Rafter covering systems of significant size are formed using trusses. They consist of two horizontal pipes, which are connected to each other by vertical (risers) and inclined (braces) elements. Trusses provide the structure with the necessary spatial rigidity and load-bearing capacity.
Roof shape and material
The length of the rafters for its installation and the brand of roofing material depend on the angle of inclination of the canopy.
Tilt angle from 22 to 30 degrees. This angle is installed on farms that are installed in regions with high levels of snowfall. Preference here is given to a belt made of a triangular-shaped profile pipe. It is recommended to cover the roof of such a canopy with straight asbestos or corrugated sheets, or various types of metal profiles.
Tilt angle from 15 to 22 degrees. Shed roofs with this angle of inclination are installed under high wind loads and have a gable shape. They have a small windage and are often covered with metal roofing coverings.
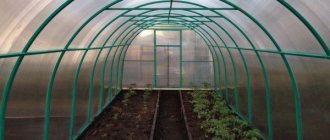
Tilt angle from 6 to 15 degrees. The simplest lean-to sheds. They can be covered with polycarbonate or profile covering.
To determine the load-bearing capacity of a roof or the permissible load that it can withstand, it is recommended to use an online calculator.
^ back to contents
Classification
Indoor areas are usually divided into several types depending on the type of support and rafter system.
Support type
Types of canopies made of metal profiles according to the type of supports:
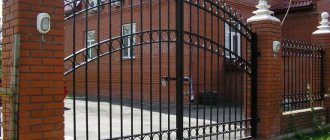
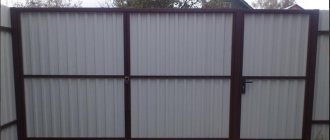
- Attached . They are attached to the load-bearing walls of the building. The design implies the presence of additional supports. Such structures are suitable for arranging terraces, entrance areas, and parking lots.
Attached type of canopy Source yandex.net
- Console . The structures have no supports and are fixed to the wall of the building. Additional fixation is provided by special suspensions. Such canopies are most often installed over balconies and entrance areas.
Cantilever canopy Source remont-book.com
- Freestanding . They rest on support posts. They are used to create coverings over parking lots, various playgrounds, and recreation areas.
Free-standing canopy Source polikarbonatvs.com.ua
See also: Catalog of companies that specialize in the design and installation of metal structures
Roof type
The roof is the basis of a suspended structure, the complexity of the construction of which depends on its size and shape. Canopy made of pipes according to the type of rafters:
- Single-pitch . The simplest design that goes well with all roofing materials. When creating a covering for large areas, trusses are used to form a rafter system.
An example of a shed roof Source zakupka.com
- Gable . It has a more complex configuration. Gable canopies made of metal profiles in the courtyard of a private house for large areas are created using trusses in the form of equilateral triangles.
Gable roof Source prom.st
- Shatrov . As the number of roof slopes increases, its calculation becomes more complicated. When creating a structure, precise cutting of the roofing material is necessary. To protect all roof joints, the use of special elements is required.
Hip roof Source landshaftdesign.org
- Arched . It is formed from trusses curved at a certain radius or arched rafter legs. To create the coating, exclusively flexible materials are used. The roof has the shape of an arch or wave.
Arched roof Source stroybat.bel
Design and calculations
When drawing up drawings and carrying out calculations, you need to pay attention to many important points:
- Tilt angle. This parameter directly depends on what material will be used for the roofing.
The minimum value for slate, corrugated sheets, metal and ceramic tiles is 6 degrees, for bitumen tiles - 12.Copper and galvanized sheets must be positioned at an angle of at least 17 degrees.
- Visor length.
It is calculated in such a way that this structural element reliably protects the adjacent wall from precipitation. In windy weather, raindrops fall at an angle to the vertical; this must be taken into account when designing the overhang. On average, its length is 600 mm for one-story private houses. For two-story cottages and mansions - about 1000-1200 mm. - The pitch of the rafter legs. These structures are laid in a transverse position with a pitch of 500-750 mm. This value largely depends on the roofing material. If a heavy coating is used, a lower value should be selected. If the roofing material is relatively light, the pitch can be increased.
- Thickness of wooden load-bearing beams. It must be at least 50 mm. In this case, it is necessary that the wood be of high quality, without visible defects: cracks, knots, etc., since the beams bear a significant part of the load.
Calculation and creation of drawing
The design of a canopy made of metal structures is necessary to calculate materials and to facilitate subsequent installation. The location of the main and additional elements is noted on the drawing and their dimensions are indicated.
When creating a design project, the following values are taken into account:
- tilt angle (Q);
- rafter length (L).
The angle of inclination of the slopes is selected taking into account the standard snow and wind load (selected for a specific climatic region according to SNiP). The type of roof chosen is also taken into account. A canopy made of corrugated pipe can have slopes that form an angle of 6-15% with the horizontal plane. For other types of structures this figure should be in the range of 22-30%.
Example of a canopy drawing Source prom.st
What determines the angle of inclination of a pitched roof?
There are flat (up to 5 degrees to the horizontal), low-slope (5...30 degrees) and steep-slope (over 30 degrees) pitched roofs. At the same time, flat and low-slope roofs require very careful waterproofing and water drainage - this is due to the fact that snow lingers on such surfaces and begins to melt from below, from the heat emitted by the house.
Snow and wind loads
These parameters are of great importance when choosing the angle of inclination.
It is believed that snow does not slide off a roof with a slope of less than 20 degrees and remains on the surface. With a greater slope, the preservation of the snow cover depends on the type of roofing material. On roofs with a slope of more than 50 degrees, snow cover does not linger, regardless of the covering, except in certain cases (immediate glaciation, complex structures).
The need to take into account the weight of the snow cover is related to the calculation of the roof’s strength, therefore, before the design begins, it is necessary to clarify the snow loads of the given region. Information can be found in SP 20.13330.2016, section 10 “Snow loads”. There, in the “Wind Impacts” section, there is data for calculating the wind load.
You can easily “estimate” the snow load using a map of the Russian Federation (territory zoning based on the weight of snow cover and wind areas). Please understand that these data are simplified and do not take into account possible nuances associated with prevailing winds, terrain and other factors.
The wind load is calculated taking into account the height of the building and its location. Zone A – open spaces, zone B – forested areas, dense urban development.
When the building height is less than 10 m, it is permissible not to take into account the wind load, with the exception of buildings located in large open spaces.
When calculating the optimal angle of inclination of the structure, it is necessary to take into account:
- to reduce the wind load it is necessary to reduce the angle of the slope;
- To reduce the snow load (ensuring snow sliding), the angle should be increased.
Thus, the decision made is a compromise between the desire to get rid of regular cleaning of the roof from snow and the reluctance to re-lay the covering torn off by the wind. Examples of calculations taking into account snow and wind loads are shown below.
Selecting the type of coating
Depending on how steeply the slope is inclined to the horizontal, you can choose one or another roofing material. Sometimes the inverse problem occurs - the roofing material has already been selected, now it is necessary to determine the permissible angle of inclination.
The permissible and typically applicable roof angles for different materials are listed in more detail in the table below.
Attention: heavy, fragile materials are not suitable for steeply sloped roofs! It is also necessary to take into account the reliability of fastening of individual elements and correctly calculate the waterproofing!
The weight of the roofing material can be taken approximately from the table below or found out independently from the manufacturer/seller.
Important: when making calculations, you should rely on the maximum figure, this will give the necessary margin of safety for the structure!
Insulation and waterproofing
There is only one rule: the smaller the number, the more thorough the waterproofing should be. Thus, for flat and low-slope structures, it is necessary to install two-layer insulation with careful gluing of joints and obligatory laying of panels (rolls, films) overlapping with a margin of at least 20 cm.
Roof insulation depends on the region of residence, its temperature range, the planned operation of the premises under the roof, heating of the building as a whole and other nuances. The calculation of thermal insulation will not be described in detail here.
The type and specific gravity of the selected materials must be determined in advance; this is required to calculate the prefabricated load from the “roofing pie” on the overall structure and load-bearing walls.
Technology of work execution
Sheds made of metal profiles in the courtyard of a private house are installed taking into account generally accepted building codes. The list and scope of work performed also depends on the chosen structural design of the structure.
Single-pitch design
A single-pitch canopy from a profile pipe is made according to the following scheme:
- Preparatory work . The area where the profile pipe carport will be placed is cleared of debris and leveled.
- Marking . The installation locations of the support pillars are indicated.
Marking a columnar foundation Source yandex.net
- Foundation . A hole with a depth of at least 60 cm and a diameter of 25 cm is dug under each pillar.
- Installation of racks . Each pipe, which acts as a rack, has a “heel” - a special strip - welded to the bottom. The element is installed in the design position, after which the free space in the hole is filled with concrete mixture.
- Frame strapping . The racks are connected along the contour using horizontally oriented elements.
- Creation of farms . Two pipes located along the legs of the structure are welded. The hypotenuse is measured, a piece of pipe of the required size is cut off, and then welded in the right place. Cross members are welded between the leg and the hypotenuse to increase the spatial rigidity of the structure.
- Installation of additional fasteners . When creating a canopy from a profile pipe, a horizontal strip is welded to each smaller leg of the truss. Holes are made in it, which will allow you to subsequently attach the structure to the wall of the house.
Frame installation Source ad-cd.net
Useful tips for choosing and creating metal structures
In order for truss welding to be of high quality, it is necessary to follow a number of recommendations. Among them are the following:
- When choosing a standard size, you should give preference to square and rectangular products, which add stability to the structure thanks to stiffening ribs.
- It is necessary to use only high-quality products; the material is high-carbon alloy steel, resistant to environmental aggression.
- The correct choice of products and materials will be the key to the required load-bearing capacity.
- When connecting metal truss components, it is necessary to use paired angles and tacks.
- Metal I-angles are mounted in the upper belt, making connections along the side that has a smaller size.
- When mating parts, equilateral angles are used.
- The components of long metal structures are secured using overhead plates.
- The braces are mounted at an angle of 45 degrees, and the racks - 90 degrees.
- Initially, the main structure is assembled, after which they begin to weld the truss, checking the welds for quality.
In order for the design to turn out in accordance with the requirements, it is important to adhere to a certain operating algorithm. Initially, the site is marked. To do this, install vertical supports and embedded parts.
If necessary, metal profile pipes can be immediately placed in the pits and concreted. The installation of vertical supports is checked with a plumb line, and to check parallelism, the cord is pulled
To do this, vertical supports and embedded parts are installed. If necessary, metal profile pipes can be immediately placed in the pits and concreted. The installation of vertical supports is checked with a plumb line, and to check parallelism, the cord is pulled.
Video on the topic:
The next step is to fix the metal profile pipes by welding. The products are welded to the supports. Truss elements and assemblies are welded on the ground, and then secured using jumpers and braces. The next step is to lift the metal beams to a height, weld them with profile pipes and supports, weld in the jumpers and create holes for fasteners in them. Finally, the elements are cleaned and the structure is prepared for roofing and painting.
Video description
More information about how to install metal canopies from metal structures to a house is described in this video:
Gable
The gable structure is being built according to a similar technological scheme. The only difference is the roof design. Trusses, which are equilateral triangles, are used as rafter legs. Inside the structure there are always vertical and inclined elements that provide additional rigidity.
If a canopy for a house made of metal profiles is made using corrugated sheets, special screws are used to attach the sheets to the sheathing. They are installed without pre-drilling holes and ensure a tight connection due to the presence of a rubber gasket.
The joint of sheets on a gable roof is closed with a special ridge strip. It is attached using the same screws to the upper groove of the corrugated sheet.
Requirements for calculating a profile pipe for the construction of a farm
When calculating the dimensions and wall thickness of profile pipes required for the construction of your metal structures; the following conditions are taken into account:
- Dimensions of the metal structure, and in particular, length, support spacing - the distance between supports.
- Height of supports and trusses.
- Farm shape.
- Maximum snow load in winter.
- Wind load.
- Possible features of geological conditions (seismic activity, possibility of landslides).
- Coating weight.
What happens if you calculate incorrectly
If the calculations are incorrect, the following consequences are possible:
- Farm structures will deform under the weight of snow and wet leaves.
- In the worst case, the structures will deform under their own weight.
- The entire structure may collapse in strong winds.
- Deformation will sooner or later lead to the destruction of the truss and the entire structure, which is dangerous for humans and can damage objects located under the canopy - a car, for example.
- A fragile and movable structure will lead to the destruction of the roof laid on the truss.
- When using a profile that is too powerful and heavy, the costs of materials and work during the construction of metal structures increase unjustifiably.
Additional recommendations
Canopies made of metal profiles in the courtyard of a private house or public building are made taking into account the following rules:
- Before laying the foundation, you need to find out the depth of soil freezing for a specific area. The pillars should be buried no higher than this level. This will guarantee the strength and durability of the structure.
- All elements of the metal frame must be coated with a special primer and paint. This will prevent the material from being destroyed by moisture.
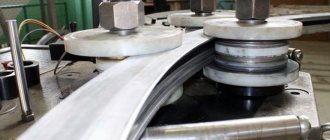
- Arches for a canopy from a profile pipe are made using special equipment that helps bend the metal to the desired radius. It is impossible to do this on your own.
- To fix pipes with a diameter of up to 25 mm, you can use the crab system. These are special clamps that provide simultaneous connection of several frame elements.
An example of using a crab system Source greenhouse-yaroslavl.rf
- To connect elements from a profile pipe, in addition to welding, you can use bolted connections. They are no less durable and can withstand significant loads.
We manufacture and install trusses
We will give you some valuable tips on how to independently weld such trusses right on your own site without much difficulty:
- Option one: you can contact the factory, and they will custom-make all the necessary individual elements according to your drawing, which you just have to weld on site.
- Second option: purchase a ready-made profile. Then all you have to do is cover the inside of the trusses with boards or plywood, and lay insulation in between, if necessary. But this method will, of course, cost more.
So, now we come directly to the assembly of the trusses themselves. The following step-by-step instructions will help you cope with this:
Step 1: First prepare the trusses. It is better to weld them directly on the ground in advance. Step 2. Install vertical supports for future trusses
It is vital that they are truly vertical, so test them with a plumb line. Step 3. Now take the longitudinal pipes and weld them to the support posts. Step 4
Raise the trusses and weld them to the longitudinal pipes. After this, it is important to clean all connection points. Step 5. Paint the finished frame with special paint, having previously cleaned and degreased it. Pay special attention to the joints of the profile pipes.
What else do those who make such farms at home face? First, think in advance about the support tables on which you will place the truss. Throwing it on the ground is far from the best option - it will be very inconvenient to work with.
Therefore, it is better to install small bridge supports that will be slightly wider than the lower and upper chords of the truss
After all, you will manually measure and place jumpers between the belts, and it is important that they do not fall to the ground
The next important point: trusses made from profile pipes are heavy in weight, and therefore you will need the help of at least one more person. In addition, it wouldn’t hurt to have help with such tedious and painstaking work as sanding metal before cooking.
Also, in some structures it is necessary to combine different types of trusses in order to attach the roof to the wall of the building:
Also keep in mind that you will need to cut a lot of trusses for all the elements, and therefore we advise you to either purchase or build a homemade machine similar to the one in our master class. Here's how it works:
So, step by step, you will draw up a drawing, calculate the truss lattice, make blanks and weld the structure on site. Moreover, you will also be using up the remains of the profile pipes, therefore, you will not need to throw anything away - all this will be needed for minor parts of the canopy or hangar!
Briefly about the main thing
A carport made of metal profiles is the optimal solution from a constructive, functional and aesthetic point of view. Also, such structures are excellent for arranging covered areas for recreation, games, sports, for decorating terraces and entrance areas.
Such structures consist of a foundation, racks, hangers, slopes, rafter system and roof. Depending on the type of support, they can be free-standing, cantilevered or attached. According to the type of roof used, such structures are divided into single-pitched, gable, arched, and hipped.
It is best to entrust the calculation and installation of the canopy to professionals. This will allow you to get a reliable design that will last for many years.
Ratings 0
Features: pros and cons
A pitched roof is a rectangular, absolutely flat shape located at an angle relative to the building frame. The magnitude of its inclination may vary depending on the architectural design, climatic conditions and the surrounding landscape. When using high-quality materials, it lasts at least 20–30 years.
Such a roofing arrangement is considered the most resistant, including to external natural influences, if the location of the structure is unmistakable in relation to the wind rose.
The sloping lean-to form is better than the gable form, although it does not allow for the creation of a comfortable attic space. But it’s easier with a ventilation system: aerators and a ventilated ridge are simply not needed.
The benefits also include:
- Low load on supporting structures due to relatively low weight.
- Lowest consumption of building materials compared to other types of roofs.
- Modest financial costs.
- A simple and quick method of construction that can be done with your own hands.
- There are no restrictions in the choice of roofing materials and rafter system.
- Affordable planning and installation of drainage and chimney systems.
A harmonious, beautiful project requires compliance with many conditions, sometimes to the detriment of functional needs.
There are fewer disadvantages than advantages, but still they exist.
- To arrange the living space of the attic, a significant width of the house and a high roof angle are required.
- A low bevel can cause poor thermal insulation.
- A reinforced drainage structure with a wider pipe diameter is required, since all the water flows in one direction. Metal systems with brackets secured at a distance of at least 40 cm are recommended.
- If the slope is less than 45 degrees, in winter you will have to constantly clear the roof of snow to reduce the load.
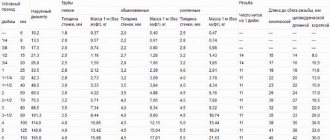
How to calculate a truss from a steel profile pipe
Calculation of any metal structure is an important and responsible stage, regardless of what kind of structure is intended to be built.
The calculation of a rafter system from a profile pipe comes down to the following points:
- Determining the size of the span of the structure that is planned to be covered, as well as choosing the configuration of the pitched roof, with an effective angle of inclination of the slope (s).
- Selection of the optimal contours of the truss chords, taking into account the nature of the building, the shape and dimensions of the roof, the angle of inclination, and design loads.
- Determining the optimal height of the structure at the center of the span (H), based on the following formula (where L is the length of the truss). For parallel, polygonal and trapezoidal belts: H=1/8×L. In this case, the slope of the upper chord should correspond to 1/8×L or 1/12×L. For a triangular truss: H=1/4×LH=1/5×L.
- Clarification of the conditions for assembling the structure depending on its dimensions. If the dimensions of the metal structure are impressive, then it is better to weld it right there, on the construction site, and only then install it in place using a construction crane, and if the dimensions are small, then it is better to weld the truss in the factory premises, and then transport it to the installation site . Although the latter option is more expensive, it is more reliable, since it is very problematic to carry out work in an unprepared place.
- Calculation of the size of the panels depending on the design loads acting on the roof during its operation.
- Determining the angle of attachment of the grille braces, which can be in the range of 35-50 degrees, although it is recommended to install them at an angle of 45 degrees.
- The next step is to determine the distance between the fastening units, although usually the distance is equal to the width of the panel. For span sizes of 36 meters or more, it is necessary to calculate the amount of construction lift - the reversible bending that the structure experiences during operation.
- Taking into account all the measurements and calculations, a technical drawing is drawn indicating all the necessary dimensions, according to which the metal structure will be manufactured from a metal pipe.
To avoid large discrepancies in calculations, it is better to use a construction calculator. Based on a special program, you can calculate any metal structure, including roof rafters from a profile pipe.