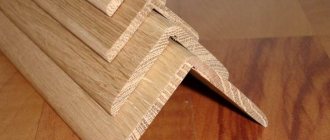
Today, many home craftsmen use aluminum elements for various purposes, ranging from indoor renovation work to furniture decoration.
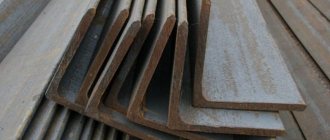
The aluminum corner 20x20 is in greatest demand. Let's figure out how to bend this part correctly. After all, if you try to mechanically bend it, the metal may crack, and this component will be irretrievably damaged.
Types of sheet benders
There are three types of sheet metal bending machines:
- Simple manual ones, in which metal bending occurs when force is applied in a certain place. These units make it possible to bend sheet material in a straight line at any angle - from a few degrees to almost 360°.
For bending sheet metal
To obtain radial bending of a metal sheet
All these devices are classified as sheet bending machines. The easiest way to make one with your own hands is the unit of the first group, a little more difficult - the third (rollers for sheet metal). So we’ll talk about them - from how to make a sheet bending machine with your own hands.
Simple manual
Shaped metal parts cost a lot of money. Even more than corrugated sheeting or metal tiles, therefore it makes sense to make a simple machine for bending sheet metal, and with its help make as many corners, ebbs and other similar parts as you need, and exclusively to your own dimensions.
If you're worried about appearance, you shouldn't be. On sale today there is sheet metal not only galvanized, but also painted. In all designs, the sheet is fixed tightly, so that when working it does not slide on the table, which means that the paint does not rub off or get scratched. It is also not damaged in places of bending. So the products will look quite decent. If you try, they will look even better than what they sell on the market.
Powerful sheet bending machine from brands
This sheet bending machine will require a flat surface (table), preferably metal, three corners with a shelf width of at least 45 mm, and a metal thickness of at least 3 mm. If you plan to bend long workpieces (more than a meter), it is advisable to take wider shelves and thicker metal. You can use brands, but this is for bending metal sheets of large thickness and length.
You will also need metal door hinges (two pieces), two large diameter screws (10-20 mm), wings on them, and a spring. You will also need a welding machine - weld the hinges and make holes (or a drill with a metal drill bit).
For a homemade sheet bender, a 70 mm brand was used - three pieces of 2.5 m each, two bolts of 20 mm in diameter, a small piece of metal 5 mm thick (for cutting jibs), a spring. Here's the procedure:
- Two brands are folded, and grooves are cut into them at both ends for hinges. The edges of the recesses are beveled at 45°. The third tee is cut in the same way, only the depth of the recess is made a little larger - this will be the clamping bar, so it should move freely.
Read also: Triple Cross film 1966
Cutting notches for hinges
Boil the loops well
Weld pieces of reinforcement to the bolt head
Homemade sheet bender in progress
This option is very powerful - you can bend long workpieces and sheets of considerable thickness. Such scales are not always in demand, but they can always be reduced. The video suggests a similar design of a smaller size, but with a different fastening of the clamping bar. By the way, no one bothers you to also install a spring on the screw - it will be easier to raise the bar. What’s interesting about this design is that you can make beading on it, something that such devices usually cannot do.
From a corner with a different type of clamping bar
This model is welded from a thick-walled angle, the frame is made like an ordinary construction sawhorse, which is welded from the same angle. The handle is from a luggage trolley. The design of the screws is interesting - they are long, the handle is curved in the shape of the letter “L”. Convenient to unscrew/screw.
Small manual sheet bender for DIY production
This homemade sheet metal bending machine has many features:
- The corners are not arranged with shelves facing each other, but are directed in one direction. Because of this, attaching the loop is not the most convenient, but it can be done.
Now let's move on to the design of the clamping bar (pictured above). It is also made from a corner, but is laid on the machine with an upward bend. To ensure that the bar does not bend during operation, reinforcement is welded on - metal jumpers. Small metal platforms are welded at both ends of the strip, in which holes are drilled for bolts.
Another important point is that the edge that faces the bend is cut off to obtain a sharper bend angle.
The bar is set like this
The clamping bar is placed on the machine, and a spring is placed in the place where the nut is installed. The handle is installed in place. If it does not press the bar, it is raised above the surface due to the elastic force of the spring. In this position, the workpiece is tucked under it, positioned, and pressed.
Place a spring under the hole, then a bolt
A good option for home use. It will not be possible to bend thick metal, but tin and galvanized steel can be bent without difficulty.
Sheet metal rollers or roller bender
This type of sheet bending machine can have three types of drive:
They make rollers for sheet metal with manual or electric drive with their own hands. Manual ones have 3 shafts, electric ones can have 3-4, but usually there are also three.
This machine needs a good solid foundation. This could be a separate bed or some kind of workbench or table. The basis of the structure is rolls. They are made the same size. The two lower ones are installed permanently, the upper one is movable, so that in the lower position it is located between the rollers. By changing the distance between the lower rollers and the upper one, the radius of curvature changes.
Read also: Do-it-yourself workbench for a miter saw
The machine is set in motion using a handle attached to one of the shafts. Then the torque is transmitted to other rollers through sprockets. They are selected so that the rotation speed is the same.
If the equipment is intended to produce pipes, the upper roller on one side is made removable, with a quick fixation system. Once the sheet is rolled into a pipe, there is no other way to pull it out.
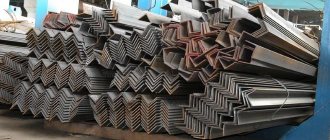
Tin corners are used to cover corners both inside and outside the house,
in the household, to strengthen shelves, corners of drawers, and so on.
There are two types of tin corners
| External corner | Internal corner |
Profile dimensions: 15-50-50-15 mm
Angle bending is a technological process for obtaining various products of given parameters and required shapes by mechanical action, including on special profile bending equipment.
The products obtained by bending a metal corner are widely used in various fields of construction. They allow you to create reliable frames and various metal structures that, despite their external lightness, can withstand significant loads.
How to bend rebar, sheet metal, etc. without having a special tool
If you have already started a major renovation with your own hands, regardless of where it is carried out: at home or in an apartment, then you need to be prepared for many tests.
Among other things, a number of issues may arise that are very difficult to solve without the proper experience and special equipment. For example, not everyone knows how to bend a sheet of metal, reinforcement, profile, corner, etc., while obtaining a decent result.
In this article we will try to answer “inflexible” questions, while making do with a minimum amount of tools.
Very often, when installing metal structures, it is necessary not only to cut steel sheets, but also to give them a curved shape. This can be done at home without spending money on third party services. For example, how to bend a sheet of metal? To do this we need a wooden or rubber hammer, pliers, and a table. If a 90-degree bend is expected, then this set of tools should be sufficient.
The sheet is simply hung over the edge of the table, after which the desired curvature is achieved by uniform tapping in the bending area. If the workpiece is relatively small, then you can use a vice, in which, using two gripping bars, you can firmly secure a sheet of metal, and only after that bend it with a hammer.
If necessary, the bend can be heated with a gas burner, but this method is not applicable to galvanized products!
Bend a sheet of metal
If we are talking about a thin metal sheet, then the bending procedure can be significantly simplified. To do this, the metal is “scratched” at the bend (we use a rule or a metal ruler, and a pointed piece of a hacksaw blade for metal as a cutter). The metal, cut to half its thickness, subsequently easily bends along the outlined line. We can say that we have almost figured out how to bend a sheet of metal.
We bend galvanized steel
How to bend galvanized steel? This can be either a galvanized metal sheet or a finished product, for example, a profile. The sheet is bent in the same way as when bending any other metal sheet. How to bend a profile? You'll have to tinker with him.
To obtain a large radius of curvature of a square or rectangular profile, you can use the following method: tightly fill the profile with fine sand, plug both holes with wooden stakes, and only then bend it by gently tapping it with a mallet.
To bend a U-shaped profile (this, in principle, also applies to obtaining sheets of curved shape), it is necessary to additionally use a form object, the curvature of which corresponds to the finishing part. To facilitate the bending process, triangular elements can be cut out in the profile.
Then the bent product is “wrapped” around the object by uniform tapping with a hammer. Important! In order for the bend to be as even and correct as possible, the hammer blows should be light and lie as close to each other as possible .
How to bend galvanized sheet easier? Using a grinder, we make one or two cuts in the bend area (thereby temporarily weakening the structure), bend the product, and then weld the bend. This approach is important to use when bending profiled pipes and products of complex metal shapes.
We remember that you cannot heat galvanized steel to simplify bending!
Perhaps one of the most difficult tasks faces people who are thinking about how to bend a corner. To get a solid product, you will have to sweat, evenly and slowly tapping the surface of the corner, gradually bending it. It is recommended to use a gas burner, which can be used to heat the bend. You can do it easier - use a grinder as in the case described above with a galvanized product. It’s even easier to buy an already curved product, then the question “how to bend a corner” will disappear by itself.
How to bend reinforcement
At home, it is quite possible to bend the reinforcement, however, a lot depends on your physical characteristics and the diameter of the metal rod. How to bend reinforcement? To do this, we need two pieces of steel pipes, the diameter of which is greater than the diameter of the bent rod.
The longer the length of such pipes, the easier it will be to bend the reinforcement (gain in strength due to leverage).
All you need to do in order to bend the reinforcement is to insert it into two pipes and, securing one of the pipes (pressing it with your foot or resting it between the pillars), using the second as a lever to give the reinforcement the desired curvature. That's all!
| Technology of building a house from timber Where to start building a house from timber? What needs to be taken into account so as not to later regret the choice of building material? In one article, we sequentially examined the stages of erecting a cobblestone structure, taking into account the requirements of technology. Having such a short guide before your eyes, you will be confident in the correctness of your actions. |
| Metal grill and more If you're going outdoors, don't forget to take your grill with you! Is it not available? Of course, you can run to the store and buy it, but why not make the same, if not better, metal barbecue with your own hands? The work will take a maximum of a couple of hours. We will try to explain in detail the manufacturing process of this simple device. |
| Strengthening the foundation of a private house Are you preparing to build an extension to your house? Have you decided to add a second floor? Perhaps the old foundation of the house scares you with an abundance of cracks and uncharacteristic distortion? All this indicates the need to strengthen the foundation. We have tried to summarize data that will be useful in resolving this issue. |
Source: https://CdelayRemont.ru/kak-sognut-armaturu-list-metalla-itd-ne-imeya-specialnogo-instrumenta
Corner bending methods
Several basic methods are used to obtain structures of a given shape and profile from a metal corner, namely:
- cold bending,
- hot bending,
- shaping by cutting, bending and welding the finished product.
Cold bending of a metal corner, in turn, is divided into:
- free bending is when the corner is bent without the use of special equipment;
- bending using a rolling mechanism on a specialized profile bending machine.
The use of cold bending of a metal corner, unlike other methods, has certain advantages, namely:
- this is the least expensive method of giving metal a given shape, and does not require the use of additional equipment for heating, cutting, welding and subsequent processing of the metal;
- the resulting frame has greater strength, since it eliminates possible defects characteristic of heating, cutting and welding;
- finished structures are guaranteed to last longer due to the fact that the integrity of the metal profile structure is preserved during processing;
- the likelihood of metal corrosion occurring over time is reduced.
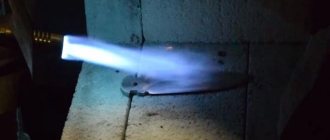
Profile bending with a gas torch
Using a gas torch, it is necessary to heat the aluminum profile exactly at the bending point and next to it. The main heat of the flame should be concentrated at the point of bending.
After the required temperature has been reached and the profile has become noticeably more plastic, a steel metal pipe of suitable diameter is applied to the bending metal. Strictly speaking, its outer diameter will be equal to the bending diameter of the aluminum profile.
It is necessary to work with thick gloves, as the metal becomes very hot. Leaning the pipe against the profile, we begin to carefully bend it. Apply jerky, soft movements (you don’t have to constantly pull the profile to bend).
We watch the place of bending. If we see a change in color, continue heating with a gas burner. The final result will be achieved much faster than using homemade rolling machines.
The video demonstrates how you can bend an aluminum profile at home:
Metal landing.
Sheet metal bending, called upsetting, is used in cases where one sheet must overlap the edge of another sheet (Fig. 1).
Bend a corner radius
Bending a metal corner along a radius is a rather complex technological operation, since any bending is a simultaneous compression of the inner and stretching of the outer layer of metal, and, in the case of a profile in the form of a corner, such processes cannot proceed evenly, which will be accompanied by an attempt to longitudinally displace one from these layers.
Directly for a metal corner, two main methods of bending in the profile plane are used - this is when one of the shelves lies in a vertical plane, and the other in a horizontal one, and its bending will be:
- inside the radius of curvature of the deformation, in which case it will be greatly compressed,
- outside the radius of curvature of the deformation, accordingly, it will stretch.
Cold bending of a metal corner using the rolling method on special profile bending equipment allows you to bend both a steel corner and an aluminum profile, thereby obtaining products of almost any radius with an ideal shape.
You can see how to bend a corner along a radius with your own hands in this video.
Read also: Tension clamp for vultures
It is worth keeping in mind that for both hot and cold bending methods there are maximum radius values that directly depend on the size of the corner flanges and its thickness. So, you can simply calculate the radius by which it is permissible to bend a corner, according to the following values:
- the permissible radius for an equal-flange corner must be a minimum of 45 times the width of the shelf;
- for an unequal-sided profile, the permissible radius cannot be less than 45 times the width of the shelf for a larger shelf and 50 for a smaller one.
But it is better and easier to be guided by the values given in the tables.
Tables of the minimum permissible bending radii of steel angles depending on the type, size and ratio of the shelves
How to connect ebb tides at 90 degree angles?
How to connect ebb tides at corners? Oddly enough, even those who know how to do this ask this question. Paradox. Is not it? The fact is that there is no generally accepted rule explaining how to connect ebb tides at corners. And therefore, every specialist is interested in how other masters do it.
There are two methods that I have heard of but never used:
- Soldering. I can't even imagine how to do this.
- Lock. This method was very popular in Soviet times on galvanized metal roofs.
Of course, I have my own way - how to connect ebb tides at corners , which I hasten to share. And it is the simplest compared to those described above. But before that, it must be said that there are three types of tide joining:
- Connecting tides at an angle of 90 degrees (in this article).
- Connection of ebbs and flows at an angle of more than 90 degrees. Bay window connection for low tides.
- Direct connection of ebb tides. No corners.
Well, let's take a closer look at the first method.
How to connect ebb tides at an angle of 90 degrees?
In general, it should be noted that this article primarily refers to the connections of ebb tides on loggias and balconies. Moreover, as you know, the upper tides differ from the lower ones in configuration. There is already an article on this topic. Read here.
Tools
Let's start, as usual, with tools, fasteners and other consumables. In order to connect ebb tides, you need to have in your arsenal:
- Metal scissors
- Pliers
- 90 degree square
- Goniometer
- Pencil
- Manual riveter
- Aluminum rivets 3.2 x 10 (matching the color of the tide)
- Screwdriver
- Screws (bug or 4.2 x 25 with drill)
- Sealant to match the color of the tide (usually white)
- Polyurethane foam
- Foam gun
- Roulette
- Some auxiliary hand tools (knife, hammer, etc.)
It seems such a simple matter, but how many tools and consumables are required. Well, however, a window installer has a much longer list.
By the way, I am now creating my first free video course, specifically on the topic “Tools and building materials for installing PVC windows.” So subscribe to blog updates and be the first to know about it.
How to connect ebb tides?
Well, let's take as an example a standard U-shaped balcony that is 3 meters long and has a projection of 0.9 meters. It has two 90 degree angles.
How to connect ebb tides at corners? We will assume that the width of the tides is 100 mm. Let's take the left corner as an example (looking at the corner from the side of the room). I always say, “If work goes from left to right, that’s Russian.” And when it’s the other way around - in Chinese))), although of course you need to act according to the situation.
1. Apply a mark. We take the short left ebb and place it in place on the frame so that its left edge is pressed against the wall. We make a mark with a pencil at the location of the future joint of the tides. If our ebb is attached to the frame, then the mark will coincide with the angle of the window structure.
If under the frame, that is, in the stand profile, then the mark will be shorter by 10 - 15 mm.
2. Next we make the markings. Since the angle of our window structure is 90 degrees, it would seem that the angle of the cutting line should be 135 degrees. And this value would be correct if the low tide angle was 90 degrees.
But, because the slope for low tide is necessary, and has different values from 100 to 150 degrees depending on the opening, accordingly, the angle of the cutting line will be different from 125 to 135 degrees.
There is a table of the relationship between the angles of inclination of the ebb and the angles of the cut line of the ebb, although only for the most common size of ebb, 100 mm wide. Also, the table shows values that can be used to make more accurate markings without using a protractor.
Next, with a protractor it is enough to measure only the angle of inclination of the tide. Then, using the dimensions indicated in the table, we make the markings:
- or with a protractor from an already placed mark to the outer edge of the ebb
- or with a tape measure, first plotting the linear dimension from the table from the already placed mark along the length of the ebb, and then drawing a perpendicular to the edge of the ebb along the width. Then you can connect the resulting marks. This marking will be more accurate.
In order not to make a mistake in which direction to draw the cutting line (I have had this happen more than once due to lack of experience), you need to remember that the cutting line is always drawn from the original mark diagonally towards the trim.
3. Cut off the ebb according to the markings. I know that many installers cut flashings with a grinder.
But, firstly, this is wrong, because most of the ebbs are galvanized. When working with a grinder, galvanized steel heats up and loses its corrosive properties at the cut site.
Well, and secondly, why work with a noisy grinder if you can quietly cut with scissors. By the way, I recommend long metal scissors - a universal cut from. These scissors produce a beautiful and neat cut, and are very comfortable to work with. In St. Petersburg you can buy it in the Stroitel chain of stores. And here you can read the article “Where to buy components for plastic windows?”
Important. Always mark the line so that when you cut, the left side of the scissors is the cast and the right side is the trim. That is, the marking is done either from the front side or from the inside. (In this case, the cutting line made with scissors will be more accurate). By the way, the upper ebb of a complex configuration can also be cut with metal scissors.
4. How to connect the ebb? Next, in order for our ebb connection to be correct, we must rivet it. The drill diameter size is 3.3 mm. Aluminum rivet - white or according to the color of the shimmer - 3.2 x 10 mm.
To do this, when marking on one of the ebbs involved in the connection, an overlap is provided, which is slightly bent downwards. And on the second, a clean cut is performed. Moreover, the overlap is hidden under the clean cut.
This joint is riveted and a beautiful connection is obtained, which it is advisable to seal on the lower ebbs. The upper connection is sealed according to the situation if necessary.
Do not forget that the ebb level must coincide with the level of the windows, at least visually. It is clear that installers install windows at level, and low tides often vary. And when you approach the window on the balcony and visually see that the horizontal line of the windows does not coincide with the ebb line, you understand that this is a “jamb”. Most clients, of course, don’t give a damn, but out of a hundred clients you will meet one and will have to redo it. Well, the most important thing is probably the reputation of the master.
It's important to understand. That it is not always possible to combine ebb tides beautifully. The reason for this is haste. Therefore, the most reliable way is to cut off the ebb with an allowance. Then try it on and only then trim it completely. Although a high-quality sealant always saves))).
Source: https://lankins.ru/montazhnikam/kak-soedinyat-otlivy-na-uglax-v-90-gradusov.html
How to bend a corner into a ring with your own hands
To do this, it is best to use the hot method of metal processing. But you can achieve a given radius only with the help of a pre-prepared template. We preheat the metal and begin to bend the template evenly, while the horizontal shelf must be adjusted during the entire bending process using a sledgehammer or hammer, otherwise the shelves will not maintain the original angle of 90 degrees to each other.
It is necessary to heat the metal to half the value of its melting point, so, for example, an aluminum corner will have to be heated to at least 250⁰ C, and a steel profile - to 600⁰ C. To do this, you will need a natural gas burner or a gasoline blowtorch, and it is best to use welding acetylene cutter if the corner is large.
Using an angle grinder and a welding machine, you can also bend a steel corner into a ring, but for this you need to make fairly accurate calculations, mark and outline the sectors to be removed, bend and weld the seams. Unfortunately, no matter how hard you try, in this case you will end up with a circle in the form of a rounded polyhedron.
Welding products from metal corners
In the manufacture of various metal structures, rolled steel angles (angles) are among the most commonly used materials. In addition to welding corner pieces together, it often becomes necessary to weld a corner to a pipe or to a flat surface. Such compounds are used in construction and installation work, in the manufacture of furniture and crafts.
Types of connection
Welding steel products using angle iron comes down to several main types of connections:
- butt welding of billets from angle bars;
- welding corner blanks at an angle of 90 °;
- welding of angle steel with other products.
When creating a structure, a good welder solves at least two problems. The first is to weld a strong product that can successfully withstand certain loads. The second task is to ensure that the completed work looks aesthetically pleasing. After all, the work of a true master is always pleasing to the eye.
Let's look at typical examples showing how to weld iron corners to each other, as well as to other surfaces.
Butt joint
You can butt weld pieces of corner profiles. This type of welding is often required to lengthen an existing piece of steel. The technology for making such a connection is simple and basically does not differ from the butt connection of sheet blanks. But there are still some features.
At 90 degrees
Almost all buildings have a rectangular shape, so the most common action with corners is the need to bend them at 90 degrees.
Bend the corners 90 degrees for the future frame is quite simple. First you need to make a development in the place of the future fold. To do this, mark two corners on one of the shelves in different directions from the normal, 45 degrees each, and cut them out with a grinder. Carefully and slowly bend the corner and weld the cut area using electric welding; it is recommended to preheat the bend area so that the second shelf does not crack or break during bending.
Acceptable design dimensions for correctly marking and bending metal corners at 90 degrees are shown in the table:
How to correctly bend a metal pipe, corner or strip profile?
Sometimes it may be necessary to bend a metal pipe, metal corner or strip profile at home. Let's find out how this can be done without resorting to the services of a specialist.
https://www.youtube.com/watch?v=oT8_D6E7r8U
Before starting manipulations, you need to take into account that you can work with a profile up to 5 millimeters thick, as well as a pipe up to 15 millimeters in diameter, even if the workpieces are cold. Bending larger workpieces without preheating may result in cracks or tears.
We bend the strip profile
If it is necessary to bend metal strips, they must be fixed, for example, in a vice, having previously placed metal corners, saving the vice from damage and the profile from deformation (in the case of corners, we increase the area of pressure on the point of the metal strip).
Then, with precise blows of a hammer, the profile is bent to the desired angle. To avoid damaging the metal and get an even bend, it is better to hit not the profile directly, but a flat wooden block placed on it.
In order to correctly bend the profile, giving it the most complex design, before work you need to put marks on it in the places of future bends.
It should be remembered that a perfectly right angle is almost impossible to obtain at home and the minimum bending radius, despite all the skill of the master, will still remain.
We bend the pipe
Pipes in a cold state are much more difficult to bend, because when bent, it has an inner side that contracts, and an outer side that expands significantly; when stretched, a cold pipe can become deformed and simply burst.
To prevent this from happening, you should fill the pipe with dry sand, which will distribute the pressure and make the bend more natural, preventing it from breaking. To do this, pour dry, homogeneous sand into the pipe, after closing the outlet with a wooden or plastic plug (can be purchased at metal stores for your pipe diameter). When filling in sand, the pipe must be tapped to compact the contents, and then the entrance must be closed.
After this, the pipe is bent by tightly holding one of the ends in a vice and using physical force. It is advisable, of course, to use a pipe bender (a special machine for bending pipes) for this, since in the case of a vice, special requirements are placed on their support (the support point must withstand significant shear loads and lifting off the ground).
Copper and aluminum (the most flexible) pipes are the best to bend. They are most often used in plumbing - here you cannot do without a specialized tool (most often, plumbing pipe benders work with radial curvature of pipes).
The situation is more complicated with steel or galvanized pipes.
The former are much more difficult to bend, but it is not recommended to bend galvanized pipes at all, since small cracks in the upper protective layer will form at the bends, and the pipe will rust, and when heated, the zinc may evaporate and corrosion will still begin at the bend, even if there are no cracks.
To successfully bend steel, cast iron pipes, as well as pipes made of various alloys, you can heat the area of the future bend with a blowtorch. However, it must be remembered that by heating the pipe excessively, you can significantly change the structure of the metal and increase its fragility.
Bend corner
With corners, as with pipes, the situation is more complicated than with simple strips.
The most effective option for obtaining a curved metal corner would be the following operation: at the required bend location, a cut is made on one of the edges of the metal corner, and then the product is bent here like a regular strip of metal (as long as this allows making a cut).
To get the correct bend angle, you will need some practice and correct calculation of the cut section, since the final bend angle will depend on it.
A more difficult option would be to bend the corner without making cuts. In this case, as with a square profile, the bending angle will be insignificant, since sharp corners will lead to cracks in the material. Such bending requires a strong lever and reliable support with fixation of the product. If the edges of the angle are more than 15 mm, heating of the bend will be required.
conclusions
It is not so easy to bend a pipe or strip profile at home in a high-quality manner. But, as in any business, skill and knowledge of the basic features and rules of the process are important here. After trying a few times, working with different materials, you will soon become an expert in this field and add a new skill to your home crafts collection.