Concept of vulcanization
Vulcanization is a chemical process during which raw rubber, improving the properties of the material in strength and elasticity, becomes rubber. In fact, rubber can be used as a special glue to seal a puncture in an inner tube or tire. Rubber vulcanization processes are as follows:
- electric;
- sulfuric;
- hot;
- cold.
What is needed for silicone casting
Initially, it seems like a complicated matter, but in practice, silicone casting is not such a costly and technologically labor-intensive process. Production is quite easy to organize in your own kitchen, having at hand a gas stove or a regular microwave, a large disposable syringe or a small metal mug with a molded spout and a pre-prepared matrix mold.
To prepare a matrix mold, you will need to buy construction plaster and prepare an analogue of the manufactured product to form the impression required for casting. As a rule, this is a factory bait, which, based on the results of work on the matrix, is given additional touches that affect the final shape. It will be useful to have a sharp knife and a metal spatula, similar in appearance to a tool for sculpting products from plasticine and an ordinary metalworker's scriber, for the possibility of applying marks and corrugations on a still raw workpiece that has not frozen into a matrix form.
The raw materials for production will be old baits or newly purchased silicone mixtures, as well as dyes, fluorescent compounds and glitter, as well as concentrated attractants. The above-mentioned modest belongings and materials are quite enough to start productive work.
Types of rubber
Rubber is one of the few materials that has different hardness. Depending on the percentage of sulfur, it is:
- soft – contains up to 3% sulfur;
- semi-solid – from 4 to 30% sulfur;
- hard – more than 30%.
Rubber is a natural material, and as a rule, products made from natural ingredients are of the highest quality and most durable. Therefore, components for bicycle and car wheels are made of soft rubber, which is based on rubber.
Electrical vulcanization of rubber
In general, vulcanization can be cold or hot. The electrical vulcanization process is a hot method. An electric stove with a ceramic heater is used as a heater at home; a hair dryer or a regular iron is also suitable. The optimal temperature for this method is 145C o. To determine the temperature, you can also use available means, for example, if a sheet of paper begins to char, it means that the temperature has reached the required values.
Electrical vulcanization of rubber
There are also special clamps with a heating element. Such devices can operate from a 220V household network, from a car battery, through a cigarette lighter socket, or from their own battery. It all depends on the performance of each device. These clamps are easy to use; you need to attach a rubber patch to the camera, clamp it and plug it into the network.
Sulfur vulcanization of rubber
After rubber vulcanization
This operation consists of a chemical reaction in which sulfur atoms are added to the rubber. When added up to 5%, it produces raw materials for the manufacture of tubes and tires. In the case of gluing two elements, sulfur helps connect the rubber molecules, forming a so-called bridge. This procedure refers to the hot method, but it is unlikely that it will be possible to do it on a hike or on the highway.
Rubber
There are two types of raw materials: natural and artificial. Natural rubber is obtained from the latex of rubber plants that grow in Latin America, and these include the following types of trees: - ; - Ficus rubber; - Landolphia varieties.
Artificial rubber is called synthetic. It is based on the synthesis of isoprene and butyllithium using a chemical catalyst. In the production of synthetic rubber, petroleum derivatives are also used as a solvent. It was first obtained in 1920, and in 1931 its mass production on an industrial scale began. Currently, there are the following types of synthetic rubbers: - styrene butadiene; - polybutadiene; - polysoprene; - butyl rubber; - ethylene-propylene; - chloroprene; - butadiene - nitrile.
Hot vulcanization
Rubber, as a raw material, has the property of being welded into a single composition at a temperature of 150 °C. As a result of this process, the rubber becomes rubber and cannot return to its original position. Thanks to its capabilities, rubber can fix any punctures and cuts in the tube and tire.
It is necessary to vulcanize rubber using a hot method, only using a press. The depth and area of the cut will tell you how long to weld. Typically, it takes 4 minutes of cooking to repair a 1mm cut. Accordingly, if the cut is 4mm, then it needs to be vulcanized for 16 minutes. In this case, the equipment must be warmed up and configured.
By performing hot vulcanization at temperatures above 150C o, you can ruin the rubber and achieve nothing, since the material will deteriorate and lose its characteristics.
Using clamps or a press allows you to properly patch the damage. After finishing the work, you should make sure that there are no voids or air bubbles in the seam. If there are any, you need to clean the puncture site from fresh rubber and repeat the whole process again.
In order to hot seal a camera at home, you must do the following. From raw rubber, you need to cut a piece slightly smaller than the patch itself. The tube or tire is cleaned slightly wider at the damaged area, to a rough state, and then degreased with gasoline. When preparing the patch, you need to cut the chamfer at an angle of 45°, also sand and degrease. Then we cover the puncture site with a patch, clamp it in a vice and heat it to the desired temperature.
If you dissolve raw rubber in gasoline, you can get a special glue for rubber, the use of which improves the quality of the seam. Particular attention should be paid to temperature conditions. Vulcanization is carried out at a temperature of 140 - 150 ° C; if there is a smell of burnt rubber, it means the patch has overheated, and if it has not merged with the overall product, then it may not have reached the required temperature. To prevent rubber from sticking to metal, you need to place paper between them.
Where is silicone used?
This material is used in almost all spheres of human life - in construction, everyday life, medicine and production. Silicone has earned popularity due to its unique and valuable qualities that are absent from analogues of this substance.
Silicone is capable of reducing and increasing the adhesion process, as well as imparting hydrophobic properties to the target object. This universal material is able to maintain its basic parameters at extremely high, low temperatures and in conditions of high humidity. In addition, silicones have dielectric characteristics, bioinertness, a high degree of elasticity, are durable and environmentally friendly.
On an industrial scale, silicone liquids and emulsions based on them are used as anti-adhesive lubricants for large heavy molds, the production of water-repellent liquids, greases, special oils, shock-absorbing, coolants, coolants, sealants and dielectric compounds. Particularly popular are defoamers made on the basis of silicone mixtures.
This material is used to produce silicone alkides and silicone polyesters for various coatings, which must be particularly durable and resistant. It follows that different types of gaskets, bushings, rings, cuffs, plugs and other parts can be used at temperatures from minus 60°C to plus 200°C.
Another property of silicone is resistance to substances such as ozone, radiation, sea water, ultraviolet radiation, boiling water, alcohol, acid solutions, alkalis, mineral oils, various fuels and electrical discharges.
Cold vulcanization
Nowadays, using this method is not difficult, since you can purchase a repair kit in every auto or bicycle parts store. The contents of this set may vary, but each one contains patches and special glue.
Cold vulcanization of rubber
The repair procedure in this case is similar to the hot method. You also need to treat the damaged surface with an abrasive, remove rubber dust and degrease. After drying, apply glue to the camera and glue the patch. In this case, it is not the duration of the pressure that plays a role, but its strength. Therefore, it will not be enough to simply press down with a stone; more force is required.
Do-it-yourself cold vulcanization of rubber is a fairly simple process that can be performed wherever you are if you have a special kit. However, raw rubber is not made with your own hands at home. For such work you need special equipment.
Making a vulcanization device
Each vulcanizer has two main elements - a heating part and a clamping device. The basis of such rubber processing equipment can be used:
- iron;
- “bazaar” electric stove;
- piston from the engine.
In a device with an iron, the heating part is the surface that is used for ironing in everyday life. If we plan to use an electric stove, then the heating coil should be covered with a metal sheet, and when working, you need to place paper between the rubber and the metal. Such a device must be equipped with a thermostat to avoid overheating of the material.
The pressing part of the vulcanizer is easiest to make from a clamp. The simplest device to manufacture would be a device consisting of an iron and a clamp. Since they are both metal, joining them using arc welding is not difficult. The iron also has a thermostat.
A piston vulcanizer also uses a metal plate. A rubber bladder is placed on it. The piston, with its smooth part, which is in contact with the explosive mixture in the engine, presses down the patch using a homemade clamp. Paper is also placed between the piston and the patch. After that, gasoline is poured into the piston and ignited.
Such a device made from a piston is especially useful on the road, when there is no way to connect to the electrical network. However, such a device does not have a thermostat, and the temperature will have to be controlled manually.
How to impregnate a rubber boat for storage? Tips for repairing a rubber boat
The end of the season is coming. I'm going to preserve the boat . But before that I want to give her some minor repairs. Namely, I want to saturate it with some kind of impregnation to seal micro cracks and, well, tint it. I searched through a search engine, nothing useful. There is a lot of advice, but no one actually checked it, everything is from someone else’s words. Here are some tips.
Wash thoroughly with cold water and some mild fairy product. Then wipe thoroughly, especially all corners, the main thing is to remove all the sand completely and dry it. Sprinkle with talcum powder and fold. Store at a temperature of 15-20 degrees, well, if this is not the case, then at room temperature, but not higher than 30 and not lower than 10. And be sure to fold it again several times during storage with kinks in other places. Thus, the boat “Nyok-2”, which I had in the second half of the 90s, lasted 8 years, after which it was still sold in good condition. As for all sorts of “what to lubricate”, then those who have storage experience advised me not to do this at all - it wouldn’t be better, and it would be easy to get worse. All this is from personal experience.
— Still, it’s better not to bring it to 30. In this heat, the rubber cakes. I store it in the basement, it’s 15 degrees there both in winter and summer. You can’t store potatoes - they bloom, but here’s a warehouse for all sorts of things for which there isn’t much room at home.
Wipe the entire surface you want to renew. Use fine sandpaper, such as zero sand, remove dust with gasoline. Next, take rubber glue, which is sold commercially. In kits for rubber boats, dilute the “galoshes” with gasoline, add aluminum powder, and constantly stir to create a thin paint. I add powder for 1. the silver color reflects the sun's rays, does not age the rubber, does not heat up the balloon. 2 from a bird's eye view, the surface of the water is light due to the reflected sky and the dark boat is clearly visible, unlike the silver one, for a hunter this is essential. Next, we paint the boat in three or four layers with complete drying in between. The final procedure is to dust the entire painted surface with talc, I took baby powder from pharmacies. I sprinkled it and stroked my palm until there was no sticking at all, this is a must. You can also pour talc inside the boat, pump it up and tilt the boat for better uniform distribution along the inside. surfaces. You can also use oil paints instead of silver (aluminum powder) to imitate camouflage. The use of other solvents and adhesives is unacceptable and will damage the surface. I also covered an awning on a motor boat, a tarpaulin raincoat, 100% waterproof, but instead of rubber glue I used sealant, in my household white color. Materials coated with sealant at sub-zero temperatures become brittle, this does not happen with a rubber coating , however, it’s better not to disturb the product when it’s below zero. I installed oarlocks and normal oars in the boat. The boat is still used every year for fishing and hunting. The “paint” lasts for 5-7 years, it has never peeled off, it feels like it is getting thinner and the old coating is starting to show through.
If your boat is still leaking, you can make a simple boat with your own hands. The main thing is to stay afloat.
Preventative work to rejuvenate rubber in the spring, before use.
I inflate the boat and, using an ordinary paint brush, completely coat the cylinders with adhesive solution. I make the solution from rubber glue No. 88 (one part) and aviation gasoline (two parts). I do not recommend smoking during this procedure, unless you are a kamikaze, of course.
I mix the liquid thoroughly and apply a thin layer to the rubber surface. This achieves the following positive aspects: microcracks are sealed, through which air escapes unnoticeably; joining seams are strengthened; old rubber absorbs the amount of liquid rubber it needs and becomes elastic. It is advisable to carry out such prevention at least once a year. Then it will be like new for a long time. After each fishing trip, the boat must be thoroughly dried. It is advisable to do this as soon as you go ashore and wash the boat. If you leave this procedure for later, you can safely forget that your watercraft is lonely and moldy in its case. If this is repeated frequently, the threads on the connecting seams will rot and the boat will burst at the “most opportune” moment. If the day is sunny, insert one oar into the oarlock and put the boat on its butt. In twenty to thirty minutes it will be dry. Leaving your “rubber friend” on the balcony during the winter is tantamount to betrayal. Large temperature changes and cold negatively affect the properties of rubber.
How to extend the life of car door seals
Good day to all! It is absolutely not worth underestimating the role played by car door seals. This is one of the components of comfort inside a vehicle.
Please note that buying new seals if replacement is required is not as easy or cheap as it might seem. Not all of them are universal; some have to be selected individually for the car model. Hence the high price.
To avoid carrying out repairs or restorations that do not always give the expected result, it is much more correct to maintain the seal in good condition through routine maintenance. Achieving what you want is not difficult. You just need to know how to improve the condition, what to lubricate and what to treat.
Topic: DIY universal super glue at home.
After 30 minutes, repeat the entire process, applying a thin layer of glue to both surfaces and, do not forget that the glue should not stain your inflatable boat !
After about 10 minutes, or when the second layer of adhesive has dried tack-free, apply the patch to the designated area, making sure that the inflatable cylinder is placed on a flat surface so that pressure is applied evenly to the patch. Using a round object, such as the handle of a large screwdriver, smooth the patch over the entire surface to be glued, paying particular attention to the edges. Leave the boat with the patch lying flat for about one hour. Then you can carefully give the sides a rounded shape, but do not inflate them to working condition. The air cylinders should not be inflated to operating pressure for approximately 24 hours.
If a drop of glue has leaked past the gluing area, it should be removed immediately. The longer the glue remains on the sides, the more difficult it will be to get rid of it. Delamination is more difficult to detect. You need to spend as much time on this as necessary, but be sure to find the place of delamination. You should thoroughly clean the area of delamination, removing all traces of old glue so that both surfaces are completely clean. The preparation procedure for gluing two surfaces was described earlier. Then it is necessary to separate both surfaces to be glued and connect them only after applying two layers of glue with intermediate drying and only after the second layer has dried “tack-free”. Both surfaces to be glued must lie on a flat base. Smooth out the edges of the glue.
I would be glad if I helped someone in repairing a rubber boat .
Getting rid of silicone on clothes
Silicone sealants are widely used in repairs and construction. But careless handling of this substance can lead to the formation of persistent stains on the fabric, and to get rid of them you will have to use special cleaners or improvised means.
Acid-silicone sealant has a characteristic smell of vinegar, and its removal is carried out using a 70% acetic acid solution
When removing a stain from such silicone, you need to take precautions: wear glasses, strong rubber gloves and a respirator, since acetic acid negatively affects the eyes, skin of the hand and the respiratory tract. To clean the stain you need to apply it liberally, leave it for 30 minutes and remove the silicone with a rag. Alcohol-based silicone neutral sealant can be easily removed using alcohol-containing liquids
You can take medical, technical, denatured alcohol or vodka and apply it to the dirty area, and then remove the stain with a brush. Oxime, amine or amide silicone sealant can be removed using white spirit, benzene, acetone or solvent. The liquid is applied to the sponge, then to the stain and left for 30 minutes until the silicone dissolves. If necessary, the treatment can be repeated. Then wash the fabric as usual with washing powder.
There are also special compositions for cleaning the surface of fabrics from silicone. A remover under the trade name “Penta-840” or ANTISIL is ideal. It is necessary to carefully read the attached instructions before using any product.
In addition, the silicone stain can be cleaned mechanically using a plastic scraper. To do this, the fabric is stretched onto a flat surface and the stain is carefully scraped off. Residues can be removed using one of the methods listed above.
Important! You should only work with silicone sealants in thick cotton clothing, since it will not be possible to remove its residues from delicate items without the help of dry cleaning specialists!
Recycling old rubber
According to Ziegler
From old, unusable rubber, a product is prepared that can be used like ordinary rubber and which, in relation to the latter, has significantly greater tear resistance due to the release of plant protein substances from the rubber during processing. According to M. Ziegler's method, old unusable rubber is first washed until all dirt adhering to it is completely removed, then immersed for several days in a liquid of the following composition: dissolve 300 g of tartar emetic in 3-4 buckets of boiling water and add 1 kg of tannic acid or appropriate amount of substances containing tannic acid. If the treated rubber easily becomes sticky, then tartar emetic is replaced with 600 g of calcium sulfide (the solution is prepared in cold water). When processing rubber that occupies an intermediate position between sticky and non-sticky, add 250 g of calcium sulfide to the specified solution of tartar emetic.
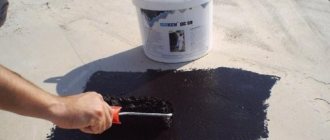
How to make liquid rubber at home
The rubber is left in one solution or another until it is properly softened, then it is removed and dried in warm air. Finally, it is rolled between rollers into more or less thin sheets, from which the necessary things are made, like ordinary rubber.
According to Brimer
The old rubber is thoroughly crushed, mixed with equal parts by weight of technical castor oil and the mixture is heated to 180-210ºC until the rubber dissolves. After cooling, the mixture is poured into twice the volume of 90º alcohol. Then rubber is released from this mixture and settles to the bottom in the form of a viscous mass, and castor oil dissolves in alcohol. After this, separate the rubber from the rest of the mixture and wash it with a small amount of fresh alcohol (to remove any remaining castor oil) until a drop placed on the paper, after the alcohol has evaporated, leaves no trace. Since the resulting rubber mass still contains a certain amount of alcohol, it is washed first in warm water mixed with a small amount of alkali, and then with clean tap water.
Rubber rolled (rolled) into thin sheets soon loses all moisture and its quality does not leave much to be desired. If it weren’t for the high cost of alcohol, Brimer’s method would have found wide application in the rubber industry.
According to Winkler
Grind up as many vulcanized rubber scraps as possible and expose them to temperatures of 300ºC until a plastic mass is formed. Heating is carried out by means of steam, which is passed through a cylinder containing crushed rubber. Then mix 3600 g of rubber mass, 72 g of wood oil, 120 g of sulfur, 1080 g of white lead or magnesia, lime, zinc oxide or clay.
According to Steenstrup
In an open vessel, with constant stirring and constant pumping of air, dissolve 1 old rubber (clippings, spoiled rubber goods) in 4-12 oils (especially linseed oil) or residual oil. After complete dissolution, its undissolved parts are separated from the mass, which is achieved by lagging. Then add a little red lead to the solution and evaporate until the mass becomes sticky (evaporation continues for 2-6 hours); after that it is cooled, and in this form it goes on sale. This mass can be used as ordinary rubber for making various items, for making linoleum, and mixed with sand and for tarpaulin.
Rubber extraction
The process of obtaining rubber is extremely simple.
Hevea trees begin to produce resin at the age of 7-8 years: it is then that the first cuts are made in them, from which white thick milky sap oozes. Each tree produces about 200 grams of sap during the day, which is collected in small cups tied to the tree. In the evening, the collected juice is poured into large containers and sent to processing factories. The milky sap is collected daily until the tree is about 30 years old, when it dries up. The plantation is completely cut down and young shoots are planted in its place. In fact, the juice collected and cleared of branches and insects can already be considered a finished product, since it quickly thickens in air and turns into a dense rubber mass, but to speed up the process, special thickeners are added to it and placed in flat small trays of square or rectangular shape. Then the resulting dough-like adhesive mass is rolled with a press, squeezing out the remaining moisture from it, and dried. Thus, you can get natural rubber almost by hand, giving it the desired shape and evaporating all the moisture.
The last step of the primary treatment is to smoke the resulting rubber sheets in order to get rid of ants and other insects. It is smoking that gives the sheets a brownish-yellow color, which is considered classic for natural rubber.
Latex sleep products (pillows, mattresses) are currently produced from natural rubber.
Rubber and gutta-percha solutions
Fischer rubber solution
Numerous experiments to dissolve rubber have not yet given completely satisfactory results, since in very few cases it is possible to dissolve swollen rubber. In addition, most solvents suffer from being easily flammable and too dense. A solvent that does not suffer from these disadvantages is, according to Fischer, dichloroethylene, the density of which is low, and the ability to dissolve rubber exceeds the ability of chloroform. Dichlorethylene is a watery-clear liquid, boiling at 55ºC; it does not develop explosive vapors and is not flammable. It gives a smooth solution, without lumps and, due to its low boiling point, easily evaporates again from the solution.
Rubber solution according to Miller.
5 finely chopped rubber with 2 1/2 ether are moderately heated in a glass flask in a sand bath until the rubber is completely dissolved. Then add 2 1/2 heated varnish and, after some cooling, 5 heated turpentine.
Rubber solution according to Winkler.
Dissolve 6 finely chopped rubber in 12'/2 purified turpentine and 15 thick oil, in a glass flask, while heating in a sand bath. 30 greasy, heated copal varnish is added to the resulting solution.
Rubber solution according to Zühl.
It is known that rubber is easily absorbed by various volatile substances that dissolve with the help of water vapor, which can then be distilled with water vapor, resulting in a homogeneous rubber solution. The most suitable such substance turned out to be naphthalene, in which rubber dissolves already at temperatures below 100ºC. Dissolve 10 rubber in 50 naphthalene, add 30 linseed oil and the naphthalene is distilled with water vapor, then after separating the mixture from the water, add turpentine oil or another diluting agent.
Rubber solution according to Eisenman.
Melt 40 rubber and 12 rosin with 60 naphthalene, add 40 boiled linseed oil and proceed as stated above.
Rubber solution according to Finkbohner.
Rubber scraps are softened in boiling water, dried and cut into small pieces; then put it in a sealed tin vessel and pour coal tar over it until the entire surface is covered. After letting the mixture stand for 12-18 hours, it is heated in hot water until it melts, and then stirred thoroughly for a while. Since this solution thickens when cooled, for use it is placed in boiling water, due to which it becomes liquid again.
Rubber solution according to Dingler.
a) Dissolve 180 g of finely chopped rubber in 720 g of carbon sulphide and filter the liquid through a cloth.
It's easy to tear, but hard to glue, how to repair a rubber boat
The proportion of rubber to carbon sulphide varies depending on how thick they want to give the solution.
Gutta-percha solution according to Zorel.
a) The composition consists of 2 rosin, 2 resin or asphalt, 8 resin oil, 6 lime hydrate, 3 water, 10 clay and 12 gutta-percha. The composition is placed in a cauldron, where rosin, resin and resin oil are first placed, and stirred until the resin and oil dissolve. Then the lime hydrate is mixed with water into a liquid slurry, the mixture is added, the mass is heated and stirred. When all the parts are well connected to each other, add gutta-percha cut into small pieces. As the heat increases, stirring continues until the gutta-percha becomes liquid, after which clay crushed into powder and mixed with water is added. When this mass also separates, add excess water and heat to a boil. In this case, the composition is separated from the water; it is scooped up, kneaded again with fresh water and passed through rollers several times to completely level it out. Rosin can be replaced with some other resin, such as var or copal. You don't need to add clay at all. If they want to make the composition completely waterproof, then add 5% stearic acid.
b) Take 8 resin (varu), 4 resin oil, 6 lime hydrate, 16 gutta-percha.
c) Take 12 resins, 6 lime hydrates, 16 gutta-percha. If they want to make the composition more viscous, then some fibrous substance is added to it, such as cotton paper, wool, hemp, cow hair or leather scraps.
Gutta-percha solution according to Forster
a) Take 4 gutta-percha, 2 burnt ivory and 1/15 arsenic. b) Take 3 gutta-percha, 1 crushed bones and 1/2 pipe clay.
Heating
In a situation where it is not possible to put a hose on a round part or pipe, immersing the desired part of the product in boiling water will help. After waiting a little, you need to remove the hose from the water and, without wasting time, install it in its proper place. This will be quite easy to do, since the high temperature will steam the material.
Sometimes a problem arises with removing rubber elements from some structural parts. In this case, air heating will be effective. A hairdryer is used. Under the influence of a hot jet, the material will expand, as a result of which it will be possible to twist and tighten the element that has become pliable.
Using these simple methods, you can soften hardened rubber, thereby increasing the service life of popular products.
14.03.2013
No matter how sad it may be, every thing has its own service life. And rubber is no exception. After a certain time, it begins to lose its shape, becomes dry and hard, becomes covered with cracks and crumbles. And quite often in such a situation, when a damaged part needs to be replaced as soon as possible, there is no time at all to go to the store for it, or there is simply no opportunity. But, fortunately, this problem can still be solved urgently. In this article, we will consider several ways to give rubber elements a second wind.
So, the materials you will need: glycerin, ammonia, kerosene and napkins.
Do not be surprised! It turns out that kerosene and ammonia can really help out when trying to resuscitate rubber parts. First you need to prepare a low concentrated solution of ammonia. Then roll the long and narrow rubber seals into a spiral. And keep them in the solution for about half an hour. If you have kerosene on hand, we carry out the same procedure, only the rubber must be in this solution for at least 2 hours. The result is that the parts will become noticeably softer and, perhaps, even a little larger than before. After solutions, rubber products must be washed in non-hot water using a soapy mixture, then rinsed in clean water and dried.
The craftsmen also found a solution for short-term renewal of seals on refrigerator doors. In this case, it is recommended to pour boiling water over the rubber. They say that for some time the seal regains its lost elasticity and ability to seal. And in order to consolidate the resulting effect, you can treat the rubber surface with a cloth soaked in silicone. However, let us remind you once again that the effect will not last long, so you need to replace the outdated part as soon as possible.
Many of us have had plastic windows installed for quite some time. But not everyone knows that if the seals on double-glazed windows are properly cared for, they will last much longer. So, you just need to lubricate the rubber elements with a layer of regular glycerin or silicone every time you wash the windows. And for the best result, it is better to use specially designed chemical compounds from window manufacturers. As a rule, they should be offered by employees of the company you are ordering from right away. Although, however, today it is not at all difficult to find such a solution on the Internet.