Along with permanent magnets, since the 19th century, people began to actively use variable magnets in technology and everyday life, the operation of which can be regulated by the supply of electric current. Structurally, a simple electromagnet is a coil of electrical insulating material with a wire wound on it. If you have a minimum set of materials and tools, it is not difficult to make an electromagnet yourself. We will tell you how to do it in this article.
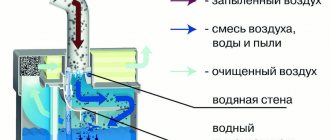
When electric current passes through a conductor, a magnetic field appears around the wire; when the current is turned off, the field disappears. To enhance the magnetic properties, a steel core can be introduced into the center of the coil or the current can be increased.
Making a simple electromagnet
The simplest electromagnet, quite suitable for solving a small range of practical household problems, can be made with your own hands without using a coil.
For work, prepare the following materials:
- steel rod with a diameter of 5-8 millimeters or a 100 nail;
- copper wire in varnish insulation with a diameter of 0.1-0.3 millimeters;
- two pieces of 20 centimeters of copper wire in PVC insulation;
- insulating tape;
- source of electricity (battery, accumulator, etc.).
From tools, prepare scissors or wire cutters (side cutters) for cutting wires, pliers, and a lighter.
The first stage is winding the electrical wire. Wind several hundred turns of thin wire directly onto the steel core (nail). Carrying out this process manually takes quite a long time. Use a simple winding device. Clamp the nail into the chuck of a screwdriver or electric drill, turn on the tool and, guiding the wire, wind it. Wrap pieces of larger diameter wire to the ends of the wound wire and insulate the contact points with insulating tape.
When operating the magnet, all that remains is to connect the free ends of the wires to the poles of the current source. The distribution of connection polarity does not affect the operation of the device.
DIY powerful solenoid. Homemade electromagnet. How to make a powerful electromagnet
An electromagnet is a very useful device that is widely used in industry and in many areas of human activity. Although this device may seem complex in its design, it is easy to manufacture and a small home electromagnet can be made at home using improvised materials.
Let's watch the process of creating this homemade product in the video:
In order to make a small electromagnet at home we will need:
– Iron nail or bolt; - Copper wire; - Sandpaper; – Alkaline battery.
At the very beginning, it should be noted that it is not advisable to use too thick wire. Copper wire with a diameter of one millimeter is perfect for a future electromagnet. As for the size of the nail or bolt, the ideal length would be 7-10 centimeters.
So, let's start making a mini electromagnet. First we need to wrap the copper wire around the bolt. It is important to pay attention to the fact that each turn fits tightly to the previous one.
You need to wind the wire so that there is a piece of wire left at both ends.
All that remains is to connect our wires to the source, namely the alkaline battery. After this, our bolt will attract metal elements.
The operating principle of an electromagnet is very simple. When an electric current passes through a coil with a core, a magnetic field is formed, which attracts metal elements. The power of the electromagnet depends on the density of the coil and the number of layers of copper wire, as well as on the current strength.
An electromagnet is a magnet that works (creates a magnetic field) only when electric current flows through a coil. To make a powerful electromagnet, you need to take a magnetic core and wrap it with copper wire and simply pass current through this wire. The magnetic core will begin to be magnetized by the coil and begin to attract iron objects. If you want a powerful magnet, increase the voltage and current, experiment. And so as not to have to worry about assembling the magnet yourself, you can simply remove the coil from the magnetic starter (they come in different types, 220V/380V). You take out this coil and insert a piece of any piece of iron inside (for example, an ordinary thick nail) and plug it into the network. This will be a really good magnet. And if you don’t have the opportunity to get a coil from a magnetic starter, then now we’ll look at how to make an electromagnet yourself.
To assemble an electromagnet, you will need wire, a DC source, and a core. Now we take our core and wind copper wire around it (it’s better to turn one turn at a time, not in bulk - the efficiency will increase). If we want to make a powerful electromagnet, then we wind it in several layers, i.e. When you have wound the first layer, go to the second layer, and then wind the third layer. When winding, keep in mind that what you are winding, that coil has reactance, and when flowing through that coil, less current will flow with more reactance. But also keep in mind that we need and important current, because we will use current to magnetize the core, which serves as an electromagnet. But a large current will greatly heat the coil through which the current flows, so correlate these three concepts: coil resistance, current and temperature.
When winding the wire, select the optimal thickness of copper wire (about 0.5 mm). Or you can experiment, taking into account that the smaller the cross-section of the wire, the greater the reactance will be and, accordingly, the less current will flow. But if you wind with a thick wire (about 1mm), it would not be bad, because the thicker the conductor, the stronger the magnetic field around the conductor and, on top of that, more current will flow, because the reactance will be less. The current will also depend on the frequency of the voltage (if on alternating current). It’s also worth saying a few words about layers: the more layers, the greater the magnetic field of the coil and the stronger the core will magnetize, because When layers are superimposed, the magnetic fields add up.
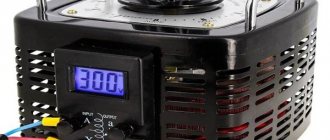
Okay, the coil has been wound and the core has been inserted inside, now you can start applying voltage to the coil. Apply voltage and begin to increase it (if you have a power supply with voltage regulation, then gradually increase the voltage). At the same time, we make sure that our coil does not heat up. We select the voltage so that during operation the coil is slightly warm or just warm - this will be the nominal operating mode, and you can also find out the rated current and voltage by measuring on the coil and find out the power consumption of the electromagnet by multiplying the current and voltage.
If you are going to turn on an electromagnet from a 220-volt outlet, then first be sure to measure the resistance of the coil. When a current of 1 Ampere flows through the coil, the coil resistance should be 220 ohms. If 2 Amps, then 110 Ohms. This is how we calculate CURRENT = voltage/resistance = 220/110 = 2 A.
That's it, turn on the device. Try holding a nail or a paper clip - it should attract. If it is poorly attracted or holds very poorly, then wind up five layers of copper wire: the magnetic field will increase and the resistance will increase, and if the resistance increases, then the nominal data of the electromagnet will change and it will be necessary to reconfigure it.
If you want to increase the power of the magnet, then take a horseshoe-shaped core and wind the wire on two sides, so you get a horseshoe lure consisting of a core and two coils. The magnetic fields of the two coils will add up, which means the magnet will work 2 times more powerful. The diameter and composition of the core plays a big role. With a small cross-section, we will get a weak electromagnet, even if we apply high voltage, but if we increase the cross-section of the heart, then we will get a not bad electromagnet. Yes, if the core is also made of an alloy of iron and cobalt (this alloy is characterized by good magnetic conductivity), then the conductivity will increase and due to this the core will be better magnetized by the field of the coil.
Everyone in childhood loved to play with magnets: either attracting them to each other, or repelling them, as well as magnetizing various metal objects, rolling them over obstacles. But it was a magnet, and it was childhood. As we become adults, we change our needs and interests, but at any moment we may need an electromagnet that is simply not at hand. In this article we will try to figure out how to make an electromagnet from improvised means.
What is an electromagnet?
In general, a magnet is understood as an object that forms a magnetic field. An electromagnet is a device that performs the same functions as a simple magnet, but due to an electric current. In other words, such a device will not work without electricity.
What will you need?
To make such a device yourself you will need:
- Nail.
- A spool of medium-sized copper wire.
- Switch.
- Power unit.
- Soldering iron.
- Scissors.
What kind of nail should it be?
If all the components are available and a clear decision has been made about what is worth trying in practice, how to make an electromagnet at home, then the first thing we do is decide on the “heart” of the entire structure – the nail. If the question arises about choosing a nail rather than, say, a bolt, then this choice is related to its geometric shape: it is round and even. The shape of the rod of the future electromagnet should not be curved, much less square. It should also be taken into account that the length of the nail must be sufficient for winding the wire, for example, 120 mm.
How to make a reel?
And now the nail is selected, which means that now you need to wrap the wire around it. How to make an electromagnet from an ordinary nail and copper wire? Very easy. The main thing is to wind the wire tightly, in rows adjacent to each other (this must be done in at least 4 layers). This operation should be performed carefully enough to prevent rupture, otherwise such an electromagnet will not work.
How to connect?
The device runs on electricity, so the resulting structure must be connected to the At the first stage, we decided that our magnetic device will operate from a power supply, but, on the other hand, it can be made portable if you use a battery. So let's look at the last step of how to make an electromagnet. The coil is ready and has two free ends of copper wire left. They need to be connected to a power source, or better yet, soldered to better secure the contact. Also, for ease of handling, you can install a switch that will allow you to turn it on only when necessary.
How does it work?
The operating principle of the created device is very simple. Energy is applied to a coil consisting of a rod and copper wire, causing the coil to become magnetized. Everything is very simple! And you now know how to make an electromagnet yourself. Such knowledge will certainly come in handy!
How to make a powerful electromagnet?
If you want to make the device much more powerful than it turned out, then for this you need to increase the coil. This is achieved by increasing the number of turns and the number of layers.
Today, electromagnets are used in a huge number of devices and instruments. Electric razors, a tape recorder, a doorbell - and this is a small part of the devices where it is installed.
The design of an electromagnet is quite simple, and in this article I will try to explain its operating principle and show you how to make a homemade electromagnet.
An electromagnet is a device that creates a magnetic field when current passes through it. If you take an ordinary wire and connect one end to the plus of the battery, and the other end to the minus, then a magnetic field is formed around the wire. True, it will be very weak; in order to strengthen it, the wire must be bent into a spiral. In this case, the turns of the wire are close to each other and the magnetic field becomes stronger.
The greater the number of turns and the greater the current, the stronger the electromagnet will attract. You can further strengthen the magnetic field by winding a wire around an iron rod.
A homemade electromagnet can be made from an ordinary nail, wire and battery. For added convenience, add duct tape to the list.
For winding, I used single-core copper wire, about a millimeter in diameter. Set aside a couple of centimeters from the edge and start wrapping the wire around the nail.
If necessary, adjust the winding so that each turn fits tightly to the previous one, so the strength of the electromagnet will be greater.
Having finished winding, set aside another 7-10 centimeters and cut the wire. Then wrap the battery with electrical tape. Bend the upper end of the wire so that it constantly touches the battery pole.
Now, taking the electromagnet in your hand and connecting the lower end of the wire to the plus of the battery, you will see that metal objects will be attracted to the nail. Homemade electromagnet works!
Using the switch
For ease of use, we suggest slightly improving the resulting diagram. Two more elements should be added to the above list. The first of them is the third wire in PVC insulation. The second is a switch of any type (keyboard, push-button, etc.).
Thus, the electromagnet connection diagram will look like this:
- the first wire connects one contact of the battery to the contact of the switch;
- the second wire connects the second contact of the switch with one of the contacts of the electromagnet wire;
the third wire completes the circuit, connecting the second contact of the electromagnet to the remaining contact of the battery.
Using a switch, turning on and off the electromagnet will be much more convenient.
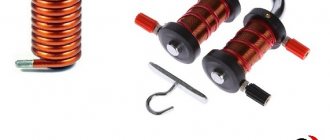
Coil based electromagnet
A more complex electromagnet is made on the basis of a coil of electrical insulating material - cardboard, wood, plastic. If you don’t have such an element, it’s easy to make it yourself. Take a small tube from the indicated materials and glue a couple of washers with holes to it at the ends. It is better if the washers are located at a small distance from the ends of the coil.
Further actions are similar to the process described above:
wind a sufficient amount of copper wire in varnish insulation onto the coil;
install a steel core inside the coil; Assemble the diagram for connecting the electromagnet to the current source described above and use the device for its intended purpose.
We recommend other articles on the topic
How to make a laser level yourself - review of designs, assembly of a simple version
Making a countertop from liquid stone yourself
Options for building a fence from plastic bottles
Do-it-yourself smoke generator for cold smoking: purpose, operating principle, manufacturing
The process of making a powerful 12-volt magnet
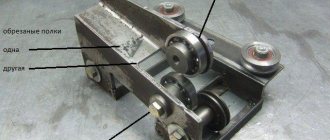
Of course, any other massive steel pin can be used as a core. But a horseshoe from an old castle will do just fine. Its bend will serve as a kind of handle if we start lifting loads of impressive weight. So, in this case, the process of making an electromagnet with your own hands is as follows:
- We wind the wire from the transformer around one of the horseshoes. We place the coils as tightly as possible. The curve of the horseshoe will interfere a little, but that's okay. When the length of the side of the horseshoe ends, we lay the turns in the opposite direction, on top of the first row of turns. We make a total of 500 turns.
- When the winding of one half of the horseshoe is ready, wrap it with one layer of electrical tape. The original end of the wire, intended for recharge from a current source, is brought out to the upper part of the future handle. We wrap our coil on the horseshoe with another layer of electrical tape. We wind the other end of the conductor to the bending core of the handle and make another coil on the other side.
- We wind the wire on the opposite side of the horseshoe. We do everything the same as in the case of the first side. When 500 turns have been laid, we also remove the end of the wire for power supply from an energy source. For those who don't understand, the procedure is clearly shown in this video.
The final stage of making an electromagnet with your own hands is recharging to the energy source. If it is a battery, we extend the ends of the stripped conductors of our electromagnet using additional wires, which we connect to the battery terminals. If this is a power supply, cut off the plug going to the consumer, strip the wires and screw a wire from the electromagnet to each one. Insulate with electrical tape. We plug the power supply into the outlet. Congratulations. You have made with your own hands a powerful 12-volt electromagnet that is capable of lifting loads over 5 kg.