Do-it-yourself liquid rubber for waterproofing is a modern way to ensure the reliability of various structures. This material can be used for roofing, foundations, and reservoirs. Of course, the production of such waterproofing will require certain financial costs, but the quality and reliability of the coating fully compensates for them. And the cost can be reduced if you do the work of applying the material yourself.
Liquid rubber can be used for roofing, foundations, and reservoirs.
Composition and features
This material contains bitumen emulsion, polymer components, groups of hardeners, as well as stabilizers. Although the finished product is very similar to rubber, its composition is something different. But it was precisely the great similarity that prompted us to come up with such a name.
Rapid hardening of the mass is carried out when the product is applied to the required surface in liquid and cold form, and, having already taken its final form, the material produces high results in terms of adhesiveness and strong adhesion to various building surfaces. The composition itself is sold as a liquid product in 200 liter containers. They are usually represented by barrels.
To quickly achieve the result in the form of a hardened material, the surface to be treated must be coated with a solution of calcium chloride, which helps to accelerate the hardening time of the mass. And after this, the result is exactly like a monolithic rubber coating without seams.
Recovery methods
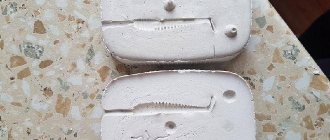
Restored rubber part using kerosene method Rubber elements, under the influence of external factors, lose their original properties, become less elastic, and harden. Their continued use will not bring the desired effect; seals, for example, will not be able to make the system completely sealed. Purchasing new rubber elements is sometimes difficult due to the lack of products of the required sizes or their inflated cost.
The following substances can soften rubber:
- Kerosene. Allows you to make rubber parts soft, affecting the structure of the material. After processing, the rubber element becomes completely elastic. The recovery technology is as follows:
- fill a small container with kerosene (select the container size depending on the size of the product to be restored);
- place the part in a container with kerosene for 3 hours;
- after the specified time, check the product for softness, if the result is satisfactory: remove the material and rinse with warm running water;
- Dry the material naturally, without using a hair dryer or battery.
- Ammonia alcohol. The process for restoring old material is as follows:
- dilute the specified alcohol with water in a ratio of 1:7;
- place the rubber material in the resulting solution for half an hour;
- after the specified time, remove the part and rinse with warm running water;
- Allow the part to dry completely before using it.
Please note: you cannot keep rubber in a solution of ammonia and water for more than an hour. If the material is not elastic after 30 minutes, use another recovery method.
- Rubbing alcohol followed by glycerin. Technology for “reanimation” of rubber parts:
- fill the container with medical alcohol;
- place the part that requires restoration in alcohol for several hours;
- after the specified time, check the condition of the product, if it is soft enough, remove the element from the solution and wash with warm soapy water;
- rub glycerin into the surface of the part using a sponge (cloth);
- remove any remaining glycerin from the surface of the product.
Instead of glycerin, it is allowed to use automobile oil; it is rubbed into the surface of the product, then the part is left for half an hour before use. During this period, the rubber becomes quite elastic.
- Castor oil and silicone. Let’s make a reservation right away - this method allows you to quickly “reanimate” old rubber, but the restoration effect will not last long; after a few days the product will become hard. For this method, follow the sequence:
- coat the part with silicone;
- wait 10 minutes;
- After the specified time has passed, the part can be used.
Please note: a similar effect is achieved by using castor oil. It is rubbed into the surface of the part, after which it becomes soft and elastic.
We recommend watching a video about softening rubber using ammonia:
Where is it used?
Even after complete drying, liquid rubber for waterproofing (reviews confirm this) remains elastic. Where is the application of such material required in the first place? These are all kinds of joints, crevices, cracks and gaps. It is also necessary to seal rooms with increased moisture resistance, basements, swimming pools, garages and other outbuildings. It is possible to treat the foundation and plinth of structures for any purpose with the composition. Good and consistently successful results are achieved everywhere.
It can also be used inside residential premises if, for example, the building has small cracks. In this case, the protective layer is applied on both sides of the object - on the outside and on the inside.
Blackening rubber with laundry soap
It’s hard to imagine that such a seemingly ordinary product as laundry soap can help with tire renewal. For this method, you will only need water, soap and a car wash brush with medium-hard bristles (approximately 70%). To carry out this procedure, you must immediately clean the tire from dust and dirt, then lather the brush thickly and rub the rubber. There is also another way, for this you will need to grind the soap with a knife or grater and dissolve it in warm water. After preparing the solution, you need to rub the tires well. Both methods are quite effective, after which your wheels will shine like new. The most important advantage of this method is its accessibility, ease of execution and low cost. There is also another side to the coin; this method is not recommended for frequent use, because soap dries out the rubber and significantly reduces their service life. Therefore, think again before applying any liquids to rubber, so that you don’t have to replace it later.
Product benefits
This material has undeniable advantages that help it gain popularity among consumers. Therefore, waterproofing with liquid rubber often has positive reviews. So, the advantages are as follows:
- the waterproofing ability of the coating is at a fairly high quality level;
- possibility of dense filling of porous formation;
- solidity, adhesiveness to wood, concrete structures and metal surfaces;
- the application method itself is simple, the material hardens quickly in normal weather conditions;
- durability and environmental friendliness;
- safety, does not cause harm upon contact with humans;
- resistance to fire;
- long service life;
- elasticity.
In terms of its performance capabilities, especially as waterproofing, liquid rubber leaves other similar materials far behind. Its layer with a thickness of 2 mm is equal to a similar coating of 8 mm if it is a rolled coating in the form of roofing material, and 6 mm if it is a fiberglass membrane. The elastic capacity exceeds any analogues, the ability to operate in temperature conditions makes a significant difference: from -45 degrees to +95. From this follows the conclusion about wide climatic application.
Technical tests of the complete hardening of the composition give the following results: at a temperature of 18-20 degrees above zero, the time for the product to acquire all standard properties, as well as to obtain full elasticity, is 3-4 hours. At a slightly lower temperature (8-12 degrees) - a little longer. The waiting time for results increases to 23 hours. In case of replacement, the material does not need to be removed; the new composition is simply applied over the old one. Thus, obvious advantages include the speed of work itself and drying. It will be possible to walk on the surface in almost half an hour. The service life of the finished coating is also high, which is 25 years. Advantages: contact ability to concrete, wood and metal surfaces, stone and almost any similar objects. High viscosity and stickiness make it possible to create a monolithic connection. High resistance to mechanical damage due to the high viscosity of the product. If problems do arise during operation, repairs are quite quick and simple. Applying a new layer 2 mm thick will save you hassle for a long time. In this regard, a new plus arises - low material consumption.
What is needed to restore the elasticity of rubber
Rubber is considered one of the most elastic materials. It is for this reason that it is used in the manufacture of various seals. After the load stops acting on the seal, it is able to return to its dimensions. This moment determines the spread of the question of how to restore the elasticity of rubber. Over time, this property is also lost. If the surface wears too much, cracks appear, due to which the insulating qualities are significantly reduced.
You can soften rubber at home using common substances. The most commonly used substances are:
- Kerosene can easily restore the elasticity index. This substance is ideal for processing small products; it can be softened by soaking them.
- Ammonia can be used to soften the structure. To do this, it is enough to create a small bath in which the product is lowered for several hours.
When soaking rubber in a restoration liquid, it is worth considering that the material can significantly increase in size. To remove the substance from the surface, the product is thoroughly washed with soap and water.
In some cases, you can use hot water to soften the rubber. This method is used to restore the insulation of the refrigerator doorway. The achieved effect can be enhanced by wetting the surface with silicone.
Seals made from the material in question are also used in the production of windows. To improve the insulating qualities of the rubber bands, they are wiped with silicone and glycerin from time to time. Such substances can be purchased without any problems.
Flaws
The disadvantage of liquid rubber is its low resistance to direct and intense solar radiation. Additional treatment with a water-based paint coating is recommended to increase UV resistance. Also, the disadvantages include the rather high cost of the composition.
Thus, suitable weather conditions are important to obtain a quality coating. Waterproofing with liquid rubber (reviews confirm) is impossible in rainy weather. It is not recommended to apply it to a damp surface. The inability to use at temperatures below +5 degrees makes it difficult to use the composition at low temperatures and its use in some regions. In addition, sometimes it is necessary to purchase special additional equipment for applying liquid rubber, which is quite expensive. The cost starts from 100 thousand rubles and requires separate personnel training. Also, surface preparation requires certain additional work. It must be thoroughly examined, cleaned and washed with detergents. Then complete drying is required.
Preparatory work
Work on laying waterproofing begins with preparing the surface. It is thoroughly cleaned of unnecessary objects, debris and dirt. Grease and oil stains must be removed using a solvent (white spirit) or by burning. After this, the entire surface is washed well with detergents and dried.
A thin primer layer of a special composition - mastic under a layer of liquid rubber - is applied to a thoroughly cleaned surface. It is recommended to lay a reinforcing layer of geotextile over the primer. This element is especially important when forming a roof covering, protecting seams and joints.
Usage
Waterproofing is applied in two ways: manually or by spraying using special equipment. You also need a device for mixing the composition in a special container. Application by spraying is carried out under high pressure, which also requires certain personnel qualifications and technical conditions. The installation drive can be electric or gasoline. Periodic stirring of the finished mixture is required.
The processing process itself consists of applying wide stripes followed by preliminary drying. This brings the layer to the required thickness.
Rubber injection molding
The production of rubber technical products by injecting a heated rubber mixture into a prepared mold is called rubber injection molding.
After injection, the vulcanization process occurs, that is, the rubber mixture turns into rubber with predetermined properties. The first experience in producing rubber products by casting was obtained many years ago. The rubber mixture was placed in a specially made mold and, using a punch, it was pressed into the free cavity of the mold. The finished product is formed in a closed shape. This approach reduces the likelihood of burrs, and the products themselves accurately replicate the required configuration of the future part.
In this case, the payback of the forms occurs quite quickly.
Silicone rubber injection molding equipment
The form consists of several parts - several rings and a core. Between the lower and middle rings there is a volume in which the product is formed. A heated rubber mixture is injected into the space between the upper and middle rings. During casting, the mixture, under the influence of external pressure, leaves the upper chamber and enters the lower chamber through the casting passages. After cooling, a finished part is formed in it.
It should be understood that a large amount of time is required for assembling, disassembling the injection mold, removing the finished part and filling the rubber mixture; we must not forget about the timely maintenance of injection molding equipment.
Dosing
Rubber molding is a continuous technological process. The pre-prepared mixture is placed in a container, from where it enters a hopper with a rotating auger. The mixture is fed into the mold under pressure created by the screw.
Dosing process in injection molding
As the mold is filled, the screw stops rotating. Conditions must be created in the container with the auger so that the rubber mixture does not scorch.
Mixing
For casting rubber into molds, pre-prepared and mixed mixtures are used. But, when it is processed in an injection molding machine, while moving along the screw channel, additional mixing occurs.
How to do it yourself?
For practical and economical builders, it is worth noting that do-it-yourself liquid rubber for waterproofing can reduce costs. Of course, in small quantities. This is important, for example, for minor surface repairs. Required:
- a couple of small jars of PVA glue;
- borax packaging;
- water (about half a glass).
It is possible to add some dye, but this is not necessary. Water is mixed with borax, and glue with dye. Everything is thoroughly mixed in different containers, then combined. If work requires a break, the finished composition should be kept in the refrigerator.
According to comments and reviews from builders, the composition is much more often used in industrial construction, and less often in private construction. This is due to the price of the product, the availability of equipment and personnel qualifications. Everything in general requires large financial costs. Further, according to experts, the appearance of the finished coating itself does not look too attractive. This especially applies to the external part, which is in plain sight. Although the product has been proven to have excellent adhesive properties, builders especially emphasize the need to work only on dry surfaces. This is especially true for brickwork. The applied composition on a damp surface will not allow further steam to escape and in winter conditions threatens severe freezing of the brick, condensation and further destruction of the masonry as a whole.
Thus, liquid rubber for waterproofing has undeniable advantages. At the same time, it is not without its shortcomings. But, according to experts, there are much fewer disadvantages than advantages. Perhaps this is precisely the reason for the high popularity of the material and its prevalence among professionals.
Casting the mold
The compound is a two-component material consisting of silicone paste and a hardener (catalyst). It's not exactly DIY silicone. But still.
By mixing these components in the correct proportions, you will get a miracle mixture for casting any shape you like.
The catalyst does not allow the silicone to harden as quickly as in the first case.
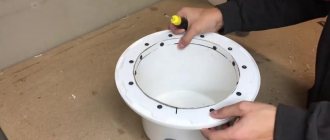
So. You have a very beautiful mold and you need to copy it in silicone format.
- Take the container and make sure it has no cracks or leaks.
- Place a model of a plastic or plaster toy in the shape of a bear in it.
- Fill the box with the model with dry mixture or sand to understand how much silicone will be needed for pouring in milliliters.
- We treat our bear with soapy water or sunflower oil and fill it with silicone.
- Think in advance about how you will seal this box hermetically.
- We wait approximately 15 minutes.
- We disassemble the container and check that the silicone does not stick to the fingers.
- Use a utility knife to cut the silicone lengthwise.
- Now replicate this form using the resulting silicone mold as much as you want.
Using liquid or cast silicone, you can make molds on platinum.
- We treat foam or gypsum platinum with the same soap solution.
- Apply liquid silicone with a brush.
- First we work on the details, the top layers generously.
- Let it dry. This will take time.
- Remove the silicone. Sleight of hand, as they say, and no fraud.
Frequently asked questions - answers
What can replace silicone molds?
An excellent alternative is glass and ceramics.
What is the electrical conductivity of silicone?
Has very low electrical conductivity.
Which silicone is best for making molds?
The best series are E-Series, Mold Star Series, Equinox Series, Rebound Series.
How to glue silicone products at home?
You can use special glue for elastic products, silicone sealant, or melt the torn edges with fire and connect them.
How to make liquid rubber at home?
The necessary ingredients are borax (1 pack), PVA glue (2 bottles), water (0.5 cups), dye, containers and something for stirring. Combine borax and water in one container, stir until clear. The other contains glue and dye. Mix the contents of both containers and wait until the liquid hardens.
How long does it take for silicone to cure?
The drying period is influenced by many factors - humidity and air temperature, layer thickness. On average, a film is formed in 15 minutes, and the substance hardens in 24 hours. Acid sealant dries in 4-6 hours, neutral sealant dries in 24 hours. Also, the approximate “ready” time is always indicated on the packaging.
A car surrounded by care stands out from the crowd. The car enthusiast washes and polishes the body, polishes the plastic moldings. Tires are often the object of intense cleaning. As you know, these parts lose their original appearance during the first year of operation. This is due to weather conditions and dust scourge. The result is that the car shines, and the tires give off a characteristic gray tint, which only repels the eye.
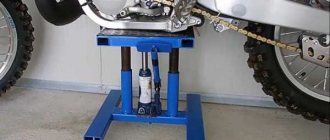
Making a vulcanization device
Homemade vulcanizers are divided into electric and gasoline. They are made from parts that have served their useful life. Main nodes:
- fixed table;
- a heating element;
- clamp.
The simplest electric model is made from an old iron that has a working coil. This option has a regulator, which means it is more convenient than others. The working surface is the sole. It is better to remove the handle, turn the iron over, and install it on a bracket made of thick sheet. The item to be repaired is placed on top and clamped with a clamp.
For the gasoline version, it is convenient to use the engine piston. Gasoline is poured into it and set on fire. To control, place paper on the patch. It begins to turn yellow at a temperature critical for rubber.
Necessary materials
We purchase liquid glass and ethyl alcohol. Mix the ingredients in equal proportions 1:1. The container can be any plastic container.
Silicone hardens quickly when exposed to air, so you need to cook quickly or in small quantities.
When mixing liquid glass and alcohol, add a dye, such as gouache, according to your mood, so that the final result is the desired color.
Frequently asked questions and answers:
What is silicone?
What does silicone look like?
The appearance depends on its components, the degree of density (liquid, gel-like, solid) and the presence of coloring substances. Color varies from clear to any color.
What is coating silicone?
How to make liquid silicone?
It is important to know the type of silicone in order to select the right solvent. Sometimes gasoline and alcohol are used. How to melt silicone at home?
How to melt silicone at home?
Finely chop the silicone into a container (resistant to high temperatures), sort if it is colored. You can put it in the microwave, but you shouldn’t do this in an apartment because of the subsequent unpleasant odor
It’s better to try to melt it over a fire, it’s important not to overheat, otherwise it will spoil
Blackening tires with glycerin and water
The most common method is to use glycerin, which can be easily purchased at the pharmacy. Glycerin is a colorless, viscous and very hygroscopic liquid, miscible with water in any proportions. In order to blacken tires at home, you will need only five jars of 25 ml or three of 40 ml, the preparation method is quite simple, you just need to mix glycerin with water in a ratio of 50 to 50 (1:1).
If you need a greasy solution, then you can use 5 parts of glycerin to 3 parts of water, then you will need not to spray the liquid, as in the first case, but simply apply carefully with a pre-moistened sponge. Also, some experimental drivers use proportions such as 1:3 (high fat effect), 1:5 (light shine) or 1:7 (light matte effect), it all depends on the degree of tire burnout.
The most important advantages of this method are:
- Availability of materials.
- Profitability and minimal financial costs, its cost is about 9 rubles.
- Possibility of fast cooking.
- Possibility of frequent use, and can also be used on black plastic elements of the car body, for example on the bumper.
Flaws:
- the fragility of using the tire, namely drying and cracking of the rubber at low air humidity;
- after application, the rubber will have a shine, but since it is a fatty, sweetish liquid, although the tire will shine, it will literally immediately begin to attract dust;
- After the first contact with water, it is washed off.
The shiny effect can last only 2-3 days and only if there are no heavy rains, so washing the car after application is not recommended, otherwise the tires will return to their previous appearance.
Reversing the rubber compound
During the vulcanization process, it is necessary to adhere to the specified time and temperature; when working with some materials, exceeding them can lead to reversion. It consists in the secondary disintegration of cross-links, manifested by the viscosity and plasticity of the material. To prevent such a mistake, it is necessary to pay close attention to the parameters of raw rubber. At the beginning of the development of the tire industry, specialists involved in tire repair had to independently select the composition of the rubber mixture, taking into account the type of tire and the type of damage.