Instructions on how to assemble a feed cutter from a washing machine
A feed cutter is a very convenient device for those who have a lot of animals and birds in their household: chickens, ducks, geese, pigs, cattle, etc. With its help, you can easily grind meat, vegetables, herbs to the desired consistency, as well as grind grain. Thus, with the help of a feed cutter you can feed livestock and make supplies for the winter by preparing food. Of course, finding such a universal device on sale for a relatively small amount of money will be very problematic. This is the main reason why it is much easier and more profitable to make a feed cutter with your own hands.
Making a feed cutter
A full-fledged feed cutter can be built using two other household devices as a basis: a washing machine (any semi-automatic design, like OKA or similar) and a device for preparing ground coffee (coffee grinder).
Due to the size of the drum capacity of the washing machine, you can place a large number of products there that will be cut. Accordingly, instead of the activator there will be knives, with the help of which the cutting will be carried out. An insert in the form of a grid will ensure good tightness and eliminate the possibility of pieces of grinding products falling out of the tank - their path will lie through the funnel directly into the container placed below - a bucket, basin, etc.
Advantages and disadvantages of a do-it-yourself feed cutter
The one made by yourself will differ from the market version of the feed cutter, which is natural, since the assembly will take place through the efforts of one or two people instead of the conveyor method practiced in factories and factories for the production of such devices. Speaking about the advantages of a manual unit, first of all, it is worth mentioning:
- compact dimensions - it is not difficult to place the feed cutter in any suitable place;
- ease of use - the feed cutter does not require studying multi-volume instructions to be able to fully operate it;
- low cost – prices for consumables are more than reasonable compared to the cost of a full-fledged device on the household appliances market.
Of course, this option cannot be called ideal - like any manual design, a homemade feed cutter has its drawbacks:
- The design feature requires the presence of parts that may not be available, and may not be sold separately. In order to get them, you may even have to buy the devices of which they are components - however, as already indicated, this will not entail financial difficulties, except that a lot of time may be spent searching for all this.
- No warranty - only the diligence and attention to detail that was put into production will be used instead.
- Compared to purchased feed cutters, the efficiency will not be as high - however, this can hardly be considered a minus, rather a pattern.
DIY feed cutting disc - Metals, equipment, instructions
Large farms use all kinds of grinders to prepare feed mixtures based on grass crops. Typically, these grinders are very powerful and are designed to grind large quantities of feed.
For a subsidiary farm where the livestock is small, the use of industrial grinders is not advisable. Of course, the industry also produces these small-capacity units, which are just suitable for preparing feed in small quantities.
But their cost is sometimes very high, so many farm owners often make shredders with their own hands.
First, let's talk about what shredders are and what they are intended for. Grinders are mechanical devices designed to break feed into small particles, which are easier for young animals to absorb and less likely to stretch and trample.
Homemade shredders have a number of advantages. Firstly, many of the components are readily available, so the cost of manufacturing them will be low.
Secondly, you can make choppers for preparing certain types of feed.
Thirdly, having such a chopper, it is possible to prepare fresh feed every day, which ensures that it is more readily absorbed by young and adult animals.
As stated, you can make this device with your own hands for certain types of feed. Therefore, we will consider the simple designs of three choppers that process different feeds.
Device and assembly
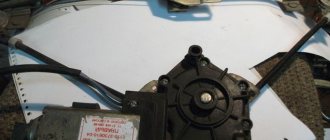
The interpreted set of a hand-assembled feed cutter will consist of a funnel for collecting the resulting consistency, pruning knives, a base flange and a fairly wide variety of parts, which can be seen in the photo below.
The choice of units taken as a basis is due to the fact that the washing machine can easily be equipped with all the listed mechanisms due to its successful shape and suitable dimensions. At the same time, cutting using such a device occurs on the principle of an electric coffee grinder. According to it, the blades, which will act as the main cutting elements, are firmly attached to the shaft of the electric motor by screwing. Due to the speed of rotation of the knives, all necessary products are quickly crushed.
The assembly proceeds as follows:
- The blades are sharpened and, upon reaching the desired shape, are placed one by one on a shaft attached to the activator pulley of the washing machine; the shaft is secured with a key. How to do this is shown in detail in the photo.
- The drain increases in diameter to approximately 15 centimeters, so the hole will be used in the feed cutter as a funnel for removing finished products.
- A grate is placed in the tank and secured at an angle of about 15 degrees. Installing such a grid is the most difficult stage of assembling a feed cutter; it is better to study it visually, using photos and videos.
Conclusion
The finished device will need to be tested in operating mode to ensure its suitability for further continuous use. Also, over time, the blades inside the structure may become dull - there is nothing wrong with that, it will be enough to simply replace them with similar ones. In general, so far there have been no widespread problems in using a feed cutter assembled by yourself - the device is excellent for household work.
Source
Vegetable cutter from washing machine
To make a vegetable cutter, you only need to remove the motor and drum from an old washing machine. In addition, to make the base, you will need a profiled pipe or metal corner, as well as thin sheets of stainless steel.
This design of a vegetable cutter is quite simple to manufacture. First you will need to make a base on which the mesh and drum from the washing machine will be placed. A small hole is made in the bottom of the drum for the motor shaft.
Then, cutting elements, which can be made from an old wood hacksaw, are attached directly to the motor shaft. This vegetable cutter from a washing machine must have at least two knives, the first of them, with slightly curved blades, is located closest to the mesh for the release of raw materials.
Also, in the bottom of the vegetable cutter, a little on the side, you should provide a large hole through which you could pour vegetables into the drum. The assembly, directly on the frame, should contain the vegetable cutter controls, to which the power cable is subsequently connected.
Washing machine feed chopper
A more complex version of a homemade device is a feed cutter from a washing machine. Before starting production, you need to familiarize yourself with the drawings and diagrams. They will help you understand the features of fastening elements and working units. The frame and motor from an old washing machine are used for manufacturing.
A cutout is made in the rear of the housing, sufficient to accommodate the shaft from the motor. Cutting discs or knives are attached to the shaft using the most common bolts. For greater productivity, it is recommended to install two knives: one is attached at the bottom, the second at the top. The role of the lower knife is to advance raw materials into the output hopper and lift unprocessed root crops. The top knife is the main chopper.
A hole is made in the lower part of the working chamber for the exit of processed feed. Place a tray or bucket under it. The shredder frame is installed on the frame. Instead of a frame, you can use a regular table - the main thing is to firmly attach the device to the surface.
It is recommended to close the upper part of the case with a lid.
The lid can be made hinged to control the quality of grinding and add new raw materials, or you can make a small window in it.
A do-it-yourself washing machine shredder made using this principle is one of the most effective and simplest. In just an hour of operation, the device can grind up to one hundred kilograms of vegetables or root crops. The size of the food particles is ideal for feeding to both young animals and adults, suitable for the preparation of wet food, as well as drying. The device is capable of shredding freshly cut grass.
Another plus: a homemade feed chopper of this type can easily be converted into a grain crusher.
To do this, another motor is installed just below the cover. It is attached to a metal corner using bolts, and another knife is placed on it. The device can handle any type of grain: from soft to the hardest.
Read also: Connection diagram for a three-phase asynchronous motor
Do-it-yourself feed cutting is an additional source of income from a subsidiary farm, a good mood and saving money. After all, to make it you will need the most common available materials that can be found in every yard of a village house.
A self-made feed cutter will serve for a long time and will bring great profit when purchasing feed. With its help, you can chop substandard potatoes, beets and carrots brought from nearby farms.
Grinder feed cutter
A feed cutter made from a grinder has a less complex design. To make it you will need to make a stainless steel container. Then you will need to drill holes in the walls of the container, the diameter of which would be about 1.5-2 cm. Be sure to bend the edges of the holes a little inward, this is the only way the vegetable cutter will chop the vegetables.
Then it will be necessary to assemble a frame on which the container could be installed, which is mounted to the base using gaskets and a flange. After this, you will need to connect an angle grinder to the previously installed flange. In this way, you can get a rotating drum for chopping vegetables.
It is better to immediately, on top of the vegetable cutter, provide for the installation of a receiving hopper, which is made from the same stainless steel or an unnecessary metal bucket. Under the influence of its gravity and the speed of rotation of the drum, the raw materials entering the vegetable cutter are crushed, and at the end you can get a very good feed for pets.
Vegetable cutter made from a bucket and a gas cylinder
In almost the same way as in the case of an angle grinder, you can easily make a vegetable cutter from an ordinary gas cylinder or bucket. If we are talking about a cylinder, then first you need to cut off the bottom and top of it. After this, at the bottom of the cylinder, a rotating part with sharp knives should be provided.
Then you will need to cut a small hole in the side of the container, which is necessary for the exit of the crushed raw materials. After this, the entire structure is installed on a low metal base, from below which the engine is mounted. Thus, you can get cheap, but quite effective equipment for grinding feed.
Source
Feed cutter from a gas cylinder
Feed cutter from a gas cylinder
Making a powerful and compact feed cutter from an old gas cylinder is done as follows:
- All the gas is drained from the old cylinder.
- Using a hacksaw for metal, cut off the top of the cylinder.
- From a thick-walled pipe with a diameter of 50-60 cm, reinforcement number 12 (diameter 12 mm) and corners, a frame with 3 legs and 6 reinforcements connecting the frame in the upper and lower parts is welded.
- A 3-phase motor with a power of 2-2.5 kW is placed on the frame so that its shaft faces upward.
- A hole is drilled in the center of the bottom of the container, a window and a tray on the side for ready-made crushed food.
- In a similar way, as in the case of a vegetable crusher, a disk with 2 knives is made.
- The disk is connected to the motor shaft using a rod of the required length.
- The motor is connected to the network via a starter.
- A bolt is welded to one of the lower frame reinforcements to connect the unit to the ground loop.
Be sure to read:
How to check eggs for embryos at home: collecting an ovoscope with your own hands
This feed chopper, unlike those described above, has a very high engine power, which directly affects how much electricity it will consume. However, since its operating time, even when the tank is fully loaded, does not exceed 5-7 minutes, the electricity consumption will not be too large.
Do-it-yourself vegetable cutter for livestock: from a machine, a bucket, an angle grinder.
Published by kachlife on 10/27/2020 10/27/2020
Farming is a rather troublesome and time-consuming task. It’s impossible to do without a handy tool. It will be needed both when breeding poultry and when raising other livestock. One of the necessary equipment is a vegetable cutter or feed cutter. It simplifies the process of feeding livestock on the farm. Few people know that it is not at all necessary to purchase such a device - you can easily make it yourself.
Design and principle of operation
The main components of a homemade feed cutter are:
- Receiving tray, or hopper , is a structural element located above the working chamber (to the side of it) and used for storing crushed feed raw materials (grass, vegetables, fruits, grain).
- A working chamber with a knife rotating inside it - in this part of the feed cutter, raw materials are crushed with the sharp edges of moving knives.
- The power unit (motor) is designed to give the chopper knife a high rotation speed. It most often uses an electric motor from an electrical appliance (washing machine, juicer).
- The outlet pipe, or tray for crushed feed, is located, as a rule, in the lower part of the working chamber and serves to divert the result of the feed chopper into a container placed under it.
However, in some cases, due to the lack of materials and the need for quick manufacturing, this design is simplified, as a result of which the raw materials are placed directly into the working chamber and the crushed feed is subsequently poured out of it.
Grain crusher, feed cutter and grass cutter in one device
A grain crusher, feed cutter and grass cutter in one device is a fairly multifunctional device that allows you to process a wide variety of raw materials. The design of such a device allows you to grind grain, corn, barley, as well as chop grass, root crops and vegetables.
Depending on what kind of raw material is crushed, the performance indicator will be different. As a rule, chopping the grass takes longer, so the productivity will be slightly lower.
It has been scientifically proven that crushed feed is better absorbed in the body of animals, significantly increasing their productivity.
How to make one from a washing machine?
It is not difficult to build a food chopper from old household appliances at home. The main thing is to find the right drawing and have everything you need at hand. Then the machine’s productivity will be able to reach 100 kilograms per hour, and crushing food to prepare roughage will become an easy process. A DIY electric feed cutter is a good budget option that can last for quite a long time.
For this you will need:
- washing machine motor;
- her drum;
- profiled pipe for the base;
- thin sheets of steel.
On the base there is a drum with a passage for the motor shaft and a mesh. At least 2 knives are fixed on the motor shaft. The drum is secured with four bolts.
Drill grass cutter
Grass cutter from a drill
A simple, but quite productive homemade grass cutter can be made from an electric tool such as a drill as follows:
- A hole with a diameter of 12 mm is made in the middle of the seat of a simple wooden stool.
- A UPC 201 bearing assembly is attached to the narrow wooden end of a 20x40 mm wooden block.
- The block, together with the bearing assembly, is attached to the back of the stool seat. In this case, the inner hole of the bearing and the similar one drilled in the seat of the stool must completely coincide (be coaxial).
- A galvanized 12-liter bucket with a 12 mm hole drilled in the center of its bottom is secured to the stool using short self-tapping screws.
- The shaft for the grass cutter knife is made from a durable rod with a diameter of 12 mm. To do this, an M12 thread is cut at one end of it, after which. By pushing it with the other end through the holes in the bottom of the bucket and the seat of the stool, it is pressed into the bearing. In this case, the length of the threaded rod protruding inside the bucket should be no more than 10-15 mm. The length of the lower end is selected taking into account the size of the drill used: it should be such that when the shaft is clamped in the chuck of a vertically installed tool, it rests on the floor and is stable.
- A diamond-shaped knife 10-180 mm long and 35-40 mm wide is cut from durable tool steel.
- The narrow ends and ends of the knife are sharpened on one side.
- The knife is installed on the working shaft and secured with a nut.
How to make a feather removal machine with your own hands: an economical option from a washing machine
A simple drill with a power of 850-1000 W is used as a drive for such a grass cutter. The chopped grass is loaded in small portions when the drive is turned on, and the container must be closed with a lid.
After the working chamber of the grass cutter is filled with chopped food, tilt the stool with the bucket and pour it into a larger container.
Important! If there is no metal bucket available, under no circumstances should it be replaced with a plastic one - such a seemingly profitable and simple way out of the current situation can lead to disastrous consequences in the future. The fact is that if the knife is destroyed, this material will not be able to protect a person nearby from metal fragments flying at high speed.
Vegetable cutter from a barrel
How to make a root vegetable chopper with your own hands from a tank or barrel:
- If the working container is welded independently, then it is better to use steel 1.5 mm thick,
- The walls are given rigidity by flanging the edges with rubber tubes,
- The bottom is made of 5-6 mm steel sheet,
- A hole is drilled in the center of the bottom to install the motor. For this model, a conventional single-phase motor is suitable,
- An unloading hole is cut out at the bottom of the barrel, under which a tray or box is placed,
- The body is mounted on four legs made from a piece of pipe or angle,
- Two knives are installed inside the working container,
- The upper knife is made double-edged with the edges bent down,
- The lower knife is made in the shape of a propeller with one cutting edge,
- The shaft is connected to the engine using a chain drive.
- The dimensions of a homemade barrel depend on the thickness of the steel used. If you use a 1.5 mm sheet, then the maximum wall height should not exceed 60 cm.
Crusher knives are made from a hand saw blade - the size should be one centimeter smaller than the diameter of the working chamber.
The role of the upper knife is chopping, and the lower one is to teddle and lift uncut particles of feed. To set the size of the crushed feed fraction, a sieve with the required cell pitch is installed on the discharge opening. Depends on the purpose of using ground vegetables: for feeding to adult large and small livestock, pigs, horses and rabbits, a sieve with a cell of 0.7 -1.2 cm is suitable. For feeding to young animals and poultry, it is better to use a smaller size: 0.2 -0.7 cm.
Making a feed cutter with your own hands is quite simple. In this case, you need to show a little ingenuity and work with your hands. In fact, you can make a structure from old and unnecessary things. A good feed chopper can be made from a washing machine. In this article, we will tell you how to feed your pets without much difficulty.
Homemade apple, potato, tomato crusher
Homemade crusher
The technology for assembling a homemade crusher for vegetables and fruits used as food consists of the following steps:
- Making a working chamber - any old boiler will do for this. A hole is made in the center of its bottom, and a rectangular window is cut on the side, to which a small box is welded.
- A disk with a diameter 15-20 mm smaller than that of the bottom of the working chamber is cut out of metal 3 mm thick.
- A hole is made in the center of the cut out disk.
- Stepping back 20-30 mm from the central hole and the edges of the disk, 4 oval-shaped slits are made on the disk for knives. The angle between two adjacent slots should be 900.
- According to the size of the slots, 4 blanks are made from a 30x30 mm corner. In the outer plane of one of the corner shelves, 2 oblong adjustment holes are drilled. The distance between them is measured and recorded.
- Blanks from the corners with the ends of the shelves are welded to the side of the oblong slots. In this case, the adjustment holes should be located on the outer plane of the shelf that faces directly to the slot.
- To drain the crushed feed from the tank into the receiving tray, two rubber elastic strips are also attached to the lower surface of the disk.
- 4 knives with one-sided sharpening are made from rapid cloth. After releasing them on the fire, 2 holes are drilled into them. In this case, the distance between them is equal to the same value between the adjustment holes on the corners.
- A frame with legs is welded from the corner.
- The tank is welded to the frame.
- Next to the tank, an engine with a power of 500-700 W is attached to the frame using 2-3 bolts. Before installing it on the frame, a seam (driven) is attached to the motor shaft.
- A shaft for a disk with knives is made from a strong rod. A thread is cut at one end, and a groove for a keyed joint is cut at the other.
- The disk with knives is installed on the shaft.
- The shaft is inserted into a hole in the bottom of the tank.
- A second pulley (drive) is attached to the end of the shaft.
- The pulleys are connected by a belt.
- A button to turn the engine on/off is mounted at the end of the stand.
- The motor is connected to the button and to the electrical network.
- To eliminate the need for human participation in the process of grinding raw materials placed in the device, a special stop-bar is attached to the inner wall of its tank, resting against which, the raw materials will be crushed faster by the disc knives.
- To prevent electric shock, the frame of the feed cutter is grounded.
How to assemble a grain crusher from an angle grinder, a washing machine, myth or reality
Using such a device, you can chop not only tomatoes, but even harder and denser apples and watermelons.
DIY grinder grinder
» Grinder » DIY grinder grinder
A feed cutter or grain crusher is a very useful thing on your farm. It allows you to speed up the preparation of feed for livestock and reduces the time for preparing feed mixtures by approximately 5 times.
It is relatively inexpensive - about 9-10 thousand rubles for the most budget option.
But if you have a little time, an old grinder and straight hands, you can easily make your own garden shredder from a grinder, which can easily replace a grain crusher, straw cutter and feed chopper.
Grinder grinder from a grinder: selecting an engine
The main mechanism in a grinder grinder is the grinder itself. A broken angle grinder will not work - it must have a working motor and shaft.
In general, if you make a chopper from an angle grinder, this does not mean that you will not be able to use it later - the design of such a unit is very simple and, if necessary, you can easily use the angle grinder for its intended purpose.
The main criteria are that the engine power must be at least 1200-1500 W, and the speed must be at least 350 rpm. That is, 95% of modern Bulgarians fit these criteria.
Do-it-yourself grain crusher diagram from a grinder
This unit is made very simply, literally from improvised means. The tools you will need are several socket and open-end wrenches, a drill with drills, a chisel, a hammer, some bolts and nuts, and a hacksaw for wood and metal.
A do-it-yourself grain crusher made from an angle grinder consists of the following elements:
- Grinder with protective cover removed
- A sheet of thick plywood for the top of the body;
- Plastic container for 4-6 liters with a cut bottom for a bunker.
- A small metal or plastic pipe that will carry the grain into the mill (optional).
- A metal round container (for example a saucepan) that acts as a mill.
A grate is installed in its lower part or frequent holes with a diameter of 3-4 mm are drilled so that the fine grain falls out of the mill. It is not recommended to use a plastic container, as it will quickly burst due to vibration and stress. - Knives.
You can use knives from an old food processor, blender, or you can make them yourself. The larger the blades, the more efficient the grain crusher will be. But you need to understand that too large knives will increase the load on the engine, so the recommended knife length is 120-150 mm.
We make a crusher-garden shredder from a grinder
After all the materials and tools have been prepared, you can begin making a grain crusher with your own hands from an angle grinder.
- We cut out a rectangular plate from a sheet of plywood - it will serve as the base.
- A hole pattern is drawn on the base. There are only two of them - one for mounting an angle grinder, the second for a bunker.
- Either a small piece of pipe or the neck of a cut plastic container is inserted into the hole for the hopper. Here everyone does what suits them best.
- We secure the angle grinder to the base using metal brackets and bolted connections. It must be held very firmly, as vibration may cause the fastenings to become loose.
- Knives are installed on the shaft and firmly fixed with a clamping nut.
- The mill body is attached to the underside of the base. As mentioned above, this could be an old saucepan or other metal container. The container must have legs in which holes are drilled for fastening joints - with their help it is attached to the base.
- It is advisable to attach a bag with an elastic band at the neck to the mill so that the flour produced when crushing grain does not spread throughout the room.
That's all - a few simple and uncomplicated steps and the unit, which is not inferior to specialized equipment, is ready.
IMPORTANT: when working, be careful not to overheat the grinder motor, otherwise it will burn out.
Making a grass grinder from a grinder with your own hands
Mown grass and small branches on your own farm are not garbage, but raw materials that can be used to create feed mixtures or prepare compost. But such raw materials must be crushed, and doing this manually is very difficult and troublesome.
If you don’t have the money to buy a special garden shredder, you can easily make a shredder from a grinder with your own hands.
Moreover, it is better to immediately make a universal unit that can chop not only grass, but straw, as well as branches of bushes and small trees.
The do-it-yourself branch chopper from a grinder is slightly different in design from the grain crusher described above, although it works on the same principle.
Do-it-yourself grass chopper and straw cutter from an angle grinder
Consider an option with a bottom-mounted engine, which is suitable for cutting silage and straw, as well as branches.
- Make a bed. You can make it from wood, but it is better to use metal - due to its mass, it is less sensitive to vibration and provides better stability.
- Prepare a metal container for 15-25 liters. The container must be round so that, through centrifugal force, all the grass falls on the knives.
- In the lower part, make a hole into which the grinder shaft will be installed.
- Cut a small hole of any shape at the bottom side. Attach a closed chute to this hole, through which the chopped silage will be poured into the prepared container.
- Make a top cover from some kind of metal or wooden plate - when the chopper is operating, it will not allow the grass to fly out of the mill.
- The do-it-yourself grinder branch chopper is almost ready. Install the grinder itself at the bottom, securing it with brackets and bolts.
- It is recommended to make several sets of knives. For grass, a simple lawn mower blade is enough. For straw you need at least four-bladed sharpened knives. If you need a branch chopper made from a grinder, then the knives should be made of stronger and thicker metal, but they do not need to be sharpened much - just mark the cutting edge. In any case, if necessary, the knives can be easily replaced for a specific purpose.
- Secure the blades to the shaft using a fastening nut.
That's all - the chopper is ready. Pour the herb into the container, close it with a lid and plug it in - the chopper will do the rest for you. The optimal mode of continuous operation is up to 15-20 minutes, so as not to overheat the engine.
Source: https://i-perf.ru/bolgarka/izmelchitel-iz-bolgarki-svoimi-rukami.html
Making a vegetable cutter-grater
This device is quite common in the process of housekeeping.
A hand-made grater for grinding feed will allow you to feed a small number of heads, and the manufacturing process of this device will take a minimum of time. In this case, the consumer will not need to use drawings in the process, and he will be able to get by with a minimum of tools involved. To make the case you will need to take:
- stainless steel sheet measuring 30 by 50 cm;
- plate for connecting elements;
- a lever by which the mechanism will rotate;
- tabletop for placing the structure.
The first step is to cut out the lid holes to a suitable diameter, then connect the stainless steel sheet with a plate, install the lever and place the resulting device on the countertop. That's it, after this the grater becomes ready for use.
What else can it be made from?
A feed cutter is a device that can be assembled from almost any trash stored in the garage, and all this at home. It is used in various fields of activity, and adapting the design to a specific situation is quite easy. It can be completely different, for example, a manual feed grater, mill, straw cutter. And by replacing the cutting element, you can easily adjust the operating modes of the chopper. Mechanized feed cutters are devices with a motor, powered by an electric drive, which ensures high labor efficiency.
Important! In this type of construction, you should always use only a metal bucket. The plastic option may be cheaper, but subsequently cost its owners health or even life. If suddenly a fragment of a knife ends up in a working feed cutter, the plastic will not serve as a reliable barrier, and the metal can get into people or animals located near the unit.
The feed cutter from an angle grinder has a relatively simple device.
- First you need to take any vessel (the main thing is that it is made of thick stainless steel) and make holes in it 1.5-2 cm in diameter. An important nuance is to bend their edges inward for more efficient chopping.
- Next, you need to construct a frame, which will subsequently serve as a stand for the container. The container itself is installed on the base using a flange and seals.
- The grinder is connected specifically to the flange, and a housing for the seal is installed on top of the axis inside the container.
- A mandatory element here is a container for receiving crushed material on top of the feed cutter. You can make one from a saucepan or a regular bucket.
A simple and inexpensive option is also to design a feed cutter based on a drilling machine, but a homemade product of this kind usually consumes a lot of energy.
Another way to build a productive feed cutter at home is to assemble a structure based on a drill.
- To do this, you will need a regular stool with a hole about 13 mm in diameter. Afterwards, you need to select a wooden block measuring 20x40 mm, and then attach a UPC 201 bearing assembly to its smaller end. This entire structure is installed on one side of the stool.
- The next step is to install a galvanized 12-liter bucket with a hole in the bottom on the stool.
- The shaft for the blades must be made from a strong rod, cutting an M12 thread on one side.
- Next, you need to push the shaft through the hole in the bucket and the stool seat by 16 mm and secure it in the bearing. The drawing must be calculated so as to take into account the size of the drill used, and then the structure will be stable.
- Then you should make a diamond-shaped knife and fix it on the working shaft.
A feed cutter from a drill usually operates on its own drive of approximately 1000 W. The bearing and stool holes must be coaxial.
How to make a feed cutter with your own hands, see the video below.
DIY vegetable cutter – Tractor driver
Equipment for animals and birds
22.12.2017
7.6 thousand
5.1 thousand
5 minutes.
2
Devices such as a homemade feed cutter and feed grinders will help provide livestock with the necessary amount of food much faster and more conveniently. The presence of such tools is especially important if there are a lot of animals, and their food should be of different quality and degree of grinding.
You can make a feed cutter and other tools with your own hands from scrap items or unnecessary parts of household appliances.
In order to make this unit, you need to use some materials that can be extracted from old household appliances. Before you begin work on creating an electric feed cutter, you will need a washing machine, from which you will need to remove the motor and drum.
Next, you need to drill a hole at the back of the drum, having previously measured and outlined the dimensions of the boundaries of the through slot.
Hole
Specifications such as the width, height and length of the slot should be the same as the motor shaft. After the measurement has been taken, you need to start drilling the outer sides of the drum. Here you need to create three slots for the bolts - 2 identical and 1 smaller, as in the picture above.
One of the walls must have an outlet (for discharging feed) in the form of an additional iron part, which is separately attached to the drum. The finished product will come out of it. In the following figure you can see this design.
Fragment for ejecting feed from the drum
This completes the main stage. Now you need to start working with the cutting part of the device.
The cutting part must be secured to the motor shaft using bolts. For this design you need to use 2 knives:
- 1. The first one includes a propeller with slightly concave blades. It should be installed closer to the bottom of the drum. Its tasks are to throw the feed up and push out the crushed particles from the feed cutter.
- 2. The second knife is the main cutting element; it can be made from an old saw blade. The following picture shows what the blades look like.
Knives
The knives are slightly curved in shape. This increases the productivity of the electric feed cutter. After completing the creation of the device blade, you need to start making the support.
The support in this device is a metal structure that resembles a stool. Attach the assembled structure to it using bolts.
Stand
In the picture above you can see the stand in more detail. It does not need to be additionally covered with sheets of iron.
To save raw materials, it is recommended to equip the unit with a lid, which will prevent feed from being wasted. The device can also be used as a vegetable cutter for livestock.
This completes the work of creating an electric feed cutter from a washing machine. The result is an effective feed cutter from a washing machine. This device is capable of processing much more feed than conventional manual grass cutters.
Feed cutter - schematic representation of the final result
When working on creating a device, you first need to evenly separate one part of the gas vessel from the other, using a grinder, so that you get two almost identical cylinders. Next, you should take one half and prepare an iron mold for the blades, as shown in the following image.
Bottom of the cylinder
Having completed these manipulations, you can proceed to working with the blades. To do this you will need to bend them slightly. Then attach the knives with screws to the prepared iron disk, which should have pre-made slots.
The figure below shows in finished form what this fragment should look like.
Cutting elements
After creating the cutting elements for the feed cutter, an opening should be cut out of the cylinder using a grinder. This should be done on the side of the gas vessel.
Under the disk with the blades shown in the image above, you need to install an iron stand with a cut-out opening, which should look like a stool in appearance, to connect the disk and cutting elements to the engine.
A cylinder with a disk attached to an iron stand and a motor under it
The motor, in turn, is installed under an iron stand. Thus, a device for grinding feed is obtained. You need to attach a bucket to it, where the finished product will be poured - as in the image above.
A disc device can be made at home from an angle grinder. There are different drawings for this, but the most popular is the diagram of a feed cutter made from an angle grinder.
Feed cutter diagram
In the diagram on the left you can see all the necessary structural elements:
- bucket;
- chopper;
- bunker;
- Bulgarian;
- lid;
- cutting element;
- stand;
- outlet for releasing food.
The electric feed cutter includes a bucket made of high-quality steel. In the image it is schematically represented by the number 2. At the bottom of this object, you should drill a hole in the center with a diameter of 1 cm - in the diagram this part is marked with the number 3. In the bottom of the bucket you also need to make holes along the edges (two on the right and on the left), the size of which should be 15 mm.
Next, you should prepare the stand - its parts are marked with numbers 4 and 6. Then make holes on its base (number 4 in the diagram) - just like at the bottom of the bucket on the outer sides. After this, fasten these two items with bolts. Next, you need to connect the motor from the grinder (number 7) to the disk (number 5). This completes the main stage of the work. You can begin to create the feed exit opening.
It is necessary to cut a hole at the bottom of the bucket and insert a part that will be designed to release food for animals (it can be seen in the diagram under number 2, near the base under number 4 at the cut site).
The chopper must contain a lid with an additional hole in the center (number 1). Feed is placed in it for subsequent processing.
If necessary, the central part is additionally covered with a smaller lid so that the raw materials do not fly out during processing. This completes the creation of the feed cutter.
Ready-made feed cutter
It is worth noting that a grinder feed grinder can have different operating performance, which depends on the engine speed.
It is not difficult to make this hand-held device at home. You need to use a steel sheet measuring 50 cm in height and about 30 cm in width.
Next, you need to take a punch and make holes on it according to the same principle as on a regular kitchen grater. In the following figure you can see what should happen.
It can be seen that the sharp parts of the slots come out. Therefore, it is necessary to bend the iron in these places in the same way.
Handle and grater
To use such a manual feed cutter conveniently, you need to attach a handle to it. To do this, the steel sheet must be bent into a cylinder shape. Next, you should weld an iron plate to its base, as in the figure below.
Then, on one side of the cylinder, place a closing element made of ordinary iron, and on the other, drill a hole and also close it with the outer shell, as in the previous image. You need to screw the handle there, securing everything with bolts.
After this, you can rotate the grater using the handle and grind the food. This completes the work.
Plate welding location
The grater can be used as a chopper for root vegetables and other vegetables for animals.
Ready-made device
It is desirable that stainless steel be used for the manufacture of elements of any presented version of feed cutters and graters. Then, if used correctly, such devices will last for decades.
How to make a feed cutter with your own hands at home. Blueprints
If you decide to start farming, you will have to take care of preparing animal feed.
Grinding feed is a necessary process when raising poultry, pigs and other animals, so we invite you to learn how to make a feed cutter with your own hands at home using drawings and videos.
A simple design is a good way to save on feed and achieve good growth of animals on the farm.
Making a simple feed cutter with your own hands
The simplest design is a feed cutter-grater, which is useful for small farms.
You can make a feed cutter at home from a piece of stainless steel measuring approximately 50 cm in height and 30 cm in width.
Following the example of a kitchen grater, holes with a curved edge are made in the bottom of the product using a punch. To increase comfort during use, a wooden frame is screwed to the feed cutter.
DIY feed cutter drawing
A do-it-yourself mechanized feed cutter can be made at home using old buckets and a grinder. You will need two metal buckets, always stainless steel, because... Some types of feed may react with the galvanized surface and food poisoning may occur in animals.
Detailed drawing for the manufacture of a feed cutter
- Holes are made in the bucket with a punch, the edges are bent into them, and a hole for fastening is also drilled in the bottom of the bucket.
- A tripod frame is welded from pieces of thick reinforcement or metal corners.
- Then the container is attached to this frame using seals and flanges. It turns out to be a rotating drum.
- Another bucket with the bottom cut off is attached above the drum - this will be a container for pouring raw materials.
- The grinder is screwed to the flange with a bolt, all fasteners are checked and they begin to check the finished product.
Grinder root vegetable grinder
Homemade units can be made from various devices, for example, from a grinder saw. To do this, you will need to select a suitable tank for the working chamber, and then perform the following steps:
- Install a raw material receiver, which can be made from sheet metal.
- A hole is cut in the central part of the body corresponding to the gearbox shaft of the angle grinder.
- Make a knife using stainless steel and sharpen it.
- Install it inside the body, attach the angle grinder shaft.
In order to avoid mistakes when constructing the device, it may be convenient to use video instructions. This model is electric, like the unit from the washing machine, which requires electricity for correct operation.
Do-it-yourself feed cutter for root crops
Planning to simplify the care of their pets, many farmers prefer to purchase special household grinders, which allow them to process an impressive amount of raw materials into feed of the required fraction. At the same time, their cost is quite high, which is why many make the units themselves.
The simplest vegetable cutter can be made with your own hands in a short time, and its assembly will require a minimal amount of material. In terms of its performance indicators and functionality, it will not differ from purchased analogues, but its cost will be significantly lower.
You can make a feed cutter yourself
There are several types of homemade units, among which it is worth mentioning:
- manual feed cutter for root crops;
- model from an angle grinder;
- drill device;
- device made from a barrel/gas cylinder;
- craft from a washing machine.
It must be remembered that a homemade device may not withstand the loads of intensive use, which is why it is recommended to operate the unit intermittently.
How the device works
Before you figure out how to make a feed chopper from a washing machine or other variations of a similar device, you should study the principle of its operation and the main design elements. The most important components of any homemade or purchased cutting model include:
- bunker - designed for storing processed raw materials;
- working chamber - used for grinding grain and root crops to the desired fraction;
- motor - responsible for rotating the knives;
- output hopper - used to supply finished products.
If desired, the design can be changed by the master towards simplification, which will reduce the list of necessary materials. For example, it is possible to supply feed directly into the chamber, eliminating the use of the input hopper.
Be sure to read: Champion ST656 Gasoline Snow Blower
The principle of operation of the unit is extremely simple - the raw material enters the working chamber, where it is crushed by the working parts to the desired state. It is then fed into the output hopper, after which it is used to feed livestock and poultry.
Manual chopping for vegetables
If in the process of agricultural activity there is a need to prepare a small amount of food for several pets, you can make a simple manual cut for vegetables. Its operating principle is similar to a grater, but the productivity is significantly higher. This option is perfect in cases where the farm does not have access to a source of electricity.
You can make the device by following the following instructions:
- Break off the handle of a galvanized bucket, cut out the bottom and drill holes in the walls. At the same time, the edges should be as sharp as possible.
- Cover the structure with stiffening ribs.
- Pull a piece of reinforcement through the holes, circle it around the edges of the product and form a handle.
- Install a receiver in the form of a metal or wood box without a bottom on top of the structure, secure it with self-tapping screws.
After successfully manufacturing the main parts of the structure, it is necessary to prepare a kind of table on which it will be used. The device will work by rotating the handle, crushing the raw material under the influence of its gravity.
Source
Types of homemade vegetable choppers
Manual feed cutter
To prepare feed for several cows, chickens or piglets, you can use a simple vegetable cutter. The device works on the principle of a grater, but is distinguished by its productivity: with its help you can process up to 10 liters of vegetables or fruits in 10-15 minutes.
An ordinary galvanized bucket with a volume of 10-12 liters is used as a grater. The bow is knocked off, the bottom is cut out, and holes are punched in the walls. The edges should be as sharp as possible, and the dimensions should be from 0.2 to 1 cm. The grater will be more effective if you punch holes in a checkerboard pattern.
For structural strength, the bucket is covered at both ends with metal stiffeners. Strips of hard metal are welded to them, in which recesses with a diameter of 1 cm are drilled in advance. A piece of reinforcement is pulled through the holes, drawn around the edges of the bucket and bent into the shape of a handle.
To supply raw materials for processing, a receiver is installed above the bucket - it can be a wooden or metal box with a knocked out bottom. The receiver is mounted on a wooden frame with bolts or self-tapping screws. The final stage of assembly is making the base. It is knocked down from durable timber in the form of a table. The front part must be strengthened with additional rails, and made lower than the back by 5-7 cm.
A root crop chopper works like this: rotating the handle drives the drum. Since the bucket is cone-shaped, the cuttings will be pushed into the front, and from there into the container underneath. Vegetables and fruits are crushed under the force of their own gravity.
