Author: Alexey
28 May 2021 05:02
Tags: weapons police skillful hands
65466
15
The other day, law enforcement officials discovered an arsenal of weapons from the Great Patriotic War era in the possession of a 66-year-old resident of the city of Dedovsk (Istra district, Moscow region). The pensioner kept a variety of rarities - from a Walther P38 pistol to two machine guns, and, according to the owner, they were bought in ordinary markets.
0
See all photos in the gallery
Illegal arsenals of this size are rarely encountered by police; more often they come across all sorts of homemade weapons, which modern “Kulibins” with a passion for firearms assemble from improvised means. The Lenta.ru collection contains the most unusual handicraft “trunks” seized by security forces.
What does it take to make a lamp?
In order to make a lamp with my own hands I needed:
- Tool
- screwdriver;
- drill for concrete - 6 mm;
- metal drill - 2mm and 6mm;
- heat gun - optional;
- screwdriver.
- Consumables
- automotive putty;
- spray paint - 2 contrasting colors;
- sandpaper with grit p80, p320 and p1000.
- Materials for the lamp body
- vase for small flowers;
- light bulb socket with E14 socket;
- wire with a switch - you can buy it, or you can find it in the garage/balcony among old unnecessary electronics. It is sold already assembled and the ends of its wires are soldered and ready to be fixed in the light bulb socket;
- a piece of threaded pipe - can be replaced with a plastic one;
- transition coupling 25 to 20 - you can do without it if you use the fastening method described in the previous publication, you can see it here;
- fitting - adapter nipple - required if you are using an adapter coupling.
Since I have many of the listed materials left over from the last build, I use them. You can do without some elements, for example, a metal pipe with threads, a fitting and an adapter coupling. And replace the car putty with cold welding. But cold welding is not so easy to process.
Homemade collet coupling of the simplest design
The simplest collet, operating on the principle of a coupling, can be made of steel wire with a diameter of 1 mm. It should be borne in mind that the collet of the proposed design is not a universal clamping device and can only be used for drills of the same diameter. It is important that the transverse size of the drills used corresponds as closely as possible to the diameter of the output shaft of the drive motor. In addition, it is important to consider that such a collet can only be used when drilling materials with low viscosity.
Homemade wire clamp
To manufacture a collet coupling of the proposed design, the following consumables, fixtures and tools will be required:
- a cylindrical metal blank, the diameter of which corresponds to the diameters of the output shaft of the electric motor and drill;
- steel wire;
- electric soldering iron;
- soldering flux.
The process of manufacturing a collet chuck for a microdrill is carried out according to the following algorithm:
- The wire is wound onto a blank so that a rigid spring is formed. It is important that the spring coils are located as close to each other as possible.
- The finished spring is carefully soldered without removing it from the blank.
At one end, such a collet-coupling is put on the shaft of the drive motor, and the drill used is inserted into the hole in its free end.
The simplest collet clamp for a microdrill can be made with your own hands and in a different design. The design of such a cartridge, the manufacturing cost of which will be very low, consists of two halves fastened with a screw. On the inner surface of each of these halves, cylindrical grooves are machined, which, when tightening the screw, ensure fixation of both the clamp on the drive motor shaft and the tool used. If you decide to make such a collet clamp with your own hands, keep in mind: in order for it to work correctly, you must balance it before using it.
Homemade clamp based on a collet pencil
The basic elements of any table lamp.
First, let's look at what elements the lamp includes.
- The support element (the “leg” of the lamp) provides support for the light source.
- Electromechanical elements - cartridge, wires and their fasteners.
- Lighting part – reflector, lampshade, light source.
The electrical part is usually hidden, so decoration issues do not apply to it. But the other two parts are quite amenable to flights of fancy and can be made from a variety of materials.
But electrical elements are key in terms of safety. Remember that working with electricity requires a certain set of knowledge (at least minimal) and experience. Otherwise, you should not experiment with devices that are hazardous to health.
Connecting the lamp
Diagram of a simple table lamp
So, the electrical circuit of the lamp is simple. To assemble it you will need: a cartridge, a cable, a plug and a switch. If you want a lamp with adjustable power, then a dimmer is included in the circuit.
The most common cartridge is threaded E27. It is simple, reliable, and easy to buy. "Minion" E14 is also a good option. The main thing is to connect the cartridge to the wire correctly . The phase wire must come to the central contact of the light bulb base. With such a connection, the likelihood of a person being exposed to current is minimal.
The phase wire comes to the central contact of the base, the zero is in contact with the screw thread. You can secure the wires in the socket with a soldering iron (non-separable method), screws, terminals or clamps. Screw connection.
Terminal connection.
Connection with clamps.
The screws are tightened sufficiently to ensure a secure connection. In the event of a breakdown, such a cartridge can be disassembled and repaired. Terminals speed up and simplify the process. It is enough to insert the wire into the clamps with a little force: the internal springs will fix it and create reliable contact. The fastening of the wire in the socket must be reliable.
The wires for a homemade lamp must also be electrically safe. The simplest option is a round cable with a core cross-section of at least 0.35 m2 and double-layer insulation. (A good option is SHVVP 3×0.5, approximate price is 15 rubles per sq.m.). Places of connections, twists, and areas with the possibility of dampness are additionally wrapped with electrical tape. Mount the cable so that it is not strained in any position of the luminaire.
The Europlug is connected to the cable as follows:
Connecting the Euro plug
When connecting the switch , remember that the phase wire is broken.
Single-key switch connection diagram
How to make hunting shotgun cartridges for long-range shooting
When hunting, there are times when you would really like to hit a target at a long distance of about 100 meters, if, for example, a capercaillie or black grouse is sitting on a tree... or suddenly a hare is in the distance, and then a cautious animal is unlikely to allow the hunter to shoot at close range. It’s at these moments that you really want to be able to make an accurate long-range or even ultra-long shot in order to be guaranteed to hit a target at a distance of 100 meters or more. such a cartridge for a long shot yourself. Simply and quickly, cartridges for long-range shooting can be made from ready-made cartridges purchased.
It is better to take a larger shot for this, for example, cartridges with shot No. 2 or No. 1, the larger the shot, the more energy is saved, the further the charge flies, but there will be fewer pellets in the scree. For those who always load cartridges themselves, there is no need to disassemble purchased cartridges; it is enough to purchase containers of the appropriate caliber and also modify them and load cartridges for long-range shooting.
With such a 20-gauge cartridge with shot No. 2 with the mass of gunpowder and shot of a magnum cartridge, the accuracy and sharpness of fire is maintained at 100 meters. Shooting was carried out from a 20 caliber IZH-27 gun from a distance of 100 meters into a square shield, the spread of pellets in the middle was always from 5 to 10 cm, 7-8 pellets hit the center.
Having several of these cartridges with you from a hunt, you will always return with trophies. When shooting at a moving target, you need to very accurately choose the lead, according to the distance to the target and the direction of movement of the target, but here everything depends on the skill and experience of the hunter. Happy hunting to you!
Source
Device.
The design of electric sockets depends on the series. The most common products are the E-series model with Edison thread. There are three main elements - a cylinder-shaped outer body, into which a metal sleeve with Edison thread is attached, a bottom and a ceramic liner.
Brass contacts and special strips are used to transfer electric current from the cable to the lamp base. To increase safety during operation, a phase is supplied to the central contact of the base, which reduces the likelihood of contact with the phase.
G-series cartridges are characterized by the same principle of operation, but have a simpler design and use a different method of transmitting current to the base.
Set Contents
Mechanical scales M500
They allow you to carry out weighing with both left and right hands. Considering their cost, they are surprising in their convenience. This scale is accurate, fast and durable - just what a scale should be for easy reloading.
Nosler Ammo Loading Guide
A comprehensive, nationally recognized step-by-step guide covering everything you ever wanted to know about handloading ammo with 600 pages of helpful facts, illustrations and data.
Handle-2
Ergonomic handle suitable for many RCBS accessories
Hex key set
Contains 8 hardened hex keys in one compact set. These wrenches will fit almost any screw in RCBS products
Chamfering tool .17 - .60
This large tool will allow you to remove internal and external chamfers and remove burrs from 17- to 60-gauge cases. One tool for all these tasks at once.
Powder funnel
Such a funnel is useful for pouring an exact portion of the powder charge into the cartridge case. It is specially designed to avoid spillage of the mixture near the cartridge case mouth.
Sleeve lubrication and preparation kit
The first step when handloading a cartridge is to thoroughly clean and lubricate the spent cartridge case. This kit contains a bottle of Case Lube - 2, a mat and two brushes.
Manual encapsulator
It will help you get things done away from the workbench. The container can hold up to 100 capsules. Uses the same RCBS shelholders as stationary presses from the same company.
Universal stand for cartridge cases
Convenient double-sided stand for cartridges with seating for 3 different sizes of cartridges on each side. Perfect for holding up to 50 shells while loading cartridges.
Rock Chucker Supreme Single Stage Press
This is definitely the largest tool in the entire set. Below you will see that the press is needed to calibrate the case, remove used primers and seat the bullet with a crimp.
Uniflow powder dispenser
This dispenser will significantly speed up the reloading process. A predetermined portion of the mixture pours out of this device with each turn of the handle. This eliminates the need to weigh each portion of the substance.
Marking.
In accordance with GOST, products with Edison threads are divided into three main types - E14, E27 and E40. The former are called “minions” and are used in microwave ovens and freezers, the latter in lamps, and the latter in organizing street lighting. The principle of operation is the same everywhere, and the differences are related to the design and dimensions.
There are markings on the cartridge body. When decoding, you can find out the characteristics of the product. E14 is installed in devices with a current consumption of no more than 2 A and a power of up to 440 W, E27 - up to 4 A (880 W), E40 - up to 16 A (3500 W). Each model is designed for 250 V AC.
Varieties according to installation method.
In fact, installation method is how exactly the product is attached to the lamp in a lamp or other electrical equipment. If a few years ago there was no alternative to a threaded connection, now pin-type cartridges are used. The latter involve fastening using pins located on the base.
Threaded connection - a classic scheme with screwing in a light bulb. The phase is transferred from it to the light bulb when the latter is completely twisted and contact of the base sleeve with the contacts of the socket is ensured.
There is a third option - combined devices with a GU10 base, used in modern chandeliers. First, the light bulb is inserted into the socket, then screwed into the lock until it stops. Elements with a rotary-threaded connection are characterized by a complex design, but are irreplaceable where lighting devices are subject to periodic/continuous mechanical stress, including vibration.
Atypical smoothbore firearms chambered for 5.6 millimeter caliber cartridges
0
In October 2015, during a search of a 37-year-old man at the Kochkovatskaya station (Omsk region), police discovered a mysterious homemade device on him. The examination showed that the homemade product is suitable for firing 5.6 millimeter caliber (“small”) cartridges. The owner of the unusual find explained that he found it seven years ago in his brother’s house. For many years, the crossbow lay idle, until finally its owner went to the forest to pick mushrooms, deciding at the same time to shoot from an unusual device. He came with him to the station, but did not wait for the train because he was detained by the police.
Varieties according to the type of base.
The choice of base depends on the light bulbs used:
- For almost all housekeepers, fluorescent and conventional lamps, type E27 with a traditional threaded connection is used. The socket is suitable for household LED appliances and a range of halogen lamps.
- Small light bulbs can be used with E14 type sockets (minions). The number in the marking indicates the diameter - in this case 14 mm.
- G-chucks are products that use pin fastening. Suitable for housekeepers and halogen lamps with the same design.
Charging using the UPS5 press
This universal device is essentially a cunning press that allows you to crimp cartridges with a “star”, it can also remove primers and insert new ones in their place, and press wads (Figure 3).
In addition to this, the equipment set for 12 gauge cartridges includes:
- Support cone, cone, also known as pestle and funnel.
- Sleeve and die for star-shaped packaging.
- Needles for removing spent igniters.
- Cup for inserting new capsules.
The kit also includes attachments for 12-gauge cartridges: a standard star-type crimp, a crimp ring for the bottom of the clip, for final pressing of the ammunition.
How to connect an electric cartridge.
To connect electric sockets in a lamp or chandelier to the electrical wiring, depending on their design, detachable and non-detachable methods are used.
With the detachable method, the electrical wiring wires are connected to the socket using a threaded screw, terminals or clamps (screwless method).
The one-piece method includes connection by soldering or by pressing wires to the contacts of the cartridge by the manufacturer, for example, as in the cartridges of the G4-G10 series. Two insulated conductors about 10 cm long simply come out of them. Such cartridges are usually connected to electrical wiring using terminal blocks, for example Vago.
Connecting the electric cartridge using screws.
In order to master in detail the technology of connecting an electric socket to wires, let’s consider the process of assembling the socket from scratch. This skill will also be useful when repairing electric cartridges.
A brass central contact plate is pressed against the ceramic liner. Using a screw screwed into a steel plate located on the opposite side of the liner, the contact plate is fixed to the liner. The screw not only performs the task of securing the central contact, but during operation of the cartridge, current is supplied through it to the central contact. The screw must be tightened with sufficient force, since it is involved in the transmission of current from the wire to the lamp base. Next, the second brass plate is attached in the same way. The central contact is bent to the level of the side contacts.
It is mandatory to form rings on the conductors. Conductors are threaded through the bottom and screwed to steel plates. If the electric cartridge is intended to be connected through a stationary switch, then the phase wire is connected to the central contact.
It is advisable to check the tightness of the central contact. To do this, you need to place the light bulb with the base and make sure that when the base rests on the side contacts, the central contact bends by at least a couple of millimeters. If the deflection is less, then you need to bend the contact slightly upward.
All that remains is to screw the cylindrical body onto the bottom and the cartridge is ready for use. All that remains is to choose the right light bulb. The site presents in a popular scientific form the article “About incandescent lamps and fluorescent LED lamps and strips”, after reading which you can easily navigate the existing variety of light-emitting equipment products.
Connecting an electric socket with screw terminals.
More modern are electric sockets, the wires of which are connected using screw terminals, reminiscent of terminal block clamps. This type of connection of the electric cartridge significantly speeds up the work of connecting it to the electrical wiring during installation.
The plastic body of these sockets is monolithic, and the contacts that supply electricity to the light bulb base are secured in the socket body with a rivet. Therefore, such a cartridge cannot be repaired and, if it fails, must be replaced entirely.
Electric sockets with clamping terminals are found in standard sizes E14 and E27 and are quite suitable for replacing traditional collapsible sockets, the design of which is described above, when repairing lamps and chandeliers.
How to insert wires into a screwless electrical socket.
The latest innovation in the variety of E14 and E27 cartridges is a cartridge with a screwless connection. The cartridge body has holes, usually two pairs. The wires are inserted into them with little effort. Internally mounted brass spring contacts pinch wires and hold them securely.
The contacts in holes 1-2 and 3-4 are connected in pairs (in the photograph the connection is indicated by red lines). This is done for the convenience of connecting parallel sockets in chandeliers and lamps with several bulbs. Supply voltage is supplied to one of the cartridges, and the next cartridge is connected to it using jumpers.
Since modern energy-saving and LED lamps consume little electricity, the number of sockets connected in this way can reach ten or more. Connecting contactless electric cartridges is easy and quick. It is enough to insert the wire, stripped of insulation for a length of one centimeter, into the hole provided for this.
But there is a feature that needs to be taken into account. Wires in the manufacture of chandeliers are usually multi-stranded, and it is almost impossible to securely fix them in the contacts of the electric cartridge, especially if the wire strands are thin. Therefore, at chandelier manufacturing plants, the ends of the wires connected to the socket are tinned. As a result, the stranded wire becomes single-core at the end. The tinned end of the wire is easily inserted into the spring contact of the cartridge and securely fixed.
The photo shows the sequence of connecting the cartridge to the electrical wiring. When replacing a socket in a chandelier, it may be impossible to get close to the wires with your fingers, then tweezers come to the rescue.
But you don’t always have a soldering iron at hand, and not everyone has one at home. In this case, when connecting the cartridge, you can do without a soldering iron. Before threading the wire into the spring contact of the cartridge, you need to insert a metal rod into the hole with a diameter slightly larger than the diameter of the wire, for example, a nail or, as in the photo, a clock screwdriver. Then the springy contact will move away and the wire will easily fit into the resulting gap. After removing the nail, the spring contact will securely clamp the wire. With this technique, if necessary, it is easy to remove the wires from the socket.
After inserting the wire into the spring contact of the cartridge, you must pull the wire lightly to check the reliability of its fixation.
Homemade cartridge
photo by Mikhail Semin
He spent a long time admiring the engraving and the condition of the gun as a whole. He talked about the brands, about the company, but complained that it was hammerless and that its main problem was the 65 mm chamber. On the whole, he was very pleased with the gun and said, laughing, that young people and fools are lucky.
Previously, only gentlemen hunted with such guns, and the fact that the chamber is a little short is a small problem, there is a mark for smokeless powder. “I will teach you how to cut paper cartridges and how to load them,” said the grandfather. “But before you hunt with it, you have to study it.” And he gave me a whole lecture - something like the “Hunting Minimum” with gestures and such vocabulary that I was confused and could not figure anything out. He, laughing, said that I should know all this and remember it like “Our Father.”
My grandfather was an inexhaustible source of knowledge, especially regarding hunting. I think that knowledge gained from hunting books, magazines, and various manuals can be useful in theoretical terms. But my grandfather always said that there is nothing better and more reliable than “your own” experience. “Just live like mine, but not so simply (with your mouth open), but meaningfully, carefully. Take note of what's what, remember it, and if you don't understand, ask. Try to do everything in life yourself,” he taught me.
My generation has faith in their elders. They taught us kindness, honesty, we tried to imitate them in everything, take their example, be modest in their presence, and this is probably why many of my peers grew up to be decent people. In my youth, in my small homeland, experienced hunters revered guns that did not kill wounded animals, did not maim animals and birds, but killed them dead.
Our ancestors were distrustful of what they wrote about guns and loading cartridges, preferring oral instructions from experienced hunters. For the gun, the old owner gave me seven cartridges in brass sleeves 65 mm long. I bought two more packs of factory cartridges in paper cartridges with shot No. 7 and 3. My grandfather brought a 20-gauge cartridge case with a length of 70 mm and, comparing it with my 65 mm case, showed how much shorter the chamber of my gun was.
- Let's unload one cartridge in a paper sleeve! Now we find out what the Soviet government poured into the shell there.
I poured the shot into a tea saucer, my grandfather began to look at it carefully: The powder wad turned out to be wood fiber, and he rejected it: “We need to sort it out, there’s a lot of defects.” He explained that we needed a felt wad, and no other, because our winter is minus thirty. Then I carefully removed the powder seal. Grandfather pinched off some bread, soaked it and glued a gasket to the end of the ramrod, disassembled the gun, and began to carefully insert it into the barrel.
I became interested and asked what it was for and why. He began to explain that in this way we will find out whether the gasket fits well with the internal diameter of the gun. Based on the results of his measurements, my grandfather came to the conclusion that the powder gasket was not only thin, but also “weak” in diameter for the barrel bore. We unloaded all the cartridges, took a gun, a cleaning rod, rags, an oil can, discharged paper cartridges, a candle, a homemade device for measuring the internal diameters of barrels and went to MTS, where my grandfather had a blacksmith friend. There, a molten candle was poured into the trunks to a certain depth.
Ten-dispersant self-roller, 16 gauge, in a folder sleeve.
After cooling and removing the resulting ingots, we measured them with a micrometer and found out the length of the projectile entrance - 30 mm. Grandfather was very pleased with such a sloping slope. Then they took a long time to measure the internal diameter of the trunks. Turner said the barrels are 17mm in diameter with two-stage chokes. Grandfather asked the turner to carve a notch for the wads so that they would fit along the bore with tension.
Having driven the gaskets onto about a third of the barrels, he lifted the barrels and, pointing them at the light of a burning light bulb, began to look from the breech of the barrels to see if light was passing between the gasket and the walls of the barrels. Grandfather was very pleased with the cutter and asked to cut the paper sleeves to a size of 65 mm. Of course, after work, all this good work was washed well.
Day off. I'm with my grandfather, and he's teaching me how to load cartridges. We cut three or four dozen gaskets of different thicknesses onto a block of cardboard sheets. Grandfather took a gasket about 3 mm thick and began to select sleeves for it, cut by a turner. If the gasket entered the sleeve with such force as the grandfather considered necessary, he placed the sleeve on one side. If the gasket fit very tightly, which was often the case, then he would reject the sleeve and put it away.
There were cases in which the gasket, in my grandfather’s opinion, did not fit so tightly that it would be rejected, and then he expanded it with a gun with a diameter equal to the bore. There were about a dozen cartridges, which diverged minimally from the bore of the gun. “We will load with different loads of both gunpowder and shot to determine which load will suit your gun.
“And also let’s figure out what the height of the wad will be,” my grandfather told me and stacked all the components of the powder wad in a column: 2 spacers of at least 3 mm, a greased felt wad, another 2.5 mm spacer, an ungreased additional felt wad and a thin spacer on wad. He pressed with his finger and said that the height of the wad should be equal to the diameter of the channel at the extension of the right barrel of this gun.
This height promotes dense loading of the cartridge and does not weaken the set pressure. If the powder wad is placed at a lower height, it will weaken the pressure and when fired may go not across, but along the barrel. Grandfather poured gunpowder, inserted two gaskets, a greasy felt wad, then a thin kraft paper gasket, then applied paper glue inside the cartridge case and inserted a gasket at least 2.5 mm thick with four ends of thread, another very thin gasket. Kraft paper gaskets served as waterproofing agents.
I added an ungreased wad, another thin gasket and poured in the shot. The shot charge should not reach the edges of the cartridge case by 1.5 mm. We inserted a thin spacer with the shot number and tied the ends of the threads crosswise. The shot, according to my grandfather’s ideas, should not be cramped in the cartridge case, but should be “audible.” Selecting a cartridge for the gun, the grandfather shot himself and settled on a cartridge with 1.9 g of Falcon gunpowder and 29 g of shot.
I have been using this method of loading a cartridge, regardless of the caliber of the gun and the length of the chamber, for 48 years. I think this is not an ideal method, but still worthy of attention.
Nikolay ROGACHEV, Samara region September 20, 2012 at 00:00
Repair of electric cartridges.
Electric cartridges of the E series can be successfully repaired, since it is possible to disassemble them. In the G series cartridges, the parts are connected using rivets and in case of breakage they have to be replaced with new ones.
Repair of a collapsible electric socket E27.
If the light bulbs in the lamp begin to burn out frequently or the light bulbs begin to change their brightness during operation, then one of the reasons, in addition to poor contact in the switch or junction box, is poor contact in the electrical socket. Sometimes, when the lamp is turned on, the cartridge begins to make a specific buzzing sound; in addition, the cartridge may smell bad of burning. It's not difficult to check. Just unscrew the light bulb and look into the socket. If the contacts are blackened, then you need to clean them. The cause of blackening may also be poor contact at the point where the cartridge is connected to the wires.
To properly repair an electric cartridge, you need to completely disassemble it, check the reliability of the wire connections and clean the brass contacts until they shine. Sometimes they need to be bent a little towards contact with the lamp base.
Sometimes when you try to unscrew a light bulb, its bulb comes unstuck from the base. In this case, you need to try to unscrew the base remaining in the cartridge by unscrewing the cylindrical body of the electric cartridge, holding it by the bottom. If you can’t unscrew the housing, you can try to grab the light bulb base by the edge with pliers and thus twist it out.
Repair of a collapsible electric cartridge E14.
We had to repair a five-arm chandelier in which only two bulbs were shining. The chandelier was old, Soviet-made, with dismountable E14 sockets with screw fastening of the wires.
The chandelier was used for many years with incandescent light bulbs, and as a result of the high temperature and weakening of the wires, they oxidized and burned where they were clamped with screws.
The screws were stuck in the threads and it was impossible to unscrew them with a screwdriver. I had to use pliers and as a result, the fastening part for fixing the wire from the side contacts of the cartridge broke off in one of the cartridges. There was no similar replacement cartridge at hand and I had to figure out how to repair it.
To do this, a screw was screwed into the fastening part of the contact until it stops and a piece of copper wire, previously coated with tin-lead solder, was inserted, as shown in the photograph.
Next, both parts were installed back into the cartridge body and lubricated with FIM flux.
After assembly, the place where the copper wire was installed was filled with a large drop of solder using a soldering iron. After repair, the electric cartridge became even more reliable than it was before.
As a precaution, all five cartridges were checked and the contacts were cleaned with sandpaper. The wires were freed, the burnt ends were bitten off, the insulation was removed and tinned with solder. But I came across one electric cartridge in which, when unscrewing the screws, the heads broke off.
I repaired the cartridge using soldering, soldering the current-carrying conductors to the place where the screws broke. Now the quality of the connection will be maintained for many years.
After such maintenance and repair, the chandelier will last for many more decades, especially since LED filament bulbs are now screwed into the sockets.
Connection of old-style carbolite.
Let's start with carbolite ones. This cartridge is collapsible and consists of three parts:
- cylindrical body with thread
- bottom
- ceramic insert with contacts
Most often in our apartments we use cartridges marked:
- E27
- E14
The value in numbers indicates the diameter of the lamp base in millimeters that is suitable for this socket.
The letter “E” indicates that it belongs to the screw series with Edison threads.
There are also pin type, G series and some others presented below.
Such products are designed for a current of no more than 4A. That is, in a 220V network you can connect a load of up to 900W to them.
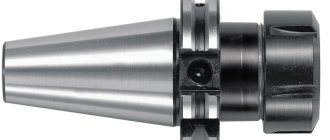
What is a collet clamp (or chuck) and how to make one yourself?
A collet chuck is a type of chuck. Designed for clamping cylindrical workpieces with a smooth surface. Used for drilling, drilling and filler, milling, lathes and numerically controlled machines.
The main element of the collet is a sleeve with longitudinal cuts. Between the cuts there are elastic petals that hold the material when compressed. Usually one cartridge is sold with a set of collets of different diameters.
The cartridge consists of three parts - a body, a replaceable sleeve (collet) and a clamping nut. The collet has several axial slots dividing it into petals. The number of petals varies depending on the diameter of the sleeve.
The material is held in place due to the fact that the locknut transfers pressure to the conical formation, and the part is compressed by radial force. There are replaceable collets for fastening cylindrical parts, as well as polyhedron-shaped workpieces.
A collet chuck is installed on the machine shaft.
Depending on the purpose, collets are divided into three types:
- Feed collet. It is a hardened steel bushing with three partial cuts. The petals are directed towards the center and are springy. The hole in the feed collet is selected with such a diameter that the part is clamped tightly. Equipped with a set of replaceable inserts, making it possible to clamp parts of different diameters and profiles.
- Clamping collet. It is a sleeve with a through hole. Two attachment points are formed along the axis. The material installed in the collet is firmly fixed and held during operation. For square parts, a clamp is made with four slots, for round and hexagonal materials - with three. With a set of collets for different shapes of workpieces, you can fix a part of any shape into a chuck. The advantage of such models is almost zero radial runout.
- Detachable collet. Used when processing parts with small diameters. The cams are moved apart using springs.
Application
Since each collet is designed for only one diameter, they are used when working with long metal rods on milling machines.
Also, high precision makes it possible to secure taps, cutters and wrench tips. With their help, drills of drilling and filler machines are attached.
The inner surface of the collet is polished, so the surface of the workpiece in the places where the clamp is made is not deformed.
In addition to equipment for machine tools, mini chucks are used in construction equipment. There are drills with mini chucks and routers with mini chucks.
Also, using mini self-clamping chucks, construction tools are attached to the handles. This allows you to make universal handles for several tools. Using a mini chuck attached to the end of the handle, it is convenient to change the shafts of files or screwdrivers.
The same principle is used to clamp the graphite rod in mechanical pencils. When you press the pencil button, a mini collet extends, the petals diverge to the side and the rod reaches the required length.
Advantages and disadvantages
To understand whether such a cartridge is right for you, it is important to understand its features. Self-clamping chucks have a number of advantages:
- Easy to install and dismantle the workpiece. There is no need to own a set of additional tools - pins, stoppers or clamps with keys.
- Clamping of small diameter parts.
- Long period of operation. Due to the fact that collet chucks are made of hardened or cemented steel, they have greater strength.
- The large contact surface area prevents the workpiece from spinning.
- Minimal beats. In self-clamping bushings the part is well centered. This allows you to increase the accuracy of material processing. Mini vibrations of the material are usually neglected.
- Versatility. Suitable for almost all types of machines.
The main disadvantage is that one collet clamp holds a part of a certain size. Therefore, it is advisable to own a set of interchangeable collets and select them for each workpiece. Adapter bushings are also used to solve this problem. They also have petals, but the shape of the bushings is cylindrical.
The sleeve is installed inside a collet of the appropriate size, and a workpiece is inserted into the hole in the adapter sleeve. The clamping nut is tightened and compresses the collet, and the adapter sleeve inside it is compressed and holds the part.
With a set of interchangeable collets or adapter sleeves, the self-clamping chuck becomes an indispensable mechanism for the machine.
Marking.
Each product must indicate all the necessary parameters. Markings include:
- normalized current (unit ampere) (sometimes lamp power in watts);
- normalized voltage (unit of measurement volts);
- normalized pulse voltage (unit kilovolt);
- type of current (for cartridges with a switch);
- manufacturer (the corresponding trademark, brand is indicated);
- product type;
- moisture, dust protection;
- highest operating temperature;
Products E14 and E27 can operate at a rated voltage of 250V. E14 can withstand rated current up to 2A (power 440W). E27 - can consume significantly more - up to 4A (power 880 W).
Characteristics:
- The normalized temperature is designated by the letter T.
- The letter A (Amperes) is used to indicate the amount of current
- Voltage – V (volts).
- Moisture protection has the symbol - IPXI. This symbol is usually marked on the outside of the cartridge.
Replacing the socket in a chandelier: detailed instructions.
Now about how to change the socket in a chandelier. To do this, you will need a stepladder and an assistant who will support the lamp during its dismantling and reinstallation:
- After turning off the power to the apartment, unscrew the light bulbs and remove the shades from the chandelier;
- Remove the lamp from the hook or bracket, having first sketched out its connection diagram and cut (unscrewed) the wires;
- Disassemble the cartridge and remove the wires from the block. To do this, you will have to separate the base from the lamp;
- The new one is installed in the reverse order;
- When assembling the lamp, be careful and carefully insulate the wires to eliminate the risk of short circuit;
- Put on the shades and screw in the lamps;
- Hang the chandelier on a hook or attach it to a bracket using decorative fasteners, connecting the wires accordingly (you should remember what colors of wires were connected to each other). If you forgot, you will have to look for zero and phase again with an indicator screwdriver;
- Restore the electrical supply to the apartment and test the lamp. If it functions correctly, you did everything right.
Please note that changing the socket is an excellent reason to check the condition of the chandelier wiring. If it is dilapidated, it must also be replaced.
Removing the old wire and screwing in a new one is a matter of diligent and patient people
It is just important not to confuse the method of connecting the lamps that was originally used. As wires, you can use a cable with two or three cores, as well as separate wires
How to load 12 gauge cartridges
The process itself does not take much time, but requires attention and accuracy from its participant. Self-equipping 12-gauge bullet cartridges has a lot of advantages; it’s not for nothing that experienced hunters equip entire workshops at home (Figure 1).
The method is universal for shot, buckshot and bullet units - it is easy to learn, and hand-rolled cartridges last much longer than those packed with a star.
In addition, when fired, the ammunition creates less internal pressure, which makes it less harsh and extends the life of older barrels, which can be damaged by excessive muzzle impact.
To complete the task, you will need special equipment for loading 12-gauge cartridges, which includes certain devices and materials:
- The first include scales with a set of weights, dispensers and measures for gunpowder and pellets, stands for shells, and a guard for delivering wads.
- The second includes charging units, wads, gaskets, gunpowder and primers.
- It is worth highlighting some devices separately - UPS, a tool for rolling sleeves.
In the process of work, it is necessary to adhere to certain rules; the peculiarities of equipping 12-gauge cartridges are that the activity itself is difficult and dangerous, so it must be carried out in a prepared place so that there are no unnecessary objects on the work table. A similar condition is the absence of strangers; for beginners, it is worth doing business in the company of an experienced person.
Figure 1. Loading ammunition requires care and concentration.
Concentration and attentiveness are the main criteria for your safety and success; you should never smoke during the exercise.
How to replace a cartridge in a chandelier.
Now let's directly look at how to replace the cartridge in a chandelier. Before carrying out work, you need to take care of electrical safety; to do this, in the panel you need to turn off the circuit breakers from which the chandelier is powered. Next, we completely remove the chandelier, since it is not very convenient to perform any work in a suspended position.
First you need to get to the connection point of the wires; they are located under the ceiling behind the top cover of the chandelier (protective cap). Remove the electrical tape at the connection point and carefully disconnect the power wire from the chandelier wires.
All this must be done very carefully, since the wiring is still Soviet and made with aluminum wire (aluminum is a very fragile metal and can break off at any moment)
As I thought, the connection was made by twisting, and copper and aluminum were connected, but nothing, after replacing the socket in the chandelier, I will try to connect these wires using wago self-clamping terminal blocks.
It may seem that changing the socket will not be difficult, even if you do not remove the chandelier from the ceiling. However, practice shows that when creating comfortable working conditions, all manipulations are carried out much more organized and faster.
Having removed the chandelier from the ceiling, we proceed to dismantling the socket itself. It should be disassembled and then disconnect the wire from the ceramic block. Next, the base of the socket is separated from the chandelier. The separation method depends on the method of attachment. It may be different in different designs.
Most often, the electric cartridge is attached to a metal tube. This connection is the most common, as it allows you to significantly expand the range of design solutions due to the ability to hold heavy structures.
The entire load is taken on not by the cartridge, but by the metal pipe. Often additional nuts are screwed onto the tube. Thanks to this, any lampshades and various decorative caps are securely attached to it.
The wire to the cartridge is passed directly along the inner surface of the tube. If the previous wiring is seriously outdated, and there are doubts about its reliability, then it is necessary to replace it. To do this, the wire is removed from the tube, and a new two-core wire is pulled in its place.
Installation of the electric cartridge is carried out in the reverse order. In this case, care should be taken not to damage the insulation in order to avoid short circuits in the future.
After the socket in the chandelier has been replaced, you can proceed directly to connecting our modernized chandelier. As I said above, to connect the chandelier wires I will not use twisting, but wago connecting terminal blocks.
With their help, you can make a connection very quickly and conveniently; no tools or additional insulating materials are required, the contact is very reliable.
Shooting device
0
In November 2015, police from the Belogorsky district of Crimea, by court order, conducted a search in the home of a 55-year-old man. Law enforcement officers seized a homemade weapon from the owner of the home, which he had made from a tree branch that looked like a pistol handle and a metal tube. This miracle of engineering fired shells with a diameter of up to 7.7 millimeters. The man explained that he needed the weapon to hunt nutria. Based on the discovery, law enforcement officers opened a criminal case under Article 222 of the Criminal Code of the Russian Federation (“Illegal acquisition, transfer, sale, storage, transportation or carrying of weapons, their main parts, ammunition”).
The main reasons for replacing the cartridge.
It is necessary to replace the socket in a chandelier not only due to manufacturing defects, but also due to design features. If the lamp is closed, the temperature inside the bulb increases greatly. Sometimes this leads to melted wiring.
In old sockets, contact with the lamp deteriorates over time. This can cause frequent breakdowns of the latter. After incandescent lamps burn out, sometimes fumes form on the terminals, which leads to poor contact. Simple cleaning rarely brings positive results, so the holders are replaced.
Another reason for replacement is the desire of people to switch to energy-efficient LED lamps. Since they are produced with a smaller base, there is a need to change the seat in the lamp. All holders have an identical design. They differ only in the diameter of the thread.
Homemade muzzle-loading firearm
0
On January 24, 2021, police officers from the Atyashevsky district of the Republic of Mordovia detained an unemployed local resident, who was found to have a suspicious device during a personal search. The man explained that he made it to scare away stray dogs. True, the examination showed that this was a homemade muzzle-loading firearm, and therefore a criminal case was opened against the unlucky gunsmith under Article 222 of the Criminal Code of the Russian Federation “Illegal acquisition, transfer, sale, storage, transportation or carrying of weapons, their main parts, ammunition.”
Possible problems and errors.
When installing a new cartridge, you can easily make a number of mistakes without practical experience. There is also a possibility of encountering problems that depend on third-party factors. Common errors and problems include the following:
- Attempting to repair a live lighting fixture. If the room is not de-energized first, there is a risk of injury.
- There are problems with the wiring. During operation, you may notice damage to the wiring and will need to be replaced. Without restoring the wiring, you may encounter more complex faults in the future.
- Incorrect connection of contacts. As a result of this error, the lighting device will not function correctly and may fail.