Do-it-yourself septic tank or wells made of concrete rings
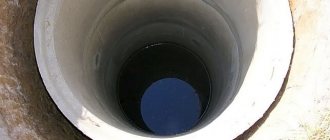
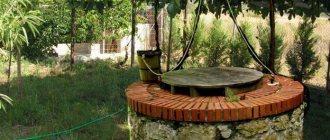
Modern construction technologies allow owners of dachas or country houses to build a septic tank from concrete rings.
Septic tanks or wells that are made of monolithic concrete have high strength and durability. In addition, there are no sanitary and hygienic claims against them.
Septic tanks or wells that are made of monolithic concrete have high strength and durability. In addition, there are no sanitary and hygienic claims against them. The advantage of this material over others is that such walls do not allow any contaminants to enter. In addition, installing a well or septic tank from rings is much easier than building from brick or stone.
Technological principles
Reinforced concrete products are produced on the basis of concrete and steel. Reinforcement copes well with tensile loads, while brittle and strong concrete can withstand compressive loads. The master should implement three stages: I - mixing the components, forming the ring; II unmolding; III set of strength.
Making concrete rings with your own hands: video, work progress:
- The production process must be organized on a level area. This is where the molding and alignment of finished products will be carried out. Recommended mode t +5-50°C;
- the solution is fed into the prepared form, vibration occurs (2-3 minutes);
- When producing rings with a diameter of 1.0 m or less, it is enough to use one vibrator, which is mounted on top of the core. Larger rings require the installation of two or three vibrators on the outer ring of the formwork;
- the mixture is added as it shrinks;
- when molding is completed, the upper edge is smoothed, the ring is kept in the formwork until the cement gains its initial strength (1-2 days);
- unmolding is carried out. The inner core is lifted, then the outer ring is removed using manual labor or a lifting mechanism;
- the form is moved to a new area and the process is duplicated. Working full daylight, you can make about 10 products;
- after 7 days the product will gain 70% of its design strength. The process of making a reinforced concrete ring with your own hands can be considered complete.
The actual time it takes for the product to gain the strength necessary to replace the ring depends on the temperature conditions. At t 20° the product can be moved after 2 days
What you need to make rings
Quartz sand is best suited as a fine filler for concrete mixtures. Silt, clay and other impurities can greatly deteriorate the quality of the material, so the sand must be cleaned of impurities by washing it with plain water.
In order to make such concrete products with your own hands, you need cement of at least grade “400”. It is strongly recommended to take fresh one, because the quality of the cement will decrease during storage. This can happen especially often in cases where it is stored in paper bags, in which it was sold from the very beginning.
Quartz sand is best suited as a fine filler for concrete mixtures. Silt, clay and other impurities can greatly deteriorate the quality of the material, so the sand must be cleaned of impurities by washing it with plain water.
The gravel grains should be slightly rounded, since such gravel is better able to adhere to the other components of the resulting mixture. It is important to know that plate-shaped gravel is not recommended. It will also need to be rinsed with water. To perform all the necessary work with your own hands, you cannot use gravel that has grain sizes longer than 1/4 of the wall thickness. For example, for walls that are 100 mm thick, the gravel grain size should be a maximum of 25 mm.
The properties of such a mixture will depend on the quality of the components that make up it. In addition, its properties are determined by the relative content of such components. When drawing up the ratio between sand, cement and gravel (crushed stone), the amount of cement must be taken as one.
To make such a ring with your own hands, it is recommended to use the following composition of the required mixture in kg: sand - 750, cement grade “400” - 300, gravel - 1200, water - 150.
In the process of manufacturing such products, it is necessary to use steel wire with a diameter of 6-8 mm as reinforcement.
Size range of products
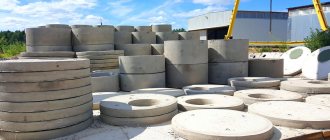
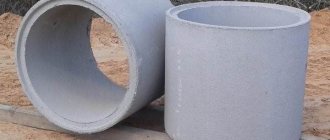
Reinforced concrete rings used for the installation of inspection, sewer and water supply wells have several basic parameters: diameter, height, wall thickness. Classifying the sizes of reinforced concrete rings for a well, they can be divided into 3 groups:
- Large - products with a diameter of 2 m, weight up to 2.3 tons, height up to 90 cm
- Medium - internal cross-section 1.5 m, weight - 0.9-1.3 t, height up to 90 cm.
- Small – diameter – 1 m, weight 600 kg, height up to 90 cm.
These are popular sizes of well rings; if necessary, you can purchase or manufacture additional elements of any height and diameter, depending on individual needs. The strength of products depends on the thickness of their walls and the presence of a reinforcement cage. When choosing a parameter, take into account the type of soil, its tendency to compression and frost heaving.
Information. Products are marked with the internal diameter of the rings in decimeters.
How can such concrete products be obtained?
In order to make the outer wall, you need to make several rings of wood, and cover them with planed and well-fitted boards from the inside.
The formwork (mold), which is used to make rings, consists of two cylindrical surfaces - internal and external. The simplest way to make such surfaces is to make them from planed wooden boards, the thickness of which is 20-49 mm. The cylindrical walls of the formwork are made almost the same way. In order to make the outer wall, you need to make several rings of wood, and cover them with planed and well-fitted boards from the inside. In order to make it more convenient to remove the formwork from the completed product, it must be made collapsible, that is, made up of several parts. In order to assemble the walls, such parts will need to be fastened using wooden planks or some other method.
The inner wall, as well as the outer one, must be made collapsible. It should include 2 rings, which will be covered with planed boards, the thickness of which is 20-40 mm. However, it is worth noting that the sheathing must be done along the outer rim. Please note that all parts of the inner wall of the formwork must have a gap of 15-20 mm between each other after assembly. This is necessary in order to be able to pull out the formwork.
Subtleties of making at home
The construction of a concrete ring is ridiculously simple; it is a concrete casting reinforced with iron from the inside. Attention should be paid to 2 main points: a correctly prepared solution and a well-made mold for casting.
Scheme of joining grooves:
The manufacturing method that is most often used
The width of the wooden ring can be made to any width. Based on the fact that the wider the product, the stronger it will be, it can be made, for example, with a width of S = 150 mm.
If, for example, a reinforced concrete product is needed, the diameter and height of which is 1000 mm, the internal diameter Din.n. from the outer wall of the formwork should be equal to:
Dv.n. = D + 2h,
where D is the diameter, and h is the thickness of the board that is sheathed.
Therefore, D = 100 mm and h = 20 mm.
The result is:
Dv.n. = 1000 + 2×2 x 20 = 1040 mm.
The width of the wooden ring can be made to any width. Based on the fact that the wider the product, the stronger it will be, it can be made, for example, with a width of S = 150 mm. Therefore, the outer diameter of the outer wall of the formwork (Dn.n.) will be equal to:
Dn.n. = Dn.v. + 2S = 1040 + 2 x 150 = 1340 mm.
Considering that the thickness of this product is D = 80 mm, we can calculate the outer diameter Dn.v. inner wall of the formwork:
Dn.v. = D – 2B – 2h,
where D is the diameter of the resulting ring, B is its thickness, h is the thickness of the board.
Now all dimensions are known, therefore it is possible to calculate the outer diameter of the inner wall of the formwork:
Dn.v. = 1000 – 2 x 80 – 2 x 20 = 800 mm.
If we take the width of the inner wall of the formwork to be equal to S = 150 mm, then we can calculate the diameter Dv.v. inner wall of the formwork:
Dv.v. = Dn.v. – 2S = 800 – 2 x 150 = 500 mm.
The inner wall, as well as the outer one, must be made collapsible. It should include 2 rings, which will be covered with planed boards, the thickness of which is 20-40 mm.
In order to make wooden rings of the formwork walls with your own hands, you need to knock down a square panel 40 mm thick on a flat area from boards 20 mm thick. In this case, you need to try to fit the boards closer to each other. The dimensions of the shield will depend on the size of the rings. For example, for Dn.n. = 1340 mm, the dimensions of the shield will be 1350×1350 mm. The boards in the layers of the shield must be placed mutually perpendicular.
On the shield that has been prepared, it is necessary to make circular markings. To do this, you will need to drive a nail into the center of the shield, tie a thin strong cord to the latter, and tie a pencil to the cord at the appropriate distance from the center. After this, draw the outer and inner circles of the corresponding rings. After all the circles have been measured and drawn, you can start cutting out using a hacksaw. At the same time, you should make sure that there are no nails in its path. To make formwork walls, it is necessary to cover the finished products in pairs with boards, the thickness of which is 20 mm and the height is 1000 mm. You need to try to fit them to each other as accurately as possible. After the cylindrical walls of the formwork are completely ready, it will be necessary to cut each one into 4 parts. It is important not to forget about the gaps that should be between the parts of the assembled inner wall of the formwork. The individual parts of the walls will need to be connected into one single formwork using, for example, steel brackets.
Required form
Let's look at how to make a mold for concrete rings. It is made from durable metal sheets. Consists of three identical fragments for the inner ring and three similar larger fragments for the outer ring.
The main thing is to assemble it correctly:
- a smaller ring is assembled on the bolts;
- a larger ring is assembled on top of it;
- They are fixed to each other with special brackets.
Note. This is how the form is assembled. Next, a reinforcing mesh is placed in it so that it is located in the middle, between both forms. After this, the form is filled with liquid concrete mortar and thoroughly compacted. It is important to compact it well and place the reinforcing mesh inside the future concrete product.
Read here Do-it-yourself roof: step-by-step design instructions and secrets of installing simple and complex structures (110 photos)
After the concrete has hardened, the form is disassembled. The staples connecting both rings are removed. The inner ring is disassembled first. Then - the outer ring. The product is ready.
The process of making such concrete products with your own hands
Outer (a) and inner (b) walls of formwork made of boards: 1 – rings; 2 – walls.
In order to make such rings, you will need to install the walls of the manufactured formwork on a flat platform (wooden panel) (they must be one inside the other). In this case, it is necessary to ensure that the walls are at an even distance from each other. Between the walls of the formwork you will need to place a frame made of reinforcement.
The fittings to be used must be manufactured as follows. Between the walls of the formwork you need to vertically evenly place 10-12 steel rods, the diameter of which is 8-10 mm. Using welding, it is necessary to secure rings of steel wire, the diameter of which should be 6-8 mm. They need to be placed in a circle every 160-200 mm, then screw the mounting loops to the rings using thin wire.
Before pouring, the fittings will need to be cleaned of rust.
As a result, the resulting frame must be fixed between the formwork with wedges, which will need to be removed as the form is filled with concrete.
In order to avoid concrete sticking to the formwork walls, you will need to lubricate them with used machine oil or cover them with plastic film.
A similar mass, which turns out to be a thick dough, must be placed in a mold in a layer whose thickness is approximately 100 mm. After this, carefully compact the material with a steel pin, the diameter of which is approximately 20 mm. This method is called beating. Using it, you need to fill the entire formwork, while covering the last one from the top from the sun using thick fabric.
The formwork can be filled using a creamy mass (W/C = 0.7), which is compacted. This is called casting. Products that were made using beating can be removed from the formwork after 3-4 days, and with casting - after 5-7 days.
The sinks that have been formed must be covered with cement mortar. It is worth noting that there are much fewer shells in cast products than in beaten ones.
After the formwork has been removed, the product will need to be left on the panel for 1-2 weeks, while protecting it from the sun. For 3-5 days you will need to moisten with water 4-5 times every day. This helps to increase the strength of concrete. At the end, you need to carefully remove the machine oil from the resulting products.
Construction of houses
95 votes
+
Vote for!
—
Vote against!
A personal water supply, well or equipped septic tank can not only receive sewage water, but even produce gas for the kitchen stove. In such structures, the reinforced concrete ring is the main element involved. Some people purchase such rings and have them delivered directly to their home. But not everyone can afford the purchase and delivery of this item. However, don't despair! There is an option to buy a ready-made mold for making well rings with your own hands. Let's take a closer look at this technology.
The evolution of well rings
If we look into history, we can say that well rings first appeared back in 2600 BC in India. Also, similar products were used in Ancient China and Ancient Rome. Well rings came to Russia only in the 19th century, when the need for their operation increased, and it was at this time that the first underground communications were built. But the walls of the very first well rings were not made of concrete, they were laid out of brick.
It was only in the sixties that the material was changed; the walls of well rings began to be made of concrete and reinforced concrete. Many problems were solved by the advent of concrete and reinforced concrete, and with them well rings, which have more advantages than the brick used to line the walls of the sewer system. At the same time, the labor-intensive and time-consuming process of installing utilities has become easier.
Along with the replacement of material for the manufacture of underground communications, the design of the well ring changed. First of all, the differences are noticeable at the end of the ring. The most common well rings had a flat end; later, products with joining ends appeared, which became known as joining rings with a lock. It is thanks to the presence of such a reliable connection that the connecting rings are highly waterproof.
Of course, well rings that have a lock have become much better than traditional ones, since it is not disturbed when the soil moves, and thus does not cause problems with its functioning. The movement of the rings along with the soil ensured the integrity of the structure in general. But this fastening system was not 100% reliable, so a new fastening was developed - external and internal ledges on well rings, which ensure tight fastening of the rings to each other and eliminate the slightest displacement.
The purpose of well rings
First of all, well rings are used to install sewer wells. They are often used to equip highways and city roads, where they are designed to remove unwanted sediment. Today, well rings are also used for arranging bridges over canals and trenches, various types of wells, various treatment facilities, landscape design, etc. Well rings are used as permanent formwork when installing engineering structures or various foundations. In addition, rings are often used to build wells at home.
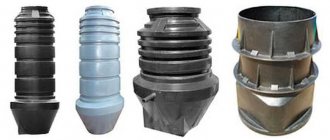
There are modern versions of well rings, such as plastic ones. They are lightweight, making them easy to install. As it turned out, in terms of strength they are not inferior to reinforced concrete. Plastic rings do not interact with various chemical elements and are not affected by corrosion. But they still will not be able to provide the entire range of properties; for example, they have very low frost resistance.
What explains such demand for these products? Firstly, they are durable and resistant to heavy loads. Secondly, the material does not allow water to pass through and is environmentally friendly, this is important, since the water that enters the structure can be used for drinking and cooking. It is worth noting that well rings are installed very quickly and have a reasonable price.
There are certain requirements for the quality of purchased well rings. It is quite clear that such products must have good density, otherwise they will be inapplicable. Well rings must be consistent with all state standards and environmental factors. The fact is that the water that enters the structure can be used for drinking and cooking. Well rings must have high strength and the ability to withstand heavy loads.
Design and production of well rings
Classic rings are cylindrical in shape, but there are also rectangular versions. It is worth noting that rings can be with or without a lock. Ordinary rings have a flat end. Well rings with a lock are equipped with connecting ends. According to experts, the tightness of the lock connection can ensure better tightness and reliability of engineering systems.
Basic rings have standard sizes and are divided into small, medium and large groups. The small rings have an internal diameter of one meter, a wall thickness of 16 centimeters, a height of 90 centimeters and a weight of 600 kilograms. The inner diameter of the middle group well ring is 1.5 meters. They weigh one ton and have the same height. Large rings weigh one and a half tons, and their internal diameter is 2 meters.
In addition to standard wall rings, wall extensions are produced, which differ in height and are used to construct the part of the well that protrudes above the ground. Such extensions are smaller in height compared to the standard version. A mandatory element of the well design are the covers and bottoms, which are included in the set of the listed groups and have the appropriate diameter.
Every year the production of reinforced concrete rings is improving due to the introduction of new technologies. Laser cutting began to be used when laying metal reinforcement. All innovations allow us to produce high-quality and reliable products. Due to the simplification of manufacturing, the final cost of well rings began to decrease.
In the manufacture of well rings, special molds are used. The dimensions of the outer inner diameter are determined using formwork. A reinforcing mesh frame or wire is placed in a space of these dimensions and the solution is poured. To better compact the mold, it is usually subjected to vibration, which compresses the concrete. As a result, the product is very durable, can withstand heavy loads and effectively fulfills its purpose.
When making well rings, you can install special brackets, which are called running brackets. Industrial reinforced concrete rings often have special seam locks (they look like protrusions at the bottom of the rings and rooms for them at the top). Thanks to this design feature, it is possible to securely and tightly fix the well shaft to avoid displacement of its constituent rings.
DIY well rings
Now it’s time to consider the step-by-step technology for constructing well rings with your own hands. If you do everything gradually and carefully, the result will be appropriate.
Well ring mold
There are many options for making a mold, let’s focus on the proven ones. You need to select two metal barrels that match the size of the well ring. The manufacturing process will not be affected by the extruded fixation strips on their walls. You can also use pipes or air ducts of the required diameter. You can assemble formwork cylinders by connecting individual sheets to each other. Good results were seen with formworks made from plastic cylinders.
On the outer surface of a large barrel of the future shape, it is necessary to make two longitudinal markings. They will divide the barrel into two equal parts vertically. Next, you need to use simple window or door awnings. You need to place two canopies on the markings so that their doors are placed at the edges of the line, and the bend of the canopy is along and on top of the marking. Canopies are attached to the cylinder using rivets or welding. On the inside of the barrel, it is necessary to accurately copy the markings placed on the outside.
From the inside, the future form is cut in such a way as not to damage the fixed canopies on the outside. Here you can use a grinder and install the thinnest cutting wheel. On one side of the future form, in the place where the canopies are installed, it is necessary to cut off the lower caps-clamps of the bending spindles for each canopy.
Please note, this is only done on one side. The cut spindles are pulled out and the resulting shape is revealed. When closing the form, fluidity and comparability of the parties should be developed. To ensure that the mold flaps are locked in place, cut spindles can be used. You can also choose other spindles that match the diameter, as in the photo of well rings.
Now you need to prepare the inside for the future shape. To do this, you need to use a metal barrel or a pre-prepared mold. On the inside, two marking lines should be applied. They should be located from each other at a distance of 1/3 of the entire circumference of the barrel. Please note that the cylinder is not divided into equal parts vertically; one part should be approximately twice as wide as the other. Canopies should be installed on the inside, as well as on the outside.
Marking lines are copied from the inside to the outside. After this, the cylinder is carefully cut along these lines so as not to damage the internal canopies. For canopies placed on the same line, you need to cut off the spindle heads from the bend. After this, the spindles are removed and the resulting shape is developed. When closing it, the comparability of the parties is adjusted.
Please note that the assembled view of the inner barrel should be approximately five to ten centimeters higher than the outer one. The external shape of the formwork is easy to close, open and lock with spindles. The inner form should also open inward easily. When the ring is released, the inner mold should be removed first.
The canopies are freed from removable spindles, the smaller part of the mold is folded inward and easily pulled out of the fresh ring. The outer form is also easy to remove, but opens outwards. You can use this form more than once. Perhaps it will be useful to your friends or relatives.
Materials for a well ring
For standard production of well rings, you will need sand, cement, crushed stone, water, a concrete mixer, lifting devices, a mold, a reinforced frame and a good construction site. First, you must decide on the volume of the well ring that you will make with your own hands. It is very important that the thickness of the ring is at least 7 centimeters.
When making a concrete ring, the temperature should be from 8 degrees. In hot weather, you should slow down the evaporation of moisture, since if the product dries quickly, it will not be able to acquire the required strength. You can protect the product from direct sunlight and provide the necessary humidity.
As with all concrete work, the composition of the mixture is usually determined by the ratio by volume of its components: sand, gravel and cement. The amount of cement serves as the unit of reference. It is advisable to use fresh and mature cement, not lower than grade M400. By mature we mean cement that has been aged for at least thirty days after its manufacture. For the manufacture of well rings, the volume of water is very important - from 0.5 to 0.7 parts of cement, sand - from 2 to 2.5, gravel - from 3 to 4. This ratio will provide the concrete with maximum density.
To prepare concrete, you first need to mix sand and cement, then add water and mix everything thoroughly again. After this, gravel is added to the resulting mixture, which is pre-soaked in water. The finished form should be placed on a flat floor or metal tray. Reinforcing mesh should be placed between the outer and inner cylinders. If it is not there, you can use a wire of two to six millimeters, which is laid gradually in turns with the addition of concrete composition.
Rings can be made without the use of reinforcement, but in this case their thickness must be at least fifteen centimeters. These rings last a very long time. Spacer wooden wedges are installed between the cylinders at a level above average to avoid displacement of the cylinders during laying of the concrete composition.
Pouring the solution into the mold
After prolonged mixing, the concrete is placed in a well ring mold to a height of no more than 15-25 centimeters. After this, the solution is compacted over the entire diameter using a thick metal rod of 12-20 millimeters. This is necessary for high-quality compaction of the shape and strength of the entire product. You can use a wooden tamper using a regular shovel, hoe, or shovel handle. The space needs to be filled again, compacting the concrete mixture in a circle. When the level of the piled concrete is above average, the wooden spacers can be removed.
You must fill the entire form and thoroughly level the exposed surface of the poured concrete. It is desirable that this surface be smooth, since it will be a docking surface. Vibration can be applied to a form filled with concrete mortar, which will help compact the concrete as much as possible and fill all possible voids. If necessary, after this procedure you can add a little more concrete mixture. But the vibration procedure is optional.
To ensure good tightness, special covers are used that provide complete isolation and block the entry of foreign objects or liquids, as shown in the video about well rings. This approach is especially useful if the structure is located in an open space or is not protected by a canopy.
After three to four days, the mold can be disassembled. If the humidity and temperature are optimal, the ring can be released from the mold the very next day. It cannot be moved or rolled, since the mixture has not completely hardened. If you want to get sufficiently strong concrete, you should wet the finished ring with water for the next 7 days. Well rings can be used after ten days of exposure, provided that the temperature is optimal and humidity is good.
The installation of well rings is carried out using cranes; they are placed one above the other according to the pyramid principle. To prevent these rings from moving relative to each other during installation, they are usually fastened together in four places using steel brackets or plates. Although, to save your time that it takes to install a well, it is best to make well rings with a lock, but this will consume more material.
If you want the well to last as long as possible, you should perform external waterproofing. For this purpose, the rings are treated with a special solution. If the production technology is disrupted and the quality of the material is poor, there is a risk of poisoning with water from the well in which these products are laid.
Thus, well rings are used for installation in sewer, gas, water supply systems, inspection walls and wells. The scope of application of these products is quite extensive. If you want to make such a ring yourself, there is nothing difficult about it. At home, you need to have special equipment for the production of well rings and a spacious area. It is necessary to strictly follow each stage of construction, and also do everything carefully and slowly.
Some tips that will be useful when performing the process
In order to calculate the number of rings needed, you need to know the depth of the aquifer. It is worth knowing that in the summer you can make about 8-10 similar products using only one set of formwork.
It is worth noting that a situation may arise when the upper part of the well trunk can be clamped with the help of crumbled soil, and the lower part continues to descend without any obstacles. To avoid this, adjacent products will need to be connected to each other using steel brackets or bolts. Therefore, additional care will need to be taken of the corresponding holes.
It is also recommended to seal the joints between the ends in the water intake part using tarred rope, the diameter of which should be about 20 mm. Such a rope will need to be laid in a special groove, which must be pre-formed in the appropriate rings. The seal will be clamped by the weight of the upper rings, therefore it will ensure a high joint density.
Stages of production of concrete products
To make a reinforced concrete ring, you need the following:
- Prepare a strong concrete mixture, taking into account the proportions: 1 part cement, 1.2 parts sand, 2.7 parts crushed stone. From 10 liters of cement, 31 liters of ready-made high-strength concrete mixture is obtained. The amount of water is 50% of the weight of cement.
- Place the form for pouring the concrete mixture on a flat, clean surface.
- Pour the concrete mixture into the mold in small portions, constantly tamping with a metal rod.
- Level the end of the future reinforced concrete products.
- Leave the product to harden for four days.
It is important to carefully remove the formwork. First open the inner cylinder, then the outer one.
