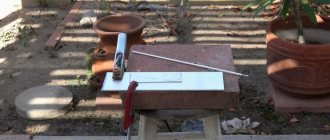
Verification of thick metal
TO
category:
Metal welding
Verification of thick metal
Next: Welding mode
With increased steel thickness and long seams, residual welding stresses increase sharply, which can cause cracks in welds. Therefore, when making long multilayer seams, in order to reduce welding stresses, it is necessary to follow a certain order of seams.
When welding thick metal, the edge grooves should be filled with a short time interval between the application of individual layers, so that each subsequent layer is superimposed on the hot previous one. To ensure sufficient heating and annealing of the layers, the thickness of each layer should not exceed 4-5 mm.
In multilayer welding, the edge grooves are filled in layers or beads. When filling the groove in layers, each layer of the seam is performed in one pass with transverse vibrations of the end of the electrode. When filling the groove with rollers, each layer is performed in two or more passes without transverse vibrations of the end of the electrode.
When welding thick metal, it is not recommended to perform separate layers along the length of the passage from one edge to the other, since the previous layer of the seam has time to cool almost completely before applying the next one, which can lead to the formation of cracks. It is advisable to perform individual elephants along the length in a reverse-step manner. When making thick seams, it is recommended to use several welders, evenly placing them on the structure. When welding metal of increased thickness, several methods of applying layers along the cross-section and along the length of the seam are used: the double-layer method, the “slide” and “cascade” methods, and the block method.
Steel with a thickness of 15-20 mm is welded using the double layer method. The entire seam is divided into sections 250-300 mm long: 1, 2, 3, etc. In section 1, the first layer is welded, the slag is quickly removed, and the second layer is welded (Fig. 61). Sections 2, 3, etc. are welded in the same order. The remaining layers of the seam are performed in a reverse-step manner.
Rice. 1. Welding thick metal: a - double layer method; b - using the “slide” method; c - “cascade” method; g - blocks
Steel with a thickness of over 20 mm is welded using the “slide” and “cascade” methods.
Slide welding is started in the middle of the joint by two welders at the same time and carried out from the middle to the edges. Each welder applies the first layer at a length of 250-300 mm. The second layer overlaps the first and ends at a distance of 250-300 mm from the end of the first layer. All subsequent layers are performed in the same order until the calculated thickness of the seam is achieved. Having filled the mound, welding is carried out on both sides of it in shorter layers in areas that have not yet reached the calculated thickness of the seam. After applying each layer, the slag is quickly removed and the next layer is applied to the still hot metal. Welding of the entire seam is carried out without interruption, preventing the unfinished seam from cooling. The last layer of the seam, decorative, is applied in a reverse-step manner.
Cascade welding is a variation of the “slide” method. A piece of the first layer 250-300 mm long is applied at the end of the joint. Welding is performed in one direction, in a sequence similar to welding using the “slide” method.
Welding in blocks (sections) is more convenient than welding in a “slide” or “cascade”, since each layer of a block (section) of the seam is located in one section. Each layer of seam within a section is performed in a certain direction using a reverse-step method.
With this welding method, the entire length of the joint is divided into blocks (sections) about 1 m long. A specific welder is placed on each block.
Technological features of semi-automatic welding of thick metal
In order for welded metal structures to withstand loads, it is necessary to create reliable connections:
- seams must firmly connect all elements of the product;
- it is necessary to relieve the stresses that arise after welding inside the alloys . You can use preheating for this. After welding, it is recommended to ensure slow cooling;
- It is important to obtain a weld leg determined by technology ; this also strengthens the metal structure.
It should be taken into account that when working at high currents there is a risk of deformation, this means that the control dimensions of the part will change, and the shape of the structure will differ from that which was planned.
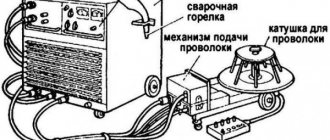
Necessary equipment and materials
To work you will need:
- Powerful welding machine . The maximum value of welding current is not less than 250 A.
- Cylinder for storing and transporting carbon dioxide . There are containers with a volume of 5, 10 and 40 liters. The cylinders are painted black.
- Reducer for reducing gas pressure . A special CO2 device is required. It is desirable to have a heating element.
- Hose and clamps - for connecting the cylinder.
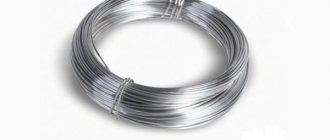
For semi-automatic welding of steels, use wire type Sv-08G2s or similar for welding carbon steels 08x18n9t, as well as an equivalent for welding corrosion-resistant steels. Diameter – 1 to 1.6 mm. Common reels weigh 5, 15 and 18 kg.
Approximate cost of wire for welding carbon steels on Yandex.market
Some devices operating on a 220-volt network can only accommodate small coils of wire.
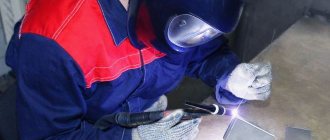
Arc welding
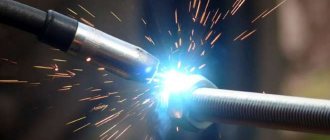
Electric arc welding (EDGS) is a type of permanent connection of parts obtained by melting metal with an electric arc that occurs when voltage is applied to the electrode and metal from a current source. When the parts being connected are exposed to such an arc, a weld pool of molten metal is formed, after cooling and solidifying, a seam is formed that connects the parts.
When welding products of large thickness (more than 20 mm) using EDGS, it is impossible to weld the entire thickness of the product. Therefore, in this case, multi-layer sutures are used. Before you start welding thick metal, you need to prepare its ends. Most often, the edges of the ends are ground off at a certain angle. A gap is left between the parts.
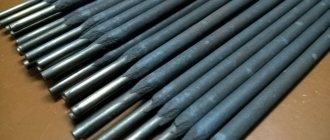
When making the first root (connecting) seam, a thin electrode 1-3 mm thick is used. Its use allows you to fix the parts and avoid burn-through.
Subsequent filling of the welding seam is carried out with an electrode of larger diameter. In this case, the layer must be laid over the uncooled previous layer. The thickness of the layer for sufficient heating should not be more than 4-5 mm.
EDGS classification
EDGS are of the following types:
- manual;
- semi-automatic;
- automatic.
With manual EDGS, the welder manually moves the electrode, resulting in the formation of a weld. In semi-automatic welding, the filler wire is fed automatically and the electrode is moved manually. In automatic welding, both the wire and the electrode move automatically.
Equipment
The most common is manual EDGS. When performing this type of welding, the following are used:
- welding machine;
- welder hand tool;
- welding aids.
The welding machine is, first of all, a power source for the electric arc.
Welding transformers, rectifiers (inverters) or generators are used as power sources for EDGS.
Approximate cost of inverter power sources on Yandex.market
The welding transformer is designed to lower the mains voltage to a lower arc voltage and provide the required current. Welding rectifiers consist of a step-down transformer and a semiconductor rectifier. They feed the arc with direct current. Generators provide power to the electric arc by converting mechanical energy into electrical energy.
In addition to the power source, the welding machine includes an electrode, an electrode holder and wires that connect the power source to the weld pool. The electrode is usually a filler material with a coating designed to protect the weld pool from the external atmosphere. Electrode holders are of screw or clamp type.
Approximate cost of electrode holders on Yandex.market
As equipment, the welder must use a protective mask that filters UV and IR radiation from the arc, a respirator and special clothing. In addition, a welder is required to have a hammer, chisel, and metal brush as hand tools.
Setting up the device and gas equipment
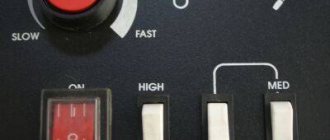
Semi-automatic welding machines from different manufacturers are designed differently. There are at least two or three regulators on the front panel:
- setting the wire feed speed – the rotation speed of the electric motor that moves the wire is adjusted;
- change in current strength - the parameter affects the melting rate of the additive in the weld pool;
- inductance adjustment - the change concerns the current characteristics. At minimum values, the depth of metal penetration is less and the seam is more convex. For welding thick workpieces, it is recommended to increase it to medium or even higher.
Tip: you can set up the device by ear. During welding, the melting of the wire occurs very smoothly, the semi-automatic machine produces an even rustling sound.
After connecting the reducer to a carbon dioxide cylinder, you need to set the outlet pressure. For indoor work, 1-1.5 kg/sq.m. is sufficient. cm. If a flow meter is installed on the gearbox, then it should be set to 10-12 liters per minute.
Electric arc
Welding metal of large thickness (20 mm or more), due to the impossibility of welding the entire thickness of the product in one pass, has its own specifics. The edges of the surfaces to be welded must be prepared.
To do this, the edges are ground at an angle. When connecting the parts, the cross-section should form the letter V. Sometimes, one edge is ground at an angle, and the other in steps. A gap is left between the parts to be welded; in the upper part there should be a groove 10-15 mm wide or more.
The width of the groove depends on the thickness of the metal. When welding metal of different thicknesses, the edge of the thicker one is ground down to the thinner section.
When butt welding and the presence of intersecting seams, stresses arise, leading to deformation and even destruction of the product. This is especially pronounced at low temperatures, when the metal loses its plastic properties.
Rigid fastening of parts in the tooling also causes excessive stress. Long seams with a large cross-section also lead to this.
It is necessary to weld a thick metal sheet so that the time between applying subsequent layers is minimal . To avoid stress, it is necessary to lay the next seam on a hot layer. The thickness of the layers should be within 4-5 mm, this will ensure sufficient heating.
When welding thick metal, due to the large depth of the weld pool, the likelihood of pore formation increases. To prevent this from happening, a cascade welding method or the “slide” method is used.
During welding, transverse shrinkage occurs, which can reach 4 mm with a metal thickness of 40-50 mm. When welding thick sheets, it is necessary to make tacks 2-3 cm long every 30-50 cm.
Preparation for work. Edge processing
Welding work using a semi-automatic machine should be carried out only with clean workpieces. The surface should be free of rust, oil and dirt. Otherwise, pores will appear.
Proper cutting of edges is an important stage in preparing parts for welding. To ensure the formation of high-quality seams, chamfers should be removed in accordance with GOST 14771-76 - depending on the type of connection. If everything is done correctly, the connection will be strong. It is important to ensure that the metal is fused throughout its entire thickness.
Welding process
Thick pieces should not be cooked in one pass. Sequence of actions after preparatory work:
- Assembling elements on tacks.
- Checking the dimensions of the future part.
- Boiling the root of the seam.
- Filling the groove between the edges in several passes.
- Creating a facing seam.
- Processing joints using a grinder with a grinding wheel.
The tack is a full-fledged short seam about 15-25 mm long with a pitch of 45-50 cm. It is welded at the same current as the entire product. The tacks should be positioned so that the future product becomes rigid and does not “lead” during welding.
If you want to eliminate (or minimize) deformation from heating, it is recommended to fix the part on the assembly table using clamps or clamps. You can temporarily grab it to a workbench or steel plate.
First pass. Root of seam
The root seam is the first and most important welded connection between the edges, which is as far as possible from the front part of the parts. It is important to ensure that a roller is formed on the reverse side, smoothly connecting both elements.
If the root weld is welded with defects, cracks may appear during operation of the part, which can lead to destruction of the entire structure.
During operation, you must ensure that the part does not heat up too much. If the cascade welding method is used, a root weld is not required.
Filling the space between welded edges
Thick metal must be welded in several passes, filling the space between the edges. The cascade welding method or the “slide” method is often used:
- “cascade” - this option involves the simultaneous formation of the root of the seam and filling the space between the edges. First, a section of the root connection about 20-25 cm long is welded. Next, a second seam 40-50 cm long is applied, half of which lies on the root. The third - 60-65 cm long - partially (by two thirds) overlaps the previous ones, and ⅓ will become root. The fourth seam (also about 60-65 cm) should overlap the third and reach the thickness of the metal above the root part of the second. This method is similar to step welding;
- “slide” - after welding the root, a second seam is welded, connecting the edges and overlapping the first. After it, the third and fourth (facing) are applied.
Due to the fact that the semi-automatic machine allows you to continuously feed wire into the weld pool, you can form long seams at high speed.
Welding in vertical and overhead positions
The peculiarities of working in positions other than horizontal are that the metal is difficult to hold; under the influence of gravity, it tends to flow out of the weld pool. To avoid this, two methods are used.
- Reducing the welding current by 15-20% . The metal heats up less intensely and crystallizes faster.
- Welding with separation . Short sutures are applied one after another. In a vertical position, you should go from bottom to top. Welding from top to bottom is not allowed due to possible lack of penetration.
Whenever possible, avoid working in positions other than horizontal. Welding vertical and ceiling seams requires more careful preparation of the edges and is considered less productive and more labor-intensive.
Cascade welding method: nuances
Using this method, the applied seam will have a slightly different appearance:
Options for welded joints.
- before starting the main joint, apply a root suture about 20 cm long;
- the next joint, having a length of 40 cm, seems to creep onto the first one, while 20 cm will be the root for the third seam, and the remaining 20 will creep onto the first;
- 20 cm of the third seam will also be root seams, 20 will lie on the root seam of the second, and the remaining 20 will be located on top of the first and second seams;
- the third closes with the fourth, which has the same length of 60 cm and goes to the root section of the second seam.
If you use a semi-automatic machine for cascade welding, the quality is much better than with the manual method.
Using block welding
If it is not possible to use a semi-automatic welding machine, then the cascade welding method can easily be changed to the block method of laying seams.
When using the block version, metal welding looks like this:
- metal welding begins with the root weld;
- On top of the root seam, the next one is welded, which is intermediate. Its length is less than that of the first seam.
- On top of the intermediate seam, a subsequent one is laid, which goes to the surface of the thick metal, its length is almost equal to the length of the root seam.
Features of flux-cored wire welding
If shielding gas is required when working with copper-plated wire, then the use of powdered wire does not require it. The process is reminiscent of electrode welding - with the formation of a slag crust that must be removed. The wire coating contains elements (flux) that, when heated, protect the weld pool from exposure to air. Distinctive features:
- high mobility - no need to move cylinders around the work site;
- Many varieties of wire grades allow you to choose the one that is needed in specific conditions;
- flux-cored wire is often used during outdoor work ; in this case, gusts of wind do not interfere with the process, unlike welding with gas.
The main disadvantage is the high cost. On average, flux-cored wire is 50% more expensive than regular copper-plated wire.
Arc welding of joints
Arc welding diagram.
Welding of thick metal products can also be done using the arc method. An arc occurs when the electrode touches the area being welded. Experience and practice are needed here, since if you delay in separating the electrode from the metal, its end will “freeze” due to the fact that it has the ability to melt under the influence of a strong current supply.
During the occurrence of an arc, the master must constantly maintain the required arc length; the arc must also not be allowed to break, and as the electrode melts, it must be lowered.
It happens that welding suddenly stops and the arc breaks. It needs to be lit again, but in front of the place where the break occurred on the unmelted metal, and then they are only transferred to the seam and the place where the arc broke is melted again, since a crater has formed there. This way a continuous weld can be achieved.
To fill a seam with molten metal, the electrode must be moved along the seam, and to ensure the resulting seam has the required width, and to melt the edges of the product, the electrode must be moved across.
If you need to fuse a joint in the form of a bead, movements are made lengthwise, without deviating from the seam. When surfacing the bead, the width of the joint will be 2 mm wider than the electrode itself. During operation, the electrode is moved along the seam, maintaining uniformity and a certain current voltage.
Electrode movement diagram.
Recently, manual high-speed welding using the support method has become widely used. The principle of this method is that the thickly coated electrode melts faster than the coating, and this leads to the formation of a cap of the coating.
After the visor is formed, the electrode is placed on the place to be welded and without hesitation, it is guided along the entire seam, which results in an excellent seam. In this way, deeper welding is carried out, in contrast to conventional welding, which gives higher productivity.
Advantages and disadvantages of arc welding
The advantages of manual arc welding, which is performed with an electrode at temperatures up to 60,000°C and concentrated heating, in contrast to gas and hydrogen welding, are that it has high speed, a small temperature zone, and small deformation.
The disadvantages include:
- it is impossible to adjust the depth of metal penetration, there is no way to control the speed of melting of the electrode, which leads to deterioration in the quality of the joint when welding thin metals;
- a lot of time is spent on training qualified welders (about 2 years);
- formation of slag on the back side of the joint when using one-sided welding.
Defects that occur when welding massive parts. How to avoid problems
During work, problems may arise that affect the quality of connections.
| Description of the defect | Causes and remedies |
| Pores appear during welding |
|
| The seam is too convex | It is necessary to configure the semi-automatic machine correctly. Adjust wire feed speed and current value. Test on unnecessary scraps of metal. The wire should flow smoothly into the welding zone and melt in a timely manner without cracking or clicking. |
| Spattering of metal during welding |
|
If a metal structure has a complex shape and there is concern that it will deform during welding, assemblers often grab additional temporary reinforcements from corners, channels or reinforcement in critical places. They allow you to keep the dimensions of the product within specified limits. When the part has cooled, they can be cut off.
Welding massive parts with a semi-automatic machine is considered the most productive method. With a minimum of effort you can get beautiful and reliable connections.