Is it possible to make a welding device from scrap materials?
In the household of a craftsman there will always be an old unused transformer, on the basis of which you can make a home welding machine for copper wires. The circuit diagram of the device is simple; any beginner can handle the installation. For production you will need:
- Transformer;
- Material for the casing or finished box;
- Electrical cable;
- Pliers for clamping twists;
- Electrode holder;
- A carbon electrode, which can be made from the core of a large coin cell battery or a large format carbon brush.
- Slot machines
A homemade device and a story about it in the video below
It is permissible to engage in the manufacture of homemade devices only if you are well acquainted with the concepts of the operation of electrical devices. There are a lot of detailed descriptions of homemade structures; below are photographs of some of them. Transformers can be used from old TVs, from microwave ovens, and others. Sufficient transformer power for making a welder lies in the range of 200-450 watts.
The assembly diagram is shown in the figure:
The good thing about this home appliance is that it does not require significant investment of money, and its functions are sufficient to solve everyday welding problems.
Follow safety rules when working with electrical devices! So, under no circumstances, do not connect the transformer from the microwave oven to the network for testing! The voltage on the original secondary winding reaches 2000 V! Only after its removal is it possible to use such a transformer for our purposes, and the secondary winding will have to be made independently.
Another homemade device and a story about it
Tools and materials for welding
One welder is not enough to make a high-quality connection of wires. The complete list of everything needed is as follows:
- Welding machine. Inverter or transformer.
- Electrodes. Copper-graphite purchased or homemade.
- Means of protection. Glasses, gloves.
- Hand tool. Pliers, wire cutters.
Welding machine
The welding machine converts the voltage from the network into one that is safe for health. Additionally, it creates a galvanic isolation between the person and the outlet.
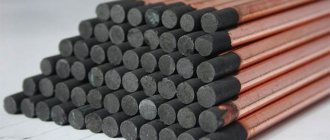
Graphite electrodes
Copper-graphite and carbon rods can withstand extreme temperatures. During operation, they often become white-hot. In this case, the electrode itself is practically not destroyed. You should be careful when working with them. Graphite is a brittle material. The electrode can crack from an accidental impact on a hard surface. You won't be able to buy a new one at your local store.
Copper-coated carbon electrodes
Individual protection means
When welding wires, a number of health hazards arise. The most significant of them are:
- Bright radiation from the electrodes. To protect against flashes, it is common to use welding masks or goggles. They will protect your eyes from too strong light radiation from the arc, and your face from possible sparks.
- High welding temperature over 1300°C. This is where gloves made from non-flammable materials come in handy. It is not so much touching hot metal that can burn you, but its splashes and sparks.
- Risk of electric shock. Such welding devices operate from an outlet. They are not always handled carefully enough. Therefore, it is possible that the insulation may be damaged and the device casing or its secondary winding may come under network potential. To protect against this factor, knowledge of electrical engineering, safety precautions and common sense will be useful.
Welder protective equipment
Other Wire Welding Tools
Hand tools include pliers, wire cutters and a knife. You may need another tool, but everyone chooses it based on their own technology for welding wires. Pliers are needed to hold the soldered twist. Nippers - to cut it to the desired length. Knife - for stripping insulation from wires. In fact, all of the above can be done with pliers alone, but it will not be as convenient as using a separate tool for each operation.
Electrical installation pliers and side cutters
Additional Information. Maybe cheat a little. One of the wires of the output winding needs to be connected to old unnecessary pliers. To do this, a screw is welded to them. Then, using nuts and a copper lug, the wire from the transformer is connected to the screw. During operation, the wires to be welded are held with the same pliers.
Junction box and what it is
All wires that supply electricity to a house or apartment come out of the electrical panel. Each room has several sockets and switches. To collect all the wires in one place and assemble a wiring diagram, junction boxes were invented. This is where they are connected for the further operation of all devices. For laying the wiring, established rules are used, described by the PUE, which stipulate the rules for laying wires and cables. It also contains recommendations regarding the conduct of connections and branches of wires, specifically in the junction box. According to these recommendations, the wires are laid along the top of the wall, at a distance of 15 cm from the ceiling surface. As soon as the wire reaches the turning point, it is lowered perpendicularly down, and the specialist installs a box at the branch point. According to this principle, all wiring cores are connected according to a given diagram. Depending on the type of installation, the boxes are:
- internal, used for hidden wiring;
- external, used for external connection.
When installing an internal box, you need to make a hole in the wall, into which the box is then installed. When the cable is supplied and connected, the box is closed and the lid is flush with the wall surface. In some cases, such a box is masked with wallpaper or a thin layer of plaster. If the thickness of the walls does not allow installing an internal box, then the only solution is to install an external type box. It is mounted on the wall surface, so complex preparatory work is not required. Depending on the shape, the box can be:
- round;
- rectangular.
The number of pins varies, in most cases there are 4, but sometimes there are more. Each terminal is equipped with a thread or fitting to which it will be convenient to attach a corrugated hose. The corrugated hose is designed for convenient location of electrical wires, so replacing a damaged cable will not cause difficulties even for a beginner:
- disconnect the corrugated hose from the junction box;
- disconnect from the socket or switch;
- pull a little;
- pull out;
- put another in its place.
If the cable was laid in a groove, then replacing it will be more difficult. You will need to dig into the wall and remove the damaged cable, and lay a new one in its place. After such work, the wall will have to be repaired. The task of distribution boxes:
- Increase the maintainability of the power supply system. The accessibility of all connections allows you to identify the damaged section of the circuit. If all the wires were laid in corrugated hoses or pipes, then replacing damaged ones will not cause much difficulty.
- Providing free access to connection points. Since the majority of electrical problems arise from poor-quality or incorrect connections, you can easily check their condition by opening the junction box.
- Ensuring fire safety.
- Financial savings. By using a distribution box, you don't have to run a cable to each outlet.
Connecting wires
Before connecting the wires in the junction box, we advise you to study the rules for their installation.
After all, it is important not only to properly connect the wires to each other, but also to correctly insert them into the junction box, and also conveniently position them for possible inspection or repair
Rules for installing wires in a junction box
First of all, let's look at the rules for the arrangement and installation of wiring in the distribution network. After all, it is with this factor that any installation begins.
Standards for installing wiring in a junction box
- First of all, you should remember that no more than eight groups of wires can be laid in one groove, box or pipe.
- All connections must be made in accordance with clauses 2.1.17 - 2.1.30 of the PUE. These clauses provide for a whole range of restrictions. First of all, remember that the wire in front of any contact must have a reserve sufficient for at least one reconnection.
- Before connecting the wires in the junction box, make sure that they are free of tension. Or that this tension will not occur due to temperature changes.
- Any wire connection points must be accessible for repair and inspection. At the same time, these places should be organized so that inspection is not hampered by structural elements.
- Any connection must be insulated. In this case, this insulation must correspond to the level of the main insulation. To achieve these parameters, it is better to use electrical tape or heat shrink.
- The distribution boxes themselves must be made of fireproof or fire-resistant materials. like in the video. This is especially true for the installation of wiring on combustible structures, which are subject to additional requirements.
Options for connecting wires in a junction box
First, let's look at how to connect the wires in a junction box. After all, it is the contact connections that are often the most vulnerable point of any electrical network and any shortcomings appear very quickly.
According to clause 2.1.21 of the PUE, all connections of wires and cables must be made by welding, soldering, crimping, screw or bolt compression. Other connection methods, especially twisting, are not allowed. Based on this, let's look at each of the possible connection methods separately.
Welding connection
The most reliable connection of wires is considered to be the welding method. It has the lowest transition resistance, resulting in virtually no increased heating. In addition, over time, such a compound does not lose its properties.
Welding of wires in the junction box is carried out using a special welding transformer and a carbon electrode. The cost of such products is high enough for a simple replacement of wiring in an apartment, so you can often find homemade devices. Typically these are transformers up to 600 W and voltage 9 - 36V.
The second place in reliability is the connection using the soldering method. This method is more accessible for home use because it does not require special equipment other than a regular soldering iron.
Connecting wires by soldering
Soldering of wires in the junction box is carried out using conventional technology and does not impose any special requirements.
The only point worth paying attention to is the quality of such connections. Indeed, if heated, the tin will heat up quickly enough and the contact will disappear
To prevent this, soldering is often combined with a twisted connection.
Wire crimping has recently become increasingly popular. After all, a large number of fairly cheap tools for crimping wires have appeared on the market, and the price of consumables for this method is quite low.
Connecting wires using crimping method
But the most common method is still the screw or spring clamp method. A huge number of buses and terminals currently on the market allow for a fairly reliable connection of wires.
Note! Screw terminals should be used to clamp single-core wires. If you use stranded copper wire, then you need to purchase special tips that will prevent the screws from breaking the strands of the stranded wire when clamping
These lugs are attached to the wire using the crimping method.
Insulation with thermotube
A tube of the required length is put on one core before twisting.
Twisting is performed, after which the thermotube is moved to the junction of the contacts.
It is necessary that the tube adheres to the wiring as tightly as possible, so it is heated a little with a lighter. Under the influence of high temperature, the heat tube will shrink, and it will be possible to ensure a tight grip on the wiring.
The advantages of all kinds of twists lie in the simplicity of their execution; despite the minimal equipment, they have proven themselves to be quite reliable connections.
When high-quality insulation is made, for which good electrical tape is used, the service life of the twist will be quite long. This connection is convenient to use: it is detachable, which means that if necessary, the wires can simply be twisted again.
Among the disadvantages of twisting, the following should be noted:
It is not possible to connect wires having different cross-sections; in such a connection, as a rule, there is a very high resistance, which causes constant heating of the wires and melting of their insulating layer.
It is difficult to twist together multi-core cables, which are soft and may break under any tension.
When there are several insulated wires in the wiring, due to the fact that each core is insulated separately, the total thickness can be very large.
Twisting is not suitable when it is necessary to connect wires made of different materials - copper and aluminum.
When choosing a method, it is important to take into account all sorts of nuances; only then will you be able to get a high-quality connection with your own hands. Twisting must be done after turning off the power supply for safety reasons.
Welding copper and its alloys: technology
Before you start welding copper and its alloys, you must carefully prepare the product . Measured blanks are cut using a grinder, lathe or milling machine. For copper with a thickness of 6-18 millimeters, you need to prepare the edges. They should be V- or X-shaped. (For large volumes, it would be advisable to purchase an edger-beveler.)
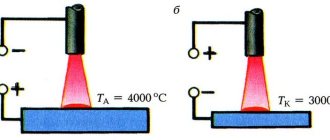
Before starting work, the seams are thoroughly cleaned of contamination and oxidation. For copper welding to be successful, it is necessary to protect the bath from exposure to oxygen. For this, it is recommended to use electrode wire, which must be alloyed with aluminum and phosphorus. In some cases it is necessary to heat the copper .
It connects well when working with consumable electrodes. It is important to know that the length of the arc should be 4-5 millimeters. Using pulsed-arc welding technology in argon, you can make any types of seams, even ceiling ones, and weld very thin metal. It is recommended to place padding elements under it.
Electrical wiring welding technology
The welding process for copper wires consists of igniting a short-term electric arc, melting the edges of the rods and connecting them into a single monolithic section, 3-5 mm long. This happens in the following sequence:
- The wiring intended for connection is cleared of insulation to a length of 60-70 mm. This is done to prevent the insulation from melting from the heated copper.
- I put the copper fibers together and twist them together. The type of twisting is not important, and it can be done either by twisting all the wires evenly, or by twisting some around the axis of others. It is the welding that creates the mechanical strength here, and not the type of twisting.
- Twisted copper conductors must have a total length of 50 mm. The remaining branched part is trimmed to a tightly twisted bundle.
- 25 - 30 mm from the edge of the connection it must be clamped with a clamping device, which is also the contact mass (negative cable from the device). The electrician will hold the wires to be welded using this element. Stripping that is too long and gripping far from the edge should not be done due to excessive overheating of the entire area between the contacts.
- The second hand brings up a holder with a special electrode.
- The end of the electrode comes into contact with the end of the twist and an arc is ignited, which must be held for 1-2 seconds (depending on the current strength and cross-section of the wire).
- The edges of the wires melt from the temperature of the arc, forming a solid connection, the cross-section of which does not interfere with the passage of current.
- By interrupting the arc, we finish the welding process and let the product cool.
- The twist that has cooled after welding must be rolled up (for compact placement in the box) and covered with heat-shrink tubing or insulating tape.
To weld wires successfully, you need to practice on “rough” pieces of cable. A common mistake made by novice electricians is sticking the electrode to the end of the wire being welded. This happens due to the distance being too short and the work being done overhead. To give clarity to the actions being performed, it is recommended to rest your hand with the mass against the wall, and press the hand with the electrode against your body with your elbow. This can minimize wobble and vibration, which can cause welding problems.
You can tell that the connection is ready by the characteristic red bead of hot metal that has a solid appearance. The rounded shape will be the final proof that the rods have fused together. Although the arc burns for only a few seconds, if extensive work is required (distributing the box, arranging the shield), it is recommended to wear safety glasses or even a chameleon poppy. The ultraviolet radiation emitted by the arc can cause serious burns to the skin of the face and the cornea of the eyes during prolonged welding.
Welding method
For more reliable contact, the connecting wires are welded in the junction box. With this option, the ends of the cores are fused and form a single whole, which is a guarantee of safety and reliability. Solid contacts do not oxidize and welded joints do not weaken over time.
The disadvantage of welding is that you must be able to handle special equipment, or you will have to invite a professional.
Required Tools
In addition to being able to cook, you will need:
- knife (to remove the insulating layer from the cores);
- sandpaper (to clean the surfaces to be joined);
- welding inverter;
- gloves (protect hands during welding);
- goggles or mask (protect eyes during welding work);
- graphite (carbon) electrode;
- flux to protect the melt from air.
Welding joint algorithm
- Remove 70-80 mm of insulation from the cores with a knife.
- Use sandpaper to clean the wires until they are shiny.
- Using the method described above, twist the wires; its length should be at least 50 mm.
- Carefully hook the grounding clamp to the top of the twist.
- Place the electrode at the bottom of the twist, lightly touch it to ignite the arc, and remove it. Welding of wires occurs literally in a few fractions of a second.
- After this, let the welding area cool down and insulate the connection.
Another important question is how many amperes to set on the welding machine? For conductors with a cross section of 1.5 mm2, 30 A of welding current will be sufficient, for 2.5 mm2 - 50 A.
Welding twists in a junction box is clearly shown in this video:
Advantages of inverter welding machines
To connect metal structures, you need experience and the welding machine itself. The best option is to use inverter equipment, which is great for working at home. This device is inexpensive and small in size and weight. Small sizes do not affect the quality of welding work. All connections are neat and reliable. Even a low-skilled craftsman can handle this type of welding.
The design of the inverter welding machine consists of the following elements:
- Power supply with filter and special rectifier unit.
- The inverter unit is responsible for converting DC voltage into alternating high-frequency current.
- A transformer is used to reduce the high-frequency current. It is he who is responsible for safety and prevents equipment overheating.
- The power rectifier serves as a means of supplying direct current to the output of the device.
- The device is controlled by an electronic unit.
This device helps to weld any metal structures if you work correctly on an inverter welding machine. Included with the equipment is an instruction manual, which contains a lot of different useful information indicating how to properly weld using inverter welding, choose electrodes depending on the type of metal, etc. Such a brochure will be useful even for experienced specialists.
When purchasing, it is important to pay attention to the presence of instructions in Russian, because using blind welding is difficult, not to mention dangerous. There are cases when equipment is bought second-hand, but the old owners have lost the instructions. Then it is best to find a specialist who will clearly show the main points of welding control
You can’t start testing it on your own without even banal instructions.
Then it is best to find a specialist who will clearly show the main points of welding control. You can’t start testing it on your own without even banal instructions.
Welding with thermite mixture
Thermite welding is rarely used. It is used on large cross-section wires and only outdoors. The wires to be welded are placed in a fireproof glass. Thermite, a powder of aluminum and iron oxide, is poured into it. The mixture is ignited and burns at a temperature of 2300-2700°C. The heat melts the wires and welds them together.
Thermite Welding Kit
The method is not suitable for an untrained person and cannot be used at home. It is extremely fire hazardous. When the thermite mixture burns, harmful gases are released. Hot sparks and drops of metal fly out of the fireproof glass.
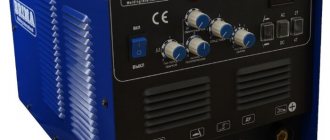
Characteristics of welding machines
To weld wires with your own hands, use units with a voltage of less than 20 V; use transformer or inverter devices that produce a low-power arc.
Inverter type
Welding with an inverter is convenient, which is explained by its compact size and optimal preset parameters. The controls make fine-tuning easy.
Unlike transformer units, inverter units are lightweight. The method of application is similar to that of other devices. When choosing, take into account the possibility of adjusting the current strength within 40-200 A.
This simplifies the process of forming a welding arc and minimizes the amount of interference. The inverter method is suitable for a novice welder.
Transformer welding
To connect wires at home, it is sufficient to use current-regulated devices. The load must be at least 400 A. To form a strong weld, heating to 1080 °C is required.
The electrodes are connected according to a straight polarity circuit. This method helps maintain a stable welding arc. A step-down transformer is used for soldering all types of copper cables. It is permissible to use the device for work in a junction box.
Requirements for homemade products
When performing one-time work, it is not necessary to purchase expensive equipment. It is better to use homemade devices that have a simple structure. The device circuit includes a transformer, monitoring and control elements, ground, and clamp. The first component is the basis of the welding equipment.
You can purchase a transformer or assemble it yourself. The number of turns and the cross-section of the winding are calculated taking into account the input and output current indicators.
A homemade welding machine must have the following technical characteristics:
- transformer type - step-down;
- input voltage range - 12-48 V;
- Current control limits are 40-150 A.
The homemade device is being improved by adding the function of welding twists with alternating voltage. To do this, a diode bridge is introduced into the circuit. It maintains a stable arc. The finished device is protected by a durable case that prevents damage to the device due to mechanical stress.
Homemade apparatus
The main component when assembling a machine for twist welding is a transformer with a power of at least 600 W, with an output voltage of 12-36 V. It must provide such voltage when connecting a supply voltage of 220-230 V.
When assembling the device, a durable metal case of suitable dimensions is required, in which it is necessary to provide the possibility of installing a fuse or circuit breaker with a rating of 16 A.
The supply voltage to the transformer must be supplied by a cable with copper conductors and a cross-section of at least 1.5 mm². It is better to use a KG 3x1.5 cable with rubber insulation for this. The device body and the transformer core must be connected to the grounding conductor.
To connect the transformer to the ground contact and the holder, two wires with a cross-section of 10.0 mm² are used, for example KG 1x10. Their length should be as short as possible to avoid current losses. The holder can be used from any used welding machine.
A carbon electrode can be made by disassembling an old 373 battery. The core, also known as the positive electrode, is perfect for this purpose.
If you cannot get such a core, you can purchase carbon brushes for electric motors used in electrical appliances or power tools at the store. The brush is clamped into the holder and sharpened into a cone shape.
It is convenient to use pliers as a ground, connecting one of their handles to the transformer with a KG 1x10 wire. After this, the handles must be insulated. This device will allow you to comfortably hold the twist while welding. At the same time, the pliers will also act as a heat sink.
Twist welding machine
When replacing wiring, it is better to weld or solder all twists of copper wires; I have even seen such welding on aluminum wires in the wiring of a house built in 1960. Even then, builders knew about welding wires... Read on to learn how to make a machine for welding copper strands with your own hands.
Wago terminals
Many will probably say: What are Wago-type terminals for? It's the 21st century!
Therefore, sometimes the good old twist will be more reliable than all this modern “goodness”!
At one time, of course, there were good dead-end terminals - you insert a twist into it and tighten it with a screw - it turns out to be insulated and firmly fixed - an awesome thing, but now they have completely disappeared from sale. It's a shame
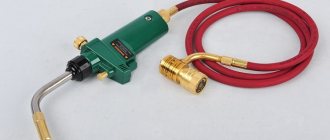
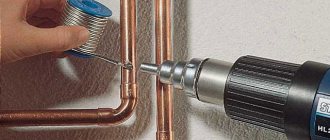
Soldering with crucible and torch
For large volumes of work, it makes sense to perform them using a crucible, which is a hollow metal cylinder with a handle filled with molten solder. The crucible can be used as an attachment to a powerful soldering iron or heated using a gas burner (Figure 6).
Figure 6. Electric and gas crucibles for soldering wires
The large volume of metal in the crucible does not allow it to cool quickly, so a heated crucible can solder several strands in succession. The main advantage of this soldering method is that tinning and soldering of the twist occurs almost instantly when the flux-coated conductors are completely lowered into the solder bath.
Stranding
One of the simplest methods of connecting wires is twisting. It is immediately worth noting that in its pure form this method is prohibited by the rules of electrical installations. The reason is unreliability, due to an increase in resistance between the twisted wires. The oxide film that appears when copper comes into contact with air, although several microns thick, has a large electrical resistance value. As a result of high contact resistance, the twist heats up and can weaken. Therefore, it is better to resort to such a connection only when absolutely necessary. Also prohibited in twisting: connections of wires made of various materials (aluminum, copper, steel); single-core cable with multi-core. If you still need to connect the wires by twisting, then you need to do it correctly.
How to make a twist:
- Strip the insulation on the core at a distance of 5-6 cm from the edge;
- Place the wires in a cross pattern and twist as tightly as possible without skewing the wires to one side;
- Then bite off the remaining edges of the wire;
- Insulate the exposed core by grabbing the edge of the wire insulation with electrical tape at a distance of at least 5 mm. If you have insulating caps or heat-shrinkable film, you can insulate them.
Connection Features
There are quite a few ways to connect wires - using screw and self-clamping terminals, crimp sleeves, a bolt and nut (through a washer). But most often, the ends of the wires are connected by twisting, that is, they are simply twisted.
All of the above methods have one significant drawback. Even if the rules and technology of work are followed, the area of the contact zone of two conductors turns out to be less than the working cross-section of the core.
At a sufficiently high load (not exceeding, however, the permissible load), the contact area will heat up. Which can lead to insulation melting, short circuit, or fire.
Twists have an advantage over other types of connections, since twists can increase the contact area of the wires. To do this, it is enough to solder the ends of the cores in a twist or weld them.
Soldering connections are quite labor intensive. And if you consider that distribution boxes, as a rule, are located at a level of 2.3-2.5 meters from the floor, it is very inconvenient to carry out the work.
After all, in addition to a soldering iron, you need to have solder with you, and sometimes also flux. And all this is at its best. In addition, in order for the connection to be of high quality, it must be heated for quite a long time, which also does not speed up the work process.
How to make a wire welding unit with your own hands
If you wish, you can make a transformer for welding copper wires with your own hands. The main issue concerns the selection of materials and tools. During the manufacture of the device, it is better to follow the instructions.
Materials and tools
To make a device with your own hands, you will need the following materials from materials:
- transformer;
- alligator clips;
- carbon electrode;
- aluminum cable - 2 pieces;
- rotary voltage regulator;
- power cable with a cross-section of more than 2.5 mm.
Tools include pliers and a set of screwdrivers. It is advisable to have pliers on hand.
Case selection
For homemade products you need a reliable casing that will protect the transformer
It is important to remember safety precautions, as it is easy to get burned. The box can be made of metal or plastic
If a mobile installation is being made, it is better to use plastic. A metal box is considered more stable, but is not intended for transportation.
Case selection
Transformer
Regarding the basis, both electronic and power units are available to choose from.
The blocks are supplied by various manufacturers and it is important to decide on the circuit of the thyristor welding device. The circuit provides space for output blocks, as well as a secondary winding
A voltage regulator is selected separately, which is responsible for the rectified current. This technology is actively used to charge batteries. Therefore, similar settings are found in starters from various manufacturers. If the choice falls on an electronic unit, it’s worth understanding its operation a little. The signal generator circuit is taken as the basis, so bipolar transistors are used. Reverse conduction is ensured and high voltage is observed.
Transformer circuit
When selecting an electronic unit, the maximum level of energy consumption, as well as voltage, is taken into account. Homemade modifications for 6 and 9 volts are considered common. In the standard circuit of the electronic unit, the transistors are opened and then the capacitors are discharged along the chain. The thyristor in the circuit works as an amplifier.
As an option, three-winding transformers of the TI series are used. Their peculiarity is their low voltage level. If desired, the element can be created independently on ferrites. Such installations have a high energy conversion rate
During assembly, it is important to achieve the required current value, which depends on the needs
Power cable
When there is a powerful 24 volt transformer, it is recommended to select the appropriate electrical wiring for it. It is recommended to use blanks with a cross-section of 2.5 mm or more. For safety reasons, it is recommended to install a switch that is connected to the wiring. Thus, if something happens, the installation can be quickly turned off by stopping the current supply.
Power cable
Using Terminals
To power a transformer or inverter, terminals are attached to it using the twisting method. Next, you connect to a 220 volt network.
Mounting the holder and contact
Two wires come from the terminals, one of which goes to the holder, the other to the contact. The welder must be able to hold the workpiece, as well as freely fix the electrode, thanks to which welding is carried out. Specialists do not always use clamps, preferring to work freely with pliers. When taking a closer look at the electrode holder, it is recommended to select long blanks, as they are more practical.
Device holder
The risk of electric shock is reduced, plus it is more practical for the welder to work in hard-to-reach places. The long holder makes it easy to work on the ceiling or in narrow passages. Additionally, if there is a long holder coming from the transformer, there is no need to move it frequently.
Types of connections
Types of wire connections
What is the task when connecting wires? Ensure good contact between the cores so that the chain does not break and there is no risk of a short circuit. In order to ensure this, you can act in several ways:
- Twisting.
- Crimping.
- Welding.
- Soldering with a soldering iron.
- Use of screw terminals.
- Bolted connections.
- Self-clamping terminals.
These are time-tested methods that you can use to ensure reliable contact. Let's take a closer look at each of them. You will learn how to properly connect wires using any of these options.
Such twists in the junction box are officially prohibited. The seventh edition of the regulatory document PUE, chapter 2, paragraph 2.1/21 lists all types of permissible connections, but there is no twisting in them. And this is not surprising, since such a contact is sensitive to pulse current and has a high transition resistance. Over time, the contact will deteriorate and simply burn out. Due to the fact that the contact area is small, heating occurs under heavy loads and the contact is weakened even more.
It is not recommended to use this type of connection, although some craftsmen still use it. If you choose twisting, all responsibility falls on you.
This option is chosen because of its simplicity. It is enough just to strip 10–20 mm of insulation and twist the wires together using pliers. This is what our fathers and great-grandfathers did. But such a connection is often unreliable, especially if an aluminum core is used.
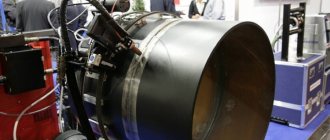
Copper wire welding machines
Copper is a specific type of metal whose welding is performed only in a well-protected environment that prevents the interaction of carbon and surrounding air. But since copper cables do not need a long seam, but only need to quickly melt the end of the twist, a conventional unit with alternating or direct current will do.
Transformers
The welding machine for welding wires must be capable of delivering enough current to melt the edge of the cable. The melting point of copper is slightly more than 1000 degrees. Therefore, a conventional transformer with current regulation up to 400 A is suitable for work. The only difference from welding carbon steel will be the use not of a coated steel electrode, but of a carbon one with an admixture of copper and not coated.
To weld twists, you need to connect the device to the network, set the required current strength, and connect the “negative” cable to the clamp, and the “positive” cable to the electrode holder. Straight polarity will provide better arc performance on this type of connection. Working with a transformer is suitable for connecting and equipping an electrical panel with many contacts. Since the entire process can take a day or more, there is no need to frequently move the bulky device. But for maneuverable work across a large space, where you need to weld several strands in a box and move on, the transformer will be inconvenient.
Inverters
For mobile, quick work with wiring, it is better to purchase a small device. This can be a regular inverter with minimal weight, whose configuration allows you to hang equipment on your shoulder and perform twist welding at any height.
The inverter works in the same way as a transformer. The “plus” with the electrode is in one hand of the electrician, and the “minus” with a special clamp is in the other. The characteristics of the device with a current range from 40 to 200 A are enough for most types of wiring found in everyday life. It is more convenient to weld copper wires with an inverter, due to the “soft” operation of the arc and less noise from the current source itself.
Welding current parameters
The parameters mean current, voltage and welding time. Here everyone has their own opinion and understanding of how to properly configure the arc. The required current value can be set using a Resanta inverter welding machine. Transformer devices do not have such functionality. The average parameters for welding wiring are given in the table.
| Cross-section of welded wires, sq. mm. | Number of cores, pcs. | Current, A |
| 1,5 | 2 | 70 |
| 1,5 | 3 | 80 |
| 2,5 | 2 | 100 |
| 2,5 | 4 | 120 |
Welding provides the highest quality and most reliable electrical wiring connection. This method requires some experience and equipment. However, the resulting contact will have increased reliability and will last no less than the wires themselves.
Welding allows you to obtain a reliable connection of wires
Welding requires a powerful current source, graphite electrodes and personal protective equipment. During operation, beware of bright arc flashes and hot electrodes. It is also necessary to take into account that the device operates on mains voltage. Therefore, it is necessary to follow basic electrical safety rules.
detailed instructions
First, let's consider the simplest option, when it is necessary to connect two single-core conductors of the same metal (for example, copper).
The technology looks like this:
- We carefully strip both cores of insulation to about 5 cm. You can also use a special tool for removing insulation for this.
- We clean the exposed veins to a metallic shine with a knife or sandpaper.
- We cross the two wires and twist them clockwise together so that they wrap around each other in a spiral (see diagram below).
- We insulate the finished twist using electrical tape. It is also recommended to use heat-shrink tubing, which reliably protects the exposed area from the external environment.
As you can see, there is nothing complicated. The peculiarity is that it is necessary to expose the veins by at least 5 cm and twist them with pliers so that there is continuous and reliable contact.
I would also like to give a couple of tips about a more complex situation when it is necessary to twist single-core and stranded wire. In this case, first repeat points “1” and “2” from the instructions provided above. Next, you need to cross the products and carefully wind the stranded wire around the middle of the single-core wire (at a distance of 2.5 cm from the end). When all the turns are wound, the free end of the single-core conductor must be bent with pliers towards the turns, as shown in the photo below. After this, the connection is insulated and placed in the junction box. By the way, in the same way you can make a good twist of two stranded wires.
You should draw your attention to the fact that it is forbidden to twist aluminum and copper under any circumstances. The first and main reason is that a galvanic couple is formed between aluminum and copper; as a result of chemical reactions, when moisture enters (it will be there in any case), electrolysis begins and the connection is destroyed. The contact resistance increases until it disappears completely, at which time it begins to heat up and burn
With direct current, such a connection will be destroyed especially quickly.
The contact resistance increases until it disappears completely, at which time it begins to heat up and burn. With direct current, such a connection will be destroyed especially quickly.
The first and main reason is that a galvanic couple is formed between aluminum and copper; as a result of chemical reactions, when moisture enters (it will be there in any case), electrolysis begins and the connection is destroyed. The contact resistance increases until it disappears completely, at which time it begins to heat up and burn. With direct current, such a connection will be destroyed especially quickly.
The second reason is that copper and aluminum have different coefficients of thermal expansion; under load, when the contact heats up, the conductors will expand “differently,” and after cooling, the twist will weaken and the resistance will increase even more - like a snowball.
The third reason is that an oxide protective film always forms on the surface of aluminum, which also increases the contact resistance, therefore, to connect aluminum wires, they are coated with quartz vaseline paste, and terminal blocks for them are sold already filled with this paste.
These are the diagrams you can use when twisting wires with your own hands:
We also advise you to watch the visual instructions:
An interesting device will allow you to quickly fasten:
Related Posts
- Repair of electrical equipment on ships - cable termination
- Overview of electrical wire connectors
- Cable current cross-section
- Connecting wires in a junction box: learning how to connect wires
- Correct choice of current transformer according to GOST
- Wire cross-section for home wiring: how to calculate correctly
- Welding of aluminum and its alloys
- Hidden electrical wiring in a frame house
- Terminals or twisting: comparing the pros and cons
- What color is phase and zero in electrical engineering?
- Terminal blocks wago
- How to use a multimeter correctly
- Pugnp and punp wires: characteristics, differences, prohibition of use
- Junction box
- Wiring diagram and installation of electrical wiring in the kitchen
- How to connect copper and aluminum wire
- Using PVC wire according to the characteristics and description
- Connecting sleeves for crimping wires: types, features, crimping tools
- Technical parameters and scope of application of heat-resistant wire RKGM
- Wire pv-1: description and characteristics
- Ouzo in electrics
- How to move a socket with your own hands: advice from professionals, a guide to action and 110 photos of transfer options
- Calculation of the resistance of parallel connection of resistors
- Baseboard and floor electrical sockets. device and installation
- Expert overview of all existing wire connection options
Read with this
- Repair of electrical equipment on ships - cable termination
- Overview of electrical wire connectors
- Cable current cross-section
- Connecting wires in a junction box: learning how to connect wires
- Correct choice of current transformer according to GOST
- Wire cross-section for home wiring: how to calculate correctly
- Welding of aluminum and its alloys
- Hidden electrical wiring in a frame house
- Terminals or twisting: comparing the pros and cons
- What color is phase and zero in electrical engineering?
Features of welding aluminum wires
The use of aluminum cores is prohibited by the current PUE. But in some older homes you can still find this type of wiring. A complete replacement entails financial costs and can take a long time. But for welding aluminum wires it is necessary to take into account a number of specific points.
They are as follows:
- cleaning contact parts from oxide film;
- use of special flux for aluminum welding;
- treating the welding area after cooling with quick-drying varnish.
The use of mechanical types of connections for aluminum wires is not recommended. Also, you cannot twist wires made of this material with copper ones. To do this, use special adapters.