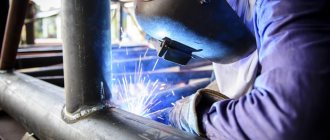
Today, it is difficult to imagine modern life without welding, and therefore, the number of people who come into contact with it at work or in everyday life is constantly growing. Becoming a good welder is not an easy task. But this means providing yourself with a job that is in demand, interesting and highly paid. And even if you already have another profession, the ability to independently weld any metal structure, be it a fence, garage, greenhouse or anything else, will not go unclaimed. How to cook using arc welding with electrodes is a serious question for beginners. Let's look at it in this article.
Basics of electric welding
So, let’s take a closer look at where it’s best to start, or arc welding for beginners.
First, let's briefly understand the theory of welding. To understand the essence of the process, you first need to decipher several terms:
A welding arc is a long-lasting electric discharge (created using a welding machine) that exists due to a maintained electric field, melting the area of the joined element. The temperature of the welding arc is very high, it ranges from 6000 to 8000 °C.
Arc length is the distance from the end of the electrode to the workpiece. The arc length is:
- short - 1-1.5mm;
- normal-1.5-2mm;
- long - more than 3mm.
Using a short arc is effective. This is how good protection and low heat input during welding are ensured. The longer the arc length, the worse the protection and the higher the voltage on the arc, and as a result, the higher the temperature of the seam.
Increased weld temperature can lead to overheating of the metal. Subsequent deformations, and in the case of alloy steels, burnout of alloying components.
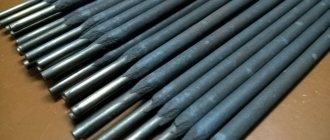
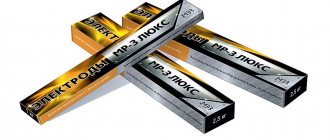
An electrode is a metal rod on which a layer of one or another coating is applied to improve its properties. During welding, the electrode core melts and forms a seam. They are connected to a welding machine and current is supplied through it to the element being welded.
Weld pool is a section of a joined element that melts during welding, where the particles of the element and the molten electrode are mixed.
The temperature of the weld pool is higher than the melting temperature of the metal being welded; usually the excess over the melting temperature is 100-500°C.
Preparation for welding
When setting the goal of learning how to properly arc weld, you should understand that the safety and effectiveness of welding largely depends on the preparatory process. You should start welding work only after preparing the welding machine:
- it is necessary to check the frequency of the electric current and voltage, the readings in the working device and in the network must be the same;
- The electrode number must be selected taking into account the power of the equipment;
- The grounding terminal must be securely fixed;
- check all connections, integrity of cable insulation;
- Place the electrode in the holder and check the strength of its fixation.
You also need to prepare the surface to be welded. It must be thoroughly cleaned of rust, traces of oil and other contaminants. If this is not done, the weld seam will have defects.
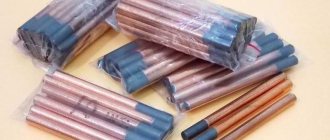
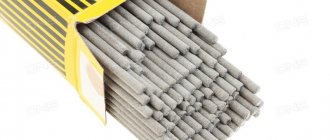
The electrodes are also checked for integrity. It is important that the coating is free of chips and cracks. It is often necessary to first calcinate or dry the electrodes and only then insert them into the device holder.
How does consumable electrode welding work?
The process occurs in this way: an arc is ignited, the metal of the joined part and the electrode is melted and mixed in the weld pool, and when the molten metal cools, a weld is formed. The higher the welding current, the deeper the metal is melted (penetration).
Arc welding can be carried out under the influence of direct (DC) and alternating current (AC).
The process carried out on alternating current is used quite rarely in practice due to the fact that arc combustion is unstable. Basically, thick sheet metal is welded using alternating current, since it is with alternating current that it is possible to obtain the highest temperature required for melting parts.
It is also indispensable in the case of welding magnetized metal, since in this case the use of direct current is excluded. Equipment required is a transformer and a specialized welding machine.
The direct current process is the most common, since the welding arc burns more stably during the process, which makes it possible to obtain a seam with less labor; also, with this type of welding, less spatter is generated, which also simplifies the work of the welder. The equipment requires a rectifier or inverter.
Designations of welding types
Often, beginners in welding are faced with various designations for the types of welding MMA, MIG, MAG, TIG. What do these letters mean? Let's take a closer look at each of the listed types.
MMA is manual arc welding with a consumable stick electrode. This is a common type of welding used both in industry and in everyday life.
MIG is mechanized inert gas arc welding. Wire is used as a melting additive.
MAG is an arc welding in an active gas environment with a consumable wire electrode.
MIG/MAG is the most productive compared to MMA.
TIG is an arc welding with a non-consumable electrode in an inert gas environment. As the name implies, tungsten electrodes are used for it, which have a very high melting point (more than 3000°C).
Let's list the main advantages:
- Low price of materials and welding equipment;
- can be carried out in various positions;
- Wide range of metals;
- Can be carried out in confined spaces;
We list the main disadvantages:
- The professionalism of the performer has a strong influence on the quality of the weld;
- The presence of a significant release of harmful substances to which the welder is exposed;
- Low productivity;
- Arc deflection due to metal magnetization
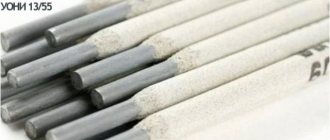
What electrodes are used?
- with base coating
- acid coated
- cellulose coated electrodes
- rutile coated electrodes
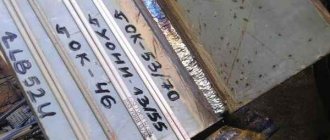
Many people are faced with the question of how to choose the necessary electrode? The diameter of the electrodes is selected according to the table provided by the manufacturer (usually indicated on the packaging), selected according to the thickness of the workpiece. Read more in our article.
Pipeline welding
Using electric arc welding, you can make a horizontal seam that runs around the circumference of the pipe and a vertical seam that runs from the side, as well as top and bottom seams. The most convenient option is the bottom seam.
Steel pipes must be butt welded, welding all the edges along the height of the walls. During operation, the electrode must be installed at an angle of 45 degrees - this is done in order to reduce sagging inside the products. The seam width should be 2-3 mm, height - 6-8 mm. If welding is overlapped, then the required width is 6-8 mm, and the height is 3 mm.
Immediately before starting work, you need to carry out preparatory procedures :
- The part needs to be cleaned.
- If the edges of the pipe are deformed, then straighten them or cut them off with an angle grinder, or simply with a grinder.
- The edges where the seam will go must be cleaned to a shine.
After preparation, you can start working. It is necessary to weld all joints continuously, completely welding . Pipe joints with a width of up to 6 mm are welded in 2 layers, with a width of 6-12 mm in 3 layers and with a wall width of more than 19 mm in 4 layers. The main feature is the constant cleaning of pipes from slag, i.e. after each completed layer it is necessary to clean it of slag and only then weld a new one. Particular care must be taken when working on the first seam, it is necessary to fuse all blunts and edges. The first layer is carefully checked for the presence of cracks; if they are present, then they must be melted or cut out and welded again.
All subsequent layers are welded while slowly turning the pipe. The last layer is welded with an even transition to the base metal.
Mistakes of novice welders
To learn how to cook with electric welding correctly, you need to consider the main mistakes that beginners make :
- Moving the electrode too quickly, resulting in an uneven seam.
- The seam moves too slowly, resulting in holes and burns in the metal.
- The seam is too uneven and flat. The main mistake here is the angle of the electrode.
- Lack of welding of metal. This happens because the 5 mm gap between the metal and the electrode was not maintained, i.e. the gap was too small.
- Otherwise, when the gap is too large, the metal is not welded.
All of the above mistakes are just the most serious ones. There are many more nuances that can only be understood with experience.
When welding thin-walled metal or profiles, a careful approach to work is required . Thin parts can be welded by applying a cleaned electrode and welding directly on top of it.
Welding on non-ferrous metals is strikingly different, as it requires different electrodes. A special protective environment is also required. Now you can buy universal machines that cook almost any metal.
There are also semi-automatic devices for working with thin-walled metals. Its essence lies in fusing a special wire.
Electric welding for beginners is not an easy task. But if you have enough desire, you can master it. You just need to follow the basic rules and listen to the advice of more experienced masters. As a result, you will be able to move on to complex tasks, honing your skills.
What is needed to operate an inverter
An inverter-type welding machine or power source necessary to create a welding arc. There are a huge number of different manufacturers and brands of inverters, of course, prices for inverters vary significantly.
However, the operating principle of all inverters is the same; differences exist in the current-voltage characteristics and quality of the equipment.
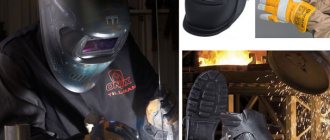
To get started you need:
- Welding machine;
- Electrodes;
- Mask;
- Welding gaiters;
- Workwear (robes) and safety shoes
- Welder's hammer
- Metal brush
If you decide to try yourself for the first time, choose inexpensive materials and tools. For training, a mid-price welding inverter (which can be rented), 3 mm electrodes and a Chameleon mask are suitable.
What do you need to buy to start welding?
This question is answered in the article - Tools and accessories for manual arc welding: a basic set. In short, to start welding with an inverter at home, you will need:
- Electrodes.
- Welder mask.
- Gaiters or protective gloves.
- Protective trigger, trousers and closed shoes.
- Welder's hammer and brush for removing slag.
A specialist talks about choosing a mask for metal welding in this video.
The optimal choice for a novice welder is a mask with a “chameleon” type filter.
Its invaluable advantage, compared to a conventional protective shield with tinted glass, is that the welder can see the parts being welded. He does not need to raise and lower the mask, because... “Chameleon” automatically darkens when a welding arc appears and reliably protects the eyes.
When the welding process stops, the glass is automatically cleared. This makes the job easier. A beginner in welding will not pick up the so-called. “bunnies” from a bright arc flash if the mask with ordinary glass is not lowered in time.
How to weld metal correctly?
To carry out the process correctly, it is necessary to study and perform step by step all the operations described below.
It is also necessary to remember that a beginner needs to primarily monitor the quality of work, the thoroughness of operations and the development of skills, and not the speed of work.
So, the first stage is preparation:
- We collect all the necessary tools and equipment, put on special clothing;
- We clean the edges of the part and degrease them;
- connect the electrode;
- We carry out preliminary assembly using tacks; The size of the tacks can be different, usually the tacks are made 10-50 mm, or in the form of points (for small parts).
When it comes to working with pipes, the length of the tack should be at least 2-5 times the thickness of the pipe wall.
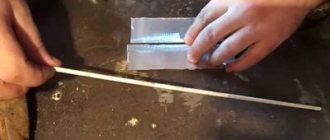
The second stage is welding of elements. The process begins with ignition of the arc. There are two main ways:
1st – by touch: the welding arc is ignited by briefly touching the metal surface; it is important to immediately remove the arc to prevent sticking.
2nd – by striking: the welding arc is ignited when held (like a match) across the surface of the metal. This method is preferable because it makes it difficult for the metal to stick, but it is not always applicable due to cramped conditions.
An important point when welding is the inclination of the electrode. If you learn how to hold the electrode correctly, you can avoid many unpleasant consequences. There are three main provisions:
1. Angle forward - the welding arc is deflected from the normal by 30-60 degrees, forming an acute angle between the arc and the seam. In this position, horizontal as well as vertical seams, ceiling seams are made, and pipes are joined in the absence of the possibility of turning the pipe during welding.
2. Backward angle - the welding arc is deflected from the normal by 30-60 degrees, forming an obtuse angle between the arc and the seam. This position is suitable for corner and butt joints.
3. At a right angle - an angle of 90 degrees is formed between the arc and the seam. This position is most often applicable in hard-to-reach places.
Selecting the angle of inclination
It is necessary to move the electrode at different angles. The choice of the desired position depends on the type of material, the location of the parts in space and the thickness of the metal. The main methods of core management include three methods.
Angle forward
In this case, the core is driven at an angle from 30° to 60°. In this position of the electrode, the molten coating forms slag.
It moves after the weld pool and reliably covers it from the invasion of harmful gases. Some slag that falls in front of the weld is displaced by molten metal on the sides of the joint.
If a large amount of slag forms in front of the bath, then the slope must be reduced. In rare cases, the tilt can be adjusted to a right angle. This must be done when there is severe slag formation.
In this case, it does not have time to harden and fills the bath, extinguishing the welding arc. Therefore, it is necessary to ignite the arc at a right angle, gradually changing it, to achieve normal slag formation.
This method is used when a small depth of heating of the base metal is necessary, for welding ceiling joints, welding a vertical seam on a channel, welding pipes with a fixed joint and for making a root weld on thick metal workpieces.
Perpendicular
It is quite difficult to constantly hold the electrode perpendicular to the surface, so the method requires sufficient skills as an electric welder.
Used for welding in inaccessible places where it is not possible to tilt the electrode at a different angle. In this case, you can achieve a small penetration of the metal parts.
Electrode movements during welding.
To obtain a high-quality seam, it is extremely important what the trajectory of movement will be.
There are various ways:
- Circular or elliptical - with a vertical joint. When performing the process in this way, both edges are evenly heated and boiled. The circular movements themselves expel the slag from the bath.
- Triangle movements. Movement along the trajectory of a triangle is most often used for fillet welds. Just like with circular ones, it ensures good heating of the edges and penetration of the root of the seam. This method is often used when connecting parts over 6mm.
- Wiring the electrode along a z-shaped path. It is better to use for parts with a wall thickness of less than 6mm. Characteristic for performing the process in the lower position and end-to-end.
Welding positions.
The following positions are distinguished: bottom, horizontal, vertical, and ceiling.
The complexity of the work at different spatial positions of the seam differs significantly. The simplest is considered to be performed in the lower position, the parts are at the bottom, and the welder is above them. It is with these seams that someone who has not worked before should start.
Because molten metal does not flow out of the weld pool, which makes the welding process much easier.
The next most difficult ones are horizontal and vertical seams . When making vertical and horizontal seams using electric arc welding, the joined elements are in a vertical position.
In this situation, there is a risk of melt leaking out of the weld pool, and therefore the qualification of the welder must be higher. To get a good result in this position, it is necessary to perform the process on a short arc, and also use electrodes with a special coating that prevents metal from leaking out.
When making a vertical seam, it is advisable to carry out the process from the bottom up in order to form a step that prevents the metal from flowing out. Driving the electrode from top to bottom is permissible, but this may result in deterioration in the quality of the seam due to leakage of metal, as well as failure to penetrate the seam.
The ceiling position is considered the most difficult, because in addition to the fact that it is physically difficult to hold your hand above you for a long time, it is also difficult to ensure the proper quality of the seam.
In order to understand how to weld a ceiling seam, any welder needs practice. To perform work that does not have to be overcooked, we recommend choosing electrodes with a basic coating, as well as conducting the process with a short arc at low voltage.
The ability to make ceiling seams is considered a sign of a qualified welder.
Welding arc length
Arc length is an important theological parameter of the welding process. The quality of weld formation, protection of the weld pool, the amount of metal spattering, and the amount of heat input depend on it.
Welding arc
Depending on the type of electrode coating, it is necessary to maintain an arc of a certain size during the welding process. Typically from 0.5 to 1.5 times the diameter of the coated electrode. When welding with electrodes with the main type of coating, welding should be done with as short an arc as possible, no more than the diameter of the electrode. When welding with an arc that is too long, the combustion process becomes unstable, there is strong metal spattering, and the protection of the weld pool deteriorates. A long arc promotes more intense oxidation and nitriding of the molten metal, and when welding with coated electrodes with the main type of coating, it leads to the formation of pores. With a short arc, fine droplet transfer of metal is ensured, which ensures a better welding process. Maintaining a welding arc of the required length is one of the key indicators of welding technique.
Basic mistakes
Now that we have dealt with the main points when performing work, let’s talk about common mistakes associated with the use of electrodes, as well as how to prevent them.
Inability to properly hold the welding arc. This leads to uneven melting of the metal. The result is burns, rough scaliness and other external defects.
Use of undried electrodes . This will lead to a lot of pores. It is important to store welding materials in a dry place.
Long arc length . This error can lead to burnout and the appearance of pores.
Electrode movement speed. As a result, lack of penetration or sagging may occur. It depends on whether the process is running faster or slower than the optimal value. The welder selects the welding speed and current strength individually. Some people cook quickly and use more current. Some people, on the contrary, set less current more slowly. This comes with experience. In the beginning, you need to adhere to the recommended values.
Tilt angle . The depth of penetration largely depends on the angle of inclination. Thin metal is welded at an angle forward.
Types of electric welding
There are several main directions:
- MMA. Welding with an electrode in a protective coating. A universal technology that allows you to get an excellent seam in any spatial position. Simple devices for converting alternating current into direct current, transformer or inverter type, are used. The current strength depends on the thickness of the metal being fused and the electrode used, ranging from 30 to 200 Amperes. An electrode is a metal rod coated with coating. During welding, the coating melts and protects the melt from air.
- MIG. Welding in a shielding gas environment. The electrode is a wire fed into the weld pool at a constant speed. Carbon dioxide or a mixture of gases is supplied to the welding zone through a hose. They displace oxygen and protect the weld seam. The advantages of this type of welding are the absence of slag, high quality of the weld, and the ability to weld thin metal.
- TIG. Welding of non-ferrous metals in a protective gas environment using a non-consumable electrode. Widely used for joining non-ferrous metals and alloys.
There are several types of different technologies used in automotive or shipbuilding. They require special qualifications of the welder. The skills of fusing or manually feeding wire into the weld pool are specific and accessible to welders of the highest ranks.
Tips for a beginner welder
- Make preparations before starting work.
- Do not forget to clean the welded elements from dirt and rust, oil, paint, and dust.
- Work can only be carried out in protective equipment (mask, overalls, safety shoes), otherwise injuries during work are very likely.
- We select electrodes for each material individually. We don’t cook everything with smell.
- We dry the electrodes (sometimes you can warm them up with a cutter, but it’s better to do it in an oven as it should be).
- Pay special attention to the choice of mode.
So we answered the question of how to weld metal. If you still have any questions about welding in general, or about how to make a specific metal structure, we will be glad to see you on our website mrmetall.ru you will always receive the answers you are interested in, and also discover something new and useful and interesting things in the world of welding.
How to weld for a beginner
Are you full of enthusiasm and ready to learn the basics of welding? Or maybe you have plans to create large-scale structures? Cool down and take your time. Any experienced specialist will tell you that the first steps should be taken slowly. First of all, you should devote time to training, and only then move on to real tasks.
In our last article, we already talked about how to prepare your workplace and what protective equipment you will need. If everything is ready, then you can proceed to active actions. But at the same time, remember that it is better to practice the first ones on a simple, flat plate. Once you have practiced simply welding metal, you can move on to joining parts.