In a private house, country house or garage, quite often there is a need to connect various metal parts and create structures from them. It makes no sense to turn to professionals for help every time in such a situation, because you can purchase an automatic welding machine yourself.
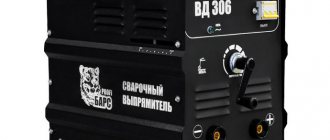
A wide selection of different devices are available in stores in different price categories, so welding with an inverter for beginners is the best that the market has to offer.
Basics of electric welding
Inverter devices are characterized by fairly high efficiency and ease of operation. The main load for the operation of such equipment falls on the electrical network.
It has storage capacitors that allow you to accumulate electricity and ensure an uninterrupted welding process and soft ignition of the arc.
Unlike old devices, which provide a maximum boost of electricity for work, which can result in traffic jams, an inverter allows you to safely operate from a household power supply.
Defects in welds.
To understand how to cook using inverter welding, you need to understand the basics of its operation.
In such manual welding machines, the arc is formed as a result of contact of the electrode with the product. Under the influence of temperature, the metal and electrode melt. The molten part of the rod and the product form a bath.
The coating of the rod also partially melts, turning into a gaseous state and closing the weld pool from oxygen. This allows you to protect the product from oxidation.
Each electrode, depending on its diameter, is designed for a certain current strength. If you reduce it below the required value, then the seam will not work. Increasing this parameter will allow you to form a seam, but the rod will burn out too quickly.
At the end of the welding work, the coating cools down, turning into slag. It covers the connection of metal parts from the outside. By tapping the seam with a hammer, it is quite easy to get rid of the slag.
There are also simple welding rules. To ensure that the arc does not go out during work, the welder should maintain a constant distance between the rod and the workpiece.
This is not easy to do because the electrode melts, so it must be fed into the welding zone at a constant speed. In addition, you must try to guide the electrode evenly along the joint in order to obtain a seam of maximum quality.
Selection of devices and components for welding
When preparing a beginner for independent welding, it is necessary to prepare all the components. Having prepared everything correctly, we will greatly facilitate our task.
You should choose a device based not so much on how it looks and how much it costs, but on its technical characteristics.
There are many devices on offer; anyone can choose a welding device that meets the necessary requirements and financial capabilities.
When choosing a machine, experienced welders look at its characteristics, ease of use, reliability, and workmanship. Choosing the right machine will help you easily learn to weld.
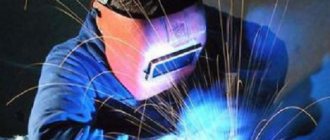
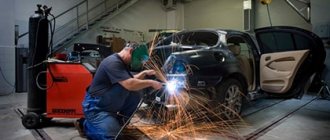
The device has been selected, let's start choosing equipment. This is a very important part of welding work. The equipment is designed to protect you from the negative effects of welding - flashes, ultraviolet radiation, splashes of molten metal.
A standard welder's kit contains a welding mask, a balaclava, protective overalls, boots, and heavy-duty gloves. We recommend a mask with chameleon-type lenses. They are somewhat more expensive, but much more convenient to use than ordinary glass.
You can sew the robe yourself, the main condition is that the fabric should be rough and dense. The use of equipment is mandatory; do not start welding work if any of the equipment is missing.
In particular, when igniting an arc, if the mask is not worn, the retina of the eye may be damaged. Symptoms of such a burn may not appear immediately.
Even experienced welders have situations when they can, in professional terms, “catch the bunny.” Usually this is due not so much to ignoring the rules of safe welding, but to the intensity of the work.
Therefore, you need to take breaks from work, and it is also advisable to have eye drops on hand.
Safety instructions must be strictly followed. Failure to comply with them often leads to injuries with burns. Also, if these rules are not followed, fires often occur.
Before welding, make sure you have a working fire extinguisher. Also, do not forget about the strong heating of the parts during the welding process; do not touch the parts until they have cooled down.
Welding methods
Nowadays there are many methods used for welding. They are divided according to various criteria. This information will be useful for a beginner, so you should definitely read it.
Depending on the heating, the edges of the product may completely melt or be in a plastic state. The first method also requires applying certain forces to the parts being joined - pressure welding.
In the second, the connection is formed as a result of the formation of a weld pool in which there is molten metal and an electrode.
There are other welding methods in which the product does not heat up at all - cold welding, or is not brought to a plastic state - connection using ultrasound.
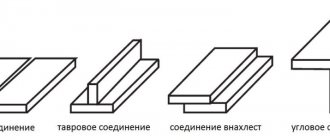
Methods and types of welding.
Other types of welding are listed below:
- Forge. In this method, the ends of the joined products are heated in a forge and then forged. This method is one of the most ancient and is currently practically not used.
- Gas press. The edges of the products are heated with oxygen acetylene over the entire plane and brought to a plastic state, after which they are subjected to compression. This method is highly efficient and productive. Used in the construction of gas pipelines, railways, and mechanical engineering.
- Contact. The parts are included in the electrical circuit of the welding equipment and current is passed through them. A short circuit occurs at the point of contact of the parts, as a result of which a large amount of heat is released at the junction. It is enough to melt and join metal.
- Butt, point and suture are varieties of the contact method of fastening the product.
- Roller. Used in joining sheet structures that require high-quality and reliable seams.
- Termite. The metal is held together by burning thermite, a mixture of iron oxide powder and pure aluminum.
- Nuclear-water. The edges of the product are melted by the action of an arc burning between two tungsten electrodes. The electrodes are connected to special holders through which hydrogen is supplied. As a result, the arc and liquid metal of the weld pool are protected by hydrogen from the harmful effects of atmospheric gases such as oxygen and nitrogen.
- Gas. The essence of the method is to use a flame to heat and melt parts. A flame is produced by burning a flammable gas in an oxygen atmosphere. The gas-oxygen mixture is produced using special burners.
Under the action of an atomic-hydrogen welding arc, hydrogen molecules are split into atoms and then recombined upon contact with cold metal. As a result of this process, a large amount of heat is released. The method is used for welding metals of small thickness, copper and alloys based on it.
The gas welding method refers to fusion welding. The gaps between the products are filled using filler wire. This method is widely used in various areas of human life. Most often found when joining thin-walled products, non-ferrous metals, cast iron.
When working with an inverter device, the polarity of the electrodes is of no small importance. Depending on the scheme, the heating intensity of the part changes, which allows you to create different welding conditions.
Wire requirements for semi-automatic welding
What else is needed for semi-automatic welding? Of course, the main equipment, without which the welding machine cannot work, is a special wire that performs the function of an electrode. It is fed using a special mechanism.
There are two types of materials for welding when working with semi-automatic machines:
- electrode flux-cored wire;
- solid welding wire.
There are more than 76 varieties of the second option, but only a small part of them are used in practice. Other types of equipment are highly specialized and are used in production. The main criterion when choosing wire is the type of metal used when welding the structure. Mostly, low-alloy and low-carbon steels are welded using automatic machines, using copper-plated and copper-free wire.
Copper-plated wire has gained the greatest popularity among welders due to the presence of an anti-corrosion coating. But not everyone knows that when copper melts, hazardous vapors are released into the air. Non-copper-coated wire is not so harmful and has a coating layer that protects against corrosion.
In addition, semi-automatic machines use electrode flux-cored wire, which does not require shielding gas for welding. It has a special marking, for example, this: SV-08G2S. Its decoding means:
SV – welded wire;
08 – in its composition the percentage of mass fraction of carbon is 0.08%;
G – this letter denotes manganese, which is present in the chemical composition of the wire;
2 – manganese content 2%;
C – the presence of silicon in the wire composition: if the letter does not have a digital value, then its presence in the composition is no more than 1%.
This grade of wire with a diameter of 0.6 mm is used for welding low-alloy steels (which is 90% of all rolled metal). It is used both in everyday life and for repairing body parts. In addition, this material can be used in installations with currents up to 500 A.
When welding parts made of stainless steel, wire of the S01X19N9 grade is used. Copper and aluminum alloys are welded in an argon atmosphere using wire of the SV-AMts, SV-A85 and SV-97 grades corresponding in composition.
One important piece of advice can be given: when operating a semi-automatic machine outdoors or in the field, you can use cored wire, which does not require blowing with protective gas.
Step-by-step instructions for welding with an inverter
First of all, for welding you need to have protective elements:
- gloves made of rough fabric;
- welding mask with a special filter protecting the eyes;
- a rough jacket and trousers made of material that will not catch fire from sparks that appear during welding;
- closed shoes with thick soles.
Electrode position during welding.
Before you start welding with a welding inverter, you must take the necessary measures aimed at creating safe working conditions.
Proper preparation of the workplace consists of:
- ensuring the necessary free space on the table, you should remove all unnecessary objects that could get splashed;
- creating high-quality lighting;
- Welding work must be performed while standing on a wooden floor that protects against electric shock.
Then the current is adjusted depending on the thickness of the parts and the electrodes are selected. The latter need to be prepared. If they were just purchased in a retail chain and their quality is beyond doubt, then this step can be skipped.
If the rods have been in an unheated, damp room for a long time, then they need to be dried for two to three hours at a temperature of 2000 degrees. For these purposes, you can use an old oven or special equipment, if available.
After preparing the electrodes, the ground terminal is connected to the product.
To obtain a high-quality and reliable connection, the metal must be prepared:
- rust is completely removed from the edges of the product;
- using solvents, various contaminants are cleaned;
- At the last stage, the edges are checked for cleanliness; the presence of grease, paint and other contaminants is unacceptable.
Next you need to connect the welding inverter. It is better to carry out training on a thick metal sheet, forming a seam in the form of a roller. Make the first connection on metal lying horizontally on the table. Draw a straight line on it with chalk along which the seam will go.
Electrical circuit of the inverter.
In the process of training on such an object, you can significantly improve your welding technique.
The welding process begins with ignition of the arc.
There are two ways to perform this action:
- scratching on metal;
- tapping on metal.
The choice of method depends on the person’s preferences; the main thing when igniting is not to leave traces of welding outside the joint area.
After igniting the arc from contact with the metal, the arc is ignited, the welder removes the electrode from the surface of the part a short distance corresponding to the length of the arc and begins welding.
As a result, a weld is formed at the junction of two metal parts. It will be covered with scale - scale on the surface. It needs to be removed. This is very easy to do by tapping the seam with a small hammer.
Welding technology
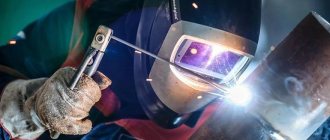
How to learn to weld metal from scratch? This question is asked by all newbies. First, let's decide what key elements we need to complete the work. This is an inverter, equipment and, of course, electrodes. Welding electrodes are widely used; they allow you to quickly and efficiently join various metals.
For welding with an inverter, so-called consumable electrodes with coating (or coating) are used. The coating plays a protective function; it does not allow oxygen to penetrate into the welding zone and deteriorate the quality of the seam. Also, thanks to the coating, the arc is easier to ignite and maintain, it is stable and burns evenly.
There are many types of coatings. The coating is selected based on the metal that we need to weld. The most popular coatings are basic, rutile and acidic. Electric welding with acid-coated electrodes is carried out using both direct and alternating current. Using acid electrodes, you can easily weld contaminated metal (but we still recommend preparing it before welding, we wrote about preparation in this article). Acid electrodes are usually used when welding not very important structures made of low-carbon steel.
Basic coated electrodes are very interesting. When melting, the coating releases carbon dioxide, which does an excellent job of protecting the welding zone. The seams are very strong and durable. In this case, you need to work only with direct current, setting reverse polarity. But such electrodes require very thorough cleaning of the metal before welding; you need to clean the surface, remove all contaminants and pockets of corrosion. If you neglect the preparation of the metal before welding, then after working with welding electrodes with a basic coating there will be a lot of slag on the seam and it will be difficult to remove it.
Rutile coated electrodes are the most popular. They are universal, inexpensive and allow you to weld any metal. They can be cooked with direct or alternating current, but always read the packaging. After all, some manufacturers produce rutile electrodes for working only with alternating or only with constant.
The basics of welding do not end there. It is necessary to choose the correct size of the electrode, namely its diameter. Everything is simple here: the thinner the metal, the smaller the diameter. Here's a simple example: we need to weld a thin sheet of metal (for example, aluminum). For these purposes, we take an electrode with a diameter of up to 2 millimeters. And so with all other metals. The quality of the seam directly depends on the choice of diameter.
By the way, there are different types of seams. You can see them in the picture below.
The bottom seam is the easiest. Cook it by placing the part horizontally on a flat surface. We recommend starting training from the bottom seam. The horizontal seam is similar to the bottom one, but is more difficult because it requires more skill from the welder. Proceed with horizontal seams only after you have learned how to make the bottom seams well.
Vertical seams are even more difficult than horizontal ones. The electrode must be guided from top to bottom and, under the influence of gravity, the molten metal rapidly flows down. It takes a lot of experience and skill to learn how to make a vertical seam so that it is evenly cooked. But the most difficult part is the ceiling seam. Here all the difficulties are brought together. If a welder can weld a ceiling seam without any problems, then he is a true professional. Strive for this and you too can become a true master of your craft.
We are often asked how to learn how to weld a pipeline or how to properly learn how to weld various pipes? For some reason this causes difficulty for many people. This is not surprising: when welding a pipe, the seams are combined, you will have to be able to weld both the bottom and vertical and ceiling seams to connect the pipes. The only thing we can advise is to practice more. Don't expect to learn some unique method that can easily weld complex seams. Only by practicing will you improve your skills.
Now let's talk about polarity. We have already mentioned this word in the article. Let's put it in simple words: with straight polarity, the part heats up quickly, the electrode is consumed little. And with reverse polarity, the opposite is true. We wrote more about reverse polarity in this article, be sure to read it, where we explain everything in detail. Reverse polarity is most often used. Well, direct polarity is needed for cutting metal, for example.
The first connection of metal with your own hands should begin with the bottom seam, since it is the simplest, as we wrote earlier. For the test, you can use unnecessary metal parts that you find in the garage. Buy popular electrodes (for example, MP-3 electrodes), you can choose cheaper ones. Such electrodes will allow a beginner to quickly light and conduct an arc, and the seam will not be of very high quality (but this is not the main thing yet). Don't buy SSSI electrodes because you simply won't be able to handle them due to lack of experience.
Next you need to learn how to light an arc. There are two methods: the tapping (or touching) method and the scratching method. Heat the tip of the electrode with a torch and tap it on the part, then lightly move it over the part. Movements should be smooth and confident, moderately fast. Otherwise, the electrode will stick to the metal. Preheating the electrode will make it easier to light the arc, but in the future you must learn to light the arc without warming up.
The striking method is similar to lighting a match on a box. Quickly move the tip of the electrode over the metal surface, without preheating. When struck, the electrode already warms up sufficiently and when it is brought to the surface of the metal, it easily ignites. This makes it easier to start welding.
Wait for the arc to start. Then start welding. As soon as you bring the electrode to the metal, you will see how it begins to melt and an indented area is formed. It is called a weld pool. In the weld pool, all processes are visually visible: the release of shielding gas, the formation of slag and metal spatter. Monitor the processes in the weld pool to understand how to make a weld.
The seam is carried out smoothly, the electrode is kept at an equal distance, without changing it along the way. We recommend keeping the arc short, i.e. Place the electrode at a distance of 3 millimeters from the metal surface. Beginners may want to set the amperage to a lower value to avoid accidentally melting more metal than necessary.
There are three types of suture management. You can see them in the picture below. The most popular type is the forward angle (denoted by the letter “b” in the picture). The letter “a” denotes a seam at a right angle, the letter “b” denotes a seam that is made at an angle backwards. Depending on the chosen direction, the finished seams also differ. For beginners, we recommend that you first guide the electrode at an angle forward.
The welding of metal does not end there. The seam must be properly finished and the work completed. Do not abruptly tear the electrode off the metal surface, otherwise the arc will go out and a noticeable crater will remain at the end of the weld. This may cause further splitting of the connection. Instead, hold the electrode in one place for a couple of seconds and then gently move it back.
Forward and reverse polarity
Melting of the metal for welding occurs under the influence of an arc. It, as noted above, is formed between the surface of the product and the electrode, since they are connected to opposite terminals of the device.
There are two main options for welding, differing from each other in the order of connection and called direct and reverse polarity.
In the first case, the rod is connected to the minus, and the part to the plus. In this case, an increased flow of heat occurs into the metal. As a result, a deep and narrow melting zone is formed.
Direct and reverse polarity.
With reverse polarity, the electrode is connected to the positive, and the product to the negative. In this case, the melting zone is wide and shallow.
The choice of polarity is entirely determined by the product you are working with. Welding can be performed with two types of polarity. When choosing, you should take into account the fact that the element connected to the positive is subject to greater heating.
For example, it is difficult to weld thin metal products due to possible overheating and burning. In this case, the part is connected to the minus. Currents are also selected according to the diameter of the electrode and the thickness of the metal. This data is taken from a special table.
Requirements for special protective welding work clothing
are imposed on the welder's workwear :
- resistance to heat, sparks, splashes, scale, elevated temperatures, hot surfaces;
- protection from general industrial pollution;
- absence of deformation due to exposure to harmful welding factors;
- presence of moisture-repellent characteristics;
- high wear resistance, durability, strength, practicality;
- ease and simplicity of cleaning from dirt;
- compliance with sanitary standards, environmental safety;
- high-quality tailoring and accessories;
- providing comfort and freedom of action.
These requirements are universal ; they apply to items of clothing and additional accessories, regardless of the season of use.
But it should also be noted that there are specific requirements that a specific type of workwear must meet: winter, insulated and summer.
Winter
Winter workwear should protect not only from the full range of welding influences, but also from cold, frost, precipitation, strong and piercing winds.
Therefore, suitable materials for this type of uniform will be strong and dense fabrics capable of performing a thermal insulation function: split wood, leather, cloth .
In addition, a mandatory element of winter equipment is a warm lining made of natural fiber: fur or wool.
Read more about winter suits here.
Summer
Special clothing for use outdoors in summer, in warm rooms and in confined spaces is made from light and thin materials that provide an excellent level of ventilation.
Also, fabrics should provide comfort when touching open areas of the body and not cause allergic reactions. About summer suits here.
Insulated
Insulated workwear models are designed for use in particularly harsh climatic conditions, at low temperatures, and strong cold winds.
Reliable protection from weather conditions is provided by the density of the base material and the thermal insulation of the lining .
Warm clothing has several levels of protection , which are indicated in the characteristics of the equipment. It is recommended to pay attention to clothes with removable insulation .
Effect of electrode feed speed
The feed rate of the welding electrodes must provide the required amount of molten material supplied. Not having enough of it can lead to undercutting. This factor is very important in both direct and reverse polarity when welding.
During electric arc welding, due to the rapid movement of the rod along the joint, the arc power may not be enough to heat the metal. The result is a shallow seam that lies on top of the metal. The edges remain unmelted.
Slow advance of the electrode leads to overheating. In this case, it is possible to burn the surface and deform the thin metal.
Modern welding machines have a wide range of different functions and capabilities. Nevertheless, at the moment, most of the quality work done is still determined by human skill.
How to start welding metal workpieces
The first step is to light the arc. You scratch the coating on the end of the electrode against the metal, and when a spark appears, move the end of the electrode 2-3 mm from the surface of the part.
Using circular movements, we achieve the appearance of a weld pool, trying to maintain a gap between the electrode and the part, after which we begin to move the electrode along the part in a straight line. The angle of inclination of the electrode is 45 degrees.
And in the end you will end up with something similar to a seam, although it is still far from ideal. You will need to train your hand.
Now let's try to weld two parts. And the first thing you need to do is clean the metal from rust and dirt with a grinder about 2-3 cm from the edge. If the metal is thick, then it is necessary to maintain a certain gap.
We put two tacks: one at the beginning of the seam, the second at the end. And we weld the entire seam along its entire length, making zigzag movements with the electrode. You may not succeed the first time, but don’t be discouraged, everything comes with experience.
The main thing is to remember to maintain a gap between the part and the electrode, and also keep the electrode itself at an angle. Well, it is important to choose the current strength correctly. Moreover, it is advisable, if possible, to tilt the part slightly so that during the welding process the slag flows in the opposite direction from the direction of the electrode.
It is better for beginners to weld vertical seams with a tear. That is, first we put a “point”, wait until it cools down a little (but at the same time it should remain red), then we “light” the electrode from it, and put a new “point”. In this way we go through the entire seam point by point from top to bottom.
You can get more detailed information about the intricacies of welding for beginners in this video.
Andrey Vasiliev
Ask a Question
Effect of current
Welding current selection table.
When mastering the basics of welding with an inverter, it is important to understand what current strength needs to be set in each individual situation. A properly configured inverter welding machine is the key to success.
Data on the current value are taken from the table, which also shows the size of the electrodes. However, these current values are not exact; they are plus or minus several tens of amperes.
Pros and cons of the profession
Pros:
- high demand in the labor market;
- fairly high salaries for experienced welders.
Minuses
- difficult working conditions (sometimes you have to work in extreme conditions, at high altitudes or under the influence of various meteorological factors);
- heavy load on vision due to the high brightness of infrared and ultraviolet radiation, electric arc (the appearance of the disease electroophthalmia);
- the presence of other occupational diseases due to inhalation of industrial dust (silicosis, pneumoconiosis, bronchial asthma).
Features of welding thin metal
In everyday tasks, we are most often faced with the need to join thin metal. In this case, it is necessary to remember the basics of inverter welding for beginners, namely the importance of connecting the product to the correct pole. Thin parts are connected to the “minus” of the welding machine.
To learn how to weld correctly and get beautiful seams, you need to practice.
Here are some useful tips that can help improve your skills:
- start cooking using the minimum current;
- form the seam at an angle forward;
- use reverse polarity;
- secure the part to reduce distortion during welding.
Common mistakes made by newbies
Arc welding diagram.
Beginner welders tend to make mistakes due to ignorance of the basics regarding the use of welding equipment. For example, beginners may not know how to choose the correct polarity for welding with an inverter, which will lead to poor-quality joint formation or even burning of the part.
The following main errors can be identified:
- neglect of safety precautions;
- incorrect choice of welding machine;
- use of low-quality or unprepared electrodes;
- work without trial seams.
For beginners, it is worth separately noting one feature if you cook Resanta by welding. This equipment is very popular, but it has short connection cables, which can create inconvenience in operation.
Let's sum it up
Having learned to work with welding equipment, it will be possible to solve many everyday problems that often arise when working in the country or in the garage. Beginners should pay special attention to the polarity of welding parts of different thicknesses with an inverter.
By understanding how to properly configure the equipment and choose an electrode, you will be able to obtain high-quality seams on any product. Be sure to pay attention to the forward and reverse polarity of connecting the welding inverter.
When welding thick parts, direct polarity is used when welding with an inverter, and for thin parts, reverse polarity is used.
Welder tools
It's worth noting that some welders do not use many of the tools that are listed in this construction magazine article. In addition to an iron hammer, metal brush and clamps, it is rare to see an inspection mirror, KL1 and KL2 templates, as well as a number of other specialized and highly targeted tools in a welder’s box.
Of course, the type of tasks performed during welding largely depends here. And if one welder only needs a hammer, a grinder and a welding machine to complete the job, then another cannot do without an inspection mirror and templates.
Welding tools and accessories include:
Electrode holder - it is with this device that the welder holds the burning electrode. The electrode holder should be easy to use and should not weigh too much. The optimal weight of the electrode holder is no more than 0.5 kg.
Welding helmet - without this device it would not be possible to weld. The welding mask protects the eyes and face from ultraviolet radiation and “bunnies”. Therefore, the better the quality of the welding helmet, the safer it will be to weld. The best option in this regard is the automatic Chameleon mask.
Welding machine - without it there would be no welding at all. Today, the most popular are welding inverters that are light in weight and small in size. You can wear such a device directly on your shoulder.
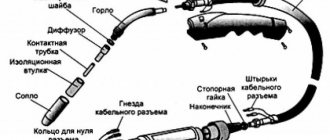
Welding wires - through them the current flows from the welding inverter to the ground clamp and electrode holder. Welding wires must be thick and in high-quality rubber insulation. The safety of welding work depends on these two conditions.
What a welder can't do without
The following list includes tools that are no less important, namely:
A welding hammer is a small hammer with a pointed end used to knock slag off the weld metal. You can see the quality of the weld only after completely removing the slag crust from its surface. You can buy a hammer for welding, but most welders prefer to make it themselves, so to speak, to suit their needs and requirements.
Metal brush - used for preliminary surface preparation. You can also add a grinder here, which can be used to remove rust from metal.
A chisel is an equally important tool for a welder, which is necessary for cutting out weld defects. The chisel is also used to prepare the edges of the metals being welded, for example, when welding cast iron.