Absolutely every car owner will eventually be faced with the need to do car body repairs. To carry out this type of activity, appropriate specialized knowledge and skills are required, and the work will also require special equipment and tools. In all cities, there are specialized services where the driver can leave his car for repairs, and qualified craftsmen will carry out body repairs on the car: they will correct all defects, perform painting, and generally return the car to its salable condition.
Large bodywork services use the conveyor type. The assembly worker prepares the car for the upcoming repair, the tinsmith aligns fragments of body parts, and the painter finally carries out the painting. There are not only large service shops, there are also small companies that will offer you car body repairs. In Moscow there are many “small” service centers where all work is carried out by one master. There is no need to think that the quality may be worse, quite the opposite - small auto repair shops quite often surprise with the high quality of the work done and the low cost of repairs.
What stages does body repair include and what does your car go through to acquire a presentable appearance?
Estimate the cost of repairs from a PHOTO in 5 minutes!
Make a short call to the specialist: +7 and make sure that we are the best service in terms of price/quality ratio
. Send a photo of the damaged parts and within 5 minutes the specialist will make a calculation!
Viber
Telegram
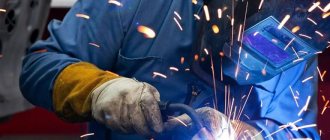
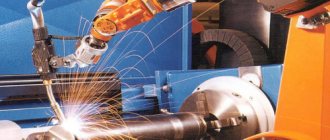
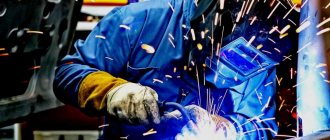
An important stage in car repair is welding. They are used to connect metal parts. Body welding work is considered one of the most complex, so its implementation should be trusted exclusively to highly qualified specialists who have special theoretical training and who have professional equipment at their disposal.
The peculiarity of welding work is that during its implementation it is necessary not only to achieve high quality and strength of the connection, but also to ensure the aesthetic appeal of the body. The last requirement is especially important if the part is in plain sight. Otherwise, a rough weld will ruin the visual appeal of the vehicle.
How to prepare a car for restoration
Before body repair, perform the following steps:
- Metal stripping. You can only cook parts from which traces of paint and rust have been completely removed. It is also necessary to dismantle elements that complicate repair work.
- Treating the affected areas with automotive primer. Particular attention is paid to the edges of the defect. This method of metal preparation is used with caution. Excess composition on the surface leads to rapid melting or combustion of the material.
- Removing moisture from surfaces. The presence of water droplets negatively affects the quality of the seam, contributing to the formation of voids.
We recommend reading: How many categories do welders have?
When you can't do without welding
As a rule, body welding work is required to replace or restore body elements, repair radiators, engines, fuel tanks, mufflers, damaged car frames, and much more. As you can see, welding is used to perform various types of work. It is versatile and allows you to eliminate various faults.
There are different types of welding that make it possible to protect seams from the negative effects of the environment. This allows you to prevent corrosion processes at the site where the seam is formed. To do this you will need to use an advanced tool.
Types of welding machines
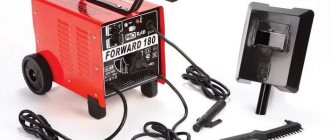
Body welding is performed by two types of welding machines. The semi-automatic machine and inverter cope well with the tasks and provide an even and smooth seam. If you have the device at home, you can perform car body repairs without going to a car repair shop.
The power of welding devices allows you to weld metal with a thickness of 0.7-4 mm . Since the wings are made of thin metal, and the side members are thick, this property makes it possible to eliminate damage to the entire vehicle body.
There are also combined inverter semi-automatic machines that combine the advantages of both types.
Semi-automatic welding
A semi-automatic device is considered one of the best ways to weld a car at home. The device is universal and copes well with any task. Cooking can be carried out even on surfaces that have suffered from corrosion or have become very thin during the operation of the vehicle.
Using a semi-automatic machine , you can easily weld both the body itself and make a patch on it from a couple of centimeters to a meter. Anyone can work with the device, as it is easy to use and provides excellent quality joints.
The device prevents metal burning, so the seam comes out even and smooth .
Inverter welding machine
The inverter operates using high frequency current. The device is used mainly in workshops, as it is used for welding thicker parts. Most often the following are brewed using an inverter:
- Frames.
- Winches.
- Fog lights.
Inverter welding is used in places where delicacy and increased caution are required. It is quite possible to do welding work yourself using an inverter, but this will require minimal skills in working with the device. It is also important that the place where the repair is carried out has a thickness of no more than 3 mm . The main advantage of this method is the speed of repair, as well as the high quality of seams.
Which method is best for a beginner?
For a beginner, it will be more common to use an inverter semi-automatic machine . If you have not previously had experience using a semi-automatic machine, then it is better to carry out repairs using an inverter. Both devices provide a high-quality joint, but the likelihood of poor-quality welding in a semi-automatic machine is quite low.
The inverter also has a feature that does not allow it to be used in rooms with high humidity or dust. Due to the presence of foreign impurities, the quality of the seam deteriorates.
Why you shouldn’t do body welding work yourself
Many drivers are considering the possibility of performing car repairs themselves, including welding work. It may seem that there is nothing complicated about this - just select the appropriate tool and perform the required actions. However, this is not the case.
Specialized organizations use not just welding machines, but expensive professional equipment that allows them to determine the type of welding and the optimal temperature for a certain type of work and material. The optimal welding method depends on the type of damage and the metal. The use of special control points will allow you not only to carry out welding, but also to control the geometry of the body. This cannot be achieved in a regular garage.
Car welding instructions
The procedure for restoring the body or other parts of the car depends on the chosen method.
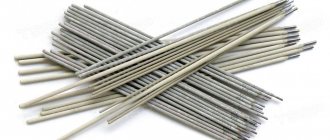
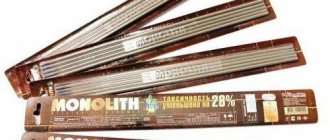
Using the Electrode
This method is used in the absence of high requirements for the aesthetic qualities of the seam . Choosing the right electrode for the type of metal helps ensure a strong connection. It is recommended to use inverter equipment that supports a stable arc. The reliability of the weld depends little on the experience of the welder.
To reduce the likelihood of joint deformation, welding work is performed in the following sequence:
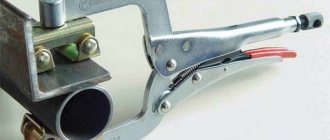
- Create potholders.
- Apply short stitches in 5 cm increments.
- Weld the part with a continuous seam.
After each step, take a short break to allow the metal to cool. Welding thick automotive parts can take 3-5 hours. Forced cooling is prohibited: it greatly reduces the strength of the connection.
Semi-automatic device
To weld with such a unit, you will need copper-plated wire with a diameter of 1 mm, coarse sandpaper, a gearbox, and carbon dioxide.
We recommend reading: How to treat an eye burn from welding
The work is carried out as follows:
- The edges treated with abrasive material are installed as close to each other as possible. For fixation, self-tapping screws, bolts, and clamps are used.
- Set the required current strength and supply speed of the consumable material using the regulators located on the device body.
- The gas cylinder is equipped with a reducer and a hose. Unscrew the nozzle and remove the tip from the burner.
- Install a coil of wire into the apparatus. The free end is inserted into the feed mechanism. Place the tip on the wire and return the nozzle to its place.
- The polarity is set: the holder is connected to the plus, the burner to the minus. The opposite option is installed when using wire that is not coated with copper.
- Connect the unit to the electrical network. The burner is brought to the area to be treated. Press the button to start the supply of gas and filler material. To form a long seam, you need to weld 3-4 points. Next, stitches 2-4 cm long are made.
- Wait for the metal to cool, weld the distances between the tacks.
SAIPA-165
Inverter Features
The popularity of such devices is explained by their compact size, low power consumption, the use of new current conversion technologies, and an expanded range of modes. The unit can operate in a wide range of input voltages. The arc is excited quickly and burns stably.
Many people starting work for the first time wonder whether it is possible to cook a car with an inverter. The process is not much different from standard welding, but the seam is of lower quality - uneven, thick.
The metal overheats, which can cause it to become deformed. Inverter technology is used to repair hidden places, such as the bottom.
Examples of work we have completed:
Our services and their costs
- Removal and disassembly of parts from 1500 rubles
- Restoration of part geometry from 3000 rubles
- Welding work from 2000 rubles
- Assembly of the part and installation in place from 1500 rubles
The Auto-Moto Soyuz body center will perform body welding work at the highest level in the shortest possible time. You won't have to part with your car for long. Contact us! We will return the lost reliability, functionality and aesthetic appeal to the body of your vehicle!
Body finishing
After completion of electric welding, perform the following steps:
- Clean welded joints from slag. This reduces the likelihood of oxidation of metal elements. To treat hidden places, use an iron brush. Open areas are sanded with a grinder and a special wheel. A sander with a burr is suitable for cleaning hard-to-reach areas.
- Degrease treated surfaces by wiping them with solvent. After this, the parts are coated with an anti-corrosion agent or acid primer. The best option is epoxy putty, which protects surfaces from moisture and air. It aligns the welded joint. The composition is applied in a thin layer and left for a day. You cannot dry the putty with a hairdryer.
- Re-treat the surfaces with sandpaper. Apply the second and third layers of putty. Prepare the body for painting.
We recommend reading Samples of technological map for welding work
Seam sealant for cars is used to protect connections in hidden places. It is leveled and painted. The sealant is applied using a pneumatic sprayer with a plastic nozzle.
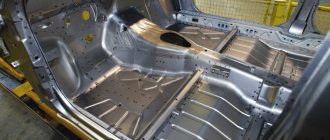
Replacing the bottom of a VAZ 2114
Today we will talk about replacing the bottom of the Samara and Samara-2.
And here is everything that will change in the near future: Packed for 16 pieces
So, let's get straight to the topic. Before starting car repair work, I would like to remind you about safety precautions, because I think everyone will agree that you want to see the finished result with two eyes, and not one... Part 1: Drilling and cutting out the bottom
. To cut out the bottom, we need to disassemble the interior. We completely disassemble the interior, remove everything, including the steering wheel and pedals. We take the Bulgarian wife (Bulgarian) in our hands and CAREFULLY cut off parts of the bottom along the lines (indicated in the photo in blue), so as not to touch the elements that will be useful to us in the near future.
After that, take a drill and put an attachment on it to remove rust from the metal.
We begin to process with a drill the places where we will drill out the points (indicated in the photo in red). Then we take a “7” drill, sharpened for drilling out points, and drill it out. For those who don’t know what it is, look here When all the work is completed, we dismantle the remains of the bottom using a hammer and chisel. Final result.
Part 2. Preparing the new bottom for installation.
1.
We take a new bottom trough and begin to clean the transport soil with a brush using a drill.
(Sometimes you don’t need to remove the shipping primer. It’s easy to check. We take a rag, wet it with 646 solvent and throw it on the area of the shipping primer. After 10 minutes, we carry out a test with another rag (clean): take it and lightly rub the shipping primer. If the primer is cleaned off or the rag turns dark , then we remove such primer. If the rag remains clean and the primer does not come off, then we leave it, having previously filled it with sandpaper R120, so that the anticorrosive will adhere better)
in the process
The process is quite hectic, but I managed it in 3.5 hours of continuous work.
Afterwards, we take sandpaper with a p80 mark and matte the metal so that the soil lays down normally and does not fly off in the future.
When the metal is matted, we dilute primers (acid and epoxy) and prime the bottom. First, prime with acid primer in one layer. Leave it for an hour to dry (you don’t have to do this step)
The best friend will not leave you in trouble)))
Then we prime with epoxy primer (I used novol protect 360 primer) in 2 layers. interlayer drying 15 minutes
The bottom is reliably protected
2.
When the bottom is primed, we leave it in the garage overnight and come back only the next day.
Why did I recommend not touching the lower elements of the bottom (all sorts of hooks, brackets) when cutting? Because we will weld them immediately in place, measuring all the dimensions as they were. I strongly recommend not to repeat my mistake, but to first weld the trough into the car and only then weld everything else to it.
, although if you have a flat floor, you can do it like I did. Only if the bottom moves a little with the propeller, it’s not my fault))) We weld all the studs, brackets, hooks and other elements, measuring everything from the old bottom.
We weld all the upper elements of the bottom, measuring all the old dimensions and marking everything with a marker.
All we need: a middle floor reinforcement, seat reinforcements, seat brackets, and those two little crap on which the outer slides are placed (the rightmost ones in the photo).
tried it on and circled it with a marker.
cleaned with R80 sandpaper
Covered with epoxy primer.
3.
We clean the side members from rust.
First of all, we clean everything with a metal brush and cover it with zinc. Then we clean off the zinc, fill it with R80 sandpaper and prime it with 2 layers of epoxy primer.
such a tsinkar.
rusty side members before cleaning.
cleaned and coated with zinc.
the zinc has worked.
Covered with soil (before that they cleaned it up, filled it with a line, no photos, because the limit is 20 photos per post)
Part 3. Installing the bottom.
Before installation, do not forget to make holes for cooking.
We insert the bottom through the bottom, having previously cleaned off all visible rust and covered it with epoxy primer. inserts with little effort through the bottom. First, we roll the car out onto the street and remove the front stabilizer. We place the bottom under the bottom, moving it forward as much as possible until it rests on the wheels. We lift the rear part and drag it back into the salon. Then we move it forward, and at the same time pull the front up. The bottom is installed! We scald and rejoice))) And yes, I completely forgot: when you cut out the bottom, blow out both the front and rear side members with a compressor so that they last longer, because a huge amount of sand, clay and earth flies out of them. Since I decided to finish everything in 2021, I will also change the door pillars so as not to save on my own car... Subscribe to the project. It will be more interesting further!