Welcome to the kuzov.info blog!
In this article we will look at how tinning and soldering of a car body is carried out.
Tinning and car body brazing have been used in automobile manufacturing and repair since the mid-1930s. Lead solder was used in the mass production of automobiles to be applied to the lap weld joints of roofs and rear fenders. Applying solder to the body for many years, before the advent of automotive putty, remained a traditional method of repairing a damaged car body (see article on the history of the invention and development of putty).
Content:
- Advantages of tinning and soldering the body
- Types of solders for body repair
- What is flux? What flux should I use for tinning the body?
- What tools and materials are needed for tinning and soldering the body?
- Tinning and soldering of car body
- Sealing holes
The process involves applying special solder to body panels to fill in imperfections, seal and mask weld joints, and solder holes. While putty is most often used in modern auto body repairs, solder is still used in classic car restorations. In fact, both tinning and putty have their advantages and disadvantages. The main disadvantages of using solder for body repair are the difficulty of its application and heating of the body. There is nothing too complicated in this process, but you need to follow some rules and acquire skills. When the burner is used correctly, the heating is quite gentle. Even the paint on the back side may remain intact. Putty wins in this sense, since it is applied to the surface easier than solder. In terms of characteristics, solder is much superior to putty. We will look at its benefits in this article below.
The solder is softened by heat and applied to the surface prepared by tinning. After cooling, a strong bond between the solder and the metal surface is formed.
Soldering the body may be necessary where other repair methods are difficult or impossible. Solder is convenient to use when the metal is too thick to straighten and there is no access from the back of the panel. Solder can be used in areas where there may be slight metal movement during vehicle operation and the putty may crack (welding joint). Solder seals the weld seam well and guarantees its corrosion resistance. Also, when using body solder, the thickness of the layer is not as critical as when using putty. Solder is well suited for areas of the body where you need to form an edge.
Advantages of tinning and soldering the body
- Solder sticks to the surface better than putty. The tensile strength (the force required to separate the solder from the metal it is applied to) is 423 bar. This is a very high figure.
- Even a thick layer of solder does not shrink, unlike putty.
- Solder has better elasticity and strength than automotive putty. Lead bends well together with the metal on which it is applied, so it does not crack.
- The solder will not crack or peel off on impact, as happens with putty.
- Solder is waterproof. Putty cannot be called completely waterproof.
- Solder can withstand high temperatures, so it can be used for repairs and subsequent powder coating.
- Another big advantage of solder over putty is that you don't have to worry about the hardening time. You can add additional solder directly onto the already applied layer. You just need to heat the surface and new solder and add it. There is no need to completely melt the already applied layer.
Soldering, tinning, gluing.
Soldering is one of the methods of forming permanent connections, widely used in modern instrument making, machine building and small mechanical engineering.
Bonding is a relatively new and very promising method for making fixed connections between parts and assemblies. It is also widely used in instrumentation and apparatus manufacturing. Both soldering and gluing are among the operations performed during the assembly process by the assemblers themselves.
Soldering is the process of obtaining a permanent connection of two or more metal parts using an additionally introduced metal or alloy, called solder and having a lower melting point than the metals being joined. The intermediate metal or alloy used in soldering is called solder. Depending on the melting point and mechanical strength of the solder, a distinction is made between soft soldering and hard soldering. In addition to solder, flux is used during soldering, the purpose of which is to protect the junction from corrosion during heating, ensure better wettability of it with molten metal and dissolve metal oxides.
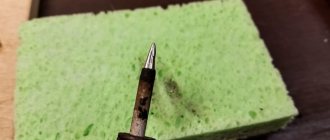
The main tool used for soft soldering is a soldering iron.
Melting techniques.
Manual soldering with soft solders is carried out using soldering irons of various configurations. The process begins with preparing the soldering areas, then after soldering the seam is cleaned. Preparation of solder joints usually consists of mechanical cleaning of the surfaces of parts, degreasing, etching and assembly for soldering.
When soldering with gas-flame torches, the joints are heated with the flame of blowtorches or gas burners.
When soldering by immersing parts in a bath of molten salts, the solder, while still in solid form, is first attached to the welding site of the parts.
When soldering in ovens, parts with pre-applied flux and solder are heated.
The most rational method is soldering with heating using high-purity currents. The soldering method involves placing the area to be heated in an electromagnetic field. As a result, a thermal effect is created that heats the part during soldering. All methods of soldering with heating can be divided into three main groups:
— manual periodic soldering with and without fixing the part in the inductor;
— semi-automatic periodic soldering with fixation of the part in the inductor;
— automatic continuous soldering.
Gluing as a method of assembling fixed and permanent joints has recently become widespread. The main advantages of bonding are: smooth external surfaces, better sealing, weight saving, reduced labor intensity and weight.
The technological process of adhesive bonding consists of the following:
Preparing surfaces for gluing comes down to cleaning them from dust and grease and imparting the necessary roughness.
The quality of the adhesive seam largely depends on the methods of applying the adhesive. The glue should be applied in one direction to avoid air bubbles getting into it.
After applying the adhesive, a soak containing a solvent is required.
Assembly and gluing of parts together is carried out using special devices and equipment. The main equipment for gluing are hydraulic or pneumatic presses and vacuum installations.
To harden the glue, a certain temperature regime and increased pressure in ovens are needed.
Inspection and testing of the adhesive joint should be given great importance. The main defect that often occurs during gluing is the so-called “non-gluing”. The quality of gluing is considered satisfactory if the destruction occurred in the material of the part, and not in the glue.
Tinning: Mechanical cleaning: clean the surface to a uniform metallic shine by brushing or grinding.
Chemical cleaning: degrease the surface with an aqueous solution of caustic soda. Tinning the surface: by immersion, prepare a clean metal container and lay in tin, melt the tin, then take the part and immerse it in a solution of zinc chloride, and then in molten tin and hold for 4 - 5 minutes.
Rubbing: wear canvas gloves. Thoroughly clean tinning areas. Apply a solution of calcium chloride to the cleaned areas for tinning and sprinkle it with ammonia powder, evenly heat the surface with a blowtorch to the melting temperature of tin and distribute the tin over the entire surface of the tinning. After final tinning and cooling, wipe the product with moistened sand, rinse with water and dry in sawdust.
Soldering safety precautions.
1.When working with a blowtorch:
· Working in a room without ventilation is prohibited. Before work, check that the ventilation is working properly.
· Before starting work, put on overalls.
· Light a blowtorch in a safe place, near a brick or special device.
· Do not over-pump air into the lamp tank.
· When working with a blowtorch: do not pour gasoline to the edge of the blowtorch cup, or into a burning or hot lamp. Light only a dry lamp.
· The lamp should only be extinguished by closing the control valve.
2.When working with a soldering iron:
· An overheated soldering iron should not be cooled in liquid.
· Soldering is prohibited: on products previously used to store flammable materials.
3.When using acids:
· When preparing etching solutions, only cold solutions are mixed.
· Store hydrochloric or sulfuric acid in glass bottles with ground stoppers.
· When preparing degreasing solutions, add caustic soda only to cold water.
· To avoid burns, do not pour water into the acid. Pour the acid into the water in a thin stream.
Types of solders for body repair
- There are different types of solders. For body repairs, soft (low-melting) solders are often used. They are sold in the form of rods, 45 cm long, of different thicknesses. In general, they are classified as lead free or lead free solders. The first type of solder was used for many years due to its ease of use. However, it has been banned in some countries for use in mass production due to health and environmental concerns. However, lead solder is still used by individuals and can be found commercially. Many craftsmen prefer to use lead solder.
- The ratio of its components (tin, lead) is indicated on the solder. Traditional body solder is 30% tin and 70% lead. May contain an additional component, for example, 74% lead, 25% tin and 1% antimony. Lead is hazardous to health. To use it, protective equipment is required and safety precautions must be taken into account. However, it is easier to use. It remains soft longer after heating (in the range of 180 to 260 degrees Celsius). This makes it easier to apply and level. This solder is easily applied to vertical and horizontal surfaces. Once lead solder has hardened, it is not recommended to process it with a grinder, as very toxic dust is generated. So, it is usually processed with a special body file, and at the final stage with a block of coarse sanding paper by hand. If you still use a grinding machine, then you need to use only coarse abrasive so that there is no suspension of fine dust. Lead residues after grinding must be disposed of immediately.
Solder containing lead (Pb 74%), tin (Sn 25%) and antimony (1%).
- Solder can have different lead to tin ratios (70/30, 60/40 or 50/50). Solder with lower lead content is also used in auto body repairs, but has a low ductility range (183ºC to 188ºC) so it is more difficult to use. Solders with this ratio are usually used on horizontal surfaces, since they quickly become liquid and can flow. The adhesion of all lead solders is approximately the same and depends on proper surface preparation.
- As an alternative to lead solder, safer lead-free solder has been developed. In all lead-free solders, tin is the main component. The other component may be silver, copper, indium or bismuth. Most lead-free solders have either a higher or lower melting point than lead solder. For body repairs, the most common lead-free solder is a mixture of tin and silver (94% tin and 6% silver or 96% tin and 4% silver). It has a higher cost. Lead-free solder is approximately equal in performance to traditional lead solder with a 50/50 (lead/tin) ratio. This solder has a higher melting point (221°C). Once heated, it remains soft for less time than lead solder, making it more difficult to align. When hardened, it becomes harder and more brittle. It is more difficult to process with a file. The advantage is that it can be sanded as it does not produce toxic dust. Although, do not forget about the respirator. An additional benefit of lead-free solder is higher tensile strength.
- Solder used in electronics typically consists of 60% tin and 40% lead. It may contain flux in the center. Rosin flux, often used with this solder, does not promote adhesion to steel, but acid flux may work well. This solder is best used only for soldering small holes, since its ductility range is very small.
- To work with aluminum bodies, a different type of solder (containing tin and zinc) is used.
Tinning methods
Tinning technology is implemented by melting solder, wetting the surface with solder and its further crystallization on the surface. According to GOST 17325-79, solder should be understood as a material with a lower melting point compared to the material from which the part is made. Tinning of copper, aluminum and steel is carried out with tin. For reference, the table shows the melting points of these metals.
| Metal | Melting point, degrees Celsius |
| Tin | 232 |
| Aluminum | 660 |
| Copper | 1085 |
| Steel | 1300-1500 |
There are two types of tinning:
- Galvanic. This method is used to tin products of various shapes and sizes under production conditions. If you have special equipment, you can tin radio and electrical parts at home. Galvanic tinning is performed in an electrolyte:
- alkaline;
- sour.
- Hot. The most ancient method of applying poluda. It is used for large parts of simple shape or wires and cables in preparation for soldering. Types of hot tinning:
- tinning by rubbing;
- tinning by immersion method.
Download GOST 17325-79
Galvanic technology
The process is based on the use of electric current and the occurrence of electrochemical reactions. Tinning occurs by immersing parts in a bath of alkaline or acidic electrolyte.
The main advantages of galvanic application of poluda:
- ensuring strong adhesion of the floor to the metal surface;
- uniformity of the applied layer;
- the ability to control the thickness of the coating, including on products of complex shape;
- obtaining a layer with low porosity;
- economical use of half and solder.
The main disadvantage is the high cost due to the consumption of electrical current. This process requires special equipment and highly qualified performers. Tinning using an electrolyte is associated with the complexity of preparing the solution. During the process, constant monitoring of the concentration of alkali or acid in the electrolyte, as well as the condition of the anodes and the surface of the bath, must be carried out.
When performing certain works in radio and electrical engineering, it becomes necessary to tin the copper surfaces of the boards before soldering. The simplest method is chemical tinning.
This is galvanic technology. Its essence lies in the fact that during the electrochemical reaction, copper ions on the surface are replaced by tin ions from a tin-containing solution. To carry out such tinning at home, you will need a soldering bath for tinning (tinker). The baths are affordable, compact (about 80 mm in diameter, 35-40 mm deep), with a power of 150-300 W. They can be used to prepare copper circuit boards for soldering by immersing them in solder, for applying semi-solder to electronic components, and for dismantling radio-electronic elements.
Solution for galvanic treatment
Two types of electrolytes are used for tinning:
- acidic, contain tin in the form of Sn2+;
- alkaline, tin is contained in the form of the SnO8 2- anion.
Due to the fact that tin has different valence in these electrolytes, its deposition rates differ. In an alkaline electrolyte, tin is deposited twice as slowly as in an acidic one.
Of the acidic electrolytes, the most widespread are:
- chloride;
- hydrofluoride;
- sulfate.
Acidic electrolytes must contain surfactants. It can be glue, phenol or gelatin. If a surfactant is not added, then the tin on the cathode will precipitate in the form of crystals and will not form a continuous layer. They must also contain enough free acid to inhibit the hydrolysis of tin salts. Otherwise, basic tin salts or sparingly soluble hydrates will form. Additionally, to increase electrical conductivity, conductive salts must be introduced into the solution (for example, in a sulfuric acid electrolyte it is sodium sulfate). If all these requirements are taken into account, the dissipative ability of an acidic electrolyte can be increased.
Alkaline electrolytes have better dissipation ability. It is advisable to use them for tinning small parts and parts of complex shapes.
There are many ways to prepare alkaline solutions. An electrolyte obtained from sodium stannate salt is considered easy to prepare. It does not contain chlorine ions, which reduces the risk of corrosion of the steel walls of the tinning bath. If problems arise during the operation of the baths, they can be easily eliminated by adjusting the properties of the electrolyte.
The advantages and disadvantages of electrolytes are given in the table.
| Electrolyte | Advantages | Flaws |
| Sour | · high metal current yield; · low cost; · safety. | · weak scattering ability; · use of simple shaped parts for tinning; · the need to introduce additional substances into the electrolyte to obtain a high-quality coating. |
| Alkaline | · use for tinning products of any shape; · high scattering ability; · obtaining a dense, non-porous, fine-crystalline coating; · the process can be carried out in baths without special lining. | · low metal current yield; · low current density; · the need for additional equipment for heating and ventilation. |
The solution for chemical tinning of copper is called “liquid tin”. It is prepared this way. To 1 liter of distilled water add 20 g of tin chloride, 40 g of concentrated H2SO4, then 80 g of thiourea to reduce turbidity. To prevent the formation of tin crystals on the surface, an additional 5 g of OS-20 is dissolved in 200 ml of water. Then the solutions are mixed. Let it sit for about three hours. Then a prepared and cleaned copper product, for example a board, is immersed in the solution. After a shiny layer of tin appears on the surface, the solution is drained.
The method of acid soldering of copper or aluminum wires of different sections is often used. In this case, soldering acid is used as a flux. Thanks to it, a reliable connection between metal and solder is created, and deposits and oxides are removed from the surface of products. The most common acid is an aqueous solution of zinc chloride.
If necessary, you can replace soldering acid:
- aspirin dissolved in water (1 tablet per glass of water);
- concentrated acetic or citric acid;
- concentrated hydrochloric acid (not suitable for soldering thin parts, as it can damage them);
- soldering grease;
- orthophosphoric acid.
Hot tinning
Hot tinning can be done in one of two ways.
- Immersion tinning. The tinning process is as follows:
- prepare the part;
immerse it in a container with a solution of zinc chloride;
- Use pliers to remove the part from the container;
- Without removing the zinc chloride layer from the surface, transfer it to a bath with molten tin;
- keep the part in the bath until it warms up to 270-300 degrees;
- remove the product from the tin bath, shake off excess water;
- let cool;
- to remove zinc chloride, rinse the part in a solution of lime or water;
- dry in sawdust.
- Tinning by rubbing. Wires and small parts can be tinned using a soldering iron. Sequencing:
- coat the surface with flux;
transfer a little solder to the surface;
- heat the surface with a soldering iron;
- Move the soldering iron in different directions to even out the thickness of the half layer.
To heat the surface evenly, the soldering iron must be held so that it is adjacent to it with both the end and the working side edge.
If you need to apply poluda to large parts of a simple shape, then you can use another method:
- pre-prepare the product (clean the surface, rinse, pickle);
- apply zinc chloride to the surface, heat it with a blowtorch until it boils;
- after boiling, sprinkle the surface with solder and wait for it to melt;
- pour powdered ammonia onto the surface;
- rub the liquid tin over the surface with a brush or canvas rag, removing excess tin;
- Allow the parts to cool;
- wipe with damp sand, then rinse with water and dry.
In case of poor preparation of the surface of the product, the thickness of the tin layer may vary, and in some places the layer may not be soldered. Then this place should be cleaned with a file, heated and tinning repeated.
What is flux? What flux should I use for tinning the body?
The purpose of the flux is to facilitate the soldering process and ensure the strength of the connection between the solder and the metal of the body. One of the barriers to achieving successful soldering is surface impurity (contamination and oxidation). Contaminants can be removed by mechanical cleaning, but oxidation increases with increasing temperature, impairing solder adhesion to the repair surface. The metal has a thin layer of oxides or sulfides, no matter how clean it appears. The purpose of the flux is to remove this layer and should prevent the formation of a new oxide layer during solder application. Flux not only prevents oxidation, but also provides dry cleaning and performs a wetting function by reducing the surface tension of the molten solder, helping it flow better over the surface. This way, the solder will not stick to an unprepared metal surface; it will form balls. On the prepared surface, the solder spreads and sticks normally.
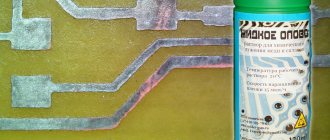
Flux paste for tinning.
Flux paste is used for tinning the body. It is a kind of primary soil. It contains acid (zinc chloride or hydrochloric acid) and solder in powder form. The acid chemically cleans the surface and removes oxidation, converting it into a soluble salt, while the powder simultaneously eats into the metal, leaving a very thin layer (tin or tin with lead) that improves solder adhesion when applied to the repair area.
After application, the paste needs to be heated and the residue wiped off with a rag.
The flux paste is activated by an acid (zinc chloride or hydrochloric acid) and must be removed after soldering is completed. If the flux is based on hydrochloric acid, then it can be neutralized with water and soda, and then washed with clean water. If the flux contains zinc chloride, then acetone will be required for neutralization. You can also use sodium dichromate.
Particles from the flux paste can remain in the pores and small cavities of the weld, which can cause corrosion. Therefore, before tinning and applying solder, it is necessary that the holes and recesses be welded.
There are many ways to connect parts to each other, one of them is soldering. This operation is accessible even to home craftsmen, but it also has its own subtleties. Soldering and tinning metal often go hand in hand as complementary processes.
Soldering is the joining of two or more metal parts or pieces using additional material - solder. If, for example, welding is based on melting the parts themselves and merging them with each other, then soldering implies that the parts being connected remain intact, but are connected using another material. Soldering is good as an electrical connection (which is why it is so often used for splicing wires).
Solder is a substance that melts at a much lower temperature than base materials. This is usually tin, but depending on the type of soldering (it is made for different metals at different temperatures, in addition, different joint strengths can be ensured), it can be alloys of tin with lead, silver with copper, copper with zinc, bismuth or gallium. Tin and lead are low-melting solder. Such an alloy softens to a liquid state at temperatures below 500 degrees, so the connection formed by it will be completely airtight, but not too strong. It is ideal if in the future the soldering area will be closed and will not be exposed to external influences. You can “plant” steel, copper, zinc, and aluminum on low-melting solder.
Solder with copper, zinc or silver is refractory. To bring such a substance to a liquid state, it will need to be heated above 500 degrees. This solder is used if the soldered product will be used in harsh conditions or will be highly susceptible to corrosion.
In addition to soldering agent, soldering requires flux - this is another substance that lubricates the surfaces to be joined, protecting them from overheating and ensuring better contact. For such purposes, rosin, boric acid, borax, ammonia, and zinc chloride are used.
Soldering in the traditional form is done manually, but there are also devices for semi-automatic soldering in production, as well as soldering by immersion in a bath of solder, soldering using gas torches or high-frequency currents.
Tinning is an operation that usually precedes soldering. It consists of applying a thin layer of tin to the surface. The half-layer (tin layer) prevents corrosion, and during the soldering process such surfaces are better wetted with solder. You can tin the part in the old-fashioned way - hot (for example, by lowering the product into a bath of molten tin). A more modern technology is galvanic tinning, when the process is controlled by the laws of electrochemistry.
What tools and materials are needed for tinning and soldering the body?
- There are special kits that include the solder itself, flux paste, tools for leveling the applied solder and instructions. Also, all accessories can be purchased separately.
Set for tinning and soldering the body.
- Requires solder and tinning paste with a brush for easier application.
- You also need a clean rag (cotton is best) to wipe off any remaining paste after heating.
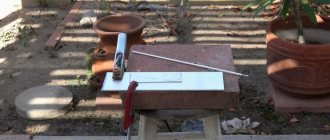
- For heating, you need a welding gas torch, propane (butane) torch or hair dryer with adjustable temperature and air flow. When using a gas welding torch, the flame must be set to the minimum temperature at which the flux will melt and the body metal will heat up.
- The solder is leveled using special hardwood blocks. A special lubricant (solid animal fat), a thin layer of oil or beeswax is applied to the paddle or block so that it does not stick to the solder. So the solder, smoothed out in blocks, turns out more even. You can make a block of the desired shape yourself.
- You must use a HEPA (high efficiency particulate air) respirator with a high efficiency particulate air filter, also known as an N100 filter. You can also install a fan nearby, which will blow harmful fumes away from the master. Then the harm of fumes is reduced and you can do without a respirator. Gloves must be used when using lead solder. Avoid contact of solder and flux with skin.
- To handle hardened solder, you will need a body file or a sanding block with coarse sandpaper.
- It is necessary that all materials and tools are within reach so as not to waste time during tinning.
Sequence of work
The first step is to prepare the surface of the wires. It is necessary to remove insulation, paint, varnish, dirt and grease from them. To do this, you can use a scalpel, carefully cleaning the surface with it, and then easily wipe with a cloth so that no dust remains. The work of soldering wires is carried out in several stages:
- We install the soldering iron on the stand and plug it into the network.
- After a few minutes, dip the soldering iron tip into rosin to check its heating. If the rosin melts, then the heating can be considered sufficient.
- We tin the surfaces to be joined, first dip the tip in rosin or treat it with soldering acid. Next, use the tip of the soldering iron to take a little solder and carefully apply it to the desired location.
The process itself is simple, but it requires dexterity and skill, so beginners do not always succeed in creating a neat and beautiful solder. A good solder joint is smooth and shiny, there are no cracks on it, but it will last a long time and there will be no problems when working with the device. It is worth remembering the basic rules of quality work:
- soldering must be applied quickly and accurately;
- if the first attempt failed to solder correctly, the soldering needs to cool and then apply a second layer;
- Solder should be applied not with the tip of the soldering iron, but with its entire surface.
Preparing the tool
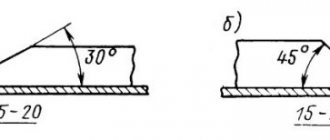
First we prepare the tip; it needs to be sharpened and heated. The tip must be ground at an angle of 45 degrees. Next, the soldering iron is left on for 20-30 minutes. If the tool starts to smoke, it’s not a big deal, as the factory lubricant burns out. Afterwards, the tip is carefully cleaned with a file to remove any soot.
Important! If the tip of the soldering iron is made of cermet, then it is not processed with a file, but wiped with a damp cloth.
We carry out tinning
After cleaning and degreasing the surface of the tip, it is tinning. After heating and cleaning, the working surface of the tip is immediately lowered alternately into solder and rosin. At this moment, the main thing is to prevent it from oxidizing. Then we move the tip in small movements back and forth along the bottom of the bath in the stand, periodically wetting it in rosin for more effective lubrication. When the work area is covered with solder on both sides, the tool preparation is complete. Only after such procedures is the instrument ready for use.
Soldering the wires
The final stage is soldering of the cores. For a more reliable connection, the wires can be twisted together and then solder applied to them. When the wires consist of a bundle of cores, it is better to fluff them up and tin each wire separately. Then we intertwine them together, twist them and seal them.
Attention! During soldering, you should not move the wires, because the connection will be fragile. The connection point must be insulated with electrical tape, which will help avoid short circuits when the wires are operating.
Tinning and soldering of car body
It is not advisable to use lead on thin metal or be careful not to overheat the thin sheet metal, thereby weakening it. Especially flat panels can be subject to thermal deformation, since they have less rigidity compared to convex shapes and panels with stiffening ribs.
The process of tinning and soldering the body (applying solder):
- First, the surface must be cleaned of paint and possible rust. Use a nylon scraping wheel, which does not remove metal when cleaning. Clean the surface at least 5 cm with a margin around the edges. Wipe the surface with degreaser or acetone.
- Use a brush to apply flux solder paste to the area to be repaired, leaving plenty around the edges.
- Next, the surface with the applied paste is heated with a propane torch (or other source of flame or hot air) until it takes on a silvery-brown foamy appearance. When this happens, take a clean cotton rag and wipe off the excess flux. Use a clean cotton rag to level the layer and wipe off any remaining flux. You should get a bright silver finish. It is important not to overheat the tinning paste, otherwise the paste will be burned and will have to be cleaned off and reapplied. You need to move the flame without stopping in one place. Only the tip of the flame should be used.
- You can use another method of tinning the body metal. The panel needs to be heated (not red hot). After heating the surface, use a copper scourer to apply flux paste. Hold it with pliers or a welding clamp, soak it in the flux paste and begin wiping the heated surface, continuing to maintain the heating of the panel with the flame. After tinning, flux residues must be thoroughly washed off the surface with a solution of hot water and soda.
- It is necessary to first prepare a wooden block to level the applied solder. If it is not new and has already been used, then you need to remove the remnants of the compound that prevents sticking to the solder that was applied to it last time. To do this, you can sand it with coarse sanding paper. The base of the block must be clean and level. Next, you need to lubricate it with fat (or beeswax) so that it does not stick to the solder, but glides easily over its surface. During operation, it may be necessary to reapply lubricant.
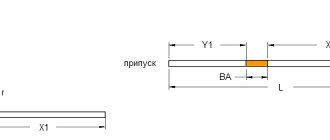
Applying and smoothing solder.
- Solder application technology may vary. You can heat the panel and solder and apply it to the surface in piles in several places. Then heat these slides again and level them with a wooden block. There is another way. You need to warm up the surface of the body, place the solder rod at an angle of 45 degrees to the surface and heat its tip until it begins to melt. Next, you need to deposit the solder in strips, moving the solder along the surface.
- After applying the strips, you need to heat up the solder again and start leveling it with a wooden block, maintaining the desired temperature.
Smoothed solder (left) and solder processed with a body file (right).
- When processing a large area, you can hold several solder rods in your hand. As in the case of putty, you need to apply solder a little further than the damaged area and above the general level of the entire panel, with a margin. It is better to cut off the excess solder with a file later than to add it after it has hardened. When working on vertical surfaces, proper solder heating is most important. It’s okay if the solder drips a little during heating and application. You just need to slightly increase the distance of the flame from the surface.
- The next step, after the solder has cooled, you need to clean the surface with a solution of soda in water to neutralize the remaining flux, and also wipe off any remaining oil from the leveling blade or block. This step is especially relevant if the flux residues were wiped off with a simple rag (see point No. 3). Mix baking soda (2 or 3 tablespoons) per 1 liter of water and apply with a sponge, rag or Scotch Brite (to wipe off flux that has been ingrained from heating), wash the surface thoroughly with this product, then dry with a hairdryer or compressed air. After this, sand it dry and cover it with acid primer. After this, you need to wash the surface with clean water. Next, you can blow off the surface and wipe it with a degreaser or acetone.
- Next, use a special body file to align the solder to the shape of the panel. You can read more about using a file in the article “Do-it-yourself straightening.” After filing, the surface becomes quite smooth. The solder is cut off by a file much faster than the adjacent surface, so periodically check the shape of the solder to ensure that you do not cut off too much. When filing, move the file diagonally along the repair surface, lifting the front of the file. If you are processing leaded solder with sanding paper, it is better not to use an abrasive size smaller than p80 so that the sanding dust does not become too fine. The file must be moved diagonally so that the notches and edges do not cut into the solder and leave scratches. Grinding should not be carried out as it creates toxic dust that is harmful to health and can stick to the solder and cause corrosion.
The body file must be moved diagonally.
- If necessary, you can apply a thin layer of putty to bring the surface to perfection. To increase adhesion before puttying or priming with acrylic primer, epoxy primer can be applied to the surface with applied and treated solder (see article “epoxy primer, application”).
Technological processes of soldering and tinning
The technological process of soldering consists of the following operations:
mechanical (scraper, file, sandpaper) or chemical cleaning. The gap between the two surfaces must be the same everywhere and not exceed 0.1...0.3 mm. Such a small gap is necessary for the formation of capillary forces, which contribute to the suction of solder to a significant depth from the edge. If the surfaces to be soldered have traces of fat or oil, then they are treated with a hot alkali solution. Usually they take a 10% soda solution. If it is impossible to mechanically clean the parts for any reason, then etching of the parts in acids is used. Usually they take a 10% solution of sulfuric acid for copper and its alloys, and for parts made of ferrous metals - a 10% solution of hydrochloric acid, and the solution must be heated to 50 - 70 ° C;
flux coatings;
heating (with a soldering iron, blowtorch or other method);
pre-tinning with solder (soldering iron, or rubbing, or immersion in solder). Pre-tinning is very important, since in this case increased strength and density of the joint are achieved. If pre-tinning is not possible, soldering can also be done on a clean surface, but the results will be lower. For preliminary tinning, the same solder is used as for subsequent soldering;
bonding places for soldering, coating them with flux and heating. The parts are fastened so that the joints do not diverge under minor mechanical stress, for example when applying a soldering iron;
introducing solder, melting it and removing excess solder, as well as flux residues.
The soldering method depends greatly on the type of solder used. The most typical cases of soldering: with a soldering iron using soft solders; a manual blowtorch using usually hard solders; electrical soldering (the junction serves as a resistance, and a low voltage current is passed through the resistance).
When soldering with a soldering iron, solders are usually used whose melting point is not higher than the melting point of lead (327 ° C). Such soldering is performed when the parts are not subjected to heavy loads or require further soldering. If parts are heated to high temperatures during operation, soldering with a soldering iron using soft solders is excluded.
The soldering iron is prepared for use simultaneously with the preparation of the parts. The soldering iron is lightly forged (partially to remove carbon deposits and oxides), clamped in a vice and filed so that its working part is semicircular. If you file a soldering iron without first forging it, it will soon wear out. The end of the soldering iron is made semicircular because in this case it does not cool as quickly as a sharp one, it warms up the soldering areas better and is corroded more evenly by liquid solder.
After mechanical preparation, the soldering iron is tinned, for which it is heated no higher than 400 °C; The end of the soldering iron is dipped into an aqueous solution of zinc chloride, after which the hot soldering iron is rubbed against a piece of solder until the entire working part is covered with a layer of half-solder.
During operation, the soldering iron must have a temperature that satisfies the following requirement: if the soldering iron is applied with a working place to a solder bar, the part of the solder adjacent to the soldering iron must melt in 0.5 ... 1 s. During operation, the temperature of the soldering iron should be such that the drops of solder that stick to the soldering iron are in a liquid state.
A more convenient way to service a soldering iron is as follows: make small indentations in a piece of ammonia (ammonium chloride) and place pieces of solder there. By moving the hot soldering iron back and forth across the solid ammonia, you simultaneously touch the solder. This way the soldering iron is tinned faster.
If you touch the seam with a heated soldering iron and at the same time place a piece of solder in the form of a rod, tape or wire on the seam, the solder will melt and penetrate into the seam. Excess solder is smoothed along the seam with a soldering iron. Solder is also applied to the seam with a soldering iron, since drops of solder always stick to the soldering iron, and if the tip of the soldering iron is passed along the seam, liquid solder is sucked into the seam. In order for new drops of solder to transfer to the soldering iron, it is again taken away from the seam and applied to a piece of solder.
The technological process of tinning consists of the following operations:
cleaning the surface from foreign substances with a wire brush, sand, lime or sandpaper;
degreasing with gasoline or a hot aqueous solution of soda or caustic soda;
washing in water;
chemical cleaning from etching oxides in acids;
coating with fluxes (zinc chloride) by brush or immersion in an aqueous solution of flux;
heating to the melting temperature of semi-solid and tinning.
Tinning small objects with a soldering iron. Tinning of large objects is done by rubbing. To do this, the product is moistened with a solution of zinc chloride and heated to the melting temperature of tin, after which it is sprinkled with a powdered mixture of tin and ammonium chloride (ammonia). The tin melts and, ground with tow, forms an even layer on the surface. After tinning, flux residues are washed off with hot water.
Cast iron. To solder a crack or other defect in a cast iron part with soft solder, thoroughly mechanically clean the soldering area and moisten it well with hydrochloric acid. Then this place is treated with an aqueous solution of zinc chloride, sprinkled with ammonia (ammonium chloride) powder and heated with a soldering iron or blowtorch. It is necessary to heat the soldering area until the solder brought to it begins to melt. Then rub solder on the joint and immediately wipe it with ammonia powder applied to a thick metal brush or tow. This operation is pre-tinning before soldering. While the part is still hot, solder cracks or other defects with a soldering iron, moving it from one end of the crack to the other. If the solder does not penetrate into the crack, it is necessary to remove a small chamfer from both edges, tin this area and solder again. Excess solder is removed with a scraper or file.
Aluminum. To solder aluminum, put a corrugated tip on the soldering iron (its working part is cut with a triangular file). The nozzle is made of steel and hardened so that the teeth do not work together. The nozzle is turned on a lathe and its end is sawed off. The nozzle tube is sawed into four parts with a hacksaw, this creates springiness of the nozzle, and it is tightly inserted into the working part of a conventional soldering iron. The diameter of the hole in the nozzle is drilled in accordance with the diameter of the working end of the soldering iron.
The welding areas are thoroughly cleaned until shiny, melted rosin is taken onto the teeth of the nozzle and applied to the soldered area. When the rosin begins to cover the aluminum during the tinning process, the soldering iron is moved back and forth in short movements, and the teeth will scrape the metal. Using this method, the entire surface of the joint is cleaned, after which the cleaned areas are tinned. Then they start soldering. To do this, take a drop of tin, previously sprinkled with rosin, on a soldering iron and bring it to the tinned area. If it is rough, then use a soldering iron to remove this roughness, which is porous tin mixed with particles of aluminum oxide formed due to a lack of flux. First, pour rosin onto the soldered joint, take a drop of tin on the soldering iron and apply it to the seam to be soldered. As soon as the tin wets the joint, the soldering iron is removed from the metal. Then soldering is performed a second time; for this, the soldering area is again sprinkled with rosin.
When soldering aluminum, especially during the tinning process, the soldering iron should be warmed up well and kept in one place for a long time and, after heating the metal, slowly move along the seam being soldered.
For soldering aluminum alloys, POS-50 and POS-90 solders are recommended. The flux is mineral oil (weapons oil is especially recommended). First, flux is applied to the seams to be soldered and then the soldering areas are cleaned. Soldering is carried out with a powerful, well-heated soldering iron. Before starting soldering, the metal should be warmed up well. For soldering aluminum alloys, a special P-250A solder is also produced; it consists of 80% tin and 20% zinc. The flux is a mixture of lithium iodide (2...3 g) and oleic acid (20 g). Before use, the soldering iron must be tinned with the specified solder using rosin. The surfaces to be soldered are cleaned of flux residues with a gauze swab soaked in acetone.
Solders and fluxes
The metal or alloy used for soldering is called solder. Based on the melting temperature of solders, soldering processes are divided into two main types: soldering with low-melting (soft) solders and soldering with refractory (hard) solders.
Low-melting solders include solders whose melting point is below 450 °C, and refractory solders include solders whose melting point is above 450 °C (Fig. 15.1). The following basic technological requirements are imposed on solders: high fluidity and good wettability of the surfaces being joined; Corrosion resistance; sufficient strength and ductility; The melting point is lower than that of the metals being joined.
Low-melting solders are alloys of non-ferrous metals. The most widely used tin-lead solders are POS-18, POS-30, POS-40, POS-50 and POS-61. The numbers indicate the percentage of tin in the solder. These solders have good surface wettability of most metals and high ductility. Their low melting point (less than 450 °C) allows soldering using the simplest means (soldering irons). As the tin content of the solder increases, the mechanical strength and corrosion resistance of the joint increases, but the cost of the solder also increases. Lead increases the ductility of solder. These solders are used to restore parts operating at high temperatures and light loads, i.e. for radiators, generator manifolds, fuel tanks, electrical wires, etc.
Low-melting tin-zinc solders of type P-200, P-250A are used for soldering aluminum, its alloys and copper. Refractory solders are pure non-ferrous metals and their alloys.
For soldering ferrous metals, copper solders of grades Ml and M2 are used. They are very fluid, wet surfaces well and provide strong and ductile joints. Disadvantage: high melting point (1083°C).
Copper-zinc solders of the PMC-36, PMC-48, PMC-54, L-62 and L-68 brands (the numbers indicate the percentage of copper in the solder) are used for soldering copper, bronze, brass and ferrous metals. As the zinc content in these solders increases, strength decreases and brittleness occurs, but zinc reduces the melting point of the solder. Therefore, brass is soldered with PMTs-36 solder, while steel and cast iron are better soldered with L-62 solder.
The best refractory solders - silver-copper-zinc grades PSrYu, PSr12M, PSr25, PSr45, PSr65 and PSr70 (the numbers indicate the percentage of silver in the solder) - allow you to obtain high-strength and ductile joints, but are very expensive. These alloys are used for soldering critical parts made of steel, copper and its alloys. Fluxes for soldering are used liquid and solid. When using low-melting solders, liquid fluxes are used, which are aqueous solutions of ammonia chloride (ammonia) and zinc chloride (zinc etched with hydrochloric acid). The concentration of the solution is within 25...50%. For soldering copper (wires), pure rosin or compounds based on it are often used as a flux.
Soldering with refractory solders is carried out with solid fluxes, which are powders of borax and its mixtures with boric acid and boric anhydride. The most widely used is pure borax, calcined before use at a temperature of 400 ... 460 “C. For soldering aluminum and its alloys, F320A, F380A and Other fluxes are convenient, containing lithium chloride, sodium fluoride and zinc chloride, which actively destroy the aluminum oxide film.
Soldering and surfacing
The difference between soldering and welding is that at the moment of welding the connected ends of the parts (products) melt, and during soldering only the solder melts. In soldering, predominantly overlapping seams are made, which leads to an increase in metal consumption. The strength of the connection depends on the amount of overlap. There are two types of soldering: low-temperature (solder with a melting point below 550 °C is used) and high-temperature (solder melting point above 550 °C). In the first case, the work is carried out with electric soldering irons and gas-air burners; in the second, with burners operating on a mixture of acetylene with butane or propane with oxygen. Low-temperature soldering involves the use of tin-lead solders, high-temperature soldering - copper-phosphorus (for copper, brass, bronze), copper-zinc (for nickel, steel, cast iron) and silver (for ferrous and non-ferrous metals, except aluminum and zinc). In any soldering, fluxes are used (rosin, fluxes with metal chlorides, borax-based fluxes, with alkali metals, powdered, etc.). The soldering process consists of the following stages: preliminary cleaning of parts, tinning them, joining parts (there should be a distance of 1-2 mm between them), flux treatment, soldering. The connected parts must cool naturally.
Gas-powder surfacing involves supplying a powder alloy (chromium-boron-nickel powders with silicon additives) through an oxygen gas flame directly to the welding site. This method allows you to restore the original dimensions of parts and increases their wear resistance. In this case, special burners are used. First, the parts are thoroughly cleaned and heated. Then a thin layer of powder is sprayed, and the area is heated again until the powder “sets” with the part. After this, the burner is moved to the side and powder is fed into the flame. The thickness of the sprayed layer should not exceed 1 mm.
Gas-flame surfacing is another method that allows you to control the heating of the base and filler metal. It is used for surfacing ferrous metals, brass and hard alloys onto cast iron and steel. Surfacing can be multi-layer or single-layer. The thickness of the deposited layer depends on the angle of inclination of the part: with an inclination angle of 7°, a thin layer is obtained; if the angle is increased to 15°, the layer will become larger. The layer thickness should not exceed 2-3 mm (in some cases it reaches 4-8 mm). During the surfacing process, the torch should be positioned at an angle of 70° to the right, and the additive - at an angle of 40° to the left. The rod must always be in the flame zone. Do not allow the flame to touch the molten metal, otherwise this will lead to the appearance of pores in the deposited metal.
Read more: Welding fluxes Welding electrodes General information about welding reinforcement Fire safety measures during welding Occupational safety when welding process pipelines Occupational safety when welding building metal and reinforced concrete structures Protection against electric shock during welding Safety precautions and industrial sanitation during welding Welding quality management Statistical method control