Business can be associated not only with the manufacture of products that are directly consumed by the population. Good results are shown by enterprises that produce equipment for production itself. What equipment is used for home and professional wax making, which is better and what is the price? Our article is about this and more.
Foundation is a thin wax sheet on which small hexagons are imprinted using a special pressing method: the bottoms of the cells. This is the material that forms the basis for the honeycomb, thanks to which the bees can devote all their efforts to collecting honey.
Guide to making foundation on rollers
Based on the book by Vladimir Ivanovich Lomakin, 1914
Preface
This brochure is the second combined edition of two out-of-print books - “Making artificial foundation on rollers by V. I. Lomakin and “Rolled wax sheets” by N. V. Lomakin and is intended to serve exclusively as a guide to the production of foundation. On those rollers and devices that I offer for this purpose. Therefore, everything that is not directly related to this goal has been thrown out, and the material itself has been reworked and supplemented. Thus, to meet the new goal of serving as an accurate, proven guide, in which nothing is omitted and nothing is superfluous.
N.V. Lomakin, 1911 Kharkov.
Making foundation on rollers is divided into two parts:
- Making smooth wax sheets;
- Pulling smooth sheets on rollers.
The sheets can be prepared in two ways. By dipping a wet wooden plank into melted wax and casting thick layers of wax, followed by rolling them on special smooth rollers. The second method is more productive and perfect. But the first one does not require smooth rollers, which means the equipment costs will be lower.
First, let's get acquainted with the first method, and then with the second.
The first method of making foundation
The wax for foundation must be solid, without impurities and of high quality. Honey punch (dead wax) is so soft and weak that it is not at all suitable for making foundation from it.
Wax refiner device
Rice.
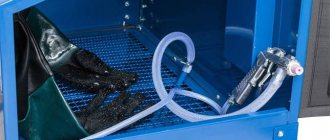
1 Melt the wax in a steam wax melter. In Fig. 1 shows its structure and application. It consists of a separate steam generator and a vessel with double walls, between which steam circulates and the wax melts inside. The steam generator is placed on the stove (Fig. 2) and connected by a tube using two special rubber couplings with a wax furnace. The wax melter is placed on a stool or some other stand. Two holes are made in the stool, corresponding to two tubes at the bottom of the wax melter. One of them is central, intended for releasing dirty wax, and the other for releasing steam. A vessel is placed under this tube to collect the water flowing out with the steam.
rice. 2
The water in the steam generator must always be no lower than 45 mm from the bottom and no higher than 2/3 of its height from the bottom to the upper arch. During operation, the amount of water is determined by weight. The steam generator rises above the stove and, based on its gravity, determines the approximate amount of water. To avoid burns, make sure that the tubes are connected tightly.
The wax is placed in the wax melter, avoiding hitting the walls with pieces of wax. Thanks to the original features of the wax refiner, the wax melts and settles at the same time. When it is all melted, almost all the dirt and water will collect at the bottom of the wax furnace and the wax can already go to work. If there is no particular rush in the work, then it is better to let the wax stand for two hours in a molten form. The wax will then be cleaner and all the water contained in the wax will be released from it, which will be at the bottom of the wax furnace. The presence of water in the wax mass causes “weakness” of the foundation with a characteristic, matte whitish appearance.
Makalnitsa
The settled wax is carefully removed from the top with a mug and strained through a fine strainer into a bucket. From there it is poured into a dipping bowl. The bowl is a stainless steel vessel. To reduce the cooling of the wax, it is sheathed in a wooden casing. Wet wooden planks are dipped into a dipping bowl filled with wax. On which the wax hardens in the form of a thin film and forms wax sheets that are easily removed. Dipping boards are made from clean, sanded, knot-free plywood. The size of the boards is 623x267x10 mm.
Rice. 3
3 - 5 hours before starting work, the boards must be steamed in hot water. There should be four of them. Two are immersed in melted wax, and from the other two (in warm water) the worker removes oriental sheets. The boards are dipped in wax 3 to 5 times, depending on the temperature of the wax and the required thickness of the sheet.
The wax in the dipping bowl during operation should have a temperature of approximately 75°C. Therefore, the wax that was just poured into the dipping bowl had a temperature of up to 88°C. As the wax is scooped out of the drip tray by immersing the boards in it, a sufficient amount of wax will have time to melt again and settle in the wax melter during this time. The top layer is drained and the dipping bowl is topped up with it. And so on until all the clean wax comes out of the wax mill. The remaining dirty wax is poured into something where it settles and hardens. When it cools, the dirty thin layer is cut off, and clean wax goes back into the wax mill. When the dirty wax is removed from the wax refinery, the layer of dirty wax adhering to the bottom and sides of the wax refinery is washed off with hot water.
Sequence of work
A new portion of wax is placed into the wax melter and work proceeds as usual. When there is no more wax to add to the bowl, then hot (75 degrees Celsius) water is added to it until good sheets are still obtained. Usually the sheets are satisfactory when the thickness of the wax in the bowl is 10-20 mm. Often, at the beginning of work, the sheets crack badly and are very thin. This is because the wax is too hot, you need to wait until it cools down. Often the sheets are of sufficient thickness, but crack. Because the water in which the boards are soaked and the sheets are removed is very cold. Recommended water temperature is 30-35. Planks that have been used once are no longer suitable the next time they dry; wax sheets are difficult to separate from such boards. For other uses, they need to be thoroughly dried and sanded.
Aging wax sheets
The sheets are stacked and kept in a cool place. This is a very important condition and here's why. Newly hardened wax is soft and strongly adheres to the objects to which it is pressed. After a week or two, and if you cool it very much (to 0°-2°), then after an hour or two it becomes hard, brittle and much less sticky again. If the newly received sheets are passed between the rollers, they will strongly stick to the rollers.
When pulled away from the rollers, the foundation is greatly stretched, and it looks matte. If you pass these sheets through a week or two, or even the next day, but first cool them overnight, then the result is a completely different job. The foundation does not stick to the rollers, does not stretch out and can be elegant in appearance - shiny.
Having received the wax sheets, after some time you can begin rolling them on rollers.
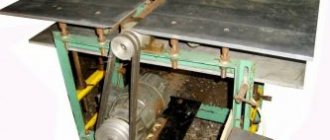
About rollers
The table on which the rollers will be placed is screwed to the floor or a weighting agent is placed on the lower shelf. The rollers are placed on it so that all the legs touch the bench. If one is raised, a board of appropriate thickness is placed under it, and then all four roller legs are screwed to the bench. In this case, special attention must be paid to ensure that the rollers do not warp during operation.
Roller maintenance
I pay special attention to lubricating the bearings with grease. Lubrication should be frequent and abundant, especially of the lower bearings, which often receive soap from the rollers. If there is insufficient lubrication, the axles jam in the bearings, the gears break, and the bearings and axles themselves soon wear out.
After lubricating the bearings, you also need to lubricate the rollers. I lubricate the rollers with liquid soap, which I prepare like this. I take glycerin transparent soap and make shavings out of it. I put them in a box and brew them from under the samovar with such a quantity of water that upon cooling the brew becomes thick, like a thin jelly, and stir it well. Rollers are coated with this soap using a brush each time before passing a wax sheet onto them. Before work, the rollers need to be lubricated two hours before starting work.
Steaming wax sheets
Now you need to prepare water for steaming the wax sheets - the sheet can be passed through the warm-steamed rollers, which is done in a special bath. The bathtub is made of white iron, its size is 356X620 mm, its height is 356 mm. It is also embedded in a wooden casing - a box. The water in which the wax sheets are heated should not be very hot so that the sheets do not turn white in it. The overheated sheet becomes similar in properties to the one just received; it strongly sticks to the rollers and stretches.
Rolling work, transportation and setup
In general, the temperature of the sheets, the temperature of the rollers, and the temperature of the room are dependent on each other. Cold rollers require hotter sheets, and vice versa, etc.
Coming out from under the rollers, a sheet of foundation is taken by an assistant and grabbed by two thin boards 45-50 mm wide and 250-270 mm long. I do not recommend using any forceps. The tongs slow down your grip and tire your fingers without providing any comfort in return.
To prevent the lower roller from bouncing up and hitting the upper one during shocks during the road, the lower screws are released when sending. This means that now with these screws you need to lift the lower roller and bring it so close to the upper one that it does not press on the upper one. In this position, you can skip sheets. During operation, these screws are adjusted as shown by the case itself. You can tighten them this way without fear of compressing the cones and damaging the rollers, so that the lower roller presses slightly on the upper one. The wax sheet must be thick so that it produces a canvas of wax three to four times longer than the sheet itself. If the sheet is thin, then the two sheets are folded together so that they are both equal in thickness to one thick sheet. It’s better to skip 2 thin ones together than one thick one.
Subtleties at work
At first the work goes very well: the foundation comes off the rollers easily, does not stretch and has an attractive shiny appearance. But then the foundation begins to stick to the rollers, at first a little and only in the middle, the middle of the canvas of foundation begins to stretch and bend. The further you work, the stronger this phenomenon becomes. Then the entire sheet begins to stick, the foundation is greatly stretched and becomes useless. If you work further, the foundation already sticks so much that it breaks every minute.
Why would this depend?
At the beginning of operation, the rollers are at room temperature, therefore they are quite cold. But from heated wax sheets they gradually heat up. In the middle the rollers heat up faster and stronger, but towards the ends weaker and slower. Wax has the following property: the warmer it is and the warmer the object to which it is pressed, the more strongly it sticks to it.
How to help grief?
It's very simple: cool the rollers and work until they warm up again. To cool the rollers, I simply cover them with ice. At first, the ice melts quickly on them - water flows in a stream. When they cool enough, when water begins to drip from them drop by drop, the ice is removed. Dirt and debris remaining from the ice on the rollers are washed off with cold water and work continues until the rollers need to be cooled again. This is the only secret that made Dadan rich and glorified him throughout the world. In his famous book, Dadan hints at it twice: “without steam and ice it is impossible to prepare good artificial foundation,” and “the rollers bend when passing the wax sheet.”
Operating temperatures
The temperature at which the foundation is made is better if it is about 15 C. The foundation at this temperature, even when pulled from warm rollers, is almost not stretched. But you can prepare excellent nesting foundation even at 28 degrees, heat, but the rollers then have to be cooled very often. It is impossible to cook honey foundation at this temperature.
I need to pay attention to one more rather important circumstance. Ice is very rarely clean and does not contaminate the rollers. After cooling, the latter always have to be washed, but it is not always possible to wash off all the debris and it is impossible to notice every speck remaining on the roller. Meanwhile, pieces of wood, straw, grains of sand and the like, when passed along with wax sheets between the rollers, leave imprints on the cones. And after several days of work, if no measures are taken, the rollers may turn out to be riddled with traces of grains of sand and other debris—almost ruined. To prevent this from happening, the rollers need to be covered with a thin cloth and then covered with ice. And after cooling, the cloth is carefully removed, rinsed to remove debris, and used again the next time it cools.
Laying and cutting sheets
The rolled sheets are stacked and the next day, when the foundation has hardened a little, they are cut with a round knife on a board, which at the same time serves as both a sheet measure and a guide for the knife. Sheets are cut, 5-10 sheets at a time. The round knife should be in boiling water at all times during work; it is better to cut with a hot knife.
Freshly rolled foundation is soft, cloudy and opaque in the light, and ugly. After two or three days it becomes so hard that it can already be given to bees. After a week or two, especially in a warm room, it becomes glassy, transparent and shiny.
Advantages and disadvantages of the first method
The method just described, despite its simplicity, requires a lot of small, but of great importance, knowledge and a certain skill.
The temperature of the wax, cooling water, methods of folding finished sheets into stands, etc. Entirely depend on the skill and knowledge of the workers and completely affect the quality of the foundation. These phenomena are such that they directly affect the quality of the foundation produced. But here there is a whole series of other phenomena, the influence of which is not direct, but which, nevertheless, significantly affects the quality and low cost of production of the product. These include uneven thickness of wax sheets. The unfavorable phenomena caused by this property of wax sheets are as follows: the sheet being passed warps, moves to one side or the other of the rollers, and the wax produced will not have the same cell sizes, which fluctuate within relatively large limits. The wax made from such sheets is generally weak and easily pulled out.
The major disadvantages of the first method include the presence of water in the wax mass itself, which also affects the strength of the foundation. Water is introduced into the wax during the working process itself. When wet boards are dipped in wax, they leave some of their water there. True, it is collected at the bottom of the dipping vessel, but, nevertheless, by moving the board down and up, part of it must certainly be mixed with wax.
The second method of making foundation using hand rollers
The late V.I. Lomakin worked to eliminate all these shortcomings in parallel with the improvement of rollers, and the result was rolled wax sheets, rolled through special smooth rollers - the same rollers as for foundation, but only without engraving. To reduce slipping, the rollers are lightly shaded.
Wax burner
The wax is melted in the same way as in the first method. After it has settled, it is poured into a special vessel, where it must be cooled to a temperature slightly above its melting point, i.e., up to 75 ° C. The vessel is made so that it has a large cooling surface. In small-scale production, this cooling can be carried out in a bucket with a spout, from which we will later pour wax into boxes. In large-scale production, the wax is cooled both in a bucket and in a vessel. Hypothermia must be avoided (the formation of a film of cooled wax on the surface of the wax is under no circumstances acceptable).
Forms
When the proper temperature is reached, begin pouring the wax into the molds. These molds are made of galvanized iron (preferably stainless steel or silicone) measuring 356X267 mm with a height of 22 mm. These molds, which we will call boxes, must be clean and well moistened with water before use, which is done by hand. It is very useful to first put them in cold water for half an hour. Excess water is washed away. Place them on a strictly horizontal surface. A mug (of a certain volume) is filled with wax from a bucket through a spout (the empty bucket is filled with wax from a vessel) and poured into boxes through a fine strainer. For this operation, the best room temperature is between 12° and 20° C. Drafts, especially cold drafts, must be avoided. Without allowing the wax to harden too much, the boxes are thrown over and emptied by light tapping. The layers, 16 mm thick, are placed in cold water with ice. They lie there until one o'clock. They are then taken out and placed in piles.
I'll tell you why there are failures. If the boxes are dirty or dry, poorly wetted (it must be borne in mind that zinc, in general, is poorly wetted), the wax is hot, the room temperature is high, or the wax in the boxes is very hardened, sticking often occurs. But a light coating of wax covering the boxes during operation does not harm the work and there is no need to clean it off. On the contrary, an attempt to clean off this plaque with hot water will spoil the matter. causing strong adhesion. In addition, when the wax is hot or in a draft, it happens that the sheets burst. If the wax is cold, then the layer is not intact, with cracks and patterns on the bottom. Keeping the sheets after removal from the boxes in cold water for 1/2-1 hour is necessary so that the layers are completely cooled. Otherwise, the sheets will heat up when stacked. The wax prepared from such layers is also very weak and has all the properties of dipped wax.
Sheets
The resulting sheets are taken to a cold place for aging, which with this method, in a sufficiently cold room, lasts 3-4 days. The longer it is, the better. Before rolling, the sheets must be heated in a bath.
The water must meet the same rules as for dipped ones, but the sheets should not turn white. Up to 45° C. at 46-48 they already turn white. Water should cover the sheets on all sides. To do this, they are placed in the bath on a long edge, pressing down on top with several sheets so that they do not rise. Close with the lids that come with each bath. It is useful to shift them more often. In any case, it is necessary to disassemble the sheets so that the water goes around each sheet. After 30 - 40 minutes (the best indication for this is experience), the layers can be rolled through smooth rollers.
Roller operating procedure
The rollers are pre-lubricated with soap half an hour beforehand and set to a thickness of 2.5-4 mm.
When passing the layer, it is pressed forward a little, as if helping the rollers to capture the layer. The rollers rotate completely freely and a person, having rolled 20 sheets, should not feel much fatigue.
Having stretched out 10 - 12 sheets, they are cut while they are still soft with a large round knife and across into separate sheets 22 mm wider than the height of the frame on which the foundation is made. The resulting rolled sheets can be stacked and used within 3 days. If they are taken out into the cold, then with sufficient cooling they can be used the next day.
The rollers heat up as they work, but while the new batch of sheets is steaming, the rollers will have time to cool down. When you force work, you need to have 2 baths: while one is steaming, the other is rolling. Then cooling is achieved by watering the rollers with cold water while the sheets are cut and the rollers are standing.
The resulting sheets are put into engraved rollers not with the cut edge, but with the edge (the side perpendicular to the cut line). Accordingly, with practice, the thickness of the leaves is determined. Only in the extreme case of an order that is inconvenient in size can you deviate from this rule and pull it forward with the sawn-off edge.
Special equipment
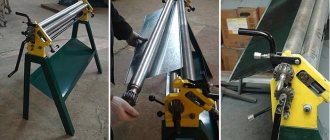
To make foundation for a dadan or rue frame with your own hands, you will need the appropriate equipment:
- for corrugating the foundation, a manual unit is used, which is made of aluminum and coated with nickel and tin;
- the set of units includes a variety of drives - manual, smooth and grooved;
- the motorized unit is equipped with a manual engine made of aluminum alloy;
- It should be noted that Bulgaria presents its own equipment, namely a press machine, thanks to which no cooling is required. Its operation is similar to a waffle iron, having cells of about 5.4 millimeters. Material of manufacture – aluminum;
- As for Swiss equipment, a press operating on the principle of a waffle iron is in great demand. This press is available in different sizes and configurations;
- The silicone matrix has a nickel-based coating.
Conclusions on methods of making foundation
In conclusion, I will say what advantages this method has from the technical and economic sides. On the first side we have a method in which the quality of the foundation is brought to a high degree of perfection. The wax is homogeneous, strong and elegant in appearance. As an example of foundation made from rolled sheets, the test sheets that I supplied with the rollers can serve as an example. Nothing like this can be done by dipping. The ease of rotation of both rollers is also not the last plus.
From an economic and economic point of view, this method provides an opportunity to develop foundation production intensively and more conveniently. Foundation can be made just as well from the last pound of wax as from a large batch. Two people alternately rotating the rollers can pull up to 190 kg through the engraved rollers in 10 hours. pure wax. Whereas dipped sheets weigh more than 125 kg. almost impossible. Thanks to the uniform, precisely selected thickness of the wax sheets, the amount of waste and scraps is reduced to a minimum. Despite 2 rollers, the amount of soap consumed does not increase compared to the first method.
Application of foundation
I advise using wax only on wires. I used to be against wires, but now I don’t use wax at all on wires. I pull them vertically at a distance of 60-65 mm from each other. Under such conditions, no matter how thin the foundation is and no matter where it is in the nest, it never stretches, does not warp, and the frame is built completely evenly.
Types of production
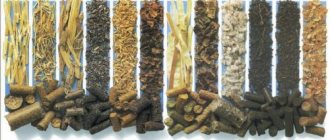
Foundation production is a responsible, important process for successful beekeeping. Natural foundation is made from beeswax. As for artificial, it contains a chemical element reminiscent of beeswax or paraffin. In addition, foundation can be made using polypropylene (plastic).
The production process is carried out by two methods, namely:
- special rollers are used - manual, automatic, in which the cellular relief is located. Thanks to it, you can swirl heated beeswax;
- a simple or electric press is used. The composition contains 2 plates with hexagonal cells. Comparing the press and rollers, it should be noted that the productivity of the first is not too high, so it is better to use it in small apiaries.
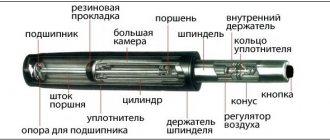
Rollers are a special device for beekeeping, consisting of two mating ones, which are located on embossed sides and have the shape of a cylinder.
As for wireless waxing, it is often used for sectional honey production. The frames have internal grooves. Plastic foundation is intended for wood frames. Wire waxing is carried out manually or electrically.
The process of producing a semi-artificial product involves adding various chemical elements and paraffin to beeswax. Such foundation can be brittle, which prevents full waxing. If it is subject to deformation, it will not be possible to straighten it.
Setting up rollers for removing foundation.
The rollers are sent by me completely installed and tested for the tasks that I assign to my rollers, with a test sheet and manual attached. But the beekeeper often has to install the rollers himself, which can be crimped from work or, out of curiosity, upset by the beekeeper himself. The entire procedure for completely installing disassembled rollers requires so much knowledge and experience that I will not even talk about it, but will only limit myself to those cases that may arise in the practice of a beekeeper.
The ability to “read” wax
Every incorrect installation is primarily reflected in the foundation. Therefore, we will learn to read installation errors on the foundation. The foundation is examined in the light and, moreover, in the position in which it comes out from under the rollers. To prevent any mistakes, you need to look for an imprinted inscription on the foundation (the customer’s name is engraved on the rollers). If we accidentally confused which side the sheet was on, then by looking at the inscription we would immediately find what was lost.
The foundation sheet is taken by hand so that it can be read. The side facing us, i.e., which was near the front pillar (where the gears are), will be called the leading edge of the blade. The opposite one, i.e., which is near the rear pillar, is the rear edge of the foundation cloth. Having carefully examined the foundation in the light, we can distinguish the lower cells, corresponding to the cones of the lower roller, and the upper cells, corresponding to the cones of the upper roller. It is necessary to firmly be able to distinguish the lower cells from the upper ones. With practice, this difference is noticed at first glance. This difference is as follows: the bottom of the cell has three edges, two vertical and one horizontal, in the cells of the lower roller the horizontal edge is at the bottom, and in the cells of the top roller it is at the top. This difference can be seen in the devil. 1, where the right cell belongs to the lower roller (the lower side of the foundation sheet). This is the rule for our rollers.
For other designers it may be the other way around. Or even like Kamenev, there are two horizontal edges and one vertical. Ideally made and carefully installed rollers should produce foundation in which all cell walls should be equally colored. When viewed in the light, i.e. of the same thickness. Usually this is almost unattainable for manual work, and the foundation is replete here and there, and then there we see thicker walls. If, however, we notice some correctness or legality in the arrangement of these thickenings, for example, all the left walls of the cells are thicker, then the rollers are installed incorrectly.
Installation of rollers
Let's now proceed to installing the rollers. The simplest case that can be encountered in the practice of a beekeeper is presented in Fig. 2. On the foundation we see that throughout the entire length of the canvas the left walls of the cells of the lower roller are thicker. This means that the rollers are so located among themselves that the distance between the left edge of the cell of the lower cone and the right upper one is greater than between the right edge of the lower cone and the left upper one.
This is clearly visible from the lines. 3. In this drawing, a section is connected by a vertical plane through the rollers and a section of the gear with the axis of the roller through the plane of the screws, which are presented in perspective. The second incision is superimposed on the first. For clarity, part of the gear has been removed so that the relative position of the roller cones can be seen. Everything is approximately doubled in size. Looking at this drawing, we see that, indeed, when the rollers are arranged in this way, the left edges of the cells will be thicker. (Let’s agree that when we talk about parts of a cell, we talk exclusively about the bottom). Consequently, the foundation depicted in the devil. 2, corresponds to the position of the rollers shown in Fig. 3.
Working with screws
Now it is not difficult to understand that if we turn the upper roller in the direction indicated by the arrows so that the ab axis aligns with the a'b' axis, then this drawback will be eliminated. All walls will be the same thickness. For such rotations, screws A and B are used, which are placed in special sockets c and d, visible in the drawing, cut in the axis of the roller. In this case, we will do the following. We release the right screw B completely freely, and press the left screw A lightly (up to 10 degrees) and secure it with the right one, pressing with a key so that the screw fits tightly into place. It is clear that by pressing the left screw A the roller will turn in the desired direction. It must be remembered that when installing the rollers, the lower lifting screws, which regulate the thickness of the foundation, must be released, and the thicker foundation will be passed through. Otherwise, it’s easy to crush the cones.
With an inexperienced hand, screw A can be transferred (or for some other reason) and the opposite disadvantage will result - the right side will be thicker. The foundation will then have the appearance shown in the devil. 4. In cross-section, this foundation is shown in Fig. 3 below. To correct it, do the opposite - release the left screw, press the right one and secure the left one.
The following may be the irregularity depicted in the devil. 5.
Here we see that often the edge of the canvas is correct, that is, all the walls are the same thickness. On the back edge, the right walls are thicker, and in the middle of the canvas there are all gradual transitions from one to another. To eliminate this, use the side screws on the rear pillar. These screws move the rear end of the roller to the right and left. The devil serves to clarify. 6.
It shows a vertical section through the rear ends of the rollers with part of the stand visible behind them. The dotted line indicates parts hidden from direct view. The bearings are covered with rollers, and screws C and D are covered with a stand. Looking at this drawing, we see that if we slightly move the upper roller to the left in the direction indicated by the arrow, then the cones of the upper roller will exactly fit into the recesses of the lower one. To do this, we release the left screw C. Press the right one D degrees up to 20 degrees (depending on the degree of irregularity) and secure the left one. From the drawing you can see that this will cause the upper bearing with the roller axis to move to the left.
Flaws
Again, the opposite drawback (Fig. 7) may be due to excessive zeal when we press screw D. Here we do the opposite: release the first screw D, press C, and fasten D again.
The situation is much more complicated when the foundation has the appearance shown in the devil. 8 and 9. These drawings correspond to those cases where the rear edge is correct, and the front has one wall thicker. Apparently there is nothing easier to correct this deficiency with the side screws on the front pillar. In fact, this is very, very difficult and it is better to never touch the front side screws. Just making sure that they don’t loosen and that the front bearing doesn’t slack. To install I proceed as follows. Let's assume that we have a foundation where the right walls are thicker at the leading edge, i.e. the devil. 8. Then we use the cogs on the upper gear, likening this case to that shown in the devil. 4, install the rollers and only make sure that the leading edge is correct. When this is achieved, the rear edge will have the appearance shown in the diagram. 7, which is eliminated with the rear side screws.
Damn case. 9 is eliminated in the same way: I press the left screw of the gear, and the rear end of the roller is moved to the left.
The latter cases happen very rarely (of course, I’m not talking about installing new or disassembled rollers). Actually, these cases exhaust all those that can be encountered in the practice of beekeepers. As an exercise, I will also suggest a very rough and rare disorder of the rollers (Fig. 10 and 11).
Let's take 10th. To correct this installation defect, first install the rear edge using the rear side screws and bring the case to hell. 9. To do this, we will move the rear end of the roller to the left. Then we press the left cog of the gear and again move the rear end of the roller to the left. You cannot do this in two steps, because you can easily dent the cones, since you will have to push the end of the roller to the left a lot. When this is done gradually with intermediate rolling of the foundation, the danger is eliminated. I won’t explain drawing 11 - it is similar to drawing 10, and those who wish can solve it themselves. These are all the theoretical rules that anyone who has our rollers and has upset them should know. I will tell you a few more practical mandatory requirements.
From experience
It is necessary to carefully read the foundation and figure out what and where to submit, for which it is necessary to thoroughly understand drawings 3 and 6, and in each difficult case, although in the most primitive way, imagine the cuts through the rollers and proceed from them. This is not a phrase - personally, despite my rather great experience, when installing rollers of other systems, I sometimes get confused and have to restore either in my mind or on paper the cut corresponding to the given case, and then only untangle it.
The second golden rule is that the more complex the case, the more strictly the rule of lifting screws must be observed, so that only the rollers do not touch each other, but that there is still some free space. The third, most important rule of thumb is to not worry, but to think about every move. If you feel that the cold horror of annoyance is beginning to creep into your soul, you’d better quit, because if the rollers don’t die, then in any case they will be badly dented and the matter will only get worse.
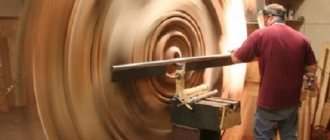
Preparing the Wax Tape
Special machines are called rollers. This is a fairly simple device; the rollers can be made from household materials.
In order for the installation of foundation in the hive to be effective as a result of the efforts made, the tape must be correctly made:
- Roll by preheating the rollers with wax;
- Reinforcement is made with gauze soaked in liquid wax.
For quality work (high class), you will need to strictly follow the instructions of specialists and provide the entire process with specialized equipment. It is important to correctly select how many “kg” of initial material are required for a high-quality result. Recycling wax residues will ensure waste-free production.
Reasons for roller failure
In conclusion, I will say a few words about why rollers can deteriorate. From three reasons:
- When the bearings are not lubricated and the soap that got into them while working with the rollers is not allowed to dry out. Without lubrication, the axles can jam in the bearings and generally wear out quickly.
- When there is no thorough cleanliness during work. On sheets, various foreign objects can get into the rollers: sand, pebbles, wood, cloves. All this crushes the cones and makes imprints on them. Litter and all sorts of foreign objects getting on wax sheets between the rollers are the biggest evil; they most often damage the rollers—engraving.
- When you want to get thin honey foundation on nesting rollers, you press the lower roller firmly on the upper roller, which can cause the cones in the rollers to also become wrinkled.
The most serious sin is when foreign objects are passed through the rollers: paper, canvas, etc. Never, under any circumstances, should this be done.
You might be interested in:
GOST requirements
Modern requirements for foundation are specified in the current GOST 21180-2012 “Foundation. Technical conditions". The most important thing is the material of manufacture and its processing. It must be natural, which is thoroughly sterilized. It is necessary to control the moisture content of the material at the stage of its preparation (no more than 2%). The class of the finished product directly depends on this indicator.
GOST provides, by agreement between the manufacturer and the consumer, to produce “thicker” foundation for a frame measuring 435×300 mm with the number of sheets per 1 kg from 11 to 13 pcs., for a frame 435×230 mm - from 15 to 18 pcs. Also, according to the current GOST, production with cells of enlarged sizes is applicable (up to 5.60 mm for bees of the Central Russian breed in the regions of Siberia).