The facade is the face of the building. In addition to decoration, it performs a number of technical functions to protect the foundation of the house. The façade system improves the energy efficiency of the building. Due to cladding, heating and air conditioning costs are significantly reduced. Read our article on how to install an air conditioner on a ventilated façade.
Facade systems are divided into two groups:
- “Wet” façade – the building is finished with plaster and putty mixtures. Finishing is carried out on a finished stone or brick base, as well as on insulation made of extruded polystyrene foam or basalt mineral wool.
- “Dry” façade – the building is clad with sheet finishing material over a metal sheathing. Finishing is carried out on a finished stone or concrete base, as well as on insulation made of basalt mineral wool.
Among framed facades, the metal ventilated facade is especially popular. With its help, facades of residential buildings, public buildings, production workshops and a number of other objects are equipped. Let's take a closer look at this technology, its pros and cons, types of facing materials, installation options, and methods of caring for the suspended facade system.
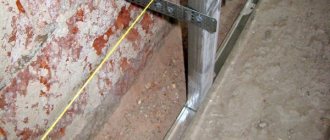
How to attach a metal profile to a wall
When repairing and finishing walls, plasterboard sheets are often used. The relative cheapness of this material and its good soundproofing and thermal characteristics make it suitable for quickly carrying out work on leveling walls and ceiling surfaces. Installation of drywall is simple and can be done independently. Since drywall is usually attached to a metal frame, the main difficulty is how to secure the metal profile to the wall in such a way as to ensure the reliability of the structure even on an uneven surface.
Video description
How to make an interior partition from a metal profile with an arch can be seen in the video
How to install a ceiling frame
Before you start connecting all the frame elements, you need to take into account that all sheets of sheathing material must be joined on the rack. The process itself is carried out as follows:
- The guide profile is fixed according to the established markings.
- On each side of the square of the ceiling frame mesh, straight hangers are installed exactly in the middle, securing them with dowels. They will capture the main elements.
- Ceiling elements are inserted into the guides and secured with self-tapping screws.
- Measure out 60 centimeters of the profile, cut it off and attach it with screws across the main profiles. At their intersections, “crabs” are used.
- The frame for the ceiling is leveled and fixed with hangers. The antennae are bent and secured with self-tapping screws.
Materials for mounting the frame under drywall
In order to properly attach drywall to the wall on a profile, it is necessary to use high-quality materials. To cover a gypsum board wall you will need:
- galvanized profile UD 27×28 mm with a wall thickness of 0.6 mm;
- galvanized CD profile 27x60 mm with a wall thickness of 0.55 mm or 0.6 mm;
- universal U-shaped suspension;
- self-tapping screws with a 3.5x9.5 mm drill, so-called “fleas”;
- self-tapping screws with a press washer and a metal drill 4.2x13 mm;
- driven dowel 6x40 or 6x60 mm;
- self-tapping screw for gypsum board measuring 3.5x25 mm for metal;
- extensions for frame elements;
- GKL.
When choosing materials for installation, give preference only to high-quality products; the final result depends on your choice
When choosing a material, it is worth noting that you should not save and buy the cheapest one, with a thickness of 0.4 mm. It is much better to use a high-quality profile from KNAUF. It has a thickness of 0.6 mm and meets all requirements for strength and durability.
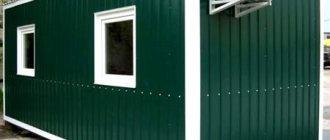
Choosing corrugated sheeting for cladding
Covering the walls of a house with corrugated sheets
According to GOST 24045-2010, corrugated sheeting is divided according to purpose into several types - load-bearing, roofing, wall and mixed type.
GOST 24045-2010
Bent steel sheet profiles with trapezoidal corrugations for construction. File for download
GOST 24045-2010
Each type is marked accordingly. For cladding facades, wall corrugated sheeting (C) is intended, characterized by a trapezoidal corrugated shape. The profile height varies between 8-44 mm, the decorative coating can be either plain or with a pattern.
Seeing the letter “C” standing in front of the numerical marking combination, there is no doubt that this is wall corrugated sheeting.
Wall corrugated sheeting
If you need to sheathe the frame of a garage or some other non-residential building, it is recommended to choose load-bearing (N) corrugated sheeting, or a mixed type, which is designated by the letters NS.
Load-bearing corrugated sheet
When marking sheets, numbers are placed next to the letter designation that indicate the height of the corrugation - C-8, C-10, C-20 and so on. When cladding private houses, the most popular is C-8 corrugated sheeting: it is the most inexpensive, lightweight, but at the same time has good strength.
Profiled sheet S-8
If the façade is subject to high wind loads, it would be more appropriate to use profiles C-15, C-20 or C-21, which are more rigid and not prone to bending.
Profiled sheet S-15
Profiled sheet S-20
No less important when choosing are the decorative qualities of the material. An ordinary galvanized sheet is not suitable for a residential building; such cladding is more appropriate for industrial buildings or domestic buildings. Therefore, preference should be given to colored corrugated sheets with a high-quality polymer coating.
Corrugated sheeting with a stone pattern
The decorative layer can be matte or glossy, plain, with a texture like stone, wood, brick and other materials. Sheets with a pattern are much more expensive than plain ones, but they look just great. From a distance, the wavy relief of the cladding is not noticeable, and it seems that the house is really made of stone or brick.
Brick imitation
Imitation of torn stone
Stonework, drawing
Volumetric drawing
Advice. When choosing a material, pay attention to the back side of the sheet. There are options with double-sided decorative coating designed for fences and partitions. Of course, they can also be used for cladding a house, but why overpay for something that won’t be visible anyway?
It is more economical to use corrugated sheets painted on one side
Prices for corrugated sheets
Corrugated sheet
Useful tips
After completing the marking stage, you should move on to arranging communications that are planned to be masked with finishing material (electrical wiring, for example). Thanks to the markings, the networks are laid so that they are not damaged in the future during the assembly of the frame.
If the profile is not long enough, it is built up end-to-end or overlapping. In the first case, you will need an additional piece or end part of the guide profile. The connection area is worked out on the sides with self-tapping screws; as a result, the latter will not become an obstacle to a tight fit of the sheet finishing to the frame.
A paper plan for the installation of profiles and communications with exact adherence to scale should be kept: after finishing, the joints of the sheet material will not be visible, and if you need to hang something on the wall, it is better to know in advance where the frame or wiring is located.
Additional elements for corrugated sheets
In addition to the sheets themselves, additional elements will be needed for finishing. Each of them performs specific functions and is an integral part of the house’s cladding.
| Item name | Purpose |
| Outside corner External corner | Used for framing external corners. Gives the skin a finished look and at the same time protects the joints from precipitation, dust, and small debris. Mounted on top of the corrugated sheet, as a result of which the screw heads remain visible |
| Internal corner Internal corner | It is attached to the inner corners of the building and performs protective and decorative functions. Mounted on top of profiled sheets, fasteners remain visible |
| External corner difficult | Performs the same functions as a regular corner, but it is attached to the sheathing before installing the sheets. This installation allows you to make hidden fasteners |
| Inner corner difficult | Installed in the internal corners of the facade before installing corrugated sheets, it performs protective and decorative functions |
The docking strip is complex | Intended for protecting and finishing sheathing joints on the wall plane. Attached to the sheathing before installing the corrugated board |
End strip | It is used to frame the ends of the sheathing, protects them from the effects of precipitation, and gives a neat appearance. Attached to the sheathing before installing the sheets |
Sloping strip | Used for framing door and window openings. Protects against precipitation and debris, attaches to the sheathing before installing the sheathing |
Docking strip | Performs the same functions as a complex docking strip, but is attached after installation of the sheathing, as a result of which the fastener heads remain visible |
| Molding | It is used to finish the joint between the facade of the house and the lining of the eaves overhang. Attached to the sheathing before installing corrugated sheets |
Window ebb | Used to protect window sills from rain flows. Installed at the bottom of the window slopes before installing the casing |
| Platband | Used to decorate door and window openings, giving them a finished look |
Base strip | It is used to protect the upper part of the base from rain and snow, thereby extending its service life. Attached to the bottom of the sheathing before installing corrugated sheets |
As a rule, these products are produced in lengths of 3.2 and 1.25 m, although each manufacturer may have its own parameters. It is much easier to calculate their number than sheathing sheets, since here everything is measured in linear meters, and not in square meters.
Types of profiles for drywall
There are 6 main markings for metal structures used under plasterboard sheathing:
PN/UW – guides with a depth of 40 mm and a width of 40, 50, 75 and 100 mm (depending on the wall), intended for assembling the frame;- PP/CD – designed to form a ceiling frame, secured using direct hangers or anchor clamps;
- PS/CW - fixed into the guide profile itself and serves as a base for walls and partitions made of plasterboard;
- PM is a type of beacon profile or rail used to level the wall and is convenient to use for plastering walls;
- UP - necessary for strengthening, as well as leveling corners.
In turn, each of these types comes in different varieties in size and other parameters, which allows you to choose an option for any task of any complexity.
✅ Installation rules depending on type
When working on installing the guides, the frame is cut to the required dimensions of the partition. You should start implementing the fastening from the floor and then move to the ceiling. It is recommended not to forget about the sealing self-adhesive tape, which is glued at the points of contact between the profile and the mating surfaces - this will increase sound insulation. Fastening to the base surface is realized using dowels. The step is 1 m, but not less than 3 dowels for each frame part.
Scope of application of metal profile
Products made from profile metal have firmly established themselves in the building materials market. Due to their diversity, versatility, reliability and other properties, they are used to create supporting structures, roof coverings, and as finishing wall panels.
The main areas of application of metal profile products:
- Creation of frames for fastening finishing materials. The lion's share of all supporting structures for drywall, siding and other boards is metal profiles. To assemble frames, frame products in the form of pipes and square racks are used as a base, and ceiling and rack profiles are used as cross members.
- Construction of the roof . Two types of material are used: pipes (rafters, beams and supporting elements) and sheets (as a covering). Moreover, they can be used both together and as separate elements.
- Construction of light structures and fences. It is possible to use exclusively metal products as support posts, crossbars and sheets, but sometimes combined structures are allowed: wooden base/corrugated sheeting or metal pipes/wooden (plastic) fences.
- Decoration of buildings and premises outside and inside. Profile metal sheets are widely used as finishing material for the exterior of buildings. Less commonly, they are used indoors, mainly in hangars, garages and other outbuildings.
It is possible to highlight other areas of use of metal profile products, but these are not so popular areas.
Choosing a profile for drywall
Before attaching the drywall profile to the wall, you need to make markings and determine their number in the frame. Profiles are supplied in standard lengths of 3 or 4 meters. For their manufacture, metal with a thickness of 0.4-0.8 mm is used. Profiles with a thickness of 0.55 mm are optimal for ease of installation on the wall and strength characteristics.
Depending on the purpose, profiles are:
- PN guides (UD). They have a U-shape with a base of 50, 75 or 100 mm, while the width of the sidewalls is 40 mm. The main purpose of the products is to assemble a wall frame in order to obtain a durable frame.
- Rack-mount PNP (CD) - can be used for wall mounting as vertical and horizontal elements.
- Corner (PU) are designed to strengthen and level the corners of the room and come in widths of 25 or 31 mm.
Advantages of metal profiles for ventilation façade construction
The facade subsystem of a ventilated facade made of galvanized profiles in combination with corrugated sheets and mineral insulation has a number of advantages that distinguish it from other technologies:
- High strength characteristics. The suspended facade made of galvanized steel combines rigidity and plasticity. Rigidity protects against destruction. Plasticity eliminates temperature deformations of the metal. Design temperature differences from -60 °C to +120 °C.
- The wall is reliably protected from the aggressive action of water, wind and snow. The insulation is always dry and does not lose its properties.
- The service life of a suspended ventilated facade is 30 years or more. It all depends on the operating conditions, the quality of installation and materials, as well as timely maintenance.
- Fire safety. All parts of the facade, including insulation, burn poorly. Under normal conditions it is impossible to set them on fire.
- The polymer-coated surface practically does not fade in the sun. It will retain its presentable appearance for many seasons.
- The galvanized facade system includes a full set of basic and additional elements. This allows it to be installed in difficult conditions on the most inhospitable grounds.
- Using brackets with variable shelf lengths, you can align walls with differences of up to 150 mm to the height of the object. This does not affect the strength characteristics of the system.
- Installation of steel structures is carried out almost all year round. The exception is hurricane winds, severe frost and rain.
Strengthening the frame
Please note: if a retractable door is installed, the metal frame must be strengthened. The structure will be strengthened if:
- the distance between vertical hangers will not exceed 40 cm;
- insert wooden beams into the first five profiles from the doorway;
- At the exit point of the door, it will not be possible to fasten it using hangers, so you need to use corners, positioning them in such a way as to avoid obstacles to the free movement of the door.
We described in detail how to attach a metal profile to a wall. Now you know in what sequence to carry out the installation work so that your room will soon take on a completely new look. Anyone who follows the instructions set out by us and also follows our advice can sheathe walls with plasterboard.
Transportation, loading and unloading
To ensure that the products are delivered without damage, our specialists comply with the following transportation requirements :
- loading is carried out on a flat base of the body. The length of the body does not exceed the length of the boxes with products;
- During transportation, the products are protected from movement and mechanical damage;
- the vehicle speed does not exceed 80 km/h. The movement of vehicles is carried out without sudden acceleration and braking.
Requirements for loading and unloading products:
- Loading and unloading of boxes of products is carried out using special lifting equipment with soft slings. When the length of boxes is more than 5 meters, traverses are used;
- When unloading manually, the sheets are lifted and carried carefully, in a vertical position. The sheets are not allowed to bend.
Surface marking
An important and painstaking stage. The appearance of the entire structure will depend on the thoroughness of the markings. An incorrectly installed metal profile may not be immediately noticeable, but will certainly appear after the work is completed.
- The most protruding point on the surface of the wall is sought. The distance from it to the inside of the drywall should be no less than the width of the metal profile used.
- A line is drawn on the floor indicating the outer boundary of the guide profile.
- Using a plumb line, this line is transferred to the ceiling. Such markings are required when attaching drywall to the wall on a profile, since it is necessary to obtain a single plane.
- Markings are made on the wall for installing rack profiles. The plasterboard sheet has a width of 1200 mm. They must be joined on the surface of the metal profile, so each sheet must be screwed to 3 or 4 racks. Accordingly, the step between the rack elements of the frame should be 40 or 60 cm. The outer racks are located along the edges of the wall, and the countdown is based on them. In most cases, preference is given to the option with three profiles per sheet: two at the edges and one in the middle.
- On the lines marking the center of the vertical profiles, the installation locations of direct hangers are marked every 60 cm.
- Places are marked for horizontal jumpers and hangers for their fastening.
An option for insulating an already built wall.
When insulating the facade with corrugated sheets, brackets are attached to the load-bearing wall. After installing the brackets, the insulation boards are installed. The insulation boards are fastened to the base using disc-type polyamide dowels. To protect the insulation from the wind, a wind and moisture protective film is used. Next, vertical U-shaped guides are attached to the brackets; fastening is done using rivets. Using guides, the walls are leveled. An air gap is created between the guides and the windproof film. Horizontal U-shaped profiles are attached to the vertical guides with a pitch necessary for reliable fastening of the profiled sheet. The wall corrugated sheet is secured with self-tapping screws with sealing gaskets.
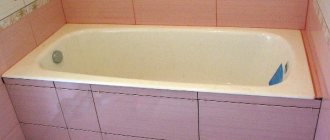
Installation of plasterboard sheets
Before attaching drywall to the mounted metal frame, it must be allowed to adapt to the temperature and humidity conditions of the room environment. Before installing plasterboard, it is necessary to separate all communication connections in the space of the future false wall: power and telephone cables, computer networks, heating and water supply pipelines, etc., for the reason that the plasterboard structure is non-removable and after finishing operations excludes free access to wall space.
When the wiring and other communications are laid, we begin installing drywall on the walls and ceiling of the room. First, we install solid sheets (standard size - 2500x1200 mm), which do not require cutting or adjusting to size. Here, as well as in the installation of a metal frame, there are certain features and rules: - a wall plasterboard sheet with a thickness of 12.5 mm weighs approximately (depending on humidity conditions) 29 kg, a ceiling - with a sheet thickness of 9.5 mm weighs 22 kg, so keep suspended and at the same time attaching the sheet to a metal frame (especially a ceiling one) is unlikely to work; — plasterboard sheets have mounting chamfers on both sides, which after installation should “look” into the room; — fastening plasterboard to a metal profile with self-tapping screws of the “gypsum-metal” type is done in increments of no more than 200-250 mm, therefore, to fasten one sheet you will need several dozen self-tapping screws, which are simply unrealistic to screw in with just a screwdriver; it’s better to stock up on a screwdriver; — the heads of the screws should extend into the body of the gypsum sheet by approximately 1 mm (in order to putty and clean the fastening area); — the self-tapping screw must “pierce” the body of the plasterboard sheet and go into the metal profile to a depth of at least 10 mm.
An option that does not require insulation: the corrugated sheet acts as a wall
In cases where the building does not require insulation, the corrugated sheet acts as a wall , protecting the interior from wind and precipitation. In this case, the corrugated sheet is attached to the wall crossbars of the frame with self-drilling bolts with a sealing gasket. The corrugated sheets are fastened to the wall through one wave in the lower deflection; the joints of the corrugated sheets are fastened with rivets at 300 mm intervals.
Pros and cons of using drywall
Drywall has become a popular material and is widely used in construction. You can use it to make neat ceilings, ideal slopes, partitions ; you cannot ignore such a direction as covering walls with plasterboard without a frame. The secret of the popularity of this material lies in its main advantages:
- Environmentally friendly , no toxins, ideal structure.
- Easy to use , with this material you can easily make the surface perfectly flat.
- Behind such a surface you can easily hide all the necessary communications.
- It is not difficult to place thermal insulation or sound insulation behind the surface of this material.
- It absorbs sound .
- The material will be suitable for almost any room, since it can be installed in the living room and bedroom.
- The material is considered universal and gives room for imagination in design terms. Thanks to the material, you can easily create multi-level ceilings, columns, pilasters, arches, niches .
- The material is very easy to cut , so finishing walls with plasterboard without a frame will not be difficult. From this material you can easily make a structure of any complexity.
- It is moisture resistant but cannot withstand prolonged exposure to water . Otherwise, after some time it will become deformed and deteriorate.
- To perform high-quality installation, you must have professional skills and follow basic technologies.
- Despite its strength, the material cannot withstand a strong blow from the hand or from a heavy object. Therefore, in those places where TVs and heating tanks will be mounted, instead of the inner sheet, a plywood insert is installed.
- After installation of this material, further finishing and painting .
- Sheets can be stored horizontally, always dry, otherwise they will become deformed.
It’s great that drywall has so many advantages, but it’s also important to take into account the main disadvantages:
Thus, from the profile you can create decorative objects in the interior. Installing drywall on a wall without a frame has many features and nuances , however, if you follow the technology, you can achieve the desired result.
Construction of houses
0 votes
+
Vote for!
—
Vote against!
Before installing drywall, you should prepare the frame on which it will be attached. For these purposes, a special profile is used, varying in size, cross-section and configuration. We’ll talk about the features of installing a profile for plasterboard and its purpose further.
Table of contents:
- Profile for drywall: characteristics and general information
- The main types of metal profiles for drywall
- Features of metal profile fastening
- Features of installing profiles for drywall around the perimeter of the room
- Installation of a guide-type plasterboard profile
- Do-it-yourself drywall profile installation: vertical sections
- Installation of horizontal fragments from a metal profile
Profile for drywall: characteristics and general information
Drywall is a material that is quite simple to use. However, in order to secure it to the surface, you should build a special structure from the profile. In the process of performing this work, difficulties most often arise.
The construction of a structure from a metal profile for fastening drywall allows this material to fully perform its functions. Since the frameless fastening of drywall consists of sheets of gypsum, which are used to decorate the room. At a time when frame structures vary in shape, size, have arched openings, etc.
The absence of sheathing will not allow for leveling the walls, finishing the ceiling or installing partitions.
There are two options for profiles used during the installation of plasterboard structures:
- wooden;
- metal.
The first option has a lot of disadvantages, including, first of all, a low service life compared to metal. In addition, a wooden profile is more susceptible to moisture than a metal one.
Steel profiles are several times more expensive than wooden ones, and this is their main drawback. Despite this, they have many advantages, among which we highlight:
- high resistance to all external influences;
- availability of purchase;
- ease and reliability of use;
- durability; galvanized steel, 6 mm thick, is used for their manufacture;
- this profile can be easily restored;
- a variety of profile options that are suitable for use in certain situations.
The main types of metal profiles for drywall
In accordance with their purpose, all profiles for installing drywall are divided into:
- basic;
- guides.
The dimensions of the profile for plasterboard vary in relation to the features of the structure that is being built from it.
The first option is marked Ps and PP. It is designed for places with high loads. It is on this type of profile that plasterboard sheets are attached. The two guide profile options differ at the edges in the form of the letter P or C.
There is a PN marking for the guide profile. It is a horizontal bar, which is the basis for attaching vertical posts. It is this profile that forms the basis of the steel frame.
We suggest that you familiarize yourself with the main profile options for plasterboard made of metal:
- PN - are guide profiles for ceiling purposes, since it is on them that the plasterboard used in the process of finishing ceilings is attached;
- PP is a type of ceiling main profile, used in the process of fixing plasterboard to the ceiling, it is fixed around the perimeter of the room when installing suspended ceilings;
- PN - profiles for wall purposes, perform the function of a vertical post in wall structures.
Tip: Ps profiles are used partially, that is, they are installed in sections, in order to save material. This does not affect the final quality of the design in any way.
There are two more profile options that are not often used:
- corner - help to form the corners of a plasterboard partition, they are installed directly on the already installed plasterboard and protect it from the effects of various kinds of mechanical irritants, when arranging the ceiling, corner profiles are fixed around the perimeter, when arranging walls they are attached to the floor and ceiling;
- arched - used in the process of constructing arches; in addition, it is used to form radius and various kinds of asymmetrical shapes of walls or partitions; simple self-tapping screws are sufficient to fix such a profile.
Please note that the maximum bending radius of the arched profile is 50 cm; with a higher load, there is a risk of structural destruction.
Features of metal profile fastening
To fix the material, special hangers are used, with the help of which the interval between the wall and the profile is adjusted. Thus, before constructing the structure there is no need to pre-level the walls.
If the ceiling height is more than two meters, then to install the profiles you will need 5 hangers attached to the ceiling or wall. With their help, the evenness of the entire structure is adjusted.
Please note that the basis of the metal frame structure is a guide-type profile. It is fixed with dowels and screws. The average distance between holes is 200 mm. Thus, the structure will be securely attached to the wall.
Some types of profiles already have pre-drilled holes; for beginners it is better to choose such materials.
In order to facilitate the installation of a profile under drywall, we suggest that you familiarize yourself with useful tips for carrying out this process:
1. Two plasterboard sheets can easily fit on the wide wall of the profile, but keep in mind that each of them must be placed evenly on it.
Tip: Calculate the installation of vertical posts so that the interval between them is six centimeters less than half the width of the drywall.
2. Screws are installed in close proximity to the wall to ensure more reliable fastening.
3. Hammer the screws exclusively at right angles, otherwise, unscrew the screw and reinstall it.
4. All screw heads are recessed 0.5 mm in the profile.
5. Vertical racks have a special place for installing engineering communications. Although in most cases, wires and pipes run directly under the drywall.
6. When finishing a private house, care should be taken to have additional heat and sound insulation.
7. When purchasing profiles and guides for hypocardboard, you should increase the required amount of materials by 10% to compensate for various types of cuts and technical issues.
Features of installing profiles for drywall around the perimeter of the room
First you need to mark the plane along which the frame will be installed. Next, prepare the tools in the form:
- two plumb lines;
- fishing lines;
- rulers;
- hammer with nails;
- chalk.
Nails are used to fix the plumb line to the wall; it should be fixed to the ceiling, but hang down to the floor. The second plumb line is attached in the same way. Please note that the plumb lines should not touch anything, as the evenness of the vertical will be disrupted.
A fishing line is stretched along the wall in three places: top, bottom and center. The highest point on the wall will serve as the installation location for the metal frame. When moving away from it, check the accuracy of the layout. Parallel to the pre-tensioned fishing line, pull another part of it near the side wall. Connect the sections of the fishing lines located on the two walls using a ruler, thus making marks according to the location of the plane.
Repeat this procedure with all other walls and the ceiling. Using a rule and chalk, draw the perimeter of the structure.
Installation of a guide-type plasterboard profile
In order for the further construction of the profiles to be smooth and correct, it is necessary first of all to correctly fix the guide profile, which is the basis of the frame, which takes on most of the entire load.
To secure the guide profile you will need:
- hammer drill;
- electric drill;
- hammer;
- fasteners;
- metal scissors;
- pliers.
Install the guide profile on the wall according to the pre-made markings. To make it more convenient to work, it is better to start the whole process from the bottom. Step back 0.3 m from the top of the profile and drill a hole, which should be a few millimeters larger than the length of the dowel nails. Make two more holes in the center and bottom and install dowel nails.
Check the evenness of the entire structure according to the specified markings, adjust the profile if necessary and hammer in nails. Next, measure the distance that remains to the end of the wall and add twenty millimeters to it, since the installation of the guides is done overlapping.
Using scissors for cutting metal products, cut off the side sections of the profile and bend it outward, cut off the central part and align it using pliers. Install the next part of the profile, while at the joint section, hammer in an additional dowel-nail.
Align the profile according to the markings and secure it with dowel nails. All subsequent guide profiles along the perimeter of the walls and ceiling are installed in the same way. To further strengthen the entire structure, dowels are used, installed in increments of thirty centimeters. Before this, it is recommended to once again check the structure for evenness and compliance with the markings.
Do-it-yourself drywall profile installation: vertical sections
Vertical profiles must be fixed in accordance with the size and type of installation of plasterboard sheets. From the beginning of the wall, a distance equal to the width of the plasterboard sheet is measured and a mark is made. This is where the vertical profile will be located, which will become the junction of two sheets. The mark indicates the transverse middle of the metal profile.
In the same way, mark all vertical sections of the profile installation. The plasterboard sheet is divided into two parts according to its width, each of them should not be more than fifty centimeters. Make marks on the floor surface; they will mark the middle part of the vertical profiles.
Throw a plumb line from the ceiling to the floor, and mark the places where the vertical profile is attached to the ceiling. Using the first mark, transfer the dimensions to the ceiling surface. To check the correctness of the work, throw a plumb line from the ceiling onto the floor; if the marks match, then the markings do not require adjustment.
To fix vertical profiles on the ceiling you will need:
- electric screwdriver;
- self-tapping screws for metal;
- fishing lines;
- pliers;
- rules;
- pencil;
- suspension in the amount of three pieces;
- hammer;
- fasteners;
- electric drill.
On the central part of the wall, measure the distance between the ceiling and the floor. Transfer all measurements to the profile surface, subtract one centimeter. To avoid errors, use a pencil to mark the size along the entire workpiece. Cut off the side sections of the profile, bend its edges outward, and cut through the central part. Use pliers to straighten the cut. Thus, the guide will connect to the vertical profile.
After installing the workpiece on the wall, you should mark it around the perimeter. Next, the wall is divided into three sections, where marks are made and the workpiece is removed.
Install the suspension according to the marks made, drill holes in the suspension using a perforated drill and secure it to the marks with dowel nails. With the help of plumb lines it is very convenient to attach drywall, in addition, with their help it is aligned in the required direction.
Install the second hanger and return the workpiece. Attach the vertical profile to the surface of the guide using metal screws. Fix the top part first and then the bottom. Please note that the profile height is one centimeter less than the overall height, so care should be taken to have an allowance of 0.5 cm at the top and bottom.
On the surface of the vertical guides, screw the screws on which the fishing line is fixed. The side sections of the hangers need to be bent, and a vertical profile is set along the fishing line. More than one person will be required to carry out this process.
Please note that under no circumstances should the profile push the line or move away from it. It is possible to check the evenness of the structure using a rule.
Advice: If even minor errors are detected, you should resort to correcting them at this stage of the work. After installing vertical profiles, errors cannot be corrected.
Installation of horizontal fragments from a metal profile
The horizontal parts are jumpers that increase the strength characteristics of the structure. These components are fixed directly to the structure and not to the wall. In order to save material, in the process of fastening the horizontal parts of the profile, the principle of fastening plasterboard should be used, that is, install jumpers in areas located under the plasterboard.
Please note that in the process of installing drywall, you should use the staggered principle, that is, first a whole sheet is laid, and then half of it. This will help prevent long seams and strengthen the strength of the structure.
To complete this process you will need:
- screwdriver;
- self-tapping screws with metal scissors;
- pliers;
- crabs;
- marker.
In the place where the transverse profile intersects with the vertical structure, a special part is installed, which is called a crab. If an even cross does not form, you should perform the following steps:
- measure the distance between the middle sections of the two verticals;
- cut the workpiece and install it in place;
- use a marker to mark the areas where the profile will be installed;
- using metal scissors, cut off the desired section of the profile;
- pliers will help to align the cuts and bend the side sections at a right angle;
- install the profile and attach it using self-tapping screws;
- check the evenness of the resulting structure.
Video installation of a drywall profile:
Horizontal
Horizontal fragments are, in fact, jumpers between vertical profiles. They strengthen the overall structure, giving it additional rigidity, and are not attached directly to the wall. When installing cross-sections, you can also use the principle of attaching a profile under drywall, only here the calculation is carried out according to the length of the gypsum board.
Nuance! It is more advantageous to install gypsum board sheets in a checkerboard pattern, that is, on the first opening there is a whole sheet from below, and on the second - a whole sheet from above. This design helps prevent the formation of long horizontal seams and, to a certain extent, strengthens the overall structure.
Installation
After the calculations, we proceed to installing the transverse profiles, for this we will need:
- screwdriver;
- metal screws;
- metal scissors;
- pliers;
- crabs;
- marker.
In places where two diameters and a vertical form a cross, crabs are used. This is a very practical device and I think instructions are not necessary.
Where the cross does not work, a slightly different approach is needed.
- We take a measurement between two verticals, measure from the middle to the middle of the other profile.
- We cut the workpiece and put it in its place.
- Use a marker to make marks on the sides so that the profile fits between the verticals.
- Using metal scissors, we make longitudinal cuts along the corners of the profile up to the marks, maybe a little deeper.
- Using pliers, we align the cuts and bend the sides ninety degrees, according to the markings.
- We install the profile in place and fasten it with screws.
- After installing all the profiles for fastening the drywall, check everything carefully again. As soon as the first sheet of gypsum board lies on the plane, alteration of the metal frame will become more complicated.
Attention! Don’t skimp on the screws: if it’s deformed, it’s better to throw it away; if the screw on the fastening has turned, tighten an additional one. By saving screws, you reduce the strength of the structure as a whole. The price that such parts will cost you is several times less than a new repair.
Commonly used types of metal profiles
When attaching drywall to walls and ceilings, use appropriate metal profiles:
Guide profiles are attached directly to one of the surfaces of the room (floor, wall or ceiling) and do not have additional stiffeners. Rack and ceiling metal profiles have special sides, so they are more resistant to bending. These elements are inserted into the guides and fixed there most often with special screws.
Installation of a drywall profile may also require the use of corner or beacon profiles. But in the vast majority of gypsum plasterboard structures they will not be needed.
For reliability, it is recommended to use a profile made of metal with a thickness of at least 0.55 mm.
The length of the products can be 3 or 4 meters. To get fewer scraps when installing drywall profiles, you should carefully calculate the number and sizes of individual frame elements, and only then go to the store.