Now we will learn how to make a DIY induction heater that can be used for various projects or just for fun. You can instantly melt steel, aluminum or copper. You can use it for soldering, melting and forging metals. You can use a homemade inductive heater for casting as well.
My tutorial covers the theory, components, and assembly of some of the critical components.
The instructions are large and will cover the basic steps to give you an idea of what goes into a project like this and how to design it without anything exploding.
For the furnace, I built a very accurate, inexpensive cryogenic digital thermometer. By the way, in tests with liquid nitrogen it performed well against branded thermometers.
Components
For the device you will need:
1. Plastic pipe; 2. Stainless steel mesh; 3. Steel wire; 4. Copper wire; 5. Welding inverter.
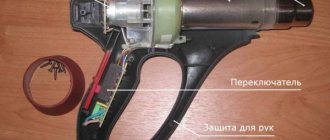
The circuit of an induction heater created by yourself will be very simple, hence the light weight and compactness of the device.
The basis is a coil that will play the role of an inductor. It is located in a plastic case. Inside the coil itself you need to place a piece of steel pipe, on which you need to make 2 pipes (inlet and outlet). They will be needed to circulate water in the heating system. The coil, in turn, must be connected to electricity for the device to function.
Note!
Do-it-yourself Gauss cannon: TOP-130 photos of the best ways to create it yourself. Design features + master class for beginners
DIY clamps - a step-by-step master class for beginners. Schemes for manufacturing different designs + 170 photos
Do-it-yourself electric scooter - a master class with step-by-step instructions for doing it yourself. Tips and simple patterns for beginners + the best photo reviews
If there is an inverter, you can use a slightly different connection method. In addition, this will increase the frequency of the current, and as a result, the efficiency of the device.
The converter itself, due to which another type of connection is possible, consists of 3 components:
1. Transistor control circuit; 2. Rectifier; 3. Two-transistor inverter.
A distinctive feature of this method is the secondary winding of the wire. It is short-circuited and is located in the first winding. In fact, the operating principle can be compared to a transformer, but the desired outcome is completely different.
In a transformer, they try to avoid heating, while in an induction heater, it’s the opposite. You can download the diagram for free.
You can get such an inverter from a welding machine, but the connection diagram will be somewhat more complicated. Thus, you can assemble induction heating with your own hands from a welding machine.
Note!
DIY rocking chair: TOP-120 photos of the best manufacturing options. Master class on creating a rocking chair at home
Smokehouse from a gas cylinder - the best master class on making a homemade smokehouse with step-by-step photo diagrams for beginners
Do-it-yourself compressor: TOP-130 photo reviews of finished compressors. Step-by-step instructions + diagrams and drawings
Pros of technology
It is used in a wide range of industries due to its low cost (depending on the type and modification) and high efficiency. Mainly used in the alloy manufacturing industry, where ultra-pure alloys can be produced through the use of an induction heater.
Note!
Do-it-yourself wind generator: TOP-170 photo reviews of finished devices. Detailed DIY instructions for beginners
Do-it-yourself spot welding - the best master class on making homemade spot welding with step-by-step photo diagrams of do-it-yourself work
Do-it-yourself tennis table: TOP-150 photos of the best manufacturing ideas. Master class on creating a tennis table at home
An environmentally friendly technology that does not pollute the environment in any way, and at the same time is cheap to produce.
It is actually possible in any shape, which allows you to evenly distribute heat over the entire area, eliminating local overheating.
In fact, if you compare this technology with similar ones, it has no disadvantages. Except for one thing: it involves the need to connect the inductor and the workpiece. If this is not done, the heating will be insufficient in most cases.
Equipment cooling
When creating an induction furnace with your own hands, the biggest problem that arises is cooling. This is due to the following points:
- During operation, not only the molten metal is heated, but also some elements of the equipment. That is why effective cooling is required for long-term operation.
- The method based on the use of air flow is characterized by low efficiency. In addition, it is not recommended to install fans near the stove. This is due to the fact that metal elements can influence the eddy currents generated.
Typically, cooling is carried out by supplying water. Creating a water cooling circuit at home is not only difficult, but also economically unprofitable. Industrial versions of the furnace already have a built-in circuit, to which it is enough to connect cold water.
Designs and parameters of induction furnaces
Channel
One of the options for making an induction furnace with your own hands is a channel one.
For its manufacture, you can use a conventional welding transformer operating at a frequency of 50 Hz.
In this case, the secondary winding of the transformer must be replaced with a ring crucible.
In such a furnace you can melt up to 300-400 g of non-ferrous metals, and it will consume 2-3 kW of power. Such a furnace will have high efficiency and will allow the smelting of high quality metal.
The main difficulty in making a channel induction furnace with your own hands is purchasing a suitable crucible.
To make the crucible, a material with high dielectric properties and high strength must be used. Such as electroporcelain. But such material is not easy to find, and even more difficult to process at home.
Crucible
The most important elements of an induction crucible furnace are:
- inductor;
- power supply generator.
As an inductor for crucible furnaces with a power of up to 3 kW, you can use a copper tube or wire with a diameter of 10 mm or a copper busbar with a cross-section of 10 mm². The diameter of the inductor can be about 100 mm. The number of turns is from 8 to 10.
In this case, there are many modifications of the inductor. For example, it can be made in the form of a figure eight, trefoil or other shape.
During operation, the inductor usually becomes very hot. In industrial designs, the inductor uses water cooling of the turns.
At home, using this method is difficult, but the inductor can work normally for 20-30 minutes, which is quite enough for home work.
However, this mode of operation of the inductor causes the appearance of scale on its surface, which sharply reduces the efficiency of the furnace. Therefore, from time to time the inductor has to be replaced with a new one. To protect against overheating, some experts suggest covering the inductor with a heat-resistant material.
The high-frequency alternating current generator is another important element of an induction-type crucible furnace. Several types of such generators can be considered:
- transistor generator;
- thyristor generator;
- generator using MOS transistors.
The simplest alternating current generator to power an inductor is a self-excited generator, the circuit of which has one KT825 type transistor, two resistors and a feedback coil. Such a generator can generate power up to 300 W, and the generator power is adjusted by changing the DC voltage of the power source. The power source must provide a current of up to 25 A.
Read also: How to drill tiles in the bathroom
The thyristor generator proposed for the crucible furnace includes in the circuit a T122-10-12 type thyristor, a KN102E dinistor, a number of diodes and a pulse transformer. The thyristor operates in pulse mode.
The analysis of the circuit showed that in such a circuit there are quite powerful parasitic oscillations at frequencies close to 120 MHz.
DIY induction furnace
Such microwave radiation can negatively affect human health. In accordance with Russian safety standards, it is allowed to work with high-frequency vibrations at an electromagnetic energy flux density of no more than 1-30 mW/m². For this generator, as calculations have shown, this radiation at a distance of 2.5 m from the source reaches 1.5 W/m². This value is unacceptable.
The MOSFET oscillator circuit includes four MOSFET transistors of the IRF520 and IRFP450 types and is a push-pull oscillator with independent excitation and an inductor included in a bridge circuit. An IR2153 type microcircuit is used as a master oscillator. To cool the transistors, a radiator of at least 400 cm² and airflow are required. This generator can provide power up to 1 kW and vary the oscillation frequency from 10 kHz to 10 MHz. Thanks to this, a furnace using a generator of this type can operate in both melting and surface heating modes.
A long-burning stove can operate on one stack from 10 to 20 hours. When making a long-burning stove with your own hands, you need to take into account the design features so that it produces maximum heat with minimal energy consumption. Read about how to properly assemble the oven on our website.
You might be interested in learning about gas garage heaters. What it should be like to ensure warmth and safety, read in this material.
Mandatory safety precautions
Any work performed with electricity, especially if the work in one way or another involves the participation/use of water in the process, requires full compliance with safety requirements.
Safety precautions must always be observed, with special care in cases where the device is assembled independently, using independently acquired skills and knowledge.
In addition, before starting any work, it is initially necessary to thoroughly study the theoretical part. This will allow you to understand the upcoming work in more detail and eliminate possible errors and misunderstandings.
In this article, we looked at several ways to make a heating device with your own hands. Photos of the induction heater, instructions and recommendations for use can be found on the Internet.
Please note that in the case of homemade induction heaters, they cannot be installed in residential areas. This is caused by electromagnetic radiation that comes from both inside and outside the coil. In fact, it will heat not only the core, but also metal objects and devices that are exposed to the magnetic field.
It is recommended to use only with a galvanized screen to eliminate this possibility.
Second
Regarding the first option, this one is much simpler, but requires additional costs. A long pipe is used as a base. Approximately a meter of paint must be removed from its surface. When the paint is removed, the cleaned area should be covered with electrical fabric in 3-4 layers. Next, copper wire is wound on top of the fabric, forming a coil.
The assembled device is isolated, all that remains is to connect it to the inverter.
How to make it yourself
Let's consider the second method of making a powerful induction heater with your own hands. Unlike the first method, there will be much fewer components, but its power will be higher due to the use of slightly different components and connection type.
We will need:
1. Welding inverter; 2. Generating welding current (from 15 A); 3. Copper wire.
It is recommended to use polymer materials as the core. This is due to the fact that they are able to withstand fairly high temperatures when heated. In our case there will be a polymer pipe with a diameter of 50 mm.
It is necessary to wind the wire around the core and connect it to the inverter terminals so that there is no twisting.