Metal shelving is a fairly common and popular item both in everyday life and in production areas. They can be seen in garages and sheds, cellars and shops, warehouses and office premises. This is a convenient place for storing and classifying goods, so they are produced in a variety of sizes, from small ones for home use to huge options for industrial enterprises.
In this article we will look at how to assemble a metal rack, since they are sold disassembled. The kit includes racks, cross parts for shelves and fittings. The tools needed to assemble them depend on the type of fasteners. There are racks with hooks, and there are designs with bolts and with prefabricated racks.
Small products are assembled and installed on the flooring without additional reinforcement. If the rack is huge and intended for a large supermarket or warehouse, then the lower part must be fixed to the concrete floor with anchors driven into the surface and cemented flush with the floor.
Prefabricated shelving for home
For home use, purchase a disassembling kit. Before purchasing, make sure that it will fit along the wall of the room. Be sure to allow an allowance of approximately 10 cm on the sides to make it easier to assemble.
Typically, shelving consists of vertical posts with holes for fasteners and shelves. You can assemble a small tool rack on the floor in a horizontal position and then lift it and put it in the right place. If the rack is large, then you need to follow the instructions for assembling metal racks.
If you decide to act on your own, then prepare a screwdriver and pliers. It is advisable to call a family member as an auxiliary worker so that, if necessary, he can support the opposite part of the structure during work.
Is it worth buying domestic shelving?
Warehouse shelving
Today's domestic warehouse suppliers assemble structures using foreign technologies, but there are also domestic technologies that are practically no different from foreign ones, and on the contrary, even better in some aspects.
Foreign designs differ in technical capabilities; overall dimensions are maintained throughout, thereby ensuring high quality assembly. Domestic designs are more focused on strength and load-bearing capacity, rather than on assembly accuracy. But there are also exceptions.
In some areas of warehouse furniture, domestic manufacturers still cannot match their foreign competitors. For example, in the segment of mobile and gravity (non-standard) shelving.
If your warehouse has non-standard parameters, then it is best to purchase racking equipment from foreign suppliers or their dealers on the Russian market.
For 2014-2015, according to experts, the need for non-standard warehouse racks fluctuates at the level of a couple of percent. Our manufacturers are also not sitting still and some are already able to compete with foreign suppliers.
Choose warehouse equipment correctly, taking into account all the details. Don't go for cheap.
Assembly instructions
Assembly begins with vertical posts. They are made in such a way that the shelves can be placed at a height convenient for you, so it is recommended to immediately calculate the distance between the shelves. When the vertical parts are assembled, screw the bottom shelf first to stiffen the structure. Then things will go much easier.
To ensure that the distance between the shelves is equal and you do not have to unscrew the already attached side, before assembling the metal rack, place marks on each vertical stand. This will speed up the work process. You can use a ruler or simply count a certain number of holes from the bottom shelf on each side (if they are provided by the manufacturer in different versions). If you are going to store large items, then use stiffeners to attach the shelves. Don’t forget to put plastic bearings on the lower ends of the racks, which will not only protect the floor from damage, but also prevent moisture from accumulating.
Assembling a metal rack is not difficult, especially if it is small in size. For large structures, have a helper hold the pieces until you finally attach them.
Wooden shelving technology
Making a rack.
In order for you to quickly assemble shelving for your home with your own hands, we will tell you about the main stages of the work.
So, let's begin:
- Marking the installation site.
First you need to decide what type of rack will be. If it is free-standing, then it can be assembled anywhere, and if it is wall-mounted, then the frame bars can be attached directly to the wall.
In this case, it is necessary to take care of the appearance of the wall surface behind the rack, since the back wall will be missing. If you are planning a shelving that covers the entire wall, then it is recommended to attach the wooden frame to the floor or ceiling.
- Frame assembly.
For the base, square or rectangular bars are used; the thickness depends on the height of the rack, the number of shelves and the weight of the things that are supposed to be stored. Usually they take dry planed bars 50 x 50 mm, 60 x 60 mm, 50 x 60 mm.
First, the lower base is assembled according to the dimensions of the rack; timber is vertically attached to it at the expected height in the corners, perimeter and middle, if an intermediate wall is planned. The racks are connected by an upper frame made of the same block.
Important! If the rack is long and high, then the vertical posts cannot always provide the necessary structural rigidity. Several diagonal struts along the ends and the rear wall, which are placed between the racks flush with the frame bars, would be appropriate here.
Wooden shelving for the balcony.
The racks are carefully measured vertically and secured with self-tapping screws to the lower and upper frames, the corners are reinforced with furniture corners. The locations of the shelves are measured on the verticals and additional horizontal connections are installed on which the shelves will lie.
- Arrangement of boxes, installation of shelves.
The finished frame is sheathed with decorative facing boards on the sides, bottom and top, which are secured with self-tapping screws or furniture screws. The joints are closed with matching clips.
For the outer walls, laminated chipboard, MDF panels, plexiglass, “Finnish” plywood, planed boards are used; the bottom and top can be covered with a simpler material.
If necessary, install a back wall; it will add additional rigidity to the entire structure (this is true for free-standing shelving; wall-mounted structures do not need it). For the back side, regular fiberboard is used.
The shelves are leveled on pre-attached horizontal bars and fixed with self-tapping screws, which are taken slightly longer than the thickness of the shelf.
The ends of shelves made of chipboard or MDF are finished with matching melamine tape, gluing it to the surface using a hot iron. You can partially or completely close decorative racks with your own hands, install several drawers, decorate the façade with carvings, original fittings, and hidden lighting.
The cladding can also be selected in the same stylistic solution as the interior of the room.
Prefabricated structure
Very convenient metal racks of a prefabricated design, where the racks are simply inserted into one another due to the different diameters of the cylindrical sticks.
They have mesh shelves with figured railings along the entire perimeter. How to properly assemble a metal rack is illustrated on the insert sheet included in the kit. For ease of use, clear the floor surface of anything unnecessary and arrange all the elements in the order of assembly. The only thing you should consider when purchasing such a product is that the shelves have places designated by the manufacturer, so it is no longer possible to rearrange them or change the distance between them for large items.
Such racks are assembled by hand, simply by putting the parts on vertical sticks. To secure the fastenings, use a rubber mallet, gently hitting the edge of the shelf until it sits completely in place. This kind of work is not difficult to do, the assembly is similar to a children’s construction set, so even a teenager or woman can assemble such a metal rack with their own hands.
Installation of warehouse systems
In order for specialists to begin work, the customer must provide them with certain conditions. First of all, it is necessary that ceiling lighting be installed at the site intended for assembling frames. To use power tools, two- and three-phase power supplies with voltages of 220V and 380V must also be provided.
- The warehouse must be closed and dry, with an air temperature of at least +5 degrees. As for the delivery of structures to the assembly site: in order to avoid having to reload components from place to place several times, it must be possible to unload a flatbed truck at the warehouse gate, and move the cargo from the body to the premises using a forklift.
Warehouse properly prepared for installation work
- For normal operation, a frame assembly area must be defined, which requires a certain amount of space - at least 30 meters long. What is important is that the floors of the warehouse must be prepared in advance by the customer, since this is not the responsibility of the installers.
- The floor should not have potholes, it should be clean and dry - but these are not all the requirements. The base of the floor must be reinforced concrete slabs with a thickness of at least 17.5 cm, in the manufacture of which concrete class B25 and higher was used. It has a fairly high compressive strength - and this is important, since warehouse floors are subject to enormous loads.
- Minor surface unevenness is allowed, but only within 5 mm per 4 square meters, or 15 mm along the entire length of the area occupied by the rack. Such defects can be easily eliminated with metal leveling plates, which are necessarily included with the system.
Marking for installation of shelving using polymer tape
- Pre-installation markings must be carried out in such a way that the anchor fastenings of the rack bearings do not fall on the areas where floor slabs are connected, or where internal reinforcement passes. The marking lines along which the rows of shelving will be mounted are marked using geodetic instruments and applied by gluing polymer tape.
Note! All work on the assembly of warehouse racks is carried out in accordance with the working documentation provided by the manufacturer. By the way, it is necessary to coordinate with him any changes in terms of placement of the rack, as well as increasing or decreasing level marks.
After approval, such changes are made to the documentation, and only after this can installation begin. Deviations associated with the sequence of technological operations, as a rule, worsen the quality of the assembly - therefore they should not be allowed under any circumstances.
Assembly order and steps
Of course, not all racks are assembled in the same way, as they may have different design features. Connections of load-bearing and fixing elements are carried out strictly according to the drawings, but the assembly procedure is approximately the same in all cases. We have already mentioned markup.
- It is a very important stage, since often in the process of its implementation errors made when measuring the dimensions of the room are revealed. It is this fact that may determine the need to make adjustments to the documentation. If no deviations are actually found, proceed to the second stage - assembling the side frames.
Racks with hooks
There are convenient metal racks on sale that do not require any fittings to connect vertical racks and horizontal shelves. They are connected to each other by snapping onto reliable hooks. There are special hooks on the shelves, and on the racks there are openings that decrease downward. How to assemble metal racks of this type? Very simple. Insert the hook into the hole and press down firmly until it goes all the way down.
Detailed assembly instructions will help make the work faster and correctly arrange the elements together. After reading it, you can assemble a shelving unit for your garage or store in just a few minutes. It is advisable to have an assistant help you to hold the shelf on the opposite side while you search for the desired hole.
What it is?
Currently, modern frontal shelving has gained great popularity and demand.
On front racks of various types there are a large number of products/goods, “scattered” in separate cells. The latter are always freely accessible.
In most cases, frontal racks are located in the walls of modern large warehouses and cargo terminals. It is precisely such systems that are especially in demand at enterprises in which there is a huge turnover of goods. Front structures are often installed in very large spaces, many of which are the size of several football fields.
Modern front-type racks have distinctive characteristics, thanks to which they do not lose their relevance.
- Such structures are quickly disassembled. Thanks to this, the warehouse area can be redeveloped if necessary. This will take literally a few hours. Adding or removing certain storage areas will be very quick and easy.
- Most modern frontal shelving is made from practical and durable metal. The structures have such a device that makes it possible to make changes to their configuration without the use of welding. You don't need a lot of auxiliary tools for this either.
- Installation and removal of the most massive and heavy loads are carried out using a special loader. These manipulations using such technology take literally a few minutes.
Algorithm of actions
Before assembling a metal rack yourself, be sure to check the location of the racks. The lower side has special holes for connecting to the thrust bearing, but the upper side does not have them. Look through all the racks at once and place them on the floor with the correct side so that after assembly you do not have to redo the work. All hooks must face down, otherwise the shelves simply cannot be attached.
To avoid thinking about this issue, immediately put the thrust bearings on the lower edges. Then it’s better to do the work together. Hooks on shelves should face down. Attach the bottom shelf first so that the posts no longer need support. To do this, insert one part of the shelf into the hooks, then attach the opposite edge. Since the hooks hold the transverse parts firmly, you need to insert the hooks all the way. This is not so easy to do with metal.
Experienced craftsmen use special rubber hammers, tapping the crossbar until it takes its proper place. If you don't have one, then there is no point in buying a tool for one-time use. Before assembling the metal rack on the hooks, prepare a wooden block and tap it to shrink it. However, here it is necessary to act without fanaticism, because with a strong impact the metal can be deformed.
How to prepare a logistics project for a warehouse?
Shelving equipment
The first step is to prepare a project for arranging a warehouse space:
- First, you need to measure the warehouse and determine the characteristics of the room (foundation characteristics, wall insulation, room temperature, and so on). This is best handled by specialist designers.
- The next step will be to draw up a warehouse plan with its size and territorial location of communications.
- Next comes the stage of planning the location of warehouse racks. At this stage, you should take into account your own opinion, the opinion of experts and determine possible ways to move warehouse equipment.
- At the final stage, the warehouse software necessary for the convenience of staff work is prepared.
By the end of the work done, the customer will have a plan for the location of the racks, the overall characteristics of the warehouse, and the carrying capacity of individual places in the warehouse. Once you have this information in hand, proceed to selecting warehouse furniture.
Rules for assembling large structures
For large stores or warehouses, racks with hooks are also used, only they have a much larger size and thicker metal walls. To assemble such products, you will need the well-coordinated work of several people, scaffolding and additional equipment in the form of lifts.
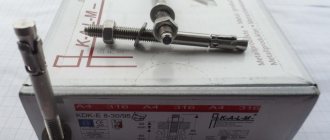
In such structures, the lower parts of the vertical posts are equipped with holes for anchor bolts. To install them, holes are made in the concrete floor with a hammer drill and screwed firmly into the base. The racks are attached to the wall in the same way, because the load on industrial racks is incredibly high.
Then, in a similar way, the hooks of the shelves are put on the hooks of the vertical posts; rubber hammers help ensure a strong grip.
What you need to know about metal racks and their assembly
The scope of use of metal shelving is quite wide: from industrial areas to domestic use. Unoccupied walls of shops, warehouses, offices, basements, industrial premises, etc. will remain idle if shelves are not conveniently placed on them. Their main function is to maintain order in the premises and prevent chaos from scattered things. This quite strongly influences the psychology of relationships within the team, including at home, with a spouse or mother-in-law.
For use at home, lightweight design options are more often purchased, on which light household items, dishes, etc. are stored. Similar racks are made from a metal profile used for:
- electrical wiring installation work;
- building frames for attaching drywall.
There are several reasons for manufacturing metal structures from profiles:
1. The workpiece is supplied in a sufficiently large length while maintaining high mechanical strength and structural rigidity. We are talking about workpieces with wall thicknesses:
- Not less than 0.45 mm for a profile for plasterboard. A lightweight profile with a wall thickness not exceeding 0.35 mm has significant technological and design limitations. It is not used for the manufacture of metal cabinets (or is used in rare cases) and will not be discussed in this article.
- From 0.2 to 0.4 cm for the profile of the electrical installation sample.
2. The profile has a protective coating against corrosion. It comes in two types:
- Zinc.
- Polymer-zinc. Reinforced protective coating, used for products intended for use in rooms with high humidity, such as loggias, basements, garages, etc.
3. The cost of such a profile is low.
4. Profiles can be assembled using simple mounting units and hardware: nuts, bolts, washers, screws, etc.
5. Any installation error can be easily corrected.
6. Installation is simplified by the absence of welding. The advantages of this assembly:
- lack of equipment for welding and specialists to carry it out;
- preserving the anti-corrosion coating, which would otherwise be damaged;
- mobility of the structure, which can be disassembled at any time, moved to a new location and reassembled.
Metal racks can always be completed and additionally equipped in accordance with your taste or need: glass, wood or plastic panels, decorative tiles, etc. They can also be used as zoning partitions in rooms, creating a unique design or fitting them into an existing one interior. Such a partition can have built-in lamps, windows and niches, as well as any other structural elements.
7. Metal profile racks are equipped with gussets and spacers, giving rigidity and stability to the structure. If necessary, they can be installed without attaching to the wall.
You can select or manufacture a prefabricated metal structure if you know the dimensions of the product, as well as the purpose of its use: storage of a library, automotive tools and parts, household supplies, etc. The racks have a fairly high load capacity, and at the same time they are quite light. For example, a shelf with only one stiffening rib can support a weight of no more than 90 kg, and two ribs - no more than 120 kg.
Such designs are in demand due to their ability to save room space. They belong to budget types of products. They are extremely easy to repair since any part can be replaced with a new one.
We recommend articles on metalworking
- Steel grades: classification and interpretation
- Aluminum grades and areas of their application
- Defects in metal products: causes and search methods
The protective coating allows the product to be used in difficult environments: high humidity and large temperature fluctuations. The rack does not rust or mold, is resistant to wear, lasts a long time and is resistant to fire.
How to assemble a metal rack? The installation process is much easier than when assembling cabinet furniture. Required tools: open-end wrench and screwdriver, preferably electric. Some designs have fastenings on hooks.
Safety regulations
Before assembling a metal rack for a store, use available materials. Scaffolding is installed to strengthen the upper parts of the structure. It is necessary to follow safety precautions and use belts or make railings on stands. Scaffolding or scaffolding must be stable and durable.
To prevent falls from height, there must be handrails. Before starting work, instruct workers on safety rules to avoid accidents when assembling such large products as in the photo above.
Lifts must also be equipped with handrails and must be stable relative to the floor. It is necessary to work at height in pairs in order to put the shelves on the hooks on both sides at once. Before you begin assembling the upper parts of the structure, you need to firmly attach the anchors to the surface of the base and to the wall of the building so that the assembly has rigidity.
Preparatory activities
Before you build a rack with your own hands, you need to do the following:
- Choose a place where it will stand.
- Measure the length , width and height of the free space.
- Come up with the shape of the rack and sketch it. If it’s a garage, balcony or storage room, then you don’t have to be particularly sophisticated; the rack can be made in a regular shape, standard sizes, it all depends on the capabilities of the room. To save space, it is better to make it up to the ceiling.
For residential premises, the shape of the rack can be different, it all depends on your imagination and skill.
DIY racks for cans.
- Decide on the items that will be placed on the shelves; their sizes depend on this.
If you decide to make a rack for cans with your own hands, then a shelf width of 25–30 cm will be sufficient; for larger items, the size increases in accordance with their volume.
The length of the shelves is also calculated based on the weight of the stored items: shelves up to 150 cm are suitable for light items, and for heavy items (for example, books), it is recommended to make the length no more than 90 cm to avoid sagging. It is better to use steel frames for metal tools.
- Select and prepare the material from which the rack will be made . Wooden frames must be made from dry, planed boards and bars of the correct geometric and linear dimensions (see How to make a rack from bars with your own hands). For shelves, you can take plywood, boards, plastic, glass, laminated chipboard or MDF panels, but at home these materials are difficult to cut efficiently and accurately to size; it is better to contact a specialist.
- Prepare the tools and fasteners necessary for the job. You will need: a jigsaw or hacksaw, a screwdriver, dowels or screws, a tape measure, a level.
Important! The material is prepared taking into account operating conditions: for wet rooms (bathroom, cellar, balcony, etc.), it is recommended to coat wooden parts with antiseptic and water-repellent compounds, and metal with an anti-corrosion agent.
Design Features
As you already understand, metal shelving comes in a wide variety of designs and assembly methods. How to assemble a metal rack without welding is described in detail in the article. Let's pay attention to the design of the shelves. They can consist of strips with corners on which you need to lay plywood cut to size.
For large-sized shelving, shelves are available ready-made, with durable metal bars and mesh covering. They are quite strong and can withstand a lot of weight.
Installing shelving is an important job
In this article we will tell you what requirements are imposed on the placement of shelving in a warehouse.
First, you need to focus on the fact that the installation of metal structures is the main task that arises when arranging logistics complexes and warehouses. To avoid force majeure situations in the future, the work is entrusted to competent specialists
Masters install complexes, guided by standards. They optimize space and create complete systems designed for storing cargo.
Warehouse racks, photos of which can be seen on our website, are made of stainless steel. This is the best material on the market. Metal structures have been in use for more than ten years and do not lose strength. Our collection contains many solutions. These are pallet, mezzanine, shelf racks. Clients also order structures for organizing work in archives, storing sawmill materials, and arranging goods in boxes.
To ensure that racking systems meet safety requirements, they must be installed by qualified personnel. This is the key to a good result and no problems in the future. Installation of metal racks is carried out in several stages. First, the load-bearing components (posts, beams) are assembled, and then other elements are attached. When the system is ready, the frames are attached to the floor. Anchor bolts are used for this. At the final stage, tests are carried out. To find out how strong a shelf is, an increased load is placed on it. If the shelf can withstand the load and does not deform, the rack is used for its intended purpose.