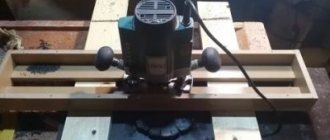
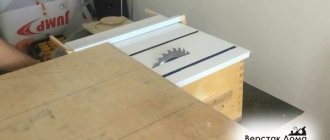
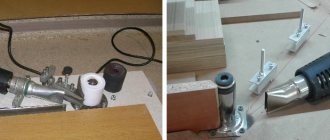
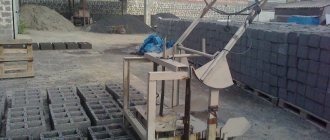
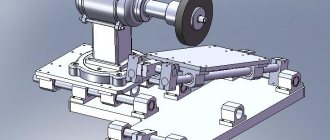
Operating principle of the machine
The lining manufacturing process includes processing the workpiece from four sides. First of all, the board goes through circular saws, which create smooth edges. Next, the thicknesser calibrates the workpiece. The last stage is milling, as a result of which chamfers and connection elements (tenon and groove) are formed.
In principle, all these actions can be performed on different machines, but this is inefficient. It is much more reasonable to use one machine, which will allow you to get a completely finished product at the output, moreover, in one pass.
The operation of this machine is possible thanks to the simultaneous installation of several (4 to 7) spindles on one tabletop. By adjusting the distance between the saws, it is easy to determine the geometric dimensions of the resulting board, changing the cutters, and flexibly adjust the profile of the product.
Manufacturing enterprises use powerful machines with working surfaces up to 12 m; for making lining at home, you can choose a portable device. At the same time, the power of a small household machine is more than enough for the needs of routine repairs.
Machine structure and necessary parts
We see the knives that will be needed when creating a machine for making lining at home
. Before we begin a detailed description of our equipment, let's watch the video in this article, which shows a homemade lining machine and provides detailed instructions for working with it.
So, ideally, the machine should have five main components, which would produce a finished lining at the output. The factory equipment is equipped with node mechanisms to the maximum, so it is capable of making top-class panels even from slabs.
It is very difficult to install all these mechanisms on homemade equipment, and most likely they will be located separately from each other. That is, to produce one panel you will have to carry out several operations, but a lot depends on the workpieces you decide to work with.
Main nodes
We see an example of a homemade machine for making lining, its components and details.
We will look at a machine that will make lining from slabs, and it should consist of the following components:
- A circular saw. Trim off the excess sides of the board.
- Reismus. We cut off the top part of the slab with the tree bark.
- Jointer. We grind the workpiece.
- Spindles. The lining is given its final shape and the locking mechanism is formed.
All this can be installed on one frame to save space and money. All components will be controlled by one electric motor, so we will calculate its power based on the maximum requirements. And in our case it is at least 5 kilowatts.
All of the listed parts can be found in specialized stores or on the Internet. There will definitely be no problems finding them.
Advice! Don't skimp on cutting parts. Saws and planers of poor quality quickly become dull and need to be sharpened. If you do not do this, the lining will end up with burrs and chips, and you will have to process it additionally.
Additional parts and tools
We see another example of a homemade machine for the production of lining at home.
You will have to calculate the number of components and materials for the manufacture of the frame yourself, since each machine for making lining with your own hands is individual and is made according to your own drawings. In addition, we will need a belt to transmit torque to mechanisms and various fasteners. It’s also impossible to announce the price for them, so we’ll take the average value.
So, let's collect all the elements into one table and try to find out how much our machine costs:
| Details | Price (rubles) | |
| Minimum | Maximum | |
| Circular saw | 500 | 2000 |
| Reismus | 2000 | 5000 |
| Jointer | 2000 | 5000 |
| Spindles | 3000 | 7000 |
| Material for the bed | 1000 | 3000 |
| Electric motor | 4000 | 10000 |
| Fasteners and additional parts | 1000 | 2000 |
| Welding services | 2000 | 5000 |
| Delivery to location | 500 | 2000 |
| Connection by an electrician | 1000 | 1000 |
| Total | 17 000 | 42 000 |
Calculations
Assembling a homemade machine for making lining yourself is not as difficult and expensive as it might immediately seem.
Well, now, let’s do the math:
- For example, we take the most expensive edged timber at a price of 6,500 rubles per cubic meter and make class A lining from it, the price of which in the store is 11 rubles. We produce it on a machine for 17,000. It turns out: 17,000 + 6,500 = 23,000 rubles. That is, by producing just two cubic meters of lining, we fully recoup the cost of the machine.
- The introductory details are the same, but we make the machine at the maximum cost. It turns out that 42,000 divided by 11,000 = 3.8 cubic meters of class A lining will fully pay for our machine.
- We exchange expensive edged timber for cheaper slab. We get: 17000+3000=20000. Or 1.7 cubic meters of lining.
What is lining
The first passenger cars were sheathed using thin boards. Subsequently, the profiled finishing board began to be called lining. For the manufacture of lining, enterprises use five types of profiles:
- standard;
- calm;
- Europrofile;
- American.
Standard
The trapezoidal section of the lining with beveled edges at an angle of 300, has two longitudinal grooves on the back side. The rear grooves serve as ventilation vents. One side of the lining has a longitudinal groove. The other side of the board is equipped with a protrusion (spike). The cladding elements are connected to each other by inserting the tenon of one strip of lining into the groove of another board.
For external use, the tenon is made slightly narrower than the groove. Under the influence of moisture from atmospheric precipitation, the tenon inserted into the groove swells. The connection becomes almost inseparable.
Calm
The boards of this lining model have rounded longitudinal edges. This is a distinctive feature from the “Standard”. The stem also has grooves, tenons and longitudinal ventilation channels.
Europrofile
The Europrofile style came to our country from Western European countries. A distinctive feature is a wider spike. Lined facades made from this material have a beautiful appearance with relief differences in the thickness of the wood. Europrofile is often called Eurolining.
American
The profile name indicates the country of origin. The beveled edges of the lining give the impression that the boards are laid overlapping. The profile is used for cladding the facades of houses and garden buildings.
Advantages of wood lining
Wood is widely used in all industries. Wooden products have become widely used. Wooden lining is used in construction for finishing work.
The advantages of wood products are:
- High strength;
- High thermal insulation;
- Increased heat resistance;
- Durability;
- Electrical insulating ability;
- Naturalness;
- Environmental friendliness;
- Aesthetics.
A special advantage of wood is the manufacture of lining at home.
Making the lining with your own hands is carried out in the following order:
- Choice of wood species;
- Determination of product sizes;
- Equipment selection;
- Manufacturing of lining.
Advantages and benefits in numbers
In the photo we see an example of a homemade machine for making lining at home.
In this situation, only a question of profit can force a person to make his own machine.
Its design is not complicated, and all the parts are freely available, but first of all we need to find out what benefits we will get by purchasing such equipment:
- Possibility of producing only top-class linings . That is, the most expensive material on the market, which for us will cost several times less.
- Possibility of producing several types and configurations . Lining can be very diverse, but it is not always possible to find exactly what we need in the store.
- Own business. Lining can be produced not only for your own needs, but also for sale. Below we will talk in more detail about prices, and you will see all the benefits of such a business.
- The ability to produce exactly as much material as needed . Without buying extra panels, which later will not have a place.
It is worth noting that these are not all the benefits. And even taking into account certain difficulties in assembly, a machine for making lining with your own hands can be a good help for the family budget.
Several different knives attachments for a homemade machine for making lining will allow you to create various wood products
So, let's compare the cost of finished lining in an ordinary hardware store and the price of timber.
For convenience, let's present this in the form of a small table:
| Wooden pine boards | Lining | ||
| Material | Price | Material | Price |
| Edged timber | 6500 RUR/cube | Extra class | 14000 r/cube |
| Semi-edged | 5500 RUR/cube | Class A | 11000 r/cube |
| Gorbyl | 3000 RUR/cube | Class B | 8500 RUR/cube |
| Log | 1500 RUR/cube | Class C | 6500 RUR/cube |
Note that lining can be produced from any wood listed in the table. Only the production time will differ. That is, it is much faster to make a lining from a completely cut board than from a slab or a log, but here it is up to you to decide what you are more willing to sacrifice, money or time.
We also note that we are talking about the production of panels of a class not lower than category A. That is, high-quality material with a minimum of knots and without cracks or chips.
Important! All prices in the table are approximate and may vary significantly from different suppliers and depending on the region. The percentage ratio of prices for raw materials and prices for finished finishing lining will remain unchanged.
So, we figured out the benefits, and they are obvious. Next, we will talk about the costs of making a homemade machine for lining, and we will find out what volumes of lining there are benefits to purchasing it, but for now, let’s figure out the choice of place to install this equipment.
Choosing a wood type
For the production of lining, coniferous and deciduous wood is used. Pine, spruce, larch, cedar, and fir are used as coniferous species. Products made from deciduous trees are widely represented by products from linden, alder, oak, ash, and aspen.
Spruce
Spruce panels have increased plasticity and softness. These properties are used in the manufacture of linings and for finishing curved interior elements. The softness of the wood has a positive effect on the tightness of the panels. The surface of the spruce board is flat and smooth. The wood texture is clear, without blur.
The disadvantage of spruce products is the increased level of moisture absorption (hygroscopicity), the appearance of resin stains, and low biological resistance. Spruce is susceptible to rapid rotting and destruction by harmful insects. Spruce products require mandatory treatment with protective agents.
Pine
DIY pine lining is the most common softwood lumber. Pine is characterized by increased strength, lightness, and low cost. Pine wood has a beautiful pattern and a delicate golden hue. The most valuable varieties of pine have a red-brown color.
There are up to 200 species of pine in nature. However, the tree grows only in the Northern Hemisphere.
The presence of a large amount of resin has a beneficial effect on the environment. Essential oils contribute to the long-term preservation of a pleasant pine aroma in the room. The smell of pine wood has a calming healing effect.
The disadvantage of pine is the appearance of resin stains over a long period of time.
The low density of wood contributes to the formation of scratches and chips if the technology for making the lining with your own hands is violated.
Larch
It is characterized by high strength, water resistance and density. Products made from this breed are excellent at resisting harmful insects and fungal parasites.
Larch lining is distinguished by long-term preservation of its physical properties. Products made from this wood have a clear wood pattern. A large number of essential substances have a beneficial effect on the nervous system.
This is interesting! The larch root system is capable of developing in a layer of sand only one centimeter thick.
The bright reddish hue distinguishes larch from other tree species.
Many positive qualities cause a significant increase in the cost of larch products.
Cedar
Cedar products have high strength and durability. The high content of essential oils causes a pleasant pine aroma. The healing qualities of cedar have been well known since ancient times.
DIY cedar lining is highly resistant to harmful insects and pathogenic bacteria. The widespread use of cedar wood is limited by the high value of cedar.
Birch
Birch blanks are easy to make lining. Birch has moderate hardness, uniform density, and is easy to process. Because of its textured surface, birch is preferable in the manufacture of lining for cladding walls indoors.
Aspen
Softwood contains a small amount of knotty inclusions. Aspen boards are resistant to deformation and retain their strength properties in a humid environment. The quality of the lining made from this material is very high.
Linden
It is characterized by high strength and water resistance. Linden wood has a beautiful pattern and a pleasant light shade. Linden products are easy to machine.
The disadvantage of wood is that it darkens over time.
Alder
Products made from alder have increased strength, water resistance, and sound insulation properties.
This is interesting! The alder root system is capable of saturating the soil with large amounts of nitrogen. This allows the tree to grow in the most difficult conditions.
Recommended: How Real Estate Fraud Has Concerned Investors?
A large number of beneficial essential substances have a beneficial effect on human health.
Oak
Refers to trees with increased timber value. Do-it-yourself oak lining is distinguished by high strength, hardness, and significant weight. A large number of positive qualities affect the cost of oak products.
How and from what is lining made?
It is noteworthy that different types of wood are needed to make lining. For finishing work (both facade and interior), the following wood species are chosen: pine, larch, cedar, spruce.
They also choose lining made from this material because it has a specific, pleasant, resinous smell that fills the room with comfort. Specifically for interior work, ash, linden, and aspen are used.
Such trees are less durable, but they are chosen for their attractive appearance and color spectrum.
If you are going to make lining with your own hands using a home machine, then you need to understand that it must meet many requirements and not be inferior to those made using industrial technology.
The production of lining consists in the fact that the finished sheet must be perfectly flat, without irregularities, deformations, or snags. This is achieved by grinding.
Also, the lining must be impregnated with special solutions, sometimes it is varnished. This is necessary so that moisture does not have such a destructive effect on the wood.
If wood is properly impregnated, it will last for decades. Depending on the type of wood, different cutting methods are chosen.
For example, if we are talking about pine, then only the lower part of the tree is sawn, because there are fewer knots there.
Larch is a cheap substitute for oak; it is characterized by high strength and integrity of the fiber structure.
Video:
Types of lining and their application
Lining is a group of facing materials. It consists of thin cladding boards, which are produced with fastening locks, which greatly simplifies installation. The range of its application is very wide. This is the cladding of external and internal walls of residential and non-residential premises, bathhouses, gazebos, roof overhangs - in fact, any planes. Even in the interior of residential premises, the lining looks stylish. Builders and ordinary buyers love lining for its ease of installation and neat appearance.
There are several approaches to classification. The first is related to the material of manufacture:
- Made of wood. The most expensive variety is made from natural wood - spruce, pine, linden, alder. Quite heavy, but looks very presentable, can be used in modern interiors. Serves up to 20 years - susceptible to rotting and exposure to harmful insects or fungi. To cope with this problem, natural wood lining is protected with varnish.
- Made from MDF - wood processing waste, compressed under high temperature and pressure. When pressing, lignin is released - a natural wood glue, which holds the chips together. The absence of chemicals during production makes MDF lining a completely safe material.
- Made of plastic. Made from polyvinyl chloride - a transparent plastic that is resistant to alkalis, acids and other solvents. It has a more affordable price and a large selection of colors. Less resistant to mechanical damage than previous varieties. It does not rust or rot, but quickly fades in the sun.
Lining is a popular facing material.
Another approach to classification is based on quality standards:
- “Ordinary”, made according to Soviet standards. Considered to be of lower quality. Builders criticize it for its tendency to deform, too small fastening locks, fleecy surface and an abundance of knots. Usually it does not have a protective varnish coating, which means it is very susceptible to rotting and bark beetles.
- "Eurostandard" according to DIN68126/86. This standard was developed in Europe and imposes much more stringent requirements on the quality of the material. This type of lining has larger spikes or locks, making it more convenient to install. It is drier (dries up to 15%), so it does not deform after installation. The varnish protects the material from bark beetles.
Requirements for raw materials
Manufactured products must comply with GOST 8242-88 (regular), DIN 68126 (euro).
Typical profiles:
- standard;
- Euro;
- American;
- calm (collective farmer, peasant woman);
- soft-line;
- land – house;
- block house.
They differ in the width of the tenon, the curvature of the surfaces, and the presence of ventilation grooves. Therefore, each type requires its own adjustments to the size and shape of knives.
Wood species
The wood used in finishing work has properties that are suitable both for facades and indoors. These are cedar, spruce, pine, larch. In addition to special impregnation, the resinous fibers of these grades are difficult to impregnate with atmospheric moisture. In a confined space they give the air a pleasant pine aroma.
Aspen, ash, linden, and alder are well suited for cladding interior walls and ceilings.
Different textures and color shades help create a cozy environment made from environmentally friendly material. The varnish coating emphasizes the design and preserves the appearance.
Preparing for submission for processing
Unedged boards are selected from the lower part of the trunk, where there are fewer knots and cracks.
Operation of spindles during lining milling
The lumber is dried to a moisture content of 12 - 15%.
A blank is formed: the edge and wane are cut off and calibrated to size. The size is prepared taking into account the fact that the machine will cut from 4 mm to 8 mm of wood. Select the front side and polish it. If the quality requirements are high, then preparation is carried out on all 4 sides of the board.
The last stage is setting up the cutting elements. The coincidence of the tenon and groove creates a set of solid planes without gaps or differences. An even cutting geometry is set using washers on an 8 mm cutter. The thickness of the layer removed is more than 4 mm. The panel cutter is adjusted based on the height of the remaining side edge that cannot be removed. Leave at least 5 mm of straight section to the front side. A slightly smaller size is allowed on the reverse side.
Advantages and disadvantages of facing material
Lining is a fairly convenient facing material with a lot of advantages. Here are the common ones for wood, plastic and MDF:
- aesthetically neat appearance;
- simple installation;
- long service life;
- wide range of applications;
- high thermal insulation and sound absorption.
Among the advantages of wooden lining, we note its unique appearance and beneficial effect on the microclimate of the room. MDF boards are lighter weight, come in a variety of colors and can be styled to look like stone, granite, marble or expensive wood. Plastic facing boards are the lightest, most affordable, easiest to install, can be used in the temperature range from -50 to +50 degrees, and are resistant to moisture.
Cladding with clapboard looks relevant and stylish in any interior.
The main disadvantage of lining is its tendency to deform and burn out. Wooden and MDF boards do not tolerate moisture well and are at the same time a fire hazard. Natural wood cladding boards are very expensive. Inexpensive materials are deformed due to drying out a few weeks after installation. The fastenings of cheap models are inconvenient and not always strong. Plastic does not tolerate mechanical damage and quickly fades in the sun.
Equipment for the production of lining
To start your own lining manufacturing business, you need to purchase the appropriate equipment:
- band sawmill (cuts wood);
- drying chamber (dries sawn boards);
- four-sided machine (for making the lining itself).
The first two equipment are needed to prepare the material for the final operation of creating the lining itself.
Sawmill
It is better to opt for an inexpensive, simple-type band sawmill (for example, “Taiga” T-2M).
Sawmill for cutting wood
This machine can cut various types of wood (even dense ones) with a length of up to 6.5 meters and a diameter of up to 800 millimeters. The engine power is 11 kW and can produce up to eight cubic meters of material per shift.
Drying chamber
Most often, cameras are made according to the client’s individual order. Some manufacturers produce and install equipment themselves. Drying technology and price depend on the size of the chamber.
How to choose the type of wood for the machine?
For a good product, you need to choose the optimal wood. The best option would be a board that was sawn from the bottom of the tree, since the number of defects will be much smaller. Also, the workpiece should not be damaged and be even - this will ensure high quality lining. The most suitable wood humidity is from 12 to 16 percent. The choice of wood species depends on the task at hand.
Important! To produce lining from oak and larch, it is necessary to use only the sharpest high-density cutters, since these types of wood are dense, which is why the cutter can quickly become dull.
Only the structure of the machines and the method of operation are given here, but the available information is sufficient to decide on the purchase of a machine and start working with it.
Preparation of the workplace
All the time, attention is paid to the work of the saw, so nothing should interfere with the process underfoot or on the table with workpieces. Finished products are neatly stacked on the opposite side of the workpieces. The simplest version of the lining machine is not intended for independent work with long workpieces.
It is very difficult to independently hold the board as it exits the cutter while pressing tightly against the ruler; there is a real danger of injury due to a violation of linearity at the ends and the need for additional effort.
Stages of lining production
Now let's move on to the production itself. It’s worth noting right away that the process of making lining with your own hands is quite painstaking work. In order for everything to work out correctly and subsequently make you (or your customers) happy, you need to be patient. Otherwise, the finished products will turn out to be of different thicknesses and widths, which means that the appearance of the surface finished with clapboard will be spoiled.
The process of making lining with your own hands will consist of the following stages:
- First of all, we cut the boards into pieces of the required length;
- Next, the workpieces need to be sawn lengthwise to make planks of the required width;
- the next step will be jointing;
- Finally, we make grooves.
The first stage is not very difficult. It is enough to cut the board lengthwise into the required sections and saw it crosswise using a circular saw. The most important is the second stage of production. When cutting boards lengthwise, it is important that all pieces are the same width. Otherwise, the surface finished with clapboard will look ugly.
To complete the second stage, draw a straight line on the workpiece from one edge. To do this, it is better to use a blue or green pencil; it will be better visible on the surface. Next, using a circular saw, saw off one edge. It is better to process more boards in this way at once, so all the work will be completed faster.
The following steps will require your attention. It is necessary to rearrange the saw along the ruler so that the second cut accurately measures the width we need. After setting up the machine, we begin sawing off the second side of the future lining.
We recommend: Sliding wardrobes – a whim or a necessity?
Next, let's start jointing. This process will give the workpiece a smooth surface, and will also make all products the same thickness. To ensure this happens, remember how many times you passed each side through the jointer. Then process all other workpieces the same number of times.
To make grooves we use special cutters for lining. This device is installed on the machine instead of a circular saw. Using a cutter, grooves are made at both ends of the lining. At the same time, make sure that their sizes are the same.
Milling lining grooves
For such work, it is advisable to have a universal woodworking machine. This device is equipped with all the necessary equipment for processing wooden workpieces. As a rule, such a machine is equipped with a jointing device and a circular saw. At the same time, it has a work surface convenient for processing wood. With such a machine, making lining with your own hands will not be difficult.
Choosing a machine for making lining
As you can see, a lot of operations and different tools are required:
- saw blade for forming smooth edges;
- thicknesser for calibration;
- milling to form grooves and ridges.
If all this equipment is put together and configured, you will get a machine for making lining. He actually exists. This is a four sided machine. Using this equipment you can make lining (and not only) of different sections.
Four-sided machine
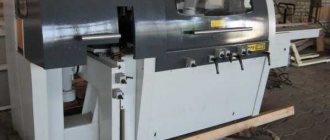
It is called so because of the presence of at least four spindles, which allow processing all four sides of the workpiece at once in one pass. The number of spindles is from 4 to 7.
This is a four-sided machine with a low degree of automation. This and similar equipment is produced in Russia and the CIS countries
If you have four spindles, you can make any boards, parquet, timber, lining. If there is a fifth, the possibility of additional processing of the front or back side with relief formation is added. Using such equipment, you can make eurolining and produce furniture blanks of complex shapes.
When selecting boards, you need to take into account that the thickness of the layer being removed is 4-8 mm. This means that calibrated workpieces need to be fed into the machine. Moreover, their dimensions must correspond with an accuracy of 4-8 mm to the dimensions of the lining.
Is this equipment convenient? Very. If the quality of the machine is good, all that is needed is to ensure an even feed of the workpieces. All that remains is to adjust the cutters correctly to obtain the appropriate product. And the lining too. Reconfiguration occurs most often from the control panel. By setting the cutters, we obtain any required profile.
This is a four-sided machine with full automation
Due to the high price, purchasing a four-sided machine for building one house or bathhouse is an unwise idea. It costs from 600 thousand rubles. The cheapest models have four, the most expensive ones have seven spindles. The price also depends very much on the manufacturer. As usual, the cheapest come from China or Korea, there is Russian-made equipment in approximately the same range, and the most expensive are European.
If you are going to make a living by making lining or other moldings, then a four-sided machine is a justified investment. If you are going to make the lining with your own hands only for finishing a house or a bathhouse, consider other options.
Universal woodworking machine
It is not for nothing that this equipment is called universal or combined. By reconfiguring and changing the tool, you can perform all the necessary operations on it: cut boards to a given size, install cutters to form a tenon and groove. If desired, you can also remove the chamfer.
Multifunctional machines will be useful for those who like to craft or who are going to earn money by processing wood, but do not yet have the funds to purchase a four-sided machine
But here’s the thing: since each new operation requires readjustment of equipment, they perform one operation with a large number of workpieces. For example, first one edge of all workpieces is cut off. Then install the block according to the required width of the lining and cut off the second edge. And also on all blanks. Afterwards, they are reconfigured again for the next parameter.
It takes less time
But the monotony of work during such work has a soporific effect, so you need to be careful and work carefully
A more modest universal woodworking machine. You can also make lining with your own hands
A little about the prices of combined machines: the more operations it can do, the higher the price. For example, machines that can perform five operations - sawing, milling, planing, cutting grooves and drilling - cost from 25-35 thousand rubles. These operations are more than enough to make lining with your own hands. There are probably cheaper options, but their quality is very questionable. In this case, look for as many reviews as possible to get an idea about the equipment.
Lining using a milling cutter
You can make lining with your own hands using only a router
It is important that your boards are calibrated. They can either be purchased or processed using appropriate equipment.
Next, all that remains is to use cutters to select the tenon and groove, and, if desired, remove the edge.
Another combination of equipment with which you can make lining with your own hands: a circular saw with the ability to install cutters and a thickness planer for calibrating the workpieces. All operations can also be done by reconfiguring the machine.
Dimensions of blanks for lining
A homemade machine for making lining must be configured to process wooden blanks of certain sizes. Do-it-yourself lining usually has the following dimensions:
Width
The width of lumber varies quite widely. The standard width of the cross-section of the board when clean, excluding the protrusion of the tenon, ranges from 8 cm to 15 cm.
Length
The maximum length of the board reaches 6 meters. In a home workshop, such long workpieces are not used. Basically, facing strips are made from 1 m to 1.5 m long.
Thickness
The thickness of the boards is usually 13 - 24 cm. It is not advisable to make the planks thinner or thicker. Thick boards will significantly weigh down the cladding, which can lead to damage to the integrity of the coating. Products made of thin material will cause difficulties during its installation and will significantly increase the fragility of the cladding. It is also necessary to take into account the conditions for milling wood.
Materials you will need
If you decide to make your own homemade machine for making lining, then you need to figure out what it consists of. You will need the following components:
- Table and machine frame. This is the working surface of our equipment. It is recommended to make them by welding. The machine table for making lining must be narrow and long, its surface can be welded from durable sheet iron. There is a recess in the middle of the table into which feed rollers are installed, driven by an electric motor hidden under the table. You should not skimp on the size of the table - the larger the dimensions, the greater the mass, and this is necessary to reduce vibration and increase stability. If the table “walks” during operation, then it will be difficult to obtain an even, high-quality lining.
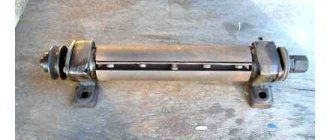
- Knife shaft. This is the main cutting tool of the machine for making lining. It is better to purchase the shaft in a store rather than make it yourself - factory samples are pre-centered and balanced, and this is necessary for stable operation of the machine. It is better to choose a stepped drive for the shaft, as well as for the engine, as it will allow you to regulate the feed speed of the material.
- Electric motor. The motor power for the machine should be in the range from 2 to 5 kW. This power will be quite enough. Less power will significantly reduce the productivity and capabilities of the machine, and more power will limit the accuracy of work. A motor from a household appliance, such as a washing machine, or from a power tool is quite suitable.
- Pressure rollers. Designed for fixing wooden workpieces on the table. You can make the rollers yourself, you can purchase factory ones or use rollers from other equipment - even squeezing rollers from an old washing machine will do.
Video:
How to make a lining from an edged board
Master class from the YouTube channel “ Samodelkin ”.
Choosing edged boards
In a home workshop, it is not possible to make lining from every edged board. For this, as a rule, 1st or 2nd grade lumber with dimensions of 100x25x6000 mm is used. This is a standard board size that is in demand at all stages of home construction.
There are certain requirements for edged boards for lining. The lumber must have natural humidity, but not more than 16%. The boards should not have mechanical damage, signs of rot or wormholes.
Cinder board for lining
The type of wood for the lining is selected depending on what will be sheathed: the outside of the house, the interior, the bathhouse. For homemade lining, inexpensive types of wood are usually used, which are often found in the retail chain:
- pine - pronounced texture, high strength, good thermal insulation properties;
- spruce - light texture, a large number of knots, easy processing, does not warp, not moisture resistant;
- alder - the texture has many shades, high moisture resistance and thermal insulation;
- linden - beautiful texture, easy processing, resistance to temperature changes.
Making lining with a milling cutter
First of all, the edged board, processed on a jointer, is planed with a thicknesser. With its help, the geometric dimensions of the future lining are formed.
Processing boards on a thickness planer
The edged board can be processed in another way. For example, it is enough to go through it with a plane and then sand the surface.
Before milling, the ribs of the workpieces are planed, and the wane is removed with a sharp knife.
Removing the wane
Since the surface of the boards is rough after the thicknesser, they have to be sanded.
View of boards before milling
For milling, a manual milling machine with a power of 2100 W is used.
Manual frezer
The profile is milled using combined cutters included in a set of two cutters. If you use separate cutters, the work will take much longer.
Milling profiles
The set of cutters is suitable for processing wood of all types. The set contains one large-diameter cutter, which forms a joining tenon, as well as an edging on the front part of the workpiece. A smaller diameter cutter forms the joint groove and edge on the other side of the board.
Set of cutters
The cutter for the docking tenon is clamped in the router spindle and the milling depth is selected.
Installing the cutter on the router
Install the parallel stop included in the router kit.
Assembled router
To facilitate the processing of edged material, the boards are laid on racks with the wane down. A special rail holds the board and prevents it from moving during milling.
Holding the board on stands
The first cut is made using a milling cutter to create a joint tenon. This cutter is used to process all the boards one by one. The back and front sides of the treated boards have different appearances.
Back side of the treated board Front side of the treated board
On the router, they change the cutter to a docking groove, and make cuts on one board that has a docking tenon.
Sawed groove of the lining
Check the correct installation height of the cutter for the joining groove by checking the presence of a gap between the two joined linings.
If the cutter is installed incorrectly, there will be a gap after joining. It is enough to recess the cutter and the gap will disappear.
Gap in the boards after joining
After adjusting the installation height of the cutter, all remaining boards with tenons are milled into the joint groove.
The quality of the lining made by a milling machine is assessed by the assembled panel.
The front part of the panel made of liningView of the panel from the side of the wane
Before installation, the lining is stored indoors. If you leave the material outside, it will move and the slats will be unsuitable for cladding.
The lining, made by a milling cutter, is distinguished by a reliable lock.
Castle view
This material is used for cladding not only indoors, but also for cladding the exterior of the house.
Methods for making lining
Making lining at home is possible only with the use of technological equipment
The idea of industrial production of lining is quite profitable and convenient, but do not forget that this requires large investments of funds, which the ordinary citizen simply does not have. If you want to try organizing the production of lining at home, you will still have to purchase equipment for making lining.
If you have never encountered the process of making lumber before, do not be afraid, because there is nothing complicated in the process of making panels, so you can do everything yourself with your own hands.
Industrial type manufacturing
Step-by-step instructions for making the material:
- We make edged boards. Such material can easily be made from cut-type material.
- We dry the panels; this can be done outdoors, that is, in the open air or in a warm, non-humid room.
- We give the board the shape we need; we need to plane the board along the front side.
- We use special-purpose equipment to perform processes such as tongue-and-groove and folding.
- We check the board for defects, cracks, and various deformations.
- We clean the panels from dirt and dust, remove chamfers from the board.
- We sort the manufactured material by quality.
Making material at home
As you yourself understand, equipment for the production of lining is vitally important, and we simply cannot do without it in this matter. In addition to the equipment, you will need special parts and tools
Mills used in the manufacture of lumber
The easiest option is to make it from edged docks:
- The first thing we do is cut the board.
- We grind the groove, on both sides
- Sand the front side of the panel, don’t forget to cut the chamfer.
- The groove should be thicker than the rail.
- The made rail is the connecting part between the slats.
Photo of a soldered cutter
A machine used to make wood panels
The design of the machine is quite complex. Such equipment must be accompanied by complete instructions.
Now the question of how to make lining becomes simply irrelevant, because thanks to this equipment the problem is solvable. Such a machine has the ability to process the board completely, that is, from all four sides.
By passing the material through this unit, you get a finished unit at the output. You don't need to be a professional to operate this equipment. But for complete confidence in your abilities, watch the video, which will describe and show in detail how this machine works.
Types of machines:
- Machines with a light load. The cross-section for manufacturing the material is small, and accordingly, the power of the unit is also small.
- Machines whose load is quite large. Everything is simple here - a large amount of work is completed in a short period of time.
There is a lot of equipment of this type on the market, so everyone will find a unit to their liking. If production is established: the lining will be of high quality.
Polyvinyl chloride lining
PVC lining
In addition to wooden lining, there are also panels made of polyvinyl chloride. To make such material you will also need special equipment.
The operating mechanism of such devices is the same:
- Raw materials enter the receiving hopper.
- The raw material enters the cylinder by transferring the dispenser.
- The cylinder gets hot.
- The mass under high pressure begins to be forced through special molds. The initial form of the material is ready.
- In the calibrator, the mass is suctioned to the mold, and the material is cooled.
- Profile trimming.
Components of a homemade machine
You can make a machine for the production of lining yourself, but you must take into account that it has a complex design. You can take on such work only if you have experience and relevant knowledge.
Drawings of a simple machine for a home workshop are easy to find on the Internet. Structurally, it consists of several main devices assembled on a common frame.
Requirements for the design of a machine for the production of lining
- The standard height of the working surface of the table is 800 mm. The workshop owner can change this size according to his height.
- The table surface is made of polished material. This will ensure easy and unhindered movement of the wooden workpiece. Usually the tabletop is made of polished steel or aluminum sheet. Sometimes, MDF sheets are used to cover the table, but in this case the tabletop quickly wears out with intensive use. The machine can be covered with textolite.
- The power device consists of an electric motor equipped with an elevator lift. Often a manual router is installed, which is already equipped with an elevator. The head of the router axis must be adapted to change cutters of different sizes.
- A nozzle for suctioning wood dust must be installed in the work area. Accordingly, the nozzle is connected with a hose to the vacuum cleaner.
- From the bottom of the table, the router is attached to a mounting plate installed on the underside of the table top. The maximum offset of the cutter above the work table surface largely depends on the thickness of the plate.
- Pressing devices (parallel, cross stop and pusher) must protect the operator’s hands from accidental contact with the cutting surface of the cutter during operation.
We recommend: Kitchen apron made of MDF panels: advantages and disadvantages
bed
The frame of the machine is a massive steel structure, which ensures stability and reliability of fastening of all components and assemblies. The bed must be stationary; for this, its center of gravity is located as low as possible. The components of the frame are connected to each other by welding.
Tabletop
The best material for a homemade machine table is a polished steel plate. Technological holes are made in it for the exit of the cutting tool, and stops are installed on it. The tabletop is made narrow and elongated; its task is to support the workpiece during processing.
For a small machine, the tabletop can also be made from wood-based sheet materials. Laminated boards or thick plywood are suitable. It is best to cover such a structure with metal or cover it with durable plastic.
Engine
All rotating devices are driven by an electric motor. Even for a small machine, its power should exceed 2 kW. The transmission of rotation is carried out using belts. To operate effectively, different cutting devices require different rotation speeds; this is achieved by using pulleys of different diameters.
Clamping mechanism
The purpose of this mechanism is to accurately orient the workpiece and hold it during processing. It is implemented by a set of rollers mounted on the tabletop. They are made removable, which allows the machine to be used for making boards of various widths.
Cutting tool
Circular saws and cutters form the profile of the product at the exit. The quality of the resulting lining depends primarily on the quality of this unit. By changing the cutting tool and its parameters, you can configure the machine to produce various products.
When creating a homemade machine, it is important to ensure the safety of its operation. All rotating parts must be covered with metal covers. The on/off unit must be located in close proximity to the operator. The off button should be red, easy to press and under no circumstances be recessed into the switch body.
How does the machine for making lining work?
A conventional unit works with wood of a certain width on four sides. A tenon or groove is created on the sides (this depends on the type chosen), and the bottom and top sides are ground.
Usually such devices are made fixed, but it can also be made portable.
Main components of the machine:
- Material supply - the quality of this unit affects the degree of parallelism of the planes of the finished product.
- Planing elements and cutters. In good machines, the elements rotate at a speed of four and a half to six thousand revolutions per minute, and the higher this speed, the better the finished element will be. When purchasing a finished device, it is important to check the degree of protection of the rotating parts.
An important part of the design is the receiving table. Although it does not affect the quality of the product, a well-made receiving table will improve the ease of use of the machine.
How to choose a machine:
Before purchasing a machine, select the type and performance you need.
For working with workpieces of small thickness, a unit with low productivity and a fairly low feed speed is suitable. This type is better than others for working from home. Despite the fact that its cost is low, it will provide you with sufficient quantities of material.
If you need to produce in large quantities or to work with thick boards, you need a high-speed machine. Its price, of course, will be higher, so if you purchase it solely for personal use, it will not be profitable.
Also, when choosing a device, you should look at the cost of parts, since in most cases the purchase of compatible components is the main expense.
If you decide to buy a handicraft machine, we advise you to carefully check its quality.
Features of the sale of finished lining
Lining, especially those manufactured according to the European standard, has proven itself well and is therefore in stable demand. High-quality cladding boards are not kept in stock; they are quickly sold out, especially if the manufacturer works a little with several distribution channels:
- construction companies;
- bases and hypermarkets of building materials;
- retail buyers renovating or do-it-yourself.
It is most profitable to find regular customers and combine several sales channels. A good solution would be to sell the lining yourself through your own retail outlet or online store. You can accept orders for a specific batch of facing boards according to customer sizes (if the equipment allows). This will increase the number of buyers many times over—everyone likes personal solutions.
A machine for making lining is a profitable business
A milling machine appeared in the home workshop, and all volumes of production of profiled wooden cladding for our own needs have been completed. The question arises - why should the equipment be idle? After all, now you can organize your own business for the production and sale of finished products to the public.
Any business aims to make a profit. To determine the profitability of your business, you need to have a rough business plan. Using the Internet, you can analyze the following data:
- cost of 1 m3 of unedged board = 5000 rubles;
- electricity consumption – 10 kWh. = 5.38 x 10 = 54 rubles;
- sale of homemade lining – 1 m3 = 8,000 rubles.
- profitability of manufacturing 1 m3 of wooden cladding = 8000 – (5000 + 54) = 2946 rubles.
You must understand that this business plan represents an approximate calculation of income from this type of activity. It is necessary to take into account the payment of taxes from self-employment and many other small expenses. Profitability must be determined on a case-by-case basis.
The main thing is that a homemade machine will always be a useful aid in running a garden and household, and will also be able to generate profit.
For the manufacture of lining
At the same time, the latter are much more expensive. In combination, it makes sense to use additional equipment designed to impregnate the block house in order to increase the service life with fire retardants / antiseptics.
For home production, it is enough to produce 350-450 m3 of finished products (70%-50% level of normal productivity). The annual revenue of home production exceeds $10,000 (depending on costs and sales volumes). The recommendations given will help novice entrepreneurs implement an interesting and effective project.
Encyclopedia of Technologies and Methods
| Woodworking machines |
Accessories for hand router
How to make a clapboard board using a hand router
Oval edges, V-shaped grooves on products can be added to any project - large or small. Use a cutter with an internal or external oval and it will allow you to easily create your own shape of decoration on the product.
Try your hand at making lining boards using our simple tips and technology for making products on a milling machine. Oval edges, grooves on the product, look great as an addition to any projects. By making them yourself, you can not only shape the appearance of the product to suit yourself, but also choose any type of wood, and the entire simple process of making clapboard boards will be done on your milling table.
Use the correct cutter. The selected cutter and router table allows you to create an oval or groove.
SETUP. Making panels from clapboard boards is not difficult. Clapboard boards are narrow boards that have a groove on one side and a tenon on the other to connect them together. The front side of the clapboard board can have oval edges, grooves in the center and edges, it all depends on your imagination. You will be working with a large number of boards, so it is worth thinking through and organizing all the work in the form of a conveyor. Thus, you will perform one operation with a router with all the boards and under the same conditions. As you can see (see picture), I started by making grooves on all the boards.
Note: Make a small sample of the clapboard board with grooves, you may have to adjust the router again in the future to make V-shaped grooves.
CUTTER. Using a single cutter, as seen in (photo below), you can get good results by simply moving the fence.
So, when you have made a pass, there will be burrs at the bottom of the groove, remove them by making a sharp sanding block (see photo below). Keep in mind that some types of wood, such as cherry and pine, tend to burn. The photo below shows a simple way to remove burn marks.
Grinding grooves. Sand the grooves with sandpaper wrapped around a pointed sanding block.
Removal of burns. To remove burn marks, use the same cutter to clean both sides of the groove.
Adviсe
- Even while working at the machine, do not remove the special protection (wedge and casing) from the saw. Many people mistakenly believe that these elements are necessary to protect the eyes from sawdust. Their main purpose is to prevent the wooden panel from flying back. The force of the blow can not only harm the master, but even pierce the abdominal cavity.
- In order not to be distracted by unnecessary objects and garbage while working, remove all unnecessary things not only from the table, but also from the floor. All attention should be completely focused on the work equipment or tool.
- If the length of the boards is more than a meter, it is not recommended to carry out the work alone. In this case, you risk not only your health, but also the quality of the lining. If you do not press the material against the ruler firmly enough, the linearity of the milling will be disrupted.
Popular brands
There is high competition in the wood processing machine market and a diverse range of models according to purpose, characteristics and prices. Russian machines are not inferior to imported analogues and are often offered at more affordable prices.
Start 160
The machine for the production of lining of the Russian brand is just gaining popularity, but already has a number of qualities that are superior to competitors in its niche:
- Quick adjustment of the dimensions of the facing board during operation;
- The speed of rotation of the spindle guarantees high quality of the product;
- A powerful gearbox ensures reliability and accuracy of products;
- High protection system;
- The precision of the grinding process eliminates tool runout.
BEAVER
Chinese four-sided machines from BEAVER have been sold on the Russian market for quite a long time and successfully. The manufacturer constantly modifies the models and confirms their high quality.
All models are highly productive: the material feed speed is 60 mmmin without loss in product quality. In addition to the production of lining, calibration of small parts is available.
HASKOVO
The machine for the production of lining from a Bulgarian company is easy to operate, some models are equipped with five spindles. Produced in Bulgaria and Austria, it has a good reputation in the European market.
QUADRO
The experienced Taiwanese manufacturer is represented on the Russian market by a large number of models with individual, diverse differences.
For serious manufacturers, a machine has been designed for the production of lining with a maximum material feed speed of 190 meters per minute.
Connecting operations
Board - lining is processed on 4 sides. To do this, it first goes through a circular saw, obtaining smooth edges, then it is calibrated on a surface planer, and finally, the tenon/groove profile joints are cut out with a milling cutter. Single work on different machines will take a lot of time and will leave individual characteristics for each part.
A machine for making lining allows you to combine operations, obtaining the result on one table for a single pass of the workpiece. By adjusting the knives, on such a four-sided machine they make lining of different sections and types. By changing cutters, you can make other types of wood products.
Lining drawing
Constructive solution
Simultaneous cutting from different sides is possible thanks to the installation of at least 4 (up to 7) spindles on one bed in the direction of movement of the workpiece. The specified parameters for lining production are achieved by selecting a set of appropriate cutters.
The manufacturer's data sheet for the cutter (Ø seats, dimensions, hardness of cutting tips) must meet the requirements of compatibility with equipment and processing of this material. Not all models may have standard parameters; there are those specialized for certain production tasks.
Small mobile models of the machine can produce small-section linings. Flow production is established on stationary units with high feed rates and programmable control. The table of such machines can reach a length of 12 m. The bed has a large mass, which dampens vibration and has a positive effect on the accuracy of parameters during repeated operations.
Types of eurolining
