5635 0 1
MesterulManole May 14, 2018Specialization: many years of experience in finishing works of residential and office premises, dachas, country cottages, etc. Hobby: cycling in all its forms
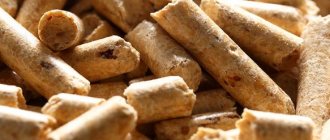
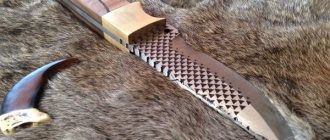
After varnishing, homemade lining looks no worse than purchased finishing materials
Wooden lining is a sought-after finishing material with the only drawback: it is expensive. However, the high price is not yet a reason to refuse to use wooden lining, because if you wish, you can make the material for finishing the house yourself. I will tell you how to make lining with your own hands using affordable woodworking equipment.
Advantages of wood lining
Wood is widely used in all industries. Wooden products have become widely used. Wooden lining is used in construction for finishing work.
The advantages of wood products are:
- High strength;
- High thermal insulation;
- Increased heat resistance;
- Durability;
- Electrical insulating ability;
- Naturalness;
- Environmental friendliness;
- Aesthetics.
A special advantage of wood is the manufacture of lining at home.
Making the lining with your own hands is carried out in the following order:
- Choice of wood species;
- Determination of product sizes;
- Equipment selection;
- Manufacturing of lining.
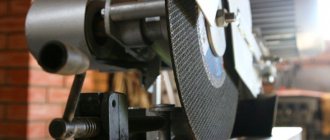
Block house machine
One of the varieties of lining (by the way, in enormous demand) is a block house. The material imitates rounded logs and is widely used for external and internal decoration of premises. It makes sense to cover houses with a block house, because such lining has a solid appearance, is durable and environmentally friendly, as it is made of natural wood. The panels are characterized by a complex shape, so the elements are connected using the “groove-tenon” principle. Making them manually is difficult and is fraught with “inconsistency” of individual “logs” in the future, so it is advisable to use specialized equipment:
- band sawmill;
- drying chamber;
- lining manufacturing machine.
When processing workpieces on machines, you can perform a number of operations:
- cutting prepared raw materials to the required size;
- surface milling;
- formation of recesses (grooves and tenons).
Choosing a wood type
For the production of lining, coniferous and deciduous wood is used. Pine, spruce, larch, cedar, and fir are used as coniferous species. Products made from deciduous trees are widely represented by products from linden, alder, oak, ash, and aspen.
Spruce
Spruce panels have increased plasticity and softness. These properties are used in the manufacture of linings and for finishing curved interior elements. The softness of the wood has a positive effect on the tightness of the panels. The surface of the spruce board is flat and smooth. The wood texture is clear, without blur.
The disadvantage of spruce products is the increased level of moisture absorption (hygroscopicity), the appearance of resin stains, and low biological resistance. Spruce is susceptible to rapid rotting and destruction by harmful insects. Spruce products require mandatory treatment with protective agents.
Pine
DIY pine lining is the most common softwood lumber. Pine is characterized by increased strength, lightness, and low cost. Pine wood has a beautiful pattern and a delicate golden hue. The most valuable varieties of pine have a red-brown color.
There are up to 200 species of pine in nature. However, the tree grows only in the Northern Hemisphere.
The presence of a large amount of resin has a beneficial effect on the environment. Essential oils contribute to the long-term preservation of a pleasant pine aroma in the room. The smell of pine wood has a calming healing effect.
The disadvantage of pine is the appearance of resin stains over a long period of time.
The low density of wood contributes to the formation of scratches and chips if the technology for making the lining with your own hands is violated.
Larch
It is characterized by high strength, water resistance and density. Products made from this breed are excellent at resisting harmful insects and fungal parasites.
Larch lining is distinguished by long-term preservation of its physical properties. Products made from this wood have a clear wood pattern. A large number of essential substances have a beneficial effect on the nervous system.
This is interesting! The larch root system is capable of developing in a layer of sand only one centimeter thick.
The bright reddish hue distinguishes larch from other tree species.
Many positive qualities cause a significant increase in the cost of larch products.
Cedar
Cedar products have high strength and durability. The high content of essential oils causes a pleasant pine aroma. The healing qualities of cedar have been well known since ancient times.
DIY cedar lining is highly resistant to harmful insects and pathogenic bacteria. The widespread use of cedar wood is limited by the high value of cedar.
Linden
It is characterized by high strength and water resistance. Linden wood has a beautiful pattern and a pleasant light shade. Linden products are easy to machine.
The disadvantage of wood is that it darkens over time.
Alder
Products made from alder have increased strength, water resistance, and sound insulation properties.
This is interesting! The alder root system is capable of saturating the soil with large amounts of nitrogen. This allows the tree to grow in the most difficult conditions.
A large number of beneficial essential substances have a beneficial effect on human health.
Oak
Refers to trees with increased timber value. Do-it-yourself oak lining is distinguished by high strength, hardness, and significant weight. A large number of positive qualities affect the cost of oak products.
Processing and protection
This is the final stage of lining installation, which involves covering the installed material with additional layers of a protective or decorative composition. At this stage (beginning of installation activities), initial antiseptic treatment can also be carried out if it was missed at the preparatory stage.
- Varnish compositions help preserve the original color and texture of wood over a long period of time.
- Thanks to the stain, the required color scheme of the cladding material is achieved; the number of layers of this composition can change the shade of color.
- Impregnation with wax gives the material a certain shine. After its use, the lining can be treated with paints and varnishes.
- Glaze with a UV filter is transparent, due to which the original texture of the wood is preserved and transmitted, and the wax and oil contained in its composition preserve the natural breathable properties of the material.
Determining the scope of work
Before making the lining with your own hands, calculate the volume of necessary materials. To determine the scope of work, calculate the dimensions of the room. The area of panel finishing is calculated based on the area of all surfaces. Depending on the height of the ceiling and linear dimensions, the width of the board is determined.
The accuracy of the calculations is verified by repeated measurements. Measurement accuracy affects the efficiency of raw material use.
To make lining with your own hands, use edged boards of the same width and thickness. The original lumber can be purchased or made by hand.
The boards are purchased on a lumber basis. Before purchasing, they are carefully inspected along their entire length. Lumber with defects and irregularities is rejected.
For purchase, choose the highest grade boards. This lumber has the least number of knots and resin pockets.
Advice. The width of the blanks for trimming is taken from 7 to 10 cm.
The length of the prepared products can vary from 1 to 3 meters.
In the manufacture of linings, powerful sawmills are used. For one-time use, it is advisable to rent industrial equipment.
For home use, it is beneficial to purchase a machine with a double-sided surface planer. To level the surface of products, a jointing machine is used.
In the absence of machine equipment, a manual electric plane is used. The disadvantage of manual equipment is low productivity and increased labor intensity.
Popular brands
There is high competition in the wood processing machine market and a diverse range of models according to purpose, characteristics and prices. Russian machines are not inferior to imported analogues and are often offered at more affordable prices.
Start 160
The machine for the production of lining of the Russian brand is just gaining popularity, but already has a number of qualities that are superior to competitors in its niche:
- Quick adjustment of the dimensions of the facing board during operation;
- The speed of rotation of the spindle guarantees high quality of the product;
- A powerful gearbox ensures reliability and accuracy of products;
- High protection system;
- The precision of the grinding process eliminates tool runout.
BEAVER
Chinese four-sided machines from BEAVER have been sold on the Russian market for quite a long time and successfully. The manufacturer constantly modifies the models and confirms their high quality.
All models are highly productive: the material feed speed is 60 mmmin without loss in product quality. In addition to the production of lining, calibration of small parts is available.
HASKOVO
The machine for the production of lining from a Bulgarian company is easy to operate, some models are equipped with five spindles. Produced in Bulgaria and Austria, it has a good reputation in the European market.
QUADRO
The experienced Taiwanese manufacturer is represented on the Russian market by a large number of models with individual, diverse differences.
For serious manufacturers, a machine has been designed for the production of lining with a maximum material feed speed of 190 meters per minute.
Selection of equipment for the manufacture of lining
The production of lining at home is carried out using two types of equipment:
- Industrial;
- Home made.
Industrial equipment is characterized by full readiness for work after purchase and installation at the work site. All parts and assemblies of such equipment are factory-made.
Milling attachments are used to cut the main profile elements. These elements are metal circles with a hole in the center. The hole in the center of the circle is intended for installing the cutter on the machine shaft. The machine shaft is directly or via a belt drive connected to the motor shaft.
Each cutter has two or four diamond-coated alloy steel cutters. The cutters are designed to form a tenon and groove. For a continuous method of producing products, industrial machines are capable of simultaneously performing several functions.
When carrying out work, observe personal safety precautions and requirements when working with electrical equipment. The area around the machine installation must be clear to allow free movement. Wear safety glasses when sawing boards. Overalls must be made of thick fabric. The electrical equipment used must be grounded.
The speed of rotation of the shaft depends on the engine power. The higher the rotation speed, the greater the productivity of the machine. The shaft rotation speed on modern industrial machines reaches 1200 rpm. This rotation speed makes it possible to produce linings 3 m or more long at high speed.
Self-made equipment is characterized by lower installation productivity. Such machines have low power motors. The main components are made at home on lathes.
Before making the lining on a homemade machine, individual components and assemblies are assembled.
Types of wood cutters
In most cases, not all cutters will be needed, but only slotted ones. But others can also be useful for applying decorative notches. When purchasing a wood cutter for making lining, you need to consider the diameter of the shank. To do this, you should find out what collets are equipped with your existing manual router or machine. The most common cutters with shank diameters are 6.8 and 12 mm.
If the unit of measurement is inches, then there are only two options - ½ and ¼ inches.
Inch cutters and regular cutters (with shanks measured in mm) are not interchangeable. That is, they cannot be inserted into a “millimeter” collet, although it seems that the difference is only tenths of a millimeter.
According to the design features of the cutters there are:
- Monolithic - cutting edges and shank are one piece. This is the cheapest and most common type. When the working edges become dull, the cutters are thrown away.
- With replaceable cutting edges, the double-sided knives are removable and can be flipped to the other side.
- Prefabricated - cutting elements are welded (soldered) to the main rod.
- For soft woods, high-speed alloys are used, designated by the letters HM.
- If the surface being treated is hard, then carbide steels - HSS - are used.
- Slotted straight cutters - with their help you can get a rectangular groove; the working part of the cutter itself has the form of a cylinder with cutting lower edges.
- Grooved fillets are similar to straight grooved ones with a rounded working edge, resulting in the shape of the groove in the form of the letter “U”.
- Groove fillet V-shaped - the tool is used to produce various V-shaped grooves; they differ in the size of the groove and the size of the angles.
- Groove structural - after milling, the groove has the shape of the letter “T”, turned upside down. Or “dovetail” - a groove in the form of an isosceles trapezoid that tapers towards the top.
- Groove shaped - needed for creating figured carvings, working with edges; the groove resembles a funnel and other symmetrical elements.
- Edge machines - differ in that they are designed for processing ends and edges; often the design includes a bearing for working according to a template.
- Edge straight lines - needed to obtain a right angle between the upper plane of the workpiece and the end part.
- Edge molding - to obtain a semicircular edge in the form of a wave, and of different shapes (depending on which part of the cutting plane is used), double cutters may have adjustment of the gaps between the cutter blades.
- Seam edges - allow you to choose a rectangular groove, a quarter on a flat or curved workpiece. The processing depth is adjusted using the position of the router or the diameter of the thrust bearing.
- Edge conical - needed for creating various kinds of decorative chamfers, for working with edges before joining them with other products, and so on.
- Edge fillets - with their help, semicircular grooves are obtained. To ensure that there are no distortions during operation, 2 bearings are provided in the design of the tool.
- Curved edge cutters (multi-profile) - to create complex-profile side edges, the length of such cutters is longer than conventional cutters; a powerful cutter is required for normal operation.
- Edge semi-rod - needed to obtain a semicircular protrusion at the end.
- Combination cutters are used to create tenon joints between several boards, both for corner and panel structures.
Most of all, the work will require tongue-and-groove cutters for lining. It is with the help of this tool that a tongue-and-groove system is created to connect the panels during assembly. They come in a set of two pieces. And for work you no longer have to calculate the dimensions of the groove and tenon.
There are varieties of tongue-and-groove regular paired cutters and those that are designed specifically for creating lining panels. The latter are distinguished by the fact that they allow you to simultaneously grind a groove/lock and round the edges on the front side. Using ordinary cutters, you can make flat panels from boards, for example, for a garage, where decorative chamfers are not needed.
Don't miss: Wood cutters - purpose, classification, tips for choosing cutters
Combined frame sets are kits; the blades can be positioned on the main axis, depending on what kind of work is supposed to be done. They contain: one or more thrust bearings, a lock washer and a clamping nut.
Figurine - needed for decorative processing of edges when creating panels. Since there is a bearing, both straight and semicircular surfaces can be processed. The diameter of the working edge of such tools is quite large, so powerful electrical equipment is needed to operate.
There are horizontal, horizontal double-sided and vertical.
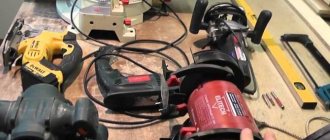
Do-it-yourself manufacturing of machine tools
The machine for making lining consists of three main parts:
- Electric motor;
- Sawing table;
- Desktop equipment.
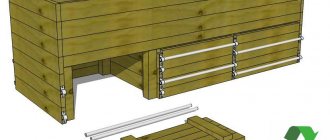
To make a cutting table, durable sheet iron with a thickness of at least 7 mm is used. The table has a reinforced frame structure. To increase stability and reduce vibration, the table frame is bolted to the floor.
To make machine tools with your own hands, use an electric motor with a power of 2 to 5 kW. When choosing an engine with less power, the productivity of work at home drops sharply. An engine with a power of more than 5 kW will not allow high-quality detailed work on profile elements.
Before making the lining on a machine, a hole is made in the middle of the sheet. Two rolling rollers are placed in the hole. The top point of each shaft coincides with the surface of the table. The shafts are connected to the motor shaft using a belt drive.
The engine is a low-power electric motor of 2-5 kW. In most cases, motors from large household appliances are suitable for use.
Before making the lining yourself at home, adjust the pressure rollers and metal stops. Pressure rollers are designed to facilitate the movement of the board along the table surface. The rollers are made of metal or durable plastic. The stops are designed to guide the movement of the board and prevent its possible shift during movement.
Aluminum benchtop equipment leaves dark streaks on the surface of finished products. To prevent marks from appearing, use a coating made of galvanized steel or organic glass.
Manufacturing lining requires many years of experience working with turning equipment. All mechanism components are made from high-quality parts.
The use of low-quality parts significantly reduces the service life of production equipment
The use of equipment components with poor assembly quality can cause sudden failure of the device.
Options for the location of the lining on the plane of the wall and ceiling
The lining on the plane of the wall (ceiling) can be positioned vertically or horizontally. Traditionally, Euro profile lining is located vertically, and Calm profile lining is horizontal. This is primarily due to the peculiarities of perception of horizontal and vertical lines. Vertical lines, especially emphasized by a wide strip of shadow from window light, due to the difference in the surface of the lining profile on the wall, visually increase the space between the floor and ceiling. The horizontal thin lines of the joint of the “calm” profile linings have no shadow and therefore create the effect of integrity. Traditionally, the ceiling is covered with clapboard in the direction of the light flow - perpendicular to the window.
Work procedure
Do-it-yourself lining is done in the following order:
- Sawing boards;
- Surface planing;
- Cutting profile elements.
Sawing boards
The production of lining is carried out using a circular saw with large teeth. Before starting work, check the reliability of fastening the saw and locking devices. If necessary, secure the part to the required level.
After checking the reliability of fastening of all parts and assemblies, turn on the device. Carefully insert the end of the board between the guide rollers. With smooth movements, bring the end to the board.
To protect against accidental movement, stops are used.
The workpiece is sawn into the required number of boards.
Residues from cutting boards can be used to make slats or bars for sheathing.
The harvested material is stacked in a predetermined location. Wooden spacers are placed between the rows of folded boards. Using spacers will speed up the drying of boards with high humidity.
Surface planing
Before making the lining, the surface of the board is jointed. Jointing is the process of obtaining a straight surface of boards using cylindrical shafts. To perform jointing, the circular saw is replaced with rolling rollers. The work is carried out in one direction. To do this, the board is passed on each side along the surface of the table.
To obtain a high-quality surface, the amount of pressure and the number of passes must be the same for all products.
To automate the jointing process, clamping devices with adjustable pressure force are used. Such devices are made independently or purchased in specialized stores.
Cutting profile elements
The tenon and groove are cut on each board using removable cutters or an inclined circular saw.
Before cutting profile elements, check the operation of all fastening and guiding mechanisms. When using milling attachments, the cutters are adjusted according to the thickness of the board and the level of penetration of the cutting edges into the wood.
Remember! The use of low-quality materials in the manufacture of machine equipment elements affects the safety of work.
When using a circular saw, carefully adjust the angle of the blade. After adjusting the cutting mechanisms, they are securely fastened. To ensure uniform passage along the length and obtain the correct profile, stops must be used.
You can see a full description of how the lining is made with your own hands in this video.
Formation of sheathing
The lining is mounted on a pre-prepared sheathing made of wooden blocks and slats attached directly to the wall or ceiling, at a distance of about a meter from each other. Such elements are fastened in a perpendicular position relative to the planned position of the lining; both horizontal and vertical placement of boards is provided. After the optimal distance between the slats has been calculated, they are fastened, the installation method depends on the degree of evenness of the surface to be upholstered.
For uneven walls, a type of fastening is provided, where the sheathing is aligned plumb or level when done:
- attaching hangers to the wall surface, on which planks or bars are installed level;
- driving wedges made of plastic or wood between the sheathing elements and the wall, which is necessary to level the beam.
When the walls are smooth, the bars can be attached directly to the walls, without prior leveling, using:
- nails that are suitable for wooden surfaces;
- dowels or screws recommended for concrete and brick walls;
- glue, the use of which is intended for those cases where drilling and driving in cannot be used.
Options for joining planks
Let us examine in detail how to dock correctly
Option #1
Connection of plastic and MDF panels:
H-shaped PVC profile. Most often, joining along the length of plastic and MDF linings is done using H-shaped PVC profiles, as in the photo below. In this version, the planks are simply inserted into the profile on both sides. The downside is that such a profile is visible, and in the case of MDF it also differs in texture.
The H-shaped profile is considered universal, but it is visible
- Thin straight and corner strips. Manufacturers of MDF panels produce thin strips that are glued to the connection line; these strips can be straight or angular.
- T-shaped moldings. They are inserted into the gap between the panels.
T-shaped moldings for hiding the joints between MDF panels are very easy to use
Option No. 2
A decorative overlay at the joint is considered the simplest way to connect wooden cladding along the length. You simply fit 2 rows of planks and nail a piece of wood on top. The configuration and dimensions of the slats can be any, and most importantly, there is no need to adjust the slats too precisely; the slats will cover the entire defect.
To decorate the joint on the Blockhouse lining, a planed board with chamfers is usually used
Craftsmen use wooden T-shaped slats, they are also called mushrooms. There the rail is inserted into the gap, which must be precisely adjusted to the size of the fungus. Plus, this joint must be on the supporting lath of the sheathing.
The gap between the slats should correspond to the thickness of the fungus stem
Option #3
Installation in a running manner. This option is the most difficult to install with your own hands.
It is being built in several stages:
- No one is going to hide the joints; on the contrary, they are highlighted, so they must be perfectly even. To do this, the ends are cleaned and ground at 90º before installation.
- To ensure that there is no gap at all when joining, lay the planks on top of each other and use a miter saw to cut off the edges of both at once.
- A grinder or electric planer is used to chamfer the outer part of the cut; the bevel should be the same as the side bevels on the plank itself.
- The planks are connected end-to-end and the cut no longer spoils the view, but is part of the interior.
When installed staggered, symmetrical seams look better
Peculiarities
Before we begin describing the manufacturing process, it is necessary to understand what this product is.
Lining is a type of facing material that is a product of processing natural wood. It is used to design both simple (linear) and complex structures. Depending on the technical characteristics, the products are used for exterior or interior decoration. Externally, these are flat panels with special connections at the edges.
In the production of lining, various types of wood are used, both deciduous and coniferous: alder, cedar, ash, pine, beech and much more.
Wooden finishing combines excellent performance and aesthetic qualities. Due to these characteristics, finishing has become widespread. Lining is used for external and internal cladding.
Advantages of lining:
- aesthetic appearance;
- a wide range of products, differing in color, texture and performance characteristics;
- it is an environmentally friendly product, safe for health and the environment;
- high-quality material has excellent practicality and wear resistance;
- finishing material made of wood is a classic that is always relevant and in demand;
- simple installation process;
- natural finishes create a comfortable atmosphere in the room.
Flaws:
- high price;
- requires careful care.
This is interesting: Features of polyurethane sealants for external seams: let’s look at them from all sides