It happens that a screw or screw that has a countersunk or semi-countersunk and round head, where there is a tightly torn cross-shaped or straight slot, and the screw or screw is tightened flush to the surface - in such cases you will not be able to take pliers and pull it out. It is not permissible to damage the surface to which the screw is screwed - here it is not at all an option to select material from under the head so that it can be fixed with pliers. Moreover, it is not allowed to use a crowbar, as in the case of nails.
Now we will look at some solutions on how to unscrew a broken screw.
What do we do first?
When your screwdriver slips along the edges for the first time, you need to stop and not try to unscrew it again. Usually in such cases the situation worsens and leads to greater difficulties. The first priority is to preserve the head in which the screw is located.
You can try using another screwdriver first. It may happen that the screwdriver simply does not match the screw you have chosen. When using other screwdrivers, you need to make sure that the tip of the screwdriver fits neatly into the head. If there is no point in changing tools, then you need to move on to other, more effective methods.
Ways to Prevent Corrosion on Threads
When you repair the threaded connection, take care to ensure that the problem does not reoccur. Threads can be protected from corrosion using lubricants with neutral acidity or slightly alkaline. This class of fuels and lubricants is called conservation, typical examples are graphite lubricant USsA and “Solidol”.
Protecting the threaded connection from the environment will also help. Most paints and enamels based on alkyd or polyurethane are suitable for this. You should not use silicone, because its high acidity only promotes the formation of rust.
Finally, don't forget that some threaded connections require maintenance and retightening. If the connection must remain detachable, it must be loosened periodically (every 2-3 years) and lubricated with at least ordinary machine oil.
rmnt.ru
How to simply unscrew a licked screw
All you need to prepare for this is a small piece of rubber or rubberized material. You can use a medical tourniquet, rubber from a bicycle or car inner tube, a rubber ball, etc.
We take what we have on hand and cut out a small rectangle. You need to place it on the licked screw, then rest it with a screwdriver and carefully, slowly begin to unscrew it.
This is a very simple manipulation, but here it is important to direct the force to apply pressure from above onto the self-tapping screw.
After making a few turns, the edges may be imprinted in the piece of rubber, after which the screwdriver will turn. We transfer the rubber band to a new surface and continue to unscrew the screw further.
I performed this operation using a tourniquet and a bicycle tube folded in half. As a result, everything gets out without question.
Video of how it's done
:
Disassembling a laptop computer
Disassembling an Acer Aspire 1410 computer.
Instructions for disassembling a laptop look like this:
- Turn off the computer completely. If the laptop does not turn off, press the power button until the laptop turns off (about 5 seconds).
- We remove all external devices from the laptop: charger, plugs and memory cards from the card reader, wireless mouse receivers, and so on.
- We check that there are no light bulbs.
- Turn the computer over.
- We take out the battery.
- There are many different screws in laptops. We write down or take photographs/sketches of where the screws were.
- Unscrew all the screws. Partially the screws are signed.
- We remove all the plugs on the screws and latches located on the back side.
- Unscrew all the screws under the plugs.
- We take out the disk drive, hard drive, wireless network modules, random access memory and others.
- We unscrew all the screws under the disk drive, hard drive, battery, and so on.
- Disconnect all cables and connectors.
- Turn the computer over. You need to open the lid with the display.
- There are several ways to remove the keyboard. Typically, there are small latches at the top or around the perimeter that need to be pushed in, or screws or latches at the bottom of the computer that support the keyboard.
- If the case cover around the keyboard is solid and there are no plastic frames, remove the keyboard. If the case around the keyboard is divided into 2 or more components, removal cannot be carried out or there is a plastic frame - remove the frame or the upper part.
- Remove the keyboard and disconnect its cable.
- We unscrew all the screws that are located under it.
- We disconnect all cables and connectors where possible.
- We remove the top cover of the laptop computer body, use a specialized spatula or other device.
- We disconnect all the cables and connectors that we can.
- We unscrew the bolts securing the display, motherboard, and other components.
- Assembly is carried out in reverse order.
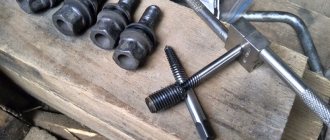
We use an extractor
You can use an improved method to unscrew a broken screw - using an extractor. People resort to its help mainly when it is necessary to unscrew a broken screw. In this case, when you unscrew it, it will not break.
The extractor is the same screwdriver, only with the difference in the form of strong and coarse metal threads located on the tip. They make it easy to penetrate the screw head and eventually unscrew it.
Types and types of screws
Screws are cylindrical rods with a screw groove and a formed head. Hardware is manufactured in accordance with GOST 1144-80, GOST 1145-80, GOST 10619-80, 10620-80, 10621-80, DIN, ISO.
There are two main types of screws: self-tapping (“self-tapping”) and, in fact, “classic” screws. When designating hardware, its diameter and length are most often used (for example, 5x35 mm, self-tapping screws length 35 mm, diameter 5 mm).
They are classified according to the design of the head and the design of the slot for the screwdriver:
- Countersunk head (flat head screw);
- With reduced concealment;
- With hemispherical;
- With a press washer.
Read also: In what year was light invented?
All of the above types can be made with a straight slot, a Phillips slot, a Torx slot (commonly known as an asterisk), an internal hexagon, and a number of other less common ones. Combinations of splines (for example, straight and cross-shaped) are also possible.
Separately, we can highlight self-tapping screws with a hex, octagonal turnkey head (roofing self-tapping screws); they can also be made with various slots.
There are also screws with special heads (ring screw, hook screw, hairpin screw, furniture screws (confirmed screws, although logically it would be more correct to call them furniture screws), etc.
According to the type of threaded part, they are also divided into types, determined primarily by the scope of application and the materials being fastened (self-tapping screws for metal, self-tapping screws for drywall, screws for small household appliances); in this article we will not dwell on this classification.
All hardware can be manufactured either with a coating (chemically phosphated, galvanized) or without it. Why does a screw with a flat head or a hemispherical head break off?
More precisely, the slot in its head breaks off. There can be quite a few reasons for edge failure, let’s look at the main ones :
- Use of low-quality, unsuitable size (type) or worn-out tools;
- Applying insufficient (and as a result, the tool jumps out of the slot) or excessive force when screwing in or out;
- Using a self-tapping screw for other purposes (attempting to screw into an unsuitable material, without pre-drilling when required, etc.);
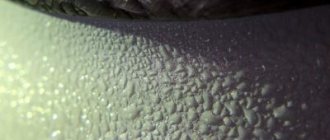
- Corrosion in the product, both the screw head and the screw thread (so-called “acidification”)
- Incorrect screwing (“hammering”).
Extreme measures and maximum results
It may happen that the above methods did not give any effect. In this case, the screw can be drilled entirely to the base. This method can also be used when the screw cannot be unscrewed through a broken thread. In such a situation, when drilling, the thread is completely destroyed, and the screw is easily removed from the workpiece. Then you can use a new screw instead, only with a larger diameter.
We've all encountered a similar problem. Convulsive movements with a screwdriver in attempts to remove a screw with a damaged slot only aggravate the situation. The reasons why the notch is broken can be different, ranging from haste/hurriedness and ending with “gifts” that were so kindly provided by the repairmen that they unsuccessfully tried to finish what was planned!
Removing broken fasteners requires a little resourcefulness, but the goal is noble and worth bringing to life. Here are 5 reliable methods for removing stripped screws. Let’s start with the most gentle method and move on to a method that can be called “cheap and cheerful.” The method you choose will depend on your situation and the importance of removing stubborn fasteners.
Let's not let screws ruin our day. Let's twist them!
Sometimes all you need to remove a stubborn screw is to slightly increase the contact area. An elastic band will help hold the end of the screwdriver in the head with a broken slot and prevent twisting.
You can use any elastic band, but a wide one will work better. Since it provides the largest contact area between the head and the screwdriver.
We put an elastic band over the screwdriver and pull it hard enough so that it does not sag, then carefully install the screwdriver into the broken slot and slowly turn it.
If the slot is not completely “removed”, a rubber band will fill the space in those places where the notch is broken and will provide the necessary friction, which will allow the screw to be unscrewed.
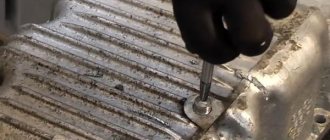
If the screw is not completely embedded in the material, there is a good chance that you will be able to clamp it into the drill/driver chuck and easily unscrew it back.
Open the chuck and place it on top of the screw head. Next, we tighten the cartridge by hand so that the “cams” are securely fastened to the screw. Set the hammer/drill switch to reverse and slowly unscrew it from the board.
This works with any type of screw/screw/bolt whose head size allows it to be clamped in the chuck.
If you come across an extremely stubborn fastener that just won't come out, it's time to call in the big guns.
Screw extractors have left-handed threads, and screws have right-handed threads.
Extractors come in different sizes. You need to choose the right size to screw into the broken slot. Install the extractor into the screwdriver chuck and tighten the chuck securely.
Set the drill switch to reverse. Since the extractor has a reverse thread, this means that a drill with the extractor installed in reverse will drill into the head. Continuing to drill in the opposite direction, the extractor will begin to turn the screw, thereby unscrewing it from the board.
Lubricant and spanner
If everything is not too advanced, you can try this technique:
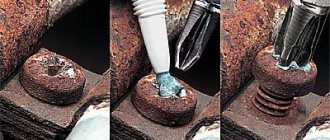
- Clean the surface of the threaded connection with a metal brush.
- Apply gasoline, kerosene, or a lubricant like WD-40 to the release nut and bolt. You can wrap them with a rag soaked in the specified composition and leave it like that for 20-30 minutes.
- After some time, we try to unscrew the nut with a spanner, but without fanaticism. The edges are already torn off, the key can jump off. In order for the rust scale to come off, you can lightly tap the connection with a hammer, just do not miss the nut or hit the thread.
> Buy as a gift or order a unique item
- More about the author
- 15 recent entries
About alexlevchenko
- DIY cat house - 10/13/2019
- DIY cardboard playhouse - 10/11/2019
- DIY Halloween toys - 10/09/2019
- DIY winter crafts - 10/08/2019
- Mega Pack for homemade items for Halloween (Halloween 2019) - 10/05/2019
- DIY giant spider for Halloween - 10/03/2019
- DIY bracelet – 10/01/2019
- Jigsaw machine with your own - 09.29.2019
- DIY radio-controlled scorpion - 09.27.2019
- DIY bird feeder – 09.25.2019
- ATTENTION! Need Brain Help! — 08.11.2017
- Ideal for a Halloween party - 10/31/2017
- Limited Edition: Black Lemonade - 10/31/2017
- Isaac Clarke's budget helmet from the Dead Space universe - 10/29/2017
- Dinner Party at Bruce Wayne's Estate - 10/28/2017
Remove paint from slots
A slot (from the German schlitz - cut) is a recess on the head (head) of a screw for a regular or Phillips screwdriver. In Soviet times, they didn’t really stand on ceremony with all sorts of handles, locks and other latches on windows and doors, and therefore they covered them with oil paint, without hesitation and without paying attention to whether there was a protective coating on the fittings or screws or not. Well, the paint, obeying the laws of physics, accumulated in the slots and dried there, replacing the putty. It is almost impossible to unscrew a screw with 3-5 layers of paint on a countersunk head without cleaning the slot. However, cleaning old oil paint from a slot is not that difficult. To do this, it is enough to have any sufficiently sharp metal object made of durable metal. By sufficiently strong metal we mean not only tool steel, but also various kinds of pobedite and corundum soldering on various kinds of scribers; in extreme cases, you can use a thin nail, in any case, its strength is much greater than the strength of oil paint. Personally, I use a special wedge attachment for these purposes; this used to be included in the screwdriver set. With this nozzle you can not only mark wood, but also clear paint from the slots. However, the disadvantage of such an attachment is that it is not always at hand. This happened in the described case, when at the dacha it was necessary to unscrew a couple of old handles, so a nail was used to clean the slots.
You need to clean the slots very carefully; the more paint you remove from the slots, the more likely it is that you will be able to unscrew the screw. However, this is not a guarantee of success. I don’t know exactly why, whether because there was some miscalculation or flaw in the technology for making screws, or screws for household purposes were made only on equipment worn out in the arms race, or from low-quality steel, or simply because I only come across These are such old screws, but the slots on old scoop screws are not of high quality. And their main drawback is that the slots are not deep. And the shallower the depth of the slot, the easier it is to “tear off” or “lick” these same slots when unscrewing. After all, when we try to unscrew a screw, we must overcome the frictional force between the screw shaft and the wood. This force arises during elastic deformations of wood and does not weaken over many years and even decades, and if the screw also rusts, then it is necessary to further destroy the resulting scale. And this is not always easy to do. Even a simple nail driven into wood, which can immediately be pulled out without any problems with a crowbar, after many years, due to corrosion, can adhere to the wood so that it is almost impossible to pull it out, only to cut it off or break it off.
Sometimes, if you have an old unnecessary screwdriver, you can sharpen it and use it as a chisel to deepen the slots.
A simple way to unscrew a licked screw
This was the easiest way to unscrew a licked screw without using a drill or other tricky devices. Also the fastest. So friends, take this advice into account. Watch the video If you don’t quite understand how to act, watch the video.
- 61 5 0
- vla917
- 27/04/2018, 21:45
- eboris_1
- 26/04/2018, 22:13
- gushan111
- 24/04/2018, 05:04
- blokroman
- 23/04/2018, 18:11
- alp001
- 27/04/2018, 09:28
- blokroman
- 27/04/2018, 20:46
There are only two simple and usually helpful methods. First: if the head of the screw protrudes even slightly above the surface of the wood, you can try to unscrew it with pliers, tightly squeezing the sides of the screw head with their jaws; Another option is to pick out the piece of wood around it, but it won’t look too neat. Second: if not, drill out the head of the self-tapping screw; Usually a drill with a diameter of 10 mm is sufficient. In this case, strictly speaking, the screw does not unscrew - but the parts connected by it are disconnected... If the slots on the head of the screw are at least relatively intact (the tip of the screwdriver reliably “clings” to them) - usually two or three times “carefully, but firmly” !” hit the end of the screwdriver handle with a hammer about three hundred grams. It twists like a sweetie... at least a couple of turns. Further, if it doesn’t work, use pliers again.
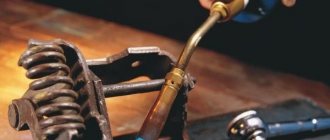
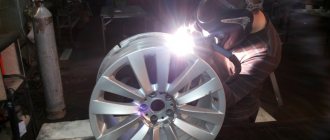
The simplest, but requiring patience, courage and some equipment, the third method is BURNING. It’s stupidly simple to do: the tip of a well-heated soldering iron with a power of 100 watts (or better yet more) is tightly “stuck” into the visible part of the screw and held for at least 5 minutes without lifting it off. The smell is not the most pleasant (especially if the screw is screwed into some kind of polishing) guaranteed - but after such an operation, even half-rotten screws, screws and other fasteners are guaranteed to be unscrewed...
«>
How to unscrew a screw, bolt or nut
But it is only good when you are not afraid of damaging the thread.
Even though I’m a girl, I had a moment when I had to pull out a rusty screw on the balcony.
I pulled out the electric soldering iron that I had at that time, I needed to heat the screw head harder with it, it took me about 3 minutes, I had a powerful soldering iron. Then you have to wait until the head cools down, but I didn’t wait, but immediately began to slowly unscrew it with a screwdriver.
A rusty screw is a problem - usually the screw rots (destroys) under the head so much that when you try to unscrew it, the head curls up and falls off without any effort at all! This is also facilitated by the part swollen with rust, located in the body and tightly held by rust and oxidation.
Initially, do not try to force this action by trying to unscrew it by force, you must definitely apply something that will release it in the hole, for example, buy VD-40 spray, before it was not available and the craftsmen used ordinary brake fluid, dripping it from a syringe - it helped no worse than the modern VaDashka.
After the screw has oxidized, or better yet, left it overnight, for example, it must be warmed up thoroughly!
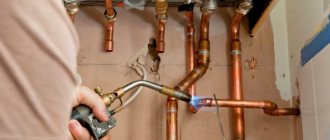
A construction hair dryer is required here, if the screw is in concrete or brick, you can use a blowtorch or a torch, but still, a construction hair dryer means there is no burning or smell!
You need to warm it up very well, if in wood it starts to smolder, if in concrete, then the screw can be heated until red hot.
After warming up, let the screw cool completely, with the difference in temperature and the expansion of the metal and the base, the bond will be significantly destroyed and the screw will be unscrewed - you can use either a regular or an electric screwdriver, a screwdriver, and even pliers or pliers - whichever is convenient for you personally.
In addition to everything that has already been said, I would like to say about my favorite method. If, for example, the screw still breaks off, which often happens when the head breaks off, then if it is necessary to remove the remainder of the screw from the surface, you can use the drilling method.
This is an extreme case and will require a powerful drill and a good strong drill bit. We work with glasses. As a result, the hole may not turn out to be very even, but after a little correction with the building mixture, you can re-hang a shelf in this place, for example.
Read also: The disk drive button on the computer does not work
Silenty, even though she’s a girl, gave very good advice. But this method is good when there is both a socket and a soldering iron within reach; in addition, this method will work with a screw wrapped in wood, but it is unlikely to work in concrete. In general, for such cases (when a screw, bolt or bolt is rusty or tightly tightened) there is a special tool called an impact screwdriver . The impact force translates into torque, which is quite powerful. A very good and useful tool, it comes with attachments (bits) for all occasions, and it’s not very expensive.
Actually, this is probably a common question asked by novice “masters”. Many people use quite skillful options for removing a rusty screw or bolt. But I think that you shouldn’t rebuild the bike and the easiest way is to just first slowly hit the screw and calmly unscrew it. After the impact, the rust partially falls off, which makes it possible to pull out the screw from anywhere without much effort. Good luck)
There are many options for unscrewing a rusty screw:
- treat the screw with WD-40 and simply unscrew;
- use a cordless screwdriver;
- tap the head of the screw with a hammer and unscrew it;
- heat the screw, tap it, and unscrew it.
More questions on your topic:
Builder's Dictionary :: Repair questions :: Calculators :: Special equipment :: Miscellaneous
Rusted bolts, screws and nuts sometimes cause a lot of inconvenience. It is useful to know how to remove a rusty bolt without wasting precious time and nerves.
Recommendations
It is better to purchase a tool useful for unscrewing different types of screws in advance and keep it on hand. This point is especially relevant for owners of garages and personal vehicles. Here, an extractor for unscrewing broken hardware will be most useful - it is better to choose a universal design type, with a shortened working part. With it, you can unscrew problematic fasteners even in hard-to-reach places.
To reduce the likelihood of edges or splines breaking, you can use a number of simple tips.
- Select only high-quality fasteners with a hardened head.
- Securely fix the tool tip in the slots. When a screwdriver or bit slips through, the protruding edges are erased - it will be more difficult to unscrew such hardware.
- Maintain the tool in working condition. The edges of a key or screwdriver are also often licked off, which greatly interferes with the normal unscrewing of the fastener.
Considering these tips, you can avoid problems with unscrewing screws for various purposes from the parts they fasten.
In the next video you will learn how to unscrew any screw.
How to prevent rust
As you know, it is easier to prevent a problem than to stubbornly fight it later. Among the many preparations for corrosion protection, the following can be distinguished:
- Long-acting inhibitor. After treating metal products with this product, you don’t have to worry about accidentally leaving them on the street. Let them lie there for at least a whole year. Now they are perfectly protected from the effects of any bad weather, which can cause a corrosive process.
- Lithium protective grease. It is used to process door hinges, various chains and cables. After application, a thin film appears on the surface, which is not afraid of exposure to the atmosphere and does not allow rust to develop.
- Silicone lubricant. Since the lubricant is silicone-based, it is easily applied to any metal products, even if they have partially plastic, rubber or vinyl inserts. When the lubricant dries, a thin, transparent, non-stick protective layer forms on the surface of the product.
- Anti-corrosion spray. Used when you need to treat areas with difficult access. The spray penetrates deeply into the product and prevents rust from appearing on it. A very popular tool for processing threads of fasteners.
- Anti-rust stain remover. The composition contains non-toxic substances. It can be used not only for cleaning construction products, but also for cutlery. If you treat all the cutlery knives in the house with it, they will certainly never suffer from rust. It is enough to wait about five hours, then wash off the solution with a cleaning solution.
All methods have proven themselves quite well. You can use any of them, although often one is not enough and you have to use them all. In any case, masters have been using them for a long time and quite successfully. But most importantly, remember that it is better to initially protect yourself from rust, rather than fight it.