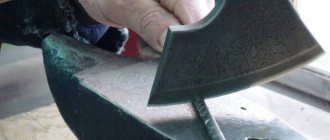
Sometimes brazing stainless steel is preferable to welding. Soldering is used for thin-walled products that are not subject to heavy loads, and in cases where they do not want to experience warping from heating.
It should be taken into account that some types of stainless steel require a certain approach, taking into account their composition and manufacturing technology. For example, cold-worked stainless alloys crack at high temperatures, so their soldering is carried out without loads, after first annealing the metal. There are other subtleties.
Inventory
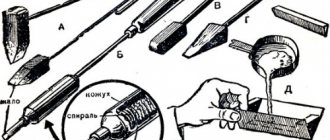
To carry out the work, you need to prepare all the necessary tools in advance. If soldering steel is carried out at home, you need the following equipment:
- Electric soldering iron. The optimal power of the equipment is 100W. As a similar option, you can use a hand-held propane torch.
- Solution for degreasing the working surface.
- Flux for soldering.
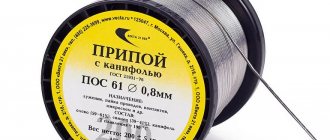
- Tin based solder.
- Rags.
We must not forget about personal protective equipment - safety glasses, gloves, a work suit and a respirator.
Solder Types
Solder for soldering stainless steel is considered the main consumable material when carrying out work. There are two groups of solders:
- Soft - mixtures made from lead and tin. These materials increase the ductility and fluidity of the consumable material for creating a connecting seam. The disadvantage of soft compositions is the low strength of the hardened material.
- Solid - used in workshops and enterprises. The compositions contain 30% technical silver, thanks to which the connection is strong and durable.
Flux preparation
Proper soldering of stainless steel requires a competent choice of flux. This is due to the fact that alloys that are resistant to corrosion processes are easily damaged during the welding process. To avoid mistakes when choosing a purchased mixture, you can prepare it yourself. Making flux:
- Take a portion of borax and the same amount of boric acid.
- Mix the ingredients together.
- Dilute with clean water.
- Stir until a homogeneous mass is formed.
The finished composition is applied to the adhesion site. After drying, the adhesion rate to the treated surface increases.
Homemade fluxes are not inferior to purchased compounds. To increase its effectiveness, before applying the substance it is necessary to treat the metal surface with sandpaper or a file.
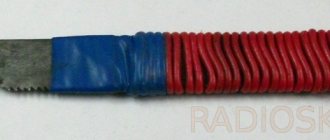
Applying flux to a tube
This is interesting: Grinding
Theory
Copper is one of the oldest metals, which is used by people to create various decorations, devices and communications. It is characterized by high plasticity and pinkish-red color, sometimes with a golden tint. In the household, copper is most often used in water pipes and heating, because it does not corrode and is resistant to temperature changes.
Photo - copper connections
There are many types of soldering; capillary soldering is used for copper. It allows you to connect two parts of a pipeline or radio components as accurately and firmly as possible. This thermal effect is also divided into:
High-temperature soldering is characterized by higher weld strength. In addition, it allows the connection to be thermally stable, which is very important for various communications. But at the same time, this type of work is not used on threaded connections. To carry out such soldering, special equipment is required - a burner with piezo ignition and acetyl, propane.
Photo - copper elements
Low temperature is used when working with soft solders (pastes, gels). The main advantage of this technique is the simplicity and ease of work. It is carried out at a temperature lower than 425 degrees, so soldering can even be done with a soldering iron. It lies in the fact that, under the influence of a certain temperature, the solder applied to the gap between the part and the area being connected expands, closing the gap.
Photo - soldering process
There is also one important rule that must not be violated under any circumstances. Soldering copper and aluminum, or aluminum and brass, is strictly prohibited. It is performed for electrical wires, for example, if you need to branch the wiring in old houses. This is prohibited due to the difference in linear thermal expansion of the metals and the likelihood of a short circuit at the joint.
Disadvantages of soldering stainless steel with tin
- Soldering is inferior to many other processes for obtaining a permanent connection in terms of strength, so it cannot be used for critical structures;
- Due to the use of tin, the temperature range of operation of the parts is reduced, since the material can melt;
- Difficulties remain with the behavior of stainless steel in a liquid state.
Tin soldering modes
| Burner flame temperature, degrees | Soldering iron power, W | Exposure time, seconds | Solder diameter, mm |
| 232-240 | 80-100 | 5-10 | 2-4 |
Preparation of equipment and necessary materials
Soldering stainless steel with tin requires the correct selection of tools and other equipment. To do this you will need:
- Soldering iron or gas torch;
- Solvent;
- Solder;
- Wire brush;
- Flux;
- Protective gloves;
- Cleaning cloth.
It is advisable to take a soldering iron with a power of 100 W, since less powerful models will not be able to melt the material.
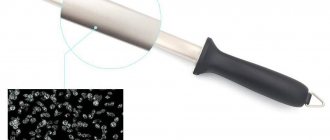
Soldering iron for soldering stainless steel
If we are talking about larger connections, then a more powerful soldering iron may be required. The tip of the tool must be fireproof, as this significantly increases its service life. It should be noted that the capabilities of the soldering iron are limited, since it can only work with low-melting solders. For such soldering, pure tin bars or rods from the POS series are best suited.
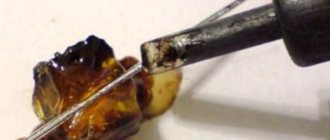
Tin bars for soldering stainless steel
The first option is well suited for dishes and other containers, as it does not contain impurities. It is best to use phosphoric acid as a flux for this type. It is necessary to treat the places where the metal will be soldered and then the adhesion will be at a much higher level.
Selection of solder and other materials
Soldering stainless steel with a soldering iron requires proper selection of solder, since the quality of the connection will depend on it. One of the most popular planets in this area is the “POS” series. Unlike ordinary tin, which is sold for soldering in the form of bars, it also has additional inclusions of lead, which changes the properties of the material. It is worth paying attention to the brands:
- POS50Kd18;
- POS-61;
- POS-40.
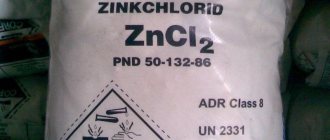
They may contain not only tin, but also cadmium, lead and other metals. If you need to solder parts that will come into contact with food, then there should be nothing extra in the material other than tin, since other things may be harmful to health. It is difficult to choose a flux for stainless steel, since not everyone can use it. What is required here is the so-called “active flux”, which is soldering acid, orthophosphoric acid or zinc chloride. It is advisable, as soon as it is applied to the surface, to immediately begin the procedure so that the flux does not form a film.
Technology of soldering stainless steel with tin
Before soldering stainless steel with tin begins, it is necessary to remove the oxide film that may form on the surface of the metal, as well as other contaminants. This is done with a wire brush or sandpaper.
Cleaning metal before soldering
Then the degreasing procedure takes place, for which you will need a solvent, for which you can also use acetone. When the surface is cleaned, you can apply flux, if you are not using a combined solder, which already contains it in its composition.
Flux application
Next, heating occurs using a torch or soldering iron tip. When using a torch, you need to monitor the oxygen level, since if there is an excess of it, the metal will oxidize. To recognize this parameter, you need to pay attention to the color of the flame, since in a supersaturated composition it will be light blue. It is necessary to heat the entire joint to such a temperature that the solder can melt.
Heating the metal
It should melt not from the burner, but from the metal heated by it. Solder is placed in the area where the joint is located, this is done gradually until the entire area is filled.
"Important!
This should be done until the excess begins to flow out of the gaps, then the best degree of setting can be guaranteed.”
Quality control
For this, GOST 19249-73 is used. Control methods with and without destruction can be used here. Among them are the following:
- Radiation control;
- Technical inspection;
- Radioscopic method;
Security measures
When soldering stainless steel with tin at home, electrical safety rules should be followed. The main problem is that you can get burned when coming into contact with a soldering iron, heated metal or solder. You should also avoid inhaling metal fumes.
Why might soldering fail?
- Insufficiently thorough cleaning;
- Weak metal heating;
- Incorrect flux or solder;
- The soldered material was subjected to physical stress even before it solidified.
Tools and materials used
Soldering of copper pipes is performed with the following tools and materials:
- Consumables.
- Gas-burner.
- Solder.
- Flux.
- Accessories.
Consumables
Pipes and fittings are used as consumables for soldering.
Depending on the manufacturing technology, copper pipes are distinguished:
- annealed;
- unannealed.
annealed pipes are hardened at a temperature of 600–700ᵒC. Additional heat treatment increases the elasticity of copper. Annealed pipes have increased ductility and bend well. The disadvantage is the relative high cost and reduced strength.
Technical Specifications of Annealed Copper Pipe
For your information. The burner flame at the moment of heating the joint should have a bright blue color. The pale blue color of the flame indicates excessive saturation of the gas-air mixture with oxygen.
Unannealed copper pipe
Unannealed pipes have high strength and relatively low cost. When laying communications, they are connected by separate links. Fixation of such copper pipes is carried out using special connecting elements - fittings.
For soldering, copper pipes with different diameters and wall thicknesses are used. The most popular are diameters from 10 to 42 mm and wall thicknesses of 1.0–3.0 mm.
A fitting is a connecting element for joining links. Depending on the purpose, fittings can have different shapes and designs.
The most common types of fittings are:
- couplings - when connecting two pipes;
- corners - when turning them;
- tees - when creating branches.
Special fittings for soldering network copper pipes are called capillary fittings. The inner surface of such fittings is coated with tin. During high-temperature soldering, tin melts and spreads over the surface of the joined elements. The solidified melt reliably connects the pipe ends.
Gas-burner
A gas torch is a hand-held tool for heating materials with an open flame. A gas burner consists of a working part and a gas storage cylinder. The working part is designed to ignite and burn the gas-air mixture. Propane is used as the working gas. The pressure and speed of gas supply are regulated by a gas reducer.
Modern models of gas burners are equipped with piezoelectric ignition. The supply and termination of gas supply is regulated by a special valve. If there is no flame, the non-return valve automatically shuts off the gas supply.
The flame temperature reaches 1300ᵒC.
Gas burner device
Solder
Solder (solder) is a metal or alloy of metals that has a low melting point and high fluidity in the liquid crystalline state.
Depending on the melting temperature, solder alloys are:
- low-melting (melting point less than 450ᵒC);
- carbide (melting point 450ᵒC or more).
Low-melting (soft) solders are used for soldering elements that do not experience significant loads. These materials are widely used in the radio-electronic industry. They are used to connect elements of radio equipment and electronic circuits. Soft materials include metals with low melting points (copper, lead, tin, bismuth, antimony, cadmium, zinc).
For your information. The required length of solder wire is assumed to be equal to the diameter of the pipes being soldered.
Hard (refractory) solders are used to join metals with a high melting point (cast iron, steel, bronze, etc.). Used in mass industrial products. The most widely used copper-zinc solders are grades PMC-42 and PMC-53.
Soldering of copper pipes is carried out using tin-lead solder of various brands. The grade is determined by the percentage of auxiliary metals. Soldering of copper pipes in the domestic industry is carried out using soldering alloys of the POS type. Such alloys contain antimony, tin and lead.
Flux
Flux is a chemical composition used to improve the adhesion of joined elements.
There are two types of fluxes used in industry:
- chemically active;
- chemically passive.
Chemically active fluxes contain acid-containing components (hydrochloric and orthophosphoric acids, zinc and ammonium chlorides). Perfectly removes fatty deposits and oxidized layers. They are highly toxic. During prolonged use, they cause destruction of the elements being connected.
Chemically passive fluxes are neutral in aggressive environments and less toxic. These include various compositions and pastes based on rosin. After soldering is completed, they require removal with a wash-off compound or solvent.
Auxiliary materials
Supporting materials include:
- metal brush;
- fabric-based sandpaper;
- sharpened knife.
A wire brush is used to clean fittings and the inside of pipes.
Sandpaper is used to clean the outer surface of the joined elements.
A knife is necessary for removing internal chamfers of joints at cut points.
Equipment used
In order to properly repair products, you need to prepare materials, equipment and study technology. To solder stainless steel in a workshop at home, you will need:
- electric soldering iron with a power of 100 W (portable propane torch);
- flux;
- degreaser (solvent);
- abrasive paper, wire brush, needle file;
- tin solder;
- rags;
- protective equipment: gloves, respirator, safety glasses or transparent face shield.
Portable propane torch
In addition, for the initial heating of massive workpieces, a more powerful soldering iron may be needed. Phosphoric acid provides high-quality surface cleaning and rapid coagulation.
Soldering sheet metal
Soldering tin (thin sheet iron) is a common process in the manufacture of metal containers. But often, even at home, it is necessary to fasten sheets of iron together, assembling sealed structures. Therefore, before soldering one sheet to another, you need to prepare everything you need.
For the process of soldering iron with tin, you will need solder with a small concentration of tin, for example, POS-40, flux, a soldering iron and an awl.
In the process of soldering iron, flux acts as a solvent and an oxidizing agent at the same time. That is, the metal is immediately wetted and protected from oxidative processes. Rosin and hydrochloric acid or zinc chloride and boric acid are used as fluxes.
As for the soldering iron, for high-quality tin soldering it is better to choose an electric tool with a power of more than 40 W. The old soldering tool, which is heated by the flame of a fire, is practically not used today, even at home.
Why do you need flux?
This substance will ensure uniform spreading of solder over the surface of the soldering zone and create conditions for high-quality adhesion of the material to the metal coating. Fluxes are currently classified according to the degree of impact on the following varieties:
- Inactive (neutral), which do not contain acids. In addition, they almost do not conduct electricity.
- Active (acid) fluxes.
- Protective (anti-corrosion), the purpose of which is to protect the soldering zone of the finished joint from corrosion and destruction.
If the question arises why flux is needed for soldering, then the answer can be this: this substance is necessary to comply with the technology, since it will definitely be needed during soldering work. However, the method of application of the composition depends on its initial state:
- if the flux is in a solid state, the soldering iron tip must first be dipped into the reagent, and then grab a little solder with it;
- the finished liquid mixture will have to be applied to the soldering area using a brush;
- The surface should be treated with a paste-like substance using a regular stick.
In addition, flux is sometimes sold in special tubes.
How to solder tungsten: features
Scheme of tungsten argon arc welding.
Tungsten products have high strength, which makes it possible to use them in certain industries:
- rocket science;
- electric lamp industry;
- radio engineering.
Tungsten can be pure or part of an alloy. This non-ferrous metal is very fragile and refractory, so its processing causes many difficulties. In this regard, soldering tungsten requires a unique approach.
The soldering operation is performed at a temperature that is lower than the recrystallization temperature of the material. Typically it is 1450 degrees. If the temperature is much higher, the strength of the metal begins to decrease. It is much easier to solder tungsten products with parts made of the same material. Soldering with different materials is always very difficult, since the materials have different linear expansion parameters.
Before starting soldering work, the surface of the tungsten parts is thoroughly cleaned. It is done in several ways:
- mechanical cleaning;
- etching in acid, using nitric or hydrofluoric acid.
If the acid is missing, it is replaced by highly heated caustic soda. After cleaning, the tungsten is wiped with alcohol, or you can rinse it with hot water.
To achieve ideal cleanliness and high density of the seam, soldering work must be carried out in a vacuum. There are also several other reducing media available, however they require the metal to be pre-plated with nickel. This results in high wetting of tungsten by the flowing solder.
Necessary equipment
Before you begin repairing the product, you need to prepare the following tools and materials:
However, before soldering stainless steel to stainless steel and, accordingly, repairing the part, you should purchase protective equipment: polyurethane gloves, goggles and a respirator. In addition, to connect large products, a more powerful soldering iron may be required, the tip of which must be fireproof: this will not only increase the service life, but also improve the technical parameters of the tool. Regarding solder, it should also be said that tin bars are suitable for soldering food utensils or other containers, since they contain fewer harmful impurities.
This is interesting: Types and characteristics of abrasive wheels
Tinning as a process. A simple homemade tool for it
Tinning itself is a wonderful way to protect many metals, but most often copper and iron, from oxidation by atmospheric oxygen and the action of acids and alkalis. In essence, it consists of coating the metal to be protected with a thin layer of another metal that better resists oxidation. One of the metals most commonly used for this purpose is tin, which is affected by air and moisture very little, and weak plant acids, fats and other components of food products have no effect at all. Coating a metal surface with a thin layer of tin is called tinning, and the layer of tin itself is called half-tin. When coating metal with tin, it is very important to obtain a completely uniform, dense and durable tin layer that well protects the metal surface from oxidation.
Go crazy, go crazy.
But don't go where you can't.
There is no greater ban in the world.
Believe this from a young age.
Mikhail Shcherbakov - “Spell”
Tinned steel basins and saucepans are a thing of the past, but even today tinning is used to protect iron (steel) from food alkalis and acids. There is such a very common material as “tinplate”. In essence, this concept generally means sheet steel coated with a protective metal, be it zinc, chromium or our tin. Tin coated tin is used specifically in the food industry, in particular, cans and some other items for kitchen and food purposes are made from it.
Tinning is also an integral operation preceding the actual soldering. It doesn’t matter whether it’s structural or for electrical installation. Actually, electrical soldering usually looks like this - cleaning surfaces, applying flux, tinning. The surfaces or leads to be soldered are folded and secured if necessary. Flux is applied to the soldering area. The soldering area is heated and solder is added, or a drop of molten solder is applied to the soldering iron tip, which, by the way, is also pre-tinned (copper tips). After the solder has spread, the heat is removed. After waiting for it to completely crystallize and then cool, the soldering area is washed, if necessary, from flux residues (especially carefully when using acid fluxes) and, if necessary, insulated. You should know that forced cooling of the soldering area significantly reduces the mechanical performance of the seam.
In amateur radio practice, tinning of large flat surfaces occurs in the manufacture of printed circuit boards. Tinning the board tracks is worth it because doing it on a flat surface, uniformly, is much easier than doing it later, during installation, for each element separately. That is, time is not saved at all; savings on solder are also questionable, given the subsequent additional fuss. However, there are a number of advantages. A printed circuit board with tinned tracks is convenient for subsequent assembly, regardless of storage time, and provides reliable mechanical contact (“common”, through fastening screws). Tinning also eliminates minor defects in tracks and increases their load capacity. It’s true that tinning with a soldering iron, even with a large and flat “tip,” is not particularly convenient. Such tinning looks very sloppy - sagging, needles and unauthorized jumpers, an uneven layer of half-plate that is difficult to control.
For convenient and quick tinning of small pieces of iron, such as printed circuit boards, you can use the method of immersion in the melt, for which you will have to make a small bath with the Rose alloy, heated by an ordinary household electric stove.
Melt temperature is 120-140° C. To prevent oxidation and the appearance of a slag film on the surface of the melt, it is filled with a layer of chemically pure glycerin 20-25 mm thick. The tinning process occurs as follows. Using tongs with long handles, grab the printed circuit board and pick it up in a 5% solution of hydrochloric acid, then wash it for 2-3 seconds in running water and dip it in the Rose melt for 1-2 seconds. Excess melt is removed from the printed circuit board using a vacuum rubber squeegee. After this, the board is ready for assembly and installation of hanging elements. The tinning installation must be provided with an exhaust hood. To stabilize the temperature of the Rose melt in the bath, you can use any simple thermostat. A Chromel-Copel thermocouple is used as a temperature sensor. Temperature maintenance accuracy ±10° C.
Of course, it is worth making such an installation if there is any significant number of printed circuit boards or other non-food items that require tinning. I once saw a similar installation in production and there, it was used for quickly tinning the ends of the installation wire.
For a home workshop, such an installation is usually unnecessary; it requires additional, specially equipped space and a fair amount of expensive Rose alloy. However, manual tinning with a vulgar soldering iron can be somewhat modernized, significantly improving the result. You just need to make a simple tool from scrap materials and take a soldering iron a little more powerful than usual. The essence of the method is to use the capillary effect, a kind of felt-tip pen for solder. Its supply in a molten state, of course, is absorbed into the copper braid and when “painting” it is spent much more economically and evenly, in comparison with tinning with a “non-armed” soldering iron.
What was used in the work.
Tools
Set of tools for radio installation. You will need a fairly powerful (65...75 W) soldering iron with accessories. A special clamp for fixing the printed circuit board is very convenient.
Materials
Flux, solder, copper braiding, better density, better not tinned. Copper wire, wooden stick the size of a pencil.
Making such a tool couldn’t be easier; you just need to find a suitable braid. Usually, this is not difficult - the craftsmen are top-notch and, say, the remains of the screens after cutting the cables are not thrown away. In addition, similar copper braiding is used as short, high-current flexible conductors, often for connection or connection in grounding loops. True, there it is already tinned, which in some cases may be inconvenient (using a different solder). There is also a special thin copper braid for electrical installation, it is without tinning, it is used to collect excess solder and solder elements.
Screens from power cables with shielded conductors are used here. They are quite thin. In my hands there is another, much denser braid. Tinned. You will have to put at least one piece into another. You can, of course, use one layer, but it will work somewhat worse - the end quickly frays and the amount of solder absorbed is small. It is distributed less evenly over the surface. The length of the copper part of the tinker is about 6...7 cm, with 1.5...2 cm for mounting on a stick.
We cut off two pieces of braid with some margin.
One of them should be expanded. To do this, carefully compress it towards the middle, from the ends, while its diameter increases significantly. We finally expand it with a sharpened pencil, but without fanaticism, otherwise it will begin to unravel.
Now carefully pull through the second piece of braid. You can have two at once for density. Then we pull the ends of the outer braid, it “slides together” like a thermal tube, tightly enveloping the contents. We obtain a workpiece of the required density. Use pliers to straighten one edge and widen it again with a sharpened pencil. Now both braids are together.
Not deep, at a length of just over 20 mm. This is where we form the seat for the stick pen. By the way, now it needs to be made or selected. The easiest way, of course, is to chip off a piece of straight-layer board with a knife or an ax, but it could also be the handle of an old brush and, perhaps, a pencil.
It won’t hurt to use a sharp knife, slightly stepping back from the edge of the stick, to create a small circular recess so that our braid does not slip off the handle - when working, you will have to pull it with some effort. Then we place the prepared two-layer braid over the handle and in the place of the recess, we wrap it with thin copper wire. The “knot” can be secured with a tiny drop of solder, but it doesn’t seem to unwind. All that remains is to clarify the length and trim the end - the length of the “free” part, for a soft braid made of thin wire, is conveniently about 5 cm.
We tin the end of the braid with the solder we intend to use, while the wires at the end are partially unraveled, this is acceptable. It is tinned a few centimeters from the edge, the middle should be flexible. If the solder is not ordinary PIC, it makes sense to record this fact with a felt-tip pen on the handle.
conclusions
The tool is quite convenient, it does not save much time, but it provides a significantly more uniform coating. In addition to printed circuit boards, it can be used for tinning parts before structural soldering, in jewelry making, in the manufacture of costume jewelry, combined Tiffany stained glass windows with complex soldering. For massive metal parts, additional heating may be required (burner flame, electric stove, iron, hair dryer).
Babay Mazay, 2021
How and what is the best way to solder?
The process of soldering stainless steel largely depends on the correct selection of the necessary equipment. When doing the work yourself, you should prepare:
This kit is enough to solder stainless steel at home or in a workshop. When working with massive parts, heating can be carried out with a more powerful soldering iron. In addition, you can combine several burners in your work, as well as use a tool with several nozzles.
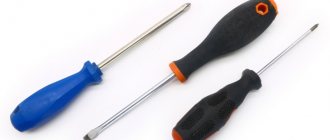
Soldering iron
To work with stainless steel, you will need a soldering iron with a thin, non-burning tip. You should also prepare PIC or tin in rods 2-4 mm thick. Let's consider the procedure.
- Clean the surface of metal parts. Depending on the size of the elements, sandpaper, a file or an angle grinder with appropriate discs can be used. It is necessary to remove all stains, traces of damage, and other possible defects.
- Perform degreasing. It is carried out using organic solvents. You can use acetone or white spirit.
- Apply flux. It is evenly distributed in liquid form over the surface of stainless steel. The layer should be thin. Flux is not needed if it is already included in the solder.
- Tin the parts to be soldered. The metal surfaces in the joint area are heated to the melting temperature of the solder, then solder is applied to them using a soldering iron. It heats up, becomes fluid, and covers the stainless steel with an even layer.
- Perform soldering. After tinning, stainless steel is completely ready for tin soldering. It is enough to simply warm up the joint area and then apply the prepared solder into it. It is important that it acquires fluidity not from contact with the soldering iron, but from the heat of the workpiece.
- To finish work. Soldering is considered completed correctly if drops of molten metal begin to protrude from the working gaps between the workpieces.
Upon completion of the work, it is important to allow the joint to cool so that the seam gains strength. It is not recommended to move or test fastened parts for rupture. Remains of flux from stainless steel are removed by washing it off with water. Excess solder can be cleaned off using machining tools.
Gas burner
Using a gas burner at home requires compliance with safety standards. A prerequisite for soldering is the use of a non-flammable shielding layer on the working surface. This can be sheet asbestos and other materials. At home, you need to ensure thorough ventilation of the soldering area.
You also need to know how to handle a propane torch correctly. In this case, it is better to use multi-component solder, which does not require prior application of flux. First, the metal is cleaned and degreased. It is then heated until it turns red. It is important to control the color of the flame - if there is a dangerous excess of oxygen, the flame will turn light blue.
The stainless steel workpiece is heated, then a bar of hard solder is brought to the soldering site. It is necessary to exclude direct contact of the flame with this area. Warming up is continued until the solder begins to come out of the joints at the place where the seam is formed. After this, the soldering is completed, the connection is cooled, and an inspection is performed for defects.
Heater types
The choice of heater type depends on the size and thickness of the steel elements being sealed. If you need to solder steel wire or thin sheets, you can use a soldering iron with a chromium-nickel or ceramic heater, selecting the appropriate power, or a soldering iron without a heater, which can be heated with a torch or on a regular gas stove. If you need to solder thick sheets of steel, you will have to use a gas or gasoline burner for heating. During operation of the soldering iron, oxidation will form on the tip, which will reduce the temperature of the soldering iron.
For cleaning, you can use either simple sandpaper or a special cleaner, such as ST-40. Coating the soldering iron tip with solder will provide a wider heat transfer range and improve soldering efficiency.
Solder Types
All solders that can be used to solder stainless steel are divided into two large groups: soft and hard. Some of them are suitable for food-grade cookware because they do not contain hazardous compounds. This category includes tin solders without lead in the composition. All other products can be combined with POS brand compositions. They quite effectively hold together stainless steel parts for technical purposes.
Sheet steel, alloys with copper (brass, bronze, cast iron), and other dissimilar metals are joined using solid multicomponent or silver solders. This is the simplest solution that allows you to obtain a strong connection between the elements. To better understand the features of each group, it is worth paying attention to the popular types and brands of compounds.
Soft
Pure tin and tin-lead solders have certain advantages when soldering stainless steel. Soft metals have a low melting point, which prevents the alloy from overheating. The process of preparing for soldering takes a minimum of time. The connection is quite strong, but is not suitable for significant mechanical loads.
Among general-purpose soft solders, POS compositions stand out. They are widespread and come in various forms and volumes. The following options are considered the most popular.
- POS-18. The composition contains 18% tin, antimony within 2.5%, and other alloying additives include bismuth, arsenic, and copper. The rest of the volume is occupied by lead.
- POS-30. Here the share of tin reaches 30%, antimony – 1.5%.
- POS-40. The share of lead does not exceed 58%, tin occupies about 40%, 2% of the volume is antimony.
Pure tin in rods or wire is used for soldering where it is necessary to avoid contact with lead connections.
Solid
When creating connections in critical, loaded areas, when fastening sheet metal, the use of hard solders becomes a more effective solution. They are made from a mixture of silver, zinc and copper; in some cases, palladium, cadmium, phosphorus, and nickel are also used as additives. The volume fraction of noble metal here varies from 10 to 80%, but the most commonly used options are those with a fraction from 25 to 45%. The inclusion of cadmium in the composition is mainly due to the need to lower the temperature at which the metal can melt.
Among the popular brands of such solders are the following options:
- PSr 25;
- PSr 40;
- PSr 45;
- PSr 70.
It is important to note that the number in the marking corresponds to the volume of silver in the composition. The higher it is, the lower the melting point will be. For example, for PSR 10 it is 850 degrees Celsius, and for PSR 72 it is only 779. The presence of phosphorus in the composition allows you to solder copper-plated stainless steels without using fluxes. Nickel and cadmium help improve the fluidity of the solder.
Necessary materials and devices: tin and others
The following tools are required for working with copper pipes:
- pipe cutter, hacksaw or grinder with a thin disk;
- chamfer;
- pipe expander (expander);
- soldering flux;
- solder;
- soldering iron for copper, for example, a propane torch for soldering copper pipes;
- rubberized gloves;
- paper napkins.
Pipe cutters of various sizes are used to cut pipes. Larger samples have a large turning radius and are inconvenient to use in hard-to-reach places, so if there is a need to cut off a section of a finished installed water supply, use a small pipe cutter. You can cut the pipe with a hacksaw or a grinder with a thin disk, but a better cut can only be achieved using a pipe cutter.
After the pipe is cut, the burrs are removed. This is necessary to ensure that there is no turbulence in the fluid flow in the system. When there are no obstacles, the water supply does not experience stress and works like a clock.
Before welding the copper, the ends of the pipe are polished with fine-grained sandpaper, which can be purchased at hardware stores. They clean both surfaces that are preparing for soldering. Sometimes small brushes with a diameter of Ø 22 mm are used for these purposes; they are suitable for almost all pipes. For cleaning, the stem of the brush is inserted into a screwdriver or drill, with the help of which the process is carried out faster and with better quality.
Flux is applied to the cleaned, smoothed outer surface - a composition that prevents the oxidation process of copper.
Advice: It is more convenient to use gray flux. When heated, it changes color, reaching the temperature required for soldering, becoming a tin shade. It is visually easy to determine when the metal has heated up, and copper can be soldered. If the flux is white, then when applied it immediately becomes transparent, so it is difficult to determine the moment when you need to apply solder.
Rubberized gloves are used to protect hands, since when cutting copper and burrs, many small metal elements are formed that dig into the skin like splinters. In addition, when cleaning the surface with a drill, the rotating brush chews on rag gloves.
To solder copper correctly, you need to take into account that from the moment of stripping and applying flux to soldering, no more than half an hour should pass, otherwise the stripping must be repeated again. If the flux is applied with a brush, there should be no bristles or hairs from it left on the surface - otherwise the connection will not be tight and the pipeline will leak after water is supplied.
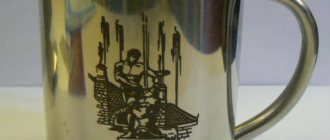
Soldering with a gas torch: repairing a kettle
First, you need to thoroughly clean the soldering area with sandpaper and remove scale near the damaged area. To solder a stainless steel kettle with a gas burner, you need to follow these instructions:
- Heat the connection with a flame, smoothly moving the device. The heating will be sufficient when the solder begins to melt upon touching the metal.
- Apply flux (rosin or phosphoric acid) to the soldering area.
- Apply tin to the damaged area, while continuing to heat the area with the burner so that the substance melts and fills the entire defective area.
- Sand the seam with a metal brush.
- Wipe the sealed area with alcohol to clean its surface from scale and oxides.
During soldering work, you need to monitor the oxygen level. To determine this parameter, you need to look at the flame, the normal shade of which is blue. In an oversaturated composition, the color will be pale, which indicates an excess of oxygen. If you ignore this requirement, there is a high probability that the stainless steel will begin to oxidize.
Soldering process
It consists of performing sequential operations:
- the pipe is cut into pieces of the required sizes, which are marked for convenience - supply or return;
- a chamfer is removed from the edge;
- the edges are cleaned by 2 cm: the outer ones on the pipe, as well as the inner ones in the socket;
- Flux is applied in a strip along the cleaned surfaces (external and internal);
- the connection is assembled: the pipe is inserted into the socket;
- excess flux is removed with a paper napkin, but not completely - an edge of 1–2 mm is left;
- the burner is ignited, the flame is brought to the junction;
- the surface is heated for 10–15 seconds to a certain temperature - the flux should acquire a tin color;
- Solder is placed on top of the joint; when heated, it will be drawn into the joint and spread along the seam, filling it.
If the connection joint has not been cleared of bristles or dust, and as a result the soldered seam of the copper water pipe leaks, then the tightness can be restored using one of two methods:
Useful tips
To perform stainless steel soldering efficiently, you should use the recommendations of experienced specialists.
- The power of a soldering iron, which must effectively heat the metal being joined, is in the range of 60–100 W, but it is better to opt for a 100-watt device. To solder large parts, such as stainless steel pipes, you will need a gas torch rather than an electric soldering iron.
- When choosing an electric soldering iron, it is better to opt for models equipped with tips that do not burn.
- The most economical and universal type of solder, which makes it possible to obtain high-quality connections for stainless steel products, is tin-lead rods. If you are soldering dishes that will come into contact with food or liquids, it is better to use pure tin as solder, which does not contain harmful impurities.
- The room in which soldering work is carried out must be well ventilated.
- When performing soldering, be sure to use personal protective equipment so as not to harm your health.
» data-lazy-type=»iframe» src=»data:image/gif;base64,R0lGODlhAQABAIAAAAAAAP///yH5BAEAAAAALAAAAAABAAEAAAIBRAA7″>
Copper pipe soldering technology
After careful preparation, they begin to carry out a set of basic works. The sequence of operations for soldering copper pipes is as follows:
Correct position of the torch when soldering copper pipes with your own hands
- Using a burner, heat the end of the pipe to be connected until the flux boils. To uniformly heat the joint, the burner flame is moved in different directions from the joint.
- After sufficient heating, the joint between the pipe and the fitting is touched with solder.
- Under the action of capillary forces, the solder fills the joint space. The work is considered completed when the composition completely fills the joint gap.
Attention! The degree of heating of the joined elements is determined by the nature of the melting of the fast ice. When heated sufficiently, it melts not from the flame of the burner, but due to the heating of the metal of the pipes.
Common Mistakes
The process of soldering stainless steel can be hampered by errors of the master performing the work. There are a number of common problems that can be identified.
- Poor cleaning quality. Stainless steel that is poorly treated before soldering will result in the solder simply rolling off the surface without staying on it. When this effect occurs, you need to re-perform the mechanical treatment, carefully removing traces of oxidation from the metal.
- Poor degreasing. It can also negatively affect how any type of solder will adhere.
- Poor heating. If the parts cannot be heated intensely enough, the soldering compounds will remain in solid form without turning into a fluid state. The situation can be corrected by increasing the heating power.
- Choosing a soldering iron with a burnable tip. Its surface will have to be cleaned - this will interfere with the continuous heating of metal workpieces.
- Choosing rosin as a flux. It is completely useless when working with stainless steel.
- Using solder with a high lead content. It is better to give preference to options with a higher percentage of tin.
- Premature connection check. A seam in which the liquid solder has not yet had time to set may lose strength. Soldering will have to be done again.
- Soldering dissimilar metals without prior tinning. It will not be possible to combine copper and stainless steel without additional processing.
- Using a soldering iron when connecting parts with a large contact area. The flux here will oxidize too quickly. You need to use a gas burner, preferably with several nozzles.
Taking into account all these points, you can carry out soldering work on stainless steel at home without much difficulty.
The following video explains how to solder stainless steel.
Soldering sheet metal: highlights
When you need to solder metal products and get a high-quality seam, you need to perform the following technological operations:
- clean the surface;
- carry out degreasing;
- apply flux;
- heat the soldering iron;
- tin the soldering area;
- solder tin parts;
- Clean the resulting surface with gasoline;
- check the resulting seam.
To clean the surface, you must use the appropriate tool (file, scraper).
To ensure the appearance of capillary forces, a gap of 0.3 mm is left between the parts. The metal fills the edges of the gap, which makes it possible to obtain a high-quality seam.
In some cases, it is very difficult to clean parts mechanically, then etching comes to the rescue. However, this is very rare when working with tin.
If there are grease stains on the surface, use a 10% soda solution. For degreasing at home, use acetone, gasoline, alcohol and universal solvent. The properties of these materials help to achieve excellent cleaning.
A lot of scientific papers have been written about soldering, this complex physical process. Abstracts describing the chemistry of the process and its results help to better understand the processes taking place and choose the most suitable soldering method.
Soldering is the process of joining metals by introducing a molten binding material - solder - between them. The latter fills the gap between the parts to be connected and, when solidified, is firmly connected to them, forming an inseparable connection.
When soldering, the solder is heated to a temperature exceeding its melting point, but not reaching the melting point of the metal of the parts being connected. Becoming liquid, the solder wets the surfaces and fills all gaps due to the action of capillary forces. The base material dissolves in the solder and their mutual diffusion occurs. As the solder hardens, it firmly adheres to the parts being soldered.
When soldering, the following temperature condition must be met: T1
Read also: Kinematic diagram of the 16k20 machine with description
To repair any household appliance, we are directly faced with the following problem - how to solder the wires ourselves? In the topic you will become familiar with materials for soldering, soldering copper with aluminum and soldering copper with iron.
Recommendations
Naturally, without a good soldering iron and flux, you won’t be able to make a reliable connection. However, before soldering stainless steel, you need to consider other points:
- It is advisable to buy a soldering iron with a tip that does not burn: the service life of such a tool is longer than that of a conventional device. However, it must be constantly descaled and sharpened. In addition, it is recommended to use a soldering iron with constant heating: this will save energy.
- Soldering stainless steel without flux is a bad idea, since an oxide film will constantly appear.
- Inexperienced craftsmen should practice a little on unnecessary parts and scraps. You need to remember: a reliable connection is difficult to tear off, and you can check its quality using a screwdriver or an awl.
- A part treated with a solvent should only be touched with gloves, since a small stain left on the surface can ruin the entire work.
- Before soldering stainless steel to stainless steel, you need to provide the room with good ventilation. In addition, do not touch heated metal or solder with your hands, or inhale toxic fumes.
- Containers with substances must be immediately closed with a tight lid after use.
- The finished part must be cleaned of flux and soldering compound. Food containers are treated with soapy water and boiled to neutralize aggressive acids.
Which metals are most strongly soldered to each other?
Unlike welding, in soldering the main indicator of the quality of the finished product is not the grade of steel or metal, but the choice of solder, as well as the technology for forming the solder seam itself. So the question here is rather about which metal, which solder sticks best to which metal. Of course, the closer in composition and density the solder and metal are, the better the adhesion will be. In the end, it all comes down to choosing the right solder for each individual case.
You also need to ensure that when connecting two metals, no electric couples are formed. Otherwise, the connection will rust and collapse from the slightest moisture. So a compatibility table for connecting non-ferrous metals with each other would be appropriate here.
The letter “A” in the compatibility table means “limitedly permissible in atmospheric conditions.”
Here are some more simple tips :
- Choose solders that are more refractory.
- Carefully clean the joints of fastened parts. Apply sandpaper not only to the seam itself, but also 0.5 - 2 cm near the joint on the metal surface.
- Tin and overlap seal. Thus, you increase the total area of fastening two or more parts.
Safety precautions when soldering steel at home
Often, neglect of basic rules for working with electrical or flammable appliances leads to loss of health or damage to property.
I strongly recommend following safety precautions when soldering:
- Keep the soldering iron on a metal pad or a special holder that takes the heated tip of the tool away from the plane of the table.
- Turn off the soldering iron from the mains immediately after finishing work.
- Check the quality of the connection of the gas cylinder to the burner itself. Avoid gas leaks.
- Work in a well-ventilated area.
- Do not leave the burner on if you have already finished working.
- Remove any flammable substances from the work area.
- Do not touch the heated seam with your bare hands. You may get burned.
- Do not touch the solder with your fingers to check the strength of the seam.
By following these measures, you can avoid injuries and also keep your property intact. Solder with pleasure and knowledge!
Source
Solder selection
The correct solder for soldering stainless steel is the key to the quality of the connection. The following factors influence the choice of suitable material:
- metal composition;
- working conditions.
Under standard conditions, soldering is performed with silver solder - it has excellent anti-corrosion properties, and the nickel in its composition increases the strength of the connection. Visually, the connection will not differ from the main surface. Craftsmen consider silver compounds to be the best material for soldering stainless steel. However, it is prohibited to use silver without additives. To improve the quality of the connection, copper or zinc is added to it.
Features of working with galvanized products
Soldering galvanized tin in a purely technological process is no different from the previous one. But the technology has its own subtle nuances that affect the quality of the final result.
You cannot solder galvanized steel with solders that contain large amounts of antimony. This substance, when in contact with zinc coating, creates a weak seam.
It is better to use boric acid and zinc chloride as flux. If the products themselves have already been tinned with tin during the production process, then rosin can be used as a flux.
When a connection is made between galvanized iron (sheet) and wire, the latter must be bent at a right angle to increase the contact area of the two products.
The rest of the process is carried out exactly the same. By the way, it doesn’t matter whether the wire was made of galvanized or ordinary steel.
There are several more important points that must be taken into account in the process of soldering galvanized products. If solder rods based on tin and lead are used for soldering iron, then it is better to add flux based on zinc chloride and ammonium chloride. The ratio is 5:1 respectively.
Tin and cadmium based solder requires caustic soda as a flux additive.
If galvanized iron products, the protective layer of which contains more than 2% aluminum, are connected to each other, then solder based on tin and zinc is used. And hydrochloric acid and petroleum jelly (stearin) are used as flux.
Regardless of which parts or assemblies are connected by soldering, it is necessary, after the process is completed and the seam has cooled, to rinse the joint with water to remove any remaining flux.