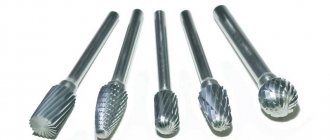
Types of Band Saws
Despite the fact that all band saws have such an element as a tape in their composition, and therefore outwardly differ little from each other, there are fundamental hidden differences between them that are understandable only to an experienced owner. These are incorporated into the shape of the teeth and the way they are routed. Different teeth are designed for different types of work.
Therefore, based on this indicator and the type of saw material, all band saws can be divided into:
Based on this information, it is necessary to select one or another type of saw to perform sawing operations.
In addition, when choosing a saw, you need to carefully examine its teeth, namely, study their geometry. There is an undeniable rule: the harder and denser the material you are going to see, the smaller the product's tooth pitch and rake angle.
If you are going to be seeing thin-walled wood, you will need a tool with a fine or standard tooth pitch because they are designed to do similar work. If you start seeing a product with a saw with large teeth, the risk of it breaking increases significantly. It is best used for its intended purpose: for processing thick-walled metals and wood products.
Band saws. A little history and theory
This article is written to help you better understand band sawing and get the most out of your sawmill.
The technology for using narrow strips in sawmilling is relatively new. It has been used in sawmills for a little over 15 years, and in second-row installations even less, although band saws have been used in furniture production for a very long time.
Technology, both in the production of the actual band blade and in the production of band saw units, is moving forward quite quickly, allowing users to achieve better and better results.
Rules for sharpening saws
Related Posts
If you decide to sharpen your bandsaw yourself, there are some fairly simple rules to follow regarding the processes involved, as well as safety practices when doing the job.
Firstly, when performing operations for sharpening belt
saw, use only special wheels. They are selected depending on the hardness level of your saw's teeth. Additionally, the shape of this wheel is also important depending on the specifications of your saw. Thus, profile grinding wheels are known, flat and in the form of a plate or cup.
Second, before you start sharpening your saw, always check how evenly the saw teeth can cut through the surface you are cutting. When sharpening, avoid sudden movements and jerks. This will help you maintain the height of your teeth and their appearance.
Review of the Makita 2107FW model
The Makita 2107 FW band tool is an extremely powerful device (power 710 W) that falls into the professional category. It is equipped with a reinforced gearbox that rotates the saw blade at a speed of 105 m/min. Thanks to the adjustable speed of movement, it is possible to choose the optimal speed mode depending on the material of the workpiece, or rather its density.
The soft and smooth functioning of the cutting belt is carried out using a pair of virtually wear-free bearings. Changing the dusty tape is very easy and the process will take no more than two minutes. Especially for this purpose, the tool is equipped with a quick-clamping mechanism. In order to avoid inadvertent turning on or off of the device, it has a start button stopper.
The Makita 2107 FW band saw can be used both manually and stationary, because the kit includes a platform for stationary use. The second option is more convenient, since the unit does not weigh so little that it can be kept suspended for a long time.
Advantages of the professional band saw Makita 2107 FW
Users noted the following particularly important advantages of the Makita 2107 FW:
- Comfortable control. Thanks to the ergonomically shaped non-slip handle, the device is very comfortable to hold in your hand and perform cutting. The built-in switch allows for more precise control of the saw blade. Due to its well-thought-out shape, you can work with both your right hand and your left.
- Stable stand. Thanks to the reliable cast base, the device is firmly located in a vertical position. This allows you to make more precise cuts.
- Work safety. The cutting blade with sharp teeth is covered with a special protective casing; only its working area is open. This ensures maximum safe operation of the unit.
- Versatility. The Makita 2107 saw does an excellent job of cutting rubber and various pipes when performing plumbing, electrical and assembly tasks.
- Very light weight for such a professional tool. 5.7 kg for such power and performance is nothing.
- The presence of a speed controller for working with various materials.
- Reliable fixation of the blade using four bearings on both sides.
- Instant blade replacement thanks to the clamping lever.
- Availability of fluorescent illumination of the working area.
- Independence of the flashlight switch from the main switch of the unit.
- Pendulum stroke.
- Ability to process workpieces with a diameter of up to 120 mm.
- High product strength and design reliability.
- Possibility of power supply from an ungrounded outlet.
Disadvantages of the Makita 2107 FW professional band saw
- inability to cut various products at an angle. There is no special clamp for this. Also, some users note that 5.7 kg is too much. However, if you remember how much power the Makita 2107 band saw produces, the opinion becomes completely opposite.
- dependence of the device on electricity, that is, the absence of a battery. In other words, this tool is not very portable. I would especially like to remind these people that the Makita 2107 band saw is a professional cutting device. It is suitable for manual use, but is still more suitable for stationary use.
- high cost, but the price fully corresponds to the quality.
User reviews
According to users, the Makita 2107 FW unit is an ideal tool for performing large-scale cutting work on metal, rubber, wood, plastic and more. If you have the financial opportunity and have enough free space in the utility room, feel free to buy this model. You won't regret it for a minute.
Video review of the Makita 2107 FW model:
Cheap band saw. Is there any reason? Scheppach HBS 20 and Einhell BT SB 200
A short overview of the band saw
(machine) for
wood
Scheppach HBS 20 (clone Einhell BT SB 200). Detailed
Third, monitor the coolant level in the grinding wheel
. This will help you avoid overheating and ensure greater accuracy in sharpening your saw.
Fourth, after completing the sharpening procedure, check for any burrs or clogging on the fabric. If found, they should be removed using a sander or grinding wheel.
As for safety, all work on sharpening saws should be performed exclusively with safety glasses and a respirator. In extreme cases, you can wear a face mask.
Review of the Bosch GCB 18 V-LI model
The Bosch GCB 18 V-LI band saw is a compact band saw in its category, powered by a battery. The minimum weight (only 3.8 kg) and compact structure (dimensions 12.7 x 733 x 1 mm) make it possible to conveniently carry out the necessary work even in very hard-to-reach areas and limited space. The cutting depth (can reach 63.5 mm) allows sawing products from all popular materials. For example, the Bosch GCB 18 V-LI hand-held band saw will “chew” an aluminum profile, plastic and metal pipes in one go. A huge advantage of this device is the ability to cut plastic, rubber, metal, aluminum and other things not only straight, but also at a forty-five degree angle.
Despite such an amazing compactness, the Bosch GCB 18 V-LI tool is considered professional and copes with the assigned tasks at the highest level, even if they need to be performed in cramped conditions.
Thanks to the indicative circulation frequency at zero load (162 m/min), high-quality cutting of flexible objects made of soft and elastic materials is ensured.
This tool runs on an 18-volt lithium-ion battery. The main advantage of this power source is that it completely lacks memory effect and self-discharge properties. Also useful is the ability to recharge the battery at any time, regardless of the state of charge. When removed from recharging, the efficiency of the device does not decrease. It can be charged at any time, regardless of the charge level.
Thanks to Bosch's unrivaled premium lithium-ion technology, the product's operating life is significantly extended and the battery retains power for as long as possible.
Advantages of the Bosch GCB 18 V-LI tool
The Bosch GCB 18 V-LI has many advantages, of which the most important are the following:
- Accuracy of cutting due to the absence of vibration during operation and the presence of illumination of the working area (there is a built-in LED flashlight).
- Long operation on a single battery charge and impressive service life.
- Availability of a system to protect the power source from deep discharge, overheating and overload. This technology is called Bosch Electronic Cell Protection (ECP)
- High mobility due to the low weight of the corrugated aluminum shield.
- Stabilized roller guide saw blade.
- Protection against accidental switching off of the saw - the start button is blocked.
- Ability to work in hard-to-reach areas and in confined spaces.
- Ability to work with one hand, either left or right.
- Significant cutting depth.
- No sparks during operation even under the heaviest loads.
- Work without sparks.
- Availability of battery charge indicator. Thanks to the charge level signaling using three illuminated LED lights, the device can be charged on time.
- The presence of an arrow indicating the cutting direction of the saw blade adds even more safety.
- There is no possibility of overload if the device is used as intended.
- Soft, ergonomic, high-quality insulated handles.
Disadvantages of the Bosch GCB 18 V-LI tool
According to users, this tool is ideal for its category, size and price and does not have a single drawback.
User reviews
Numerous users of this tool speak of it as a professional machine for working in cramped conditions. The capabilities and power of the Bosch GCB 18 V-LI saw fully correspond to its price, and this with such a low weight and compact parameters.
Video review of the Bosch GCB 18 V-LI model:
Methods for sharpening band saws
There are 2 main types of band saw sharpening: full profile and pointed tooth surfaces. When grinding, professional grinding machines are primarily used. If the second method is used, the faces of the teeth themselves are sharpened.
The first option is considered the most accurate, since all operations are performed by automatic sharpening. The employer only has to choose the right grinding wheel and set the operating mode of the machine. However, this sharpening is very expensive, since the machine itself and its consumables are expensive.
If you decide to sharpen your saws the second way, you can safely do so using hand tools. You can use special professional devices. You will need to have the skills of an engraver because your movements must be very precise so as not to damage the metal of the teeth.
Related Posts
If you are going to make a handsaw for the first time, you should try to practice this procedure on a simple sheet of metal. It's best if you sharpen the front and back sides, but usually only the back edges are sharpened because it's more comfortable and easier.
If you need to sharpen the leading edges, you must do it with a machine. In this case, it is necessary to select the exact shape and size of the grinding wheel (as in the case of full-profile sharpening).
Saw Routing Methods
The second mandatory operation for preparing saws for work after sharpening is their wiring. From a technical point of view, it consists of bending the teeth on the sides at the desired angle. The purpose of this procedure. reduce the friction between teeth. This allows the tool to move freely onto the saw surface.
The most common electrical wiring is a standard saw. With this wiring method, the saw units are bent in different directions to a distance of no more than 0.4 mm. It is quite possible to carry out such wiring at home, and it will be necessary to check that the angle of deviation of the teeth is the same.
Another type of wiring protects. It is not usually used at home because it requires bending two teeth in different directions while leaving the third one in place. Complexity is similar to wavy wiring. Here the canvas links are bent to one side, creating a sort of "wave" in the canvas. These types of broods can only be performed by an experienced craftsman, so they are practically not encountered in everyday life.
When performing this work, different types of saws require an individual approach.
In this regard, it is necessary to carefully study the operating instructions for a particular type of saw. In particular, this document indicates the density of the metal blade, as well as the recommended angle of deflection of the teeth. Typically it is 30-60%, although for some products it can be increased.
Choosing a saw sharpener
Since a band saw designed for cutting a large volume of wood products is almost impossible to separate and sharpen on your own, the question arises with choosing a specialist who will carry out such work. It would be better if he carried out these works on a professional machine. Therefore, do not forget to indicate this point when placing your order.
Read also: Tap for unscrewing broken bolts
In addition, the craftsman must be able to perform all types of sharpening and routing, not just the simplest ones. This will allow you to keep the tool from premature wear and get a quality cut. If the master states that there is only one type of sharpening. Immediately refuse his services as he is not a professional.
A true professional must have the appropriate certificate. For its presence or absence, you will need to navigate when choosing a specialist for sharpening band saws.
One of the main stages of woodworking is sawing wood. Cutting a board, creating a precise cut, cutting out a workpiece - in a home workshop, a circular saw is used for all this, but its scope of application is limited. It allows you to make only straight cuts and is capable of processing boards of relatively small thickness.
Wood band saws do not have such restrictions. Their design features allow you to cut large-section timber, cut workpieces of complex shapes, and, if necessary, unravel round timber.
DIY wood band saw
Making your own band saw is difficult. The wooden frame for the machine is assembled from scrap materials; any craftsman will have the necessary tools for assembly. The process of working on a homemade wood band saw can be divided into the main stages:
- The frame for the machine can be assembled from old furniture; a preliminary drawing will make the work easier and will allow you to assemble the saw to the required dimensions.
- The simplest homemade belt machine rests on a frame assembled from a rod and two supports. The distance between the supports should be thought out in advance; it should not be less than the size of the logs being processed; it is better to make it a little larger.
- You can use an old desk for the work surface; its cabinets can serve as containers in which sawdust will be collected.
- Depending on the engine parameters, it is necessary to calculate the diameter of the pulleys for the belt drive.
- For the lifting mechanism to which the cutting blade is attached, a massive spring is suitable, with the help of which the necessary pressure of the machine will be ensured.
- Guides are necessary to ensure that the cut is carried out along a straight line.
- In order for the machine to be safe, it is better to cover the pulley with a special casing.
- Treating the machine with wood varnish or painting will increase its service life.
Band saw: what is it
The main feature of a band saw is its working tool. This is a flexible strip of high-strength steel with sharp teeth, closed in a ring. The cutting blade is placed on two drums, one of which rotates an electric motor.
The precision of the cutting edge movement is ensured by guides. Saw blades are replaceable. By selecting canvases with different characteristics, you can get a cut with the necessary parameters. There are horizontal and vertical band saws.
Criterias of choice
Modern industry offers various models of band saws, differing in power, performance and size. For any workshop, you can choose a device with optimal characteristics. When choosing a saw for home use, you need to pay attention to a number of its main characteristics:
- engine power;
- shape, size and pitch of teeth;
- blade width;
- the ability to quickly change the cutting blade;
- equipment manufacturer.
The power of the device is selected based on the expected volume of work, the parameters of the blade are chosen based on the available wood and the type of products that are planned to be manufactured.
Characteristics
To use a band saw effectively, you will need several blades of varying widths and thicknesses. When choosing a tool for a particular job, it is important to consider the following:
- Only soft wood can be processed with a thin blade, otherwise it will quickly bend and the cutting line will be uneven;
- the wider the blade, the more accurate the cut will be;
- a thick saw is not suitable for working with small bars and thin sheet material, they are deformed due to heating;
- Angled cuts and shaped cutting can only be done with a narrow blade.
In addition to the geometric dimensions of the blade, it is important to pay attention to the profile and height of the tooth. An important criterion for a band saw blade is the number of teeth per unit length.
Note! The more frequently the teeth are spaced, the smoother the sides of the cut.
A saw with a fine tooth has a longer service life due to less pressure on each tooth. A saw with a wide tooth is preferable for hardwood due to the greater pressure on the cutting edge.
The quality of the cut is also affected by the height of the tooth. The large tooth is great for rough work and cutting thick wood. Small bars and thin sheet material can only be cut efficiently using a fine-toothed tape.
Another important parameter is the tooth pitch. There is a rhythmic step and a variable step. A saw with a rhythmic step is suitable for fine work; this tool is convenient for cutting thin slats and sawing out parts from plywood. A variable pitch blade should be chosen for processing large pieces of soft wood. Thanks to the asymmetrical arrangement of the teeth, this blade will not clog and will easily cut thick boards.
Band Saw Parameters
Such equipment brings a lot of positive aspects if wood processing is required. At home, it is necessary when running a small furniture manufacturing business.
Some types of saws allow you to additionally work with the following materials:
- metal;
- synthetics;
- stone.
The high density of these materials requires the use of equipment that includes parts and consumables made of reinforced steel. If you use standard steel, then when processing metal or stone, the disc and teeth are deformed in a short period, so preparation for work is required in advance.
They take into account not only the type of material being processed, but also the production scale. The endurance and power of the purchased equipment depends on this. For one-time use, you can buy a cheap band saw or make one from improvised means and tools, but intensive work requires a serious and expensive unit.
Blade tooth size and pitch
When choosing a saw, you need to pay attention to the size of the machine itself. The requirements are described in the instructions when purchasing the unit, but there are some nuances that are not indicated there.
The following additional recommendations should be considered when choosing a saw:
- For longitudinal sawing, choose wide saws, which are distinguished by smooth and high-quality sawing.
- In cases where a thin workpiece is processed, a tool with a thin blade thickness is used. This is an important parameter, because a thick saw when working with thin material damages it.
- Shaped and contour cutting requires individual selection of the cutting element, but if it is not possible to purchase several saw options, then it is better to choose the middle option. Taking into account the available width from 14 to 88 mm, it is recommended to purchase saws with an average size of 35-40 mm.
The quality of processing is affected not only by the size, but also by the pitch of the teeth located on the cutting blade. It determines how quickly the work will be completed and the presence or absence of damage.
When choosing, you should consider the following operating features:
- A coarse tooth pitch is used exclusively when working with thin sheet material.
- Dense setting of teeth on the blade is used when processing large blades.
- The average version with variable tooth alignment is used when working with synthetic materials. To prevent the saw from becoming clogged with waste, the cutting speed increases.
Tooth placement and sharpening
The quality of material processing, vibration, absence of deformation of the processed material and a direct impact on the service life of the machine depend on the setting of the teeth. Considering the operating principles, it is important to choose the right profile. There are several types of cutting element profile:
- A profile with wavy teeth is used for cutting thin material or small workpieces.
- The standard tooth arrangement is used for large volumes of work, contour cutting or vertical type of machine installation. The teeth are located on both sides of the central segment of the blade, but there are options with an additional arrangement of teeth in the center.
- The most expensive type of profile is a paired (variable) arrangement of teeth. This type of saw is the most durable of the presented series, it effectively copes with cutting even coarse and dense types of wood, reduces the load on the frame of the cutting element, which significantly increases its service life.
Manufacturers
Particular attention should be paid to the equipment manufacturer. A band saw, like any machine used in woodworking, must be distinguished by quality and reliability; you should not chase temporary benefits; it is better to immediately buy a good device. There are not so many manufacturers with a name.
- Arntz (Germany). One of the world leaders in the production of woodworking equipment. The saws from this manufacturer are of high quality, but belong to the devices of the highest price segment.
- Lenox (USA). A popular American company that produces high-quality machines. A distinctive feature of the products is the proprietary coating of the cutting edges, which guarantees durability and low operating costs.
- Wikus (Germany). Excellent German quality plus a wide range. In the product catalog, everyone will choose a machine that fully meets their wishes.
- Forezienne (France). The company offers a wide range of saws and other woodworking equipment. The cutting tools of this manufacturer are characterized by excellent quality and high reliability.
- Lennartz (Germany). The company specializes in the manufacture of band saws for various purposes, offering both small household machines and equipment for sawmills.
- Doall (USA). A small company that has managed to establish itself well in the woodworking equipment market. Offers a wide range of saws, spare parts and accessories for them.
Chinese manufacturers offer a wide range of band saws. These devices are distinguished by their low price, but cannot always boast of high quality.
How to make a band loom
Like many other machines, you don't have to buy a saw. Having the skills to work with the material and the desire, you can safely start making a wood banding machine. Made with high quality, its characteristics can be compared with factory equipment, and in some ways even surpass it.
First of all, you should decide on the layout of the main components and assemblies; for this you can find a drawing or make your own unique project. When creating your own saw, it is important to take into account the parameters of the tape that you will have to buy in the store. You definitely won’t be able to make it yourself.
Homemade machine bed
The basis of any machine (band saw is no exception) is the bed. This is a frame on which components and assemblies are attached; it assembles the components into a single device.
The best material for the bed of a vertical wood band saw is steel. A massive square will do, or you can use a profile thick-walled square pipe. Welding is used to assemble parts.
The bed of a homemade machine can also be made of wood. It’s worth mentioning right away that you shouldn’t use sheet materials (chipboard, plywood, etc.) for the frame. The racks can be made from timber with a cross-section of 80 x 80 mm, or a box-shaped structure can be made from boards with a thickness of 20 mm or more. The wooden frame is glued at the joints, and metal corners with screws are used for reinforcement.
No matter what material is used to make the frame, it must be stable, durable, and flexible. It must compensate for vibrations caused by the rotation of the pulleys and the movement of the cutting blade.
Pulleys and supports for them
The most important component of a band saw is the pulleys. Rotation from the electric motor is transmitted to the lower one. The best way to do this, providing the ability to change speed and safety, is a V-belt drive. The upper pulley is driven. In addition to supporting the cutting tool, it provides tension.
Multilayer plywood is suitable for making pulleys for a homemade machine. Several identical blanks are cut out of it (the total thickness of the package must be at least 30 mm). A hole for the bearing is made in the center of each workpiece.
Note! The blanks are glued together, adhering to the principle of gluing plywood - the direction of the fibers of adjacent sheets should be mutually perpendicular.
After gluing, the bag is further processed to obtain a smooth surface. The pulley itself can be lightened by cutting several symmetrical round windows in it.
The bearing is installed in a metal flange, which is secured with bolts. The axis of the bearing assembly must be exactly perpendicular to the plane of the disk, otherwise the pulley will become loose, which can cause serious damage.
To prevent the blade from slipping, the working surface of the discs is processed to a barrel-shaped profile and covered with thin rubber (an old bicycle inner tube will do).
Read also: Car degreaser before painting
Tabletop
The material for the countertop can be multilayer plywood covered with textolite or other durable plastic. If possible, you can use a metal sheet. In any case, its surface must be resistant to the appearance of burrs and ensure good sliding of the workpiece.
Be sure to make a side support on the tabletop. It must be removable and securely fixed in any position. This will greatly facilitate the processing of workpieces of the same type and ensure cutting accuracy. As a stop, you can use a square of a suitable size or make a simple structure of several rollers.
Guides
The operation of a band saw is based on the fact that, rotating on disks, the blade carries out a translational movement, biting its teeth into the workpiece. Due to the large length and complex geometry, the blade will rattle during movement. To ensure an accurate cut, it is necessary to keep the vibration of the belt to a minimum. For this purpose, the machine is supplemented with guides.
The simplest guides that can be made at home are two bearings, with a tape placed in between them. The bearings are bolted to the frame. To maintain the possibility of using tape of different thicknesses, the distance between them must be adjusted.
Exterior finishing
When making a machine for the home, we must not forget about the safety of its operation and aesthetic appearance. After installing the upper pulley, it must be covered with a casing. This will complete the entire design and ensure the safety of the operator in case the saw comes off the pulley.
If the frame is made of wood, the easiest way to cover the pulley is with plywood. In the case of a metal structure, you can use the same plywood or galvanized metal sheets. In any case, one side panel must be removed to replace the tape. At the end of the work, the casing, like the frame, is painted or varnished.
On-off buttons must be installed on the front panel next to the operator. The buttons should be easy to operate and not be pressed into the body. The wires suitable for the engine are placed in a box or corrugated tube.
To make working more convenient, a lamp is installed on the machine. It is better if it is on a movable mount. A box for collecting sawdust under the lower pulley will help to significantly simplify cleaning. This is not difficult, you just need to screw on an inclined bar along which the sawdust will be poured into the container located below.
After the sawing machine is completely installed, it is tested. First of all, you need to visually verify the alignment of the pulleys. In case of the slightest deviations, the pulleys are aligned; for this purpose, washers made of textolite or fluoroplastic are put on the shafts. Next, a test cut is made. It is performed without guides, the work proceeds without pressure. If the device is working normally, you can install the guides and feel free to get to work.
There are many different tools for sawing workpieces - these are hand saws, circular saws, cutting saws, jigsaws, etc. But a band saw occupies a special place among them. This article will focus on making a homemade bandsaw.
Description of band saws
Two rotating wheels supporting the belt are placed on the frame. They are driven by a drive coming from an electric motor. The cutting belt is fixed with two rollers and a stop next to the work table; its adjustment is provided. The size of the teeth on the saw blade is determined by the size of the unit and the type of operation, as in hand saws. The teeth are sharpened to the shape of a universal profile.
To close a strip of cutting blade into a ring, use copper soldering , so the ends are fastened together and the place of the break is connected during repairs. In factory conditions, soldering is carried out using electric welding; small workshops use a torch or special pliers.
Types of units
They are available in three types:
- units with toothed blades;
- toothless friction machines;
- saws operating on the principle of electric spark action.
A strip of a toothed saw differs in size from a hacksaw blade in length and is made in the form of a ring, but in appearance when open, they do not differ. Toothed strips are used for installation in belt machines for metal or wood; they are used in meat and fish production for cutting carcasses; in industry, they are used to cut foam concrete, mineral insulation, polystyrene foam and other building materials.
The principle of toothless belt friction is applied on the same principle as friction hole saws. There are also teeth on the working blade, but their shape does not contribute to cutting, but to heating the layer being processed. The release of heat in this case increases the performance of the unit. The cutting blade in friction saws is made with a thickness of 0.6–1.7 mm, with a width from 6 to 26 mm.
The electric spark action of the saw is used when cutting workpieces with a thickness of 150–400 mm, which cannot be processed with circular saws due to the painful pitch and diameter, which causes strong beating.
Types of material for canvases
For cutting wood, strips of steel with a high carbon content, blades with brazed teeth made of carbide material, and bimetallic strips are most often used. The bimetallic version provides a flexible blade and hard teeth, for which two types of metal are used. The base of the strip is made of a springy material; a tool high-speed wire is welded to it using electron beam welding, from which a gear profile is subsequently milled.
They produce blades that are universal in use and special saws used for specific steels. The area of use is selected taking into account the parameters of the teeth:
- size;
- hardness;
- geometry;
- wiring
For cutting large workpieces, strips with large teeth are used; in particular, for processing sheet metal of large sizes, blades with elements of increased size are used. To avoid beating of the blade and resonance phenomena, teeth of different sizes are attached to one strip (variable pitch).
The hardness of the cutting elements depends on this indicator of the steel. Most often, in the manufacture of teeth, metal with the designation M42 is used (this means an edge hardness according to the Vickers category - 950 units). To process tool steel, this indicator is not enough, so the hardness of the teeth is M71 (100 Vickers units), work of average complexity requires hardness M51.
The geometric shape is determined by the sharpening angle and the profile of the cutting element. To cut a profile (channel, angle, T-beam, I-beam, pipe) to size, it is necessary to form teeth with reinforced backs. This is dictated by the special shape of the profile, when cutting it, shock and vibration occur, leading to the occurrence of chips and cracks. To process tough stainless steel or other materials with similar characteristics, the teeth are made sharp, leaving a significant gap between them.
The layout of the cutting elements is done depending on the size and massiveness of the material being processed. For example, to prevent pinching when cutting solid massive material, strips are used on the saw with alternating narrow and wide routing.
Types of saws depending on the work with the material
The following division into categories is made according to the processing material:
- for stone;
- for metal;
- for wood;
- for synthetics.
Working with hard materials (metal, stone) is carried out with a tool whose working saw blade is reinforced with heavy-duty teeth made of appropriate alloys. The wrong choice of saw blade leads to its rupture and damage to the edges on the workpiece. Before buying a saw, determine the scope of further work.
Introduction
In the workshop, everything should be at hand and the abundance of tools makes the master truly free to choose methods and techniques of work. One of the most basic operations in any workshop is sawing workpieces. Moreover, sawing can be different - somewhere you need to saw off quickly and the quality of the cut is not important, somewhere you need a blind saw and a circular saw or jigsaw with a special file can handle it, somewhere you need an extremely even saw, and so on.
A DIY wood band saw deserves pride of place in the workshop. Not everyone has it, however, the ease of its use is undeniable. Its advantages include the following features:
- High cutting quality, as there is no return movement of the cutting blade.
- High sawing speed, as the cutting band moves at high speed.
- High maneuverability when sawing due to the small thickness of the cutting blade.
- High versatility and flexibility of tool use.
- High operational safety.
However, the band saw also has disadvantages. Let's list them:
- This is a stationary saw, so there is no possibility of its mobile movement.
- Limited sawing area due to design features.
- Large dimensions.
How to choose the right saw?
If you choose the right tool, you will not have to repair band saws on wood anytime soon. Since there are a lot of options for choosing the appropriate tool model, quite a few people know how to choose the right device for their needs. We invite you to familiarize yourself with the most important and essential criteria for assessing the quality and functions of different saws. First of all, pay attention to the technical parameters of the models.
The cutting accuracy depends on the cutting speed and material feed. There are optimal speed ranges to achieve the best performance results.
The higher the performance of the device, the less resistant the saw blade will be to damage, deformation and wear.
The reputation of the manufacturer is also of great importance - if the reviews about the manufacturer are good and the reputation is reliable, then the product will most likely be of high quality.
Examine the condition of the main components of the device - the moving structure, portal, guide parts, pulleys and rollers.
A portal made of square pipes with reinforcing profiles is suitable for sawing wood parts. Otherwise, the main body may soon become bent during the cutting process.
But working on small parts won't hurt it that way. The best material for guide elements is solid metal that is resistant to deformation from loads.
Making a band saw
Preparing for work
When starting work, you need to prepare all the tools and materials, as well as a place where it will be comfortable and safe to make a homemade band saw.
Tools:
| Descriptionoperation | A circular saw |
|
| Sawing out a niche, groove and top bolt. Making pulleys. | Clamps | There are no worthy alternatives, but you can adapt and try using a carpenter's vice or some heavy object as a press. |
| Drilling holes | Grinding machine |
|
Materials, fittings, fasteners
- Plywood 15 mm thick;
- Solid wood block;
- Bolts for horizontal and vertical adjustment;
- PVA carpentry glue;
- Wing for adjustment bolts;
- Insulating tape;
- Bearings for the upper axle;
- Two bearings for the drive axle;
- Two shafts;
- Cutting blade;
- Two bushings with internal thread;
- Self-tapping screws, nuts, washers, fittings, studs;
- Belts or attachments for a sander or screwdriver.
Main structural elements
The band saw drawing will include the following components:
- Base;
- Tape tension mechanism;
- Sawing table;
- Pulleys;
- Saw blade (cutting tape).
Manufacturing of structural elements
The manufacturing instructions will be divided into 5 points and include steps to produce a homemade bandsaw. The article provides photo and video materials that will help you not make mistakes during production.
Base
- Since the band saw must be strong, it is necessary to prepare plywood with a thickness of at least 15 mm. We cut four blanks 550 mm long and 23 mm wide.
- Next, we make the markings using a pre-created stencil, or you can make the markings directly on the workpiece. The two plates located inside must have a niche for the adjustable mechanism. For external parts it is necessary to draw a through groove. The amount of vertical adjustment will depend on the size of this groove. Next, you need to mark a through hole for the lower drive shaft. In addition, we will need a surface for a saw table, the dimensions of which in terms of the width of the table will not exceed 150 mm. In all workpieces, it is necessary to cut a square between the circles in height equal to 15-20 cm, and not exceeding 15 cm in width.
- Using a jigsaw, you need to cut out the necessary parts, as well as the adjustment groove for the upper pulley, then drill a hole for the lower drive shaft.
- Next, you need to assemble the future foundation. For assembly, use PVA glue or any other wood glue. We apply it in an even layer on all the surfaces to be glued, then we apply the parts to each other, avoiding inaccuracy. Fixing the products must be done with clamps, since high-quality gluing requires a tight fit of the workpieces. It is necessary to wait a day until the glue dries completely.
- We install bearings for the lower drive shaft.
Read also: How to properly connect a switch with one key
Saw blade (band) tension mechanism
- To make a tensioning mechanism for a band saw, you need to make a block, the dimensions of which will correspond to the niche in the saw body. A hole is drilled at the end of the block for the pin and fitting. Sockets for bearings are cut out on both sides.
- We insert the pin and secure it in the block. It should stay firmly in the hole. To increase the strength of the fastening, before inserting the pin, apply PVA glue to its surface, and you also need to additionally secure the pin with a self-tapping screw or screw.
- Next, the shaft bearings and fixing sleeve are installed.
- Using a screw in the foot, the saw blade tensioning mechanism will be rigidly fixed.
- It is necessary to install a handle on the pin, the rotation of which will allow you to change the depth of immersion of the bar into the base, thereby changing the distance between the pulleys - this is how the belt is tensioned.
Pulleys
While the base glue dries, we begin to manufacture the moving elements, namely the pulleys. The entire process of their manufacture is reflected in the photographs provided.
- On a sheet of plywood 15 mm thick, you need to mark the contours - a circle with a diameter of 150 mm.
- Cut the blanks with a jigsaw along the outlined contours and drill a hole in the center of the circle.
- Even the most precise and careful sawing will not give the workpiece perfectly correct shapes, so it is necessary to grind the ends. For this, a grinding machine with a table at 90 degrees relative to the plane being processed will be used. If you do not have a suitable tool, you can grind the edge using a hand-held grinder or a homemade screwdriver with a grinding attachment. The workpiece is fixed with a bolt or self-tapping screw to some base. Thus, when it is fed to the grinding wheel and rotated around its axis, a perfectly smooth circle is obtained.
- After processing the pulley on a grinder, you need to wrap its ends with insulating tape in several layers, and you can also use rubber from bicycle inner tubes.
Sawing table
The saw table will be 15 cm wide. It will be installed on a special end face of the base of the machine between the pulleys. You need to make a cut in the table for free movement of the saw blade. The dimensions of the table being manufactured depend on the needs and preferences of the craftsman. You can make a small table that only slightly protrudes beyond the machine and saves space, or you can make the upper surface area larger for ease of work. As always, in life you need to choose the “golden mean”, so the final decision is up to the master.
Saw blade (cutting band)
It is best not to make the cutting blade yourself, but to buy a ready-made one. In stores you can find a wide variety of options, which differ in type, size, type of steel used, hardening of the material, shape of the teeth, their setting, etc.
Below is a table with some parameters of saw blades.
| Decoding | Teeth hardness | Constant hardness | 45 - 48 units. HRc | This type is used on small diameter pulleys. |
| with high levels of tooth hardness, but a flexible body | 63-65 units. HRc | Hard Back | 48-53 units HRc | The saw band production technology is the most modern and is used in industry. Capable of performing a larger volume of work, but the price is significantly higher. The canvas is used in professional machines. |
In addition, band saws differ in tooth size:
- with small tooth
- with middle tooth
- with large teeth
The greater the hardness of the tape, the greater its resistance to dulling. The rigid blade allows you to cut material at high feed rates without compromising the performance characteristics of the work.
In this case, for our band saw, the best option was to choose a blade 1065 mm long made of carbon steel, marked Constant Hardness.
Design and assembly of a tape machine
You can make a unit for sawing various materials yourself; band saws work great in workshops. You can assemble a saw with your own hands at the lowest cost and provide for all the details of the work.
Joinery units for sawing wood of the strip type have a work table at the base, working and additional elements are located on it, and the cutting blade is fed in a circular motion, resting on two wheels. To design and install full-fledged equipment, sufficient space is required, since the equipment, together with the supply line, is large.
You can make your own portable tabletop installation for manual sawing, but in a small workshop space you cannot cut logs into boards.
Frame structure
Solid wood is chosen for the bed to avoid vibration. The surface of the desktop can be made of thick plywood, and the side ribs can be edged with slats or metal. The supporting rod is made in the form of a beam. A schematic drawing is first made, the dimensions of the parts on which depend on the horizontal dimensions and height of the workshop. The pre-designed height of the frame, the diameter of the pulleys and the length of the rods are indicated. Accurate detail drawing can be made, which is more convenient for assembly.
Read also: Self-supporting wire what is it
The height of the table for work is provided at a comfortable size, while providing space for placing the drive and lower pulley, waste chips and the engine itself. The table can be of any shape, but often the frame is made in the form of a cabinet with closed sides, which at the same time serves to accumulate chips. Easy to open for easy cleaning.
The tabletop is located directly on the frame. Sometimes the height of the lower bed is not enough, in which case a strong extension is made to raise the surface of the desktop to the required height.
Installing the rod and pulleys
The support rod is made of a timber profile with a cross-section of at least 8×8 centimeters. Two supports are attached to it from the side taken as the conventionally rear surface, on which the pulleys (wheels) will be located. The supports are made of strong material; plywood with a durable frame is acceptable. The distance between the wheels is chosen so that the sawn log passes with a margin on the sides.
The diameter of the pulleys is chosen arbitrarily; an increase in the indicator leads to better work. For selection, there is an unspoken rule according to which the ratio of the cutting blade to the pulley diameter is 1/1000. For example, for a 4 mm wide belt, the wheel diameter should be 400 mm.
The diameter of the wheel for tensioning the belt drive is selected depending on the length of the cutting belt, the diameter of the main pulleys and the engine speed.
The edge of the belt pulleys is made slightly convex, about 5-10˚, which promotes self-centering of the belt, which is why it does not go to the side and does not fall off. A shallow groove is provided on the drive pulley to accommodate the belt. Typically, inner tubes are used to cover the pulley, the rubber of which prevents the tape from slipping off.
The upper pulley is placed on a horizontally moving block to select the belt tension. To do this, you need a lifting mechanism, a simple version of which is a beam connected by a spring to a lever and located under the block. The lever is secured with several bolts at different levels, and the spring provides the required pressure.
The lower pulley is made up of two wheels (driver and driven) located on an axle. It is important to balance the lower and upper pulleys in plane, minimizing the appearance of “eights”. The upper pulley is conveniently secured with self-aligning bearings firmly attached to the wheels. After completing the assembly of this stage, a test run of the unit is carried out for a short time.
Installation of guides for canvases
To ensure that the saw cuts the material smoothly and the tape is not pressed through, guides are installed on a narrow beam along the blunt saw end. A common version of the device consists of three bearings located on the beam, one of which rests the flat side of the canvas, the other two support it from the sides. Sometimes wooden stops are placed on the sides instead of bearings.
The guides are aligned at the reference point so that there is no vertical deviation at the opposite end; for convenience, the position of the beam is noted with the canvas stretched.
Cutting band soldering process
Soldering in the workshop occurs as follows:
- the places at the junction of the canvas are ground at both ends, and a brass strip is placed between the surfaces;
- to make a strip, cut a piece of brass (0.3−0.4 mm) to the width of the saw blade, moisten it and sprinkle it with borax powder on both sides;
- The mite sponges are heated in an accessible way (gas burner or forge) until they are bright red, applied to the site of adhesion and pressed;
- the strip is heated by hot sponges, the brass melts and spreads, and borax works in the form of a flux, which prevents oxidation of the solder when heated;
- The pliers are not removed until the joint has completely cooled and the solder has hardened; after removing them, the joint is moistened with a wet sponge for hardening;
- inspect the joint, its hardness should correspond to the fabric;
- if the joint is hard, then the heating procedure with pliers is repeated until the joint becomes straw-colored, and gradually cooled;
- soft soldering requires another hot heating with tongs and more rapid cooling;
- to prevent the pliers' jaws from being soldered to the saw strip during the process, a chalk solution with liquid glass is applied to their contact surfaces;
- to install and tension the lower and upper pulleys, use a handle, check the correct placement of the stop on the disks and rollers by rotating, and adjust the correct passage;
- turn on the unit for a short time and further adjust it if necessary.
Installing additional guides
The ideal position for the guides is considered to be a distance of 30-40 mm from the log; it is not recommended to do more. If the band saw will cut wood of different widths, it is better to provide the possibility of adjusting the guide elements.
After these assembly steps, the band saw is ready for use, but safety precautions require the manufacture of a protective casing for installation on the upper pulley. This is done in case the rapidly rotating belt slips off the pulley - this way it will be held up by the casing.
The container for collecting chips is made easy to remove and clean. Since waste collection is usually carried out in the lower part of the frame, the belt drive is placed in the side space so that it does not become clogged with chips. The engine is also covered with a casing to prevent dust and processing waste.
To prevent the wood of the machine from deteriorating over a long period of time, it is treated with varnish, after using antiseptic preparations.
Instructions for properly sharpening band saws on wood
wood band saws , instructions and precautions during this operation are the main issues that every homeowner who owns saws of a similar design should be aware of. The fact is that they are used not only in production, but also in everyday life. For example, many villagers use them to make planks or saw logs on the bar.
Read also: GOST for semi-automatic welding in carbon dioxide
However, like any saw, the band tool must be periodically repaired. At the same time, this maintenance consists of carrying out technological operations such as sharpening and wiring. They are complex from a technical point of view, and if you do not have experience in carrying them out, it makes sense to contact a specialized service center to service cutting and cutting equipment.
If you have experience maintaining woodworking tools, you can also thin and sharpen the saw. The point of doing this work independently is to save money because sharpening saws are quite expensive.
Assembly
- Processing the base. After the glue has completely dried, you need to remove the clamps and treat the gluing area, ends and other surfaces.
- Installation of the saw blade tension mechanism. It is installed in the mounting groove, and a thrust element must be placed on top. During operation, the mechanism must be firmly fixed.
- Installation of pulleys. It is necessary to pay attention to the fact that the installed pulleys must be parallel to each other and rotate easily around their axis, while the axis must be absolutely static. Strong beating of the wheels is not allowed, as this can lead to the saw blade slipping off the pulley and injuring the operator. The lower drive shaft must go all the way through the housing and have a sufficient end on the reverse side so that it can be clamped into the drill chuck. The upper pulley is installed in the saw blade tension mechanism.
- Installation of the cutting blade. The saw blade should be installed over the ends of the pulleys. First, it should fit freely onto this structure, and by rotating the adjustment knob, the block with the axis of the upper pulley moves upward, thus increasing the distance between the centers of the pulleys. In this case, the tape is tensioned. After tensioning, you need to tighten the screw in the fitting to firmly fix the tension mechanism.
- Installation of the saw table. The saw table is located on the horizontal surface of the base, as shown in the photo. Its area should be sufficient for a comfortable process of sawing the workpiece. It should be noted that the perpendicularity of the table to the saw blade is very important, and in two dimensions - longitudinal and transverse. The table is fastened with self-tapping screws. Although there is an option to “plant” it with glue, and install dowels for strength.
- Installation of power tools. At the very last stage you need to make this design come to life. To do this, you need to clamp the shank of the drive shaft of the lower pulley into the drill chuck. Alternatively, you can use a hammer drill or screwdriver. But the power of a screwdriver will clearly be insufficient, so use a drill or hammer drill.
- Setting up and commissioning. Before starting work, run the band saw at idle speed. Make sure that the tape does not slip and runs smoothly. Check its tension and fixation of the saw blade tension mechanism.
How to make such a tool yourself?
Before you start assembling the saw structure, prepare at least a simple drawing to clearly understand the dimensions and main components of the device. Most of the parts will be made of wood.
The frame is made of polished sheet glued with overlap. The minimum thickness of the mechanism parts is 2.5 cm. It is not recommended to use furniture boards or wooden slabs, as they are not strong enough.
The frame is made in the shape of the letter C. To make the body rigid and durable, overlays are attached to a wooden surface glued together from six layers. Make sure that the fragments are located only at right angles to each other.
Next, we assemble the moving part of the saw. We mount the profile to simplify the creation of the guide groove. With this profile, the sawing blade will be tensioned to the desired degree.
To strengthen the corner joints, we install additional fasteners. Next, the design is modified so that the frame moves freely in the grooves.
To create the spinning rollers, several pieces of wood are glued together and round pieces are cut out. Additional parts are installed on the wheels, which will make working with the device less noisy and more productive. After fixing the wheels, the saw blade is tensioned to ensure a stable position on the pulleys. A sufficiently tensioned blade will make precise and neat cuts.
Rules for working on a band saw
A large volume of processed materials requires the installation of a blade with large teeth on the machine. The best option is to use universal band saws.
- if the workpiece is large in size, it is worth installing on a band saw with large teeth; It is better to use universal type cutting belts. This way there will be no need to change the blade when processing different materials;
- Decide on the installation location of the machine and securely mount it on a static surface, avoiding vibrations during operation. The room in which the band saw will be installed must be well ventilated.
- After finishing work, remove the sawing band and, accordingly, tighten it only before work. This will extend the useful life of the canvas
- Every two hours of operation, turn off the band saw and give the motor, in this example the drill, a rest, and at the same time check for malfunctions. Compliance with this rule will protect the worker from injury and the tool from overheating.
- Check the set of cutting teeth from time to time.