A metal shed today is practically a necessity in most summer cottages. In addition, such a structure serves as an indispensable place for the location of various premises on the construction site. In addition, it is easy to make a change house yourself, since it consists of blocks, which, in turn, are made of a frame, and metal plates. Of course, such a building will be difficult to use for a long stay, but it is an indispensable option for a summer residence.
Project of a modern metal shed with windows and air conditioning
Such a trailer can often be found at construction sites. Considering that most construction work can last much longer than one year, a small building for workers can temporarily replace housing.
In such cases, a metal change house may have the necessary minimum of amenities, which will allow you to relax a little after a hard day at work or even provide the opportunity to take a hot shower. Therefore, it is difficult to overestimate the need for such a structure on a site where there is clearly not enough space for certain needs. That is why there are many projects in which you can independently assemble and install such a structure.
Professional and amateur domestic buildings
Temporary amenity premises may have different names in different parts of the country. For example, beams, barracks, moving - all these are synonymous concepts. Professional builders build auxiliary cabins based on the standards GOST 22853-86, GOST 25957-83, GOST 23274-84, GOST 23345-84, as well as other State standards and SNiPs. The listed documents regulate technical conditions, terms and definitions, sanitary and technical parameters and design features of mobile (inventory) buildings.
And if standard construction cabins are mobile buildings of the container type or prefabricated type up to two floors, then the panel-type country cabin is made of wood. This is dictated by budget savings and the ability to use it for other purposes.
The practicality of a summer cottage is beyond doubt. After completing its task, it turns into a barn or moves to a new location. It is very wise to think through the functionality of a frame change house in advance and immediately lay down the possibility of future use.
Advantages and disadvantages of frame cabins
- Let's start with the pleasant cost of a frame change house. When compared with container and timber analogues, frame household premises made of wood are considered the most budget-friendly.
- The versatility of the design will appeal to the rational owner. It is better to immediately build a multifunctional building so that it will serve even after construction is completed.
- Installing the frame of the cabin will not cause any difficulties: you can build it alone or together, using a minimal set of tools.
- Dismantling, if necessary, is even faster and easier than assembly.
- Lightweight frame-panel structures when disassembled are easy to transport from place to place. But when assembled, the tree is fragile, so it requires special equipment for transportation.
about the disadvantages is that frame cabins made of wood are short-lived. They are poorly suited for permanent relocation, but they perfectly solve the problems of summer residents and amateur builders.
Heating
The heating is done electrically. A budget option is a pair of fan heaters. More expensive and efficient - an oil heater or convector. We select the power of the heating unit in accordance with the area of our shed.
Heating the cabin with electricity
Oil radiators
At the end, all we have to do is furnish the room. At this point, we focus entirely on our preferences and needs.
| Parameter | Wooden cabin | Metal shed |
| Price | Cheaper. To further reduce the cost, natural wood can be replaced with wood boards. | Expensive. Metal has a higher cost. |
| Durability | Lasts less than metal ones. Wood does not tolerate moisture well. | Lasts for decades. |
| Mobility | It is easier to transport, but there is no guarantee that the wooden structure will withstand transportation normally. | Transporting is more difficult, but safer. |
| Possibility of installing communications and additional elements | Can. More difficult. | Can. Easier. |
| Environmental friendliness | Eco-friendly | Less environmentally friendly when compared with wooden cabins. |
Good luck!
Prices for popular models of electric heaters
Electric heaters
Types of cabins and frames
There are three types of frames for change houses:
The best quality option for a dacha cabin is considered to be a metal frame . It turns out that the wooden frame structure is built into a welded frame made of steel channels and corner posts. It is quite expensive, but strong and durable. Steel protects the wood from deformation and allows the structure to be transported in assembled form. For private construction with a small budget, a wooden-metal frame of a change house is not the most suitable option.
A classic wooden change house is good for everything except its transport potential when assembled. The frame made of 100x100 mm timber will definitely have to be disassembled for transportation, so it is better to leave it on the site as a utility room.
To do this, the country house is initially placed on a more solid foundation, equipped with internal and external decorative cladding, and additional amenities are thought out. Environmental friendliness, normal thermal insulation and low cost are the undoubted advantages of a frame cabin made of wood. And they also fit organically into the suburban landscape.
A portable cabin is the optimal choice for a construction business when temporary housing for workers needs to be transported from point to point. Mobile cabins are also made of metal and wood. The first ones are small construction trailers with a frame made of profiled pipe 40x60 with logs made of pipe 40x40.
If the frame of a portable cabin is made of wood, it must be thickened (the timber of the main beams is taken to be at least 100x150 mm). No special finishing is required inside or outside. The disadvantages of portable models are significant: heavy weight, expensive materials for walls (hydro-, thermal insulation, corrugated sheets on the outside, chipboard on the inside), a lot of welding work.
Types of frame cabins
Change houses can be stationary or portable, made of wood or metal.
The option is selected depending on the purpose for which the house will be used. Change house 6 x 3 m in a metal frame
Main types of cabins:
Wooden - suitable for both a country house and a temporary home or utility room. Their frame is made of timber with a square or rectangular cross-section with a side of at least 10 cm. The advantages of wooden cabins are thermal insulation qualities, environmental friendliness, and compatibility with the surrounding landscape. A house used as a home can be covered with sandwich panels, which will make it warmer. Structures with a metal frame. It is often made from profile pipes. You can sheathe the frame with corrugated sheets: this is an inexpensive and reliable material that is not prone to deformation in the cold. Vinyl siding is also suitable for outbuildings. But if they are going to live in such a cabin during the cool season, it must be thoroughly insulated. In addition to the option of simple pipes, you can also find a combined one: a wooden base is built into a frame welded from corner posts and channels. Portable cabins. They can be made of both wood and metal. In the first version, the difference from the stationary version is a thick frame and a minimum of finishing. The beam for the base is taken with a cross-section of at least 10x15 cm. Metal trailers are reliable and can serve for more than 15 years. For the frame, a corrugated pipe with a rectangular section of 4x6 cm is used, and for the logs - with a square one, with a side of 4 cm
When arranging such a trailer, it is important to take care of the heat and waterproofing of the walls. For the outer cladding of the latter, corrugated sheets are used, for the inner cladding, chipboards are used.
If necessary, heating and water and electricity supply can be arranged in the change house.
Features of constructing a frame for a change house
The frame shed is based on a pair of rectangles made of timber with a cross-section of 100x100 mm or larger, connected by vertical posts. The lower rectangle is laid out from 150x100 mm timber. The overall dimensions of the frame are 6x3 m - the most optimal and versatile option in terms of weight, area and building materials.
Internal partitions will be needed if you plan to use the building as temporary housing. In this case, kitchen, toilet, storage areas and others are separated from the residential part.
It is necessary to strengthen the lower rectangle with a central longitudinal support beam. A second 100x100 beam is placed on top, as well as transverse floor joists in increments of 0.6 m from 100x50 timber. To ensure the correct slope of the roof, higher front vertical posts are installed, half a meter longer in height than the building. That is, if you expect to get a ceiling height of 2.5 meters, the front pillars will reach a level of 2.8 meters, and the rear ones - 2.3 meters.
Now regarding the installation of additional vertical racks :
- for each end of the frame shed there will be two elements made of 100x50 timber;
- on the front facade - four racks depending on the location of the door and window openings;
- on the rear - three, evenly spaced in 1.5 m increments.
Each vertical corner post requires diagonal bracing - from both sides to the top. For these purposes, a 100x40 board is used. The same braces, at least on one side, must be arranged for corner auxiliary posts that are not secured by future windows and doors. An alternative would be short braces to each post on both sides.
To install the rafters, the basis is the upper frontal beam of the frame, which rises 0.5 m above the lower one. For the rafters, a 100x50 beam is used, located evenly in increments of 0.6 m across the frame of the cabin. The rafters extend 30 cm on both sides beyond the perimeter of the frame. Additional fastening with transverse boards of the first and last rafters to the end upper beams will be required.
We build a shed from metal profiles
Country house from a change house
The construction of a frame made of metal profiles will require more effort compared to the construction of a wooden analogue. But the iron change house will last much longer.
The set of necessary tools includes:
- hammer;
- welding machine;
- drill;
- screwdrivers;
- corner;
- grinder;
- tassels;
- construction stapler;
- roulette;
- hacksaw
We also buy the following materials:
- profiled pipe measuring 2x2 cm, 4x2 cm, 4x4 cm and 4x6 cm;
- mounting rail 2x4 cm;
- galvanized sheet steel;
- corrugated sheeting;
- primer for metal;
- self-tapping screws for fastening corrugated sheets;
- screws for metal;
- staples for a construction stapler;
- rivets;
- OSB boards;
- polyurethane foam.
Making the base
We will assemble the base of the frame from a pipe measuring 4x6 cm. We cut the pipes in accordance with the dimensions of the structure being built.
We weld the pipes according to their external dimensions and get a rectangular edging. In total we need to make 2 identical rectangles. We will make the floor from one, and the upper part of the cabin from the other.
To make the floor reliable, we create a grid inside the rectangle from the same profiled pipes. We are making a change house with a width of 250 cm. With such dimensions, it is enough to weld 2-3 longitudinal pipes along the entire length inside the edging. We weld cross pipes every 50 cm.
Floor for change house
Next, we take a galvanized sheet and fix it with self-tapping screws to the base of our change house. We turn the base over and lay it with the galvanized sheet down on cinder block supports or simply a leveled area. The structure does not need to be attached to the cinder block - the cabin will be sufficiently supported by its own weight.
We mount the racks
Installation of racksInstallation of racksInstallation of crossbarsThe bottom floor is covered with steel sheet. Racks installed
We make vertical supports from a 4x4 cm pipe. We cut it into pieces in accordance with the planned height of the change house. Usually it is 250 cm.
We place the first supports in the corners of the foundation constructed at the previous stage. We check that the angle at the junction of the posts with the base is strictly straight.
We fix the leveled rack by welding. Similarly, we set up the racks in the remaining corners.
Additionally, we will need to install intermediate racks. To do this without disturbing the geometry of the structure, we take the second rectangular pipe base made in the previous step and lay it on top of the corner posts.
We scald the resulting “cube” with intermediate posts and spacers. First, we take pieces of corrugated pipe 4x4 cm along the height of the structure and weld them vertically between the lower and upper bases. The recommended installation step is 100 cm. At the same stage, we provide an opening for the door.
We weld the horizontal cross member around the support structure. The pipe must be welded to the vertical posts at a height equal to half the height of the change house.
We make the spacers from a 2x4 cm profiled pipe. We cut it into 30-centimeter pieces. We cut each edge of the workpiece at a 45-degree angle. We scald all the corners of the structure with the resulting spacers. Additionally, we can scald the floor with them.
We make the roof
Roof frame
We made the bottom part of the frame and the wall. Next we are engaged in the manufacture of the “skeleton” of the roof.
We make trusses in the form of isosceles triangles. We use a 2x4 cm pipe. The recommended installation step for the trusses is 1 m. We weld them along the length of the frame. We cover the roof with corrugated sheets. If you wish, you can use another material of your choice.
We cover all metal elements of the frame with a special primer, and after it dries, we apply paint of the desired color.
Construction of a change house at the dacha with your own hands
We offer step-by-step instructions on how to build a shed from scratch using frame technology with your own hands.
How to make a frame for a country house with your own hands
- Prepare a site on the land. Ideally, this should be a horizontal surface with solid soil. This will save time and money on excavation work.
- Before installing the foundation, carry out preparatory work. They include removing 30 cm of soil over the entire area of the future shed with removal of half a meter beyond the perimeter. Replace the removed soil with compacted sand, preferably laid on geotextiles.
- The choice of foundation is yours; it can be a cast concrete option for a steel support, cinder block or brick pillars, or concrete blocks. Lay the pillars to a depth of more than 30 cm; be guided by the cords, marked according to the drawing of the cabin frame and aligned horizontally. A typical foundation for a 6x3 cabin consists of 15 pillars every 1.5 meters (3 pieces in width, 5 in length).
- Construction work cannot be carried out on a fresh, damp foundation for a whole week.
- Saw the wood according to the drawing parameters, treat with hydrophobic and antiseptic compounds. Fire protection treatment is also desirable.
- Before installing the base of the cabin frame, supplement the pillars with 2-layer roofing material waterproofing. The base will consist of 150x100 timber: three longitudinal ones and a pair of transverse ones. Based on the drawing, lay the beams with the wide side down, then level them and secure them with reinforcement ties or anchors to the columns.
- Next will be the installation of the lower trim of the frame cabin. Strictly along the perimeter of the structure, a 100x100 beam is attached to the crown. There is no need for strapping on the middle beam. In the final stage of this stage, a 50 mm step appears along the entire inner edge.
- Install the logs on the floor correctly, that is, on 3 longitudinal beams of the base, edge down, with a pitch of 60 mm. The timber will fit into the 30mm slots in the bottom trim of the cabin frame. The logs are made from 100x50 timber.
- If desired, you can install an underground floor . This is done in order to extend the life of the cabin, as well as for additional insulation of the structure. Place construction waste in the gaps between the posts around the perimeter, and then fill the subfloor with expanded clay.
- Next, all that remains is to install and level the vertical corner posts (beam with a section of 100x100) using a level, organize the top trim and strengthen the frame of the cabin with vertical additional posts (they require a 100x50 beam).
Further stages of arranging a country house
After erecting the frame, perform the following types of work:
- limit windows and doors with horizontal bars 50x50mm;
- Replace the temporary rack braces with permanent ones (40x100mm boards will be needed);
- install rafters, sheathing and roofing material;
- lay the subfloor in a continuous flooring of 30x150 tongue and groove boards, complete with a waterproofing and vapor-proof membrane;
- insulate the space between the joists with mineral wool or expanded polystyrene, lay a polyethylene membrane on top;
- Lay the flooring from a 40x150 edged board across the joists;
- sheathe the outside frame of the cabin with vapor-proof material, cover it with clapboard or plywood panels;
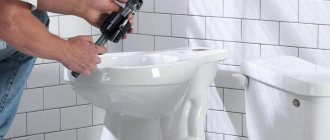
- install doors and windows;
- carry out engineering communications;
- the ceiling and internal lining are covered with polyethylene and thermal insulation, then with sheet building materials in the form of plywood, chipboard, OSB or fiberboard;
- After the construction of the frame cabin, decorative work awaits you.
Video: frame assembly
What is a change house and its purpose
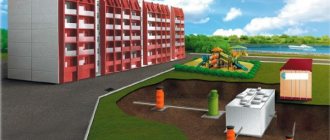
A change house is a small-sized, inexpensive and comfortable structure that is easily transported or moved. It can be made from different types of building materials. The main purpose of the change house is to store equipment and accommodate construction crews in it. In addition, it can be equipped as a production or office temporary structure.
Metal cabins with one room are designed to accommodate construction crews and store various equipment
Types of modern cabins
Depending on the material used, there are the following types of cabins:
- metal - the service life of such a design is at least 10 years. The metal change house has a strong frame, so it can be moved frequently;
The metal shed has standard dimensions that allow it to be transported on the platform of a crane.
Wooden cabins are more often used in summer cottages and country houses
Depending on its purpose, the change house can be used for the device:
- Wagon-house. This type of mobile structure is equipped with runners in winter, and wheels in summer. This car-house is intended for people working on a rotational basis or film crews. In addition, it can be used as an office, a room for drying work clothes or a recreation area.
A movable car-house on wheels can be attached to a tractor and towed to the desired location
Racks are placed inside the storage shed for convenient storage of goods.
The canteen can be used for catering at construction sites
Stationary office huts are installed on construction and retail sites, parking lots and other open areas
People can live in specially decorated cabins for a long time
Change house from a construction trailer
Cabins on wheels
Cabins on wheels
Don't want to bother with assembling the frame and other related activities? You can buy a ready-made trailer and equip it for a cabin. Such trailers do not even need their own foundation - you just need to carefully level the site and install the container (trailer).
If you equip a used trailer as a cabin, carefully examine its condition. Clean off traces of rust, replace heavily damaged cladding elements with similar ones, weld patches onto the through holes, coat the metal with a special primer and paint.
The installed structure must be insulated. The rest of the arrangement is at the discretion of the owner. These points will be discussed separately below.
You can also buy a trailer on wheels. The option is mobile and very easy to use. After completing all the measures for arranging such a trailer, it is installed on the frame of the trailer.
Preparation for construction
In terms of technological processes, building a shed is not very difficult, since there is no need for special training, the use of rare and expensive tools, or extensive knowledge in the field of construction. But you should not hope that all stages of construction of the cabin structure will go smoothly and without problems, especially for novice craftsmen.
Project drawings for standard frame cabins
The most convenient size is a change house measuring 3 x 6 meters, since it is universal in weight, area, as well as the availability of building materials of a suitable size and price. However, for each individual case, its own layout is designed, which is based on a standard frame layout with the addition of the necessary partitions and openings. If the structure is temporary or you need to divide the room into certain zones (kitchen, bathroom, warehouse, etc.), then the internal partitions must be indicated in the drawing.
The traditional configuration of a 3 x 6 meter cabin design implies the presence of the following premises: a central room 4.5 x 3 meters with amenities and heating, a corridor that prevents the entry of cold air, a bathroom and a storage room with dimensions of 1.5 x 1.5 meters. The roof is made from corrugated sheets, regardless of the model of the cabin.
Photo gallery: various layouts of cabins
Selection of material for the frame and foundation base
On the modern market you can find a huge amount of building materials for building a shed: panels, plastic, metal, wood slabs, and so on. Therefore, when choosing them, it is worth taking into account the technical properties and design configuration.
The main part of the cabin is the frame. For its construction you can use:
- A metal profile that is connected by welding. This profile is durable and resistant to various mechanical damage. Change houses with a metal frame are used for frequent moves.
The welded metal frame has sufficient strength for repeated transportation of the cabin
The wooden frame of the cabin is usually insulated with one or two layers of mineral wool, which is protected by a waterproofing film
Metal parts of the cabin frame must be painted with powder enamel
It is better to make the foundation of the cabin from brick pillars, cinder block supports or concrete blocks. Under heavy metal frames, a cast concrete foundation is made.
For the external cladding of the cabin, it is better to choose galvanized steel sheets. They are quite durable and very convenient to use. You can also use wooden paneling.
Wood-based cabins cost much less than wooden structures, but they can emit various chemicals that have a negative impact on human health. You should not chase after cheap materials for construction and subsequent cladding, as you risk wasting your money. When choosing a building material for constructing a shed, proceed primarily from your individual preferences, standards of durability, practicality, ease of design and its reliability.
Material calculation and necessary tools
When calculating the cost of a 6x3 meter wooden cabin, you must take into account the cost of materials, as well as how much their delivery will cost. To erect a temporary structure of the above dimensions, you need to purchase the following materials:
- geotextiles - 30 m2;
- anchors - 9 pcs.;
- sand - from 3 to 6 cubes;
- expanded clay - up to 3 cubes;
- material for pillars or ready-made foundation blocks;
- insulation - 8 m 3 or plates - 81 m 2;
- timber 150x100 mm - 18 linear. m or 0.27 cubic meters;
- beam 100x100 mm - 47 linear. m or 0.47 cubic meters;
- lining - 22 linear m;
- edged board 40x150 mm - 0.72 cubes;
- tongue and groove board 30x150 mm - 0.54 cubic meters;
- OSB - 63 m2;
- board 40x100 mm - 40 m or 0.16 cube;
- timber 50x100 mm - 95 meters or 0.47 cubic meters;
- sheathing beam 50x500 - 50 m or 0.125 cubic meters;
- polyethylene - 81 m2;
- waterproofing membrane - 81 m2;
- corrugated sheeting - 21 m2;
- metal corners for fastening;
- self-tapping screws for the roof - 180 pcs.;
- self-tapping screws 70 or 80 mm - as needed;
- nails 150 mm;
- windows, as well as internal and external doors - in accordance with the drawing.
- various types of partitions;
- decorative finishing;
- technical and engineering systems.
The final calculation of building materials should be made only according to the drawing.
You will need the following tools for work:
- bow saw with a sharp blade;
- shovels - bayonet and shovel;
- sherhebel;
Sherhebel is a special plane for the primary processing of unplaned wood.
Cabin layout
Today there are quite a lot of traditional layouts of cabins. They differ in the location of windows, the configuration of rooms and other characteristics. However, the main types of layouts are:
- Construction of 2 rooms. One is a work room, the other is a hallway. There is a door opposite the hallway and one window.
- Construction of 3 rooms. The peculiarity of such a change house is the separation of two hallway rooms. Each room has one window. Such cabins are called vests.
- Change house from room and hallway. In this case, the hallway will be larger than the room. The length of the hallway is equal to the width of the entire structure.
- The simplest option is a one-room cabin with one window.
- A cabin without windows.
There are other layouts of cabins. They differ in the area of the premises, the location of windows and doors. However, traditionally such structures do not provide more than 3 rooms, since the total area of the cabins is very limited.
Upper harness knots
The arrangement of the upper trim begins after the installation of the corner vertical posts . If the walls are more than six meters long, intermediate supports are also pre-installed.
When performing work, you should adhere to a number of rules:
- the harness is formed from two boards;
- rows of boards are laid in a checkerboard pattern so that the joints do not intersect;
- for fastening, use nails 6 cm or more in length;
- the areas where the boards join together are moved to the middle of the vertical posts;
- The ends of the boards are fixed with two nails.
After installing the trim, intermediate wall racks are installed, taking into account the location of windows and doors.
Step-by-step instructions for making a change house
In order to build a change house, it is necessary to carry out the following types of work:
- Site preparation. The shed must be placed on a horizontal surface. The soil must be hard, otherwise heavy excavation work cannot be avoided.
To place the change house, it is necessary to prepare a flat area on which drainage bedding will be laid
To protect the foundation base from groundwater, it is covered with a layer of sand and thoroughly compacted
The wooden beam is sawn according to specifications and treated with an antiseptic
The lower frame frame is laid on the foundation pillars through a double layer of waterproofing
Floor joists are laid in 60 cm increments
The vertical posts are plumb and temporarily secured with struts until they are connected by the upper frame
The front side of the frame is made higher than the back side to ensure the required roof slope
The rafters are laid on the beams of the upper frame and form the frame of the future roof
The sheathing connects the structure of the rafter joists and serves as the basis for the roofing material
Subfloor boards are nailed to the bottom of the floor joists
It is necessary to leave a ventilation gap between the insulation and the waterproofing film to remove moisture
The finishing material is pressed onto a layer of vapor-proof membrane
The insulation material is placed into the prepared frame with little effort and stays there without additional fastening
Video: do-it-yourself summer house
Interior decoration of the cabin
A mobile temporary structure performs a wide variety of functions. And this is achieved thanks to the interior decoration. It is this that makes the cabin suitable for temporary or permanent residence of people. At the moment, the following types of materials are mainly used for finishing the structure:
- Laminated chipboard is an attractive material that has a dense laminated surface that is resistant to negative temperatures. In addition, laminated board has different colors, textures and textures. Change houses made from laminated chipboard are practical and quite durable, but more expensive.
Laminated chipboard is one of the best materials for interior decoration of a cabin
Lining for interior decoration is most often used when it is necessary to build a change house with a beautiful and inexpensive interior
How to make a change house with your own hands? Drawings, list of building materials
When there is serious construction ahead, you need to temporarily live somewhere, relax, store some things - in a word, you need to set up a temporary home. For this purpose, a small house is built - a change house, in some cases temporary, but it is more reasonable to provide for its use in the future, for example, as a guest house, a small garage, a summer kitchen, a place to store equipment and household items. The structure can become a decoration for your site.
Such a small house can be made with your own hands. Let's consider several options. There are three main options: wood, metal profiles and a finished trailer. The dimensions of the cabin are usually 5-6 m in length and 2.5-3 m in width. But everyone decides for themselves, taking into account plans for the further use of the building.
Homemade greenhouses
A hot summer is ahead of us, which we already miss. And we must carry it out with maximum efficiency and benefit for ourselves and our children. In order to be less at the mercy of nature’s tricks and to grow beautiful flowers in our garden plot or to get a wonderful harvest of vegetables, we simply cannot do without a greenhouse.
I think that many of you can make a homemade greenhouse with the help of a chisel, a hammer and some mother (just kidding). Particularly golden hands are not needed here.
A greenhouse with dimensions of 6.0 by 2.5 m, made in the form of a metal glazed (or film) frame and built on a plinth made of concrete blocks - this is what we need to get a good harvest for the winter.
Frame change house made of wooden beams
A wooden change house is the most common option; it is usually chosen when you plan to use the structure in the future as a guest house, a bathroom or a summer kitchen.
For such a change house you will need timber with a thickness of 70-90 mm. The box is placed on a concrete foundation, supports, piles. The structure can be insulated if you plan to use it in winter, or left without insulation and used from May to October.
The most common option today is to sheathe the outside of structures with OSB boards. This material is similar in characteristics to plywood, but is distinguished by high sound and heat insulation. Compared to plywood, OSB boards are less durable, but it is their use in frame structures that makes it possible to obtain an excellent combination of strength and security. The inside of a frame house is most often covered with plywood.
The process of constructing a frame shed from OSB can be seen in the video, and under the video the author has posted an estimate and materials, which will help you navigate.
Step-by-step instruction
To build a change house with your own hands, you need to choose a place, take into account fire safety rules, if in the future the change house will be used as a Russian bath or shower.
After the location is chosen, they prepare the construction site. It is necessary to clear the area of bushes, weeds and debris. Next, we describe one of the most popular options for building a cabin.
The area where construction is planned must be leveled and a plastic film prepared, which must be at least a meter larger than the planned structure on all sides. This is necessary to protect the base from moisture.
Next we install the foundation. To do this, you will need concrete blocks or brick supports up to 200 mm.
We remove a layer of earth and turf along the perimeter, carefully compact it, cover it with film, fill it with sand and crushed stone screenings.
After this, you can install the supports. For a standard cabin size, 12 columns are used: three rows of four each. They must be leveled in height and covered with sheets of roofing material, securing the sheets with mastic insulation.
Timber boxes are installed on the bases.
The next step is installation of the frame. Usually, to create a supporting structure, they take wooden beams with a cross-section of 90 mm or more and align each rack strictly vertically, using temporary side struts for this: they are attached directly to the frame using auxiliary steel corners, which are sold in construction markets. The heads of the racks are cut to the same level.
When the frame is ready, doors and windows are installed.
Precise markings are made on the racks in advance to simplify this process.
The installation can be considered complete after laying the thermal insulation - its edges are tucked under the window frames.
Next, the roof is made. This is usually a single-slope structure. Its implementation involves securing a number of vertical posts, the front sides of which should protrude by 400 mm and be higher than the supports of the rear side of the frame. The rafters should rest on a frame of two parallel bars. The rafters are covered with lathing, film insulation and a layer of thermal insulation material made of mineral wool, sheathed with plywood, after which the roofing material of your choice is laid.
Now you can install the floor. The floor can be made of boards or slabs. The flooring material is laid on a surface covered with vapor barrier tiles. Plywood boards, linoleum, laminate - this is your choice and depends on the further use of the building.
After this they do the exterior finishing. For it they use:
- Insulation made of mineral wool or polystyrene foam.
- Scotch tape for joining joints.
- Windproof membrane.
- OSB boards.
- Corrugated sheeting or wood on top of OSB for improvement.
We are building a wooden cabin
Wooden cabin
Wooden change house
Let's start building the frame of our change house. First, we lay a wooden beam around the perimeter of the future structure, as well as in its center to further strengthen the structure.
Bottom harness
Attaching the bottom harness
Bottom harness
Methods for connecting beams at corners
Lags
We connect the opposite sides of the beam. To do this, we fasten the logs to the beam of the lower trim. You can connect in any suitable way. Connections using the tongue-and-groove method, using metal corners and anchors, have proven themselves well. We made preliminary selections to connect the elements and additionally strengthened the fastening points with nails.
We install vertical corner and intermediate posts. We install intermediate supports in meter increments. To do this, we use timber with a cross section of 15x15 mm. Don't forget to leave an opening for the door. To securely connect the frame elements, we use metal corners and self-tapping screws. At the same stage, we install support pillars for the future porch, if its presence is provided for by the design of the cabin.
Corner support posts
Corner support posts
Vertical rack mounting options
Important! The height of the vertical supports on the rear and front sides of the cabin should differ by approximately 50 cm. Such a difference will ensure an optimal slope of the roof and precipitation will not linger on it.
We mount the beam of the upper trim. The support posts of our cabins have different heights, so we work as follows: first we lay the timber on the tops of the higher supports, then we connect the low posts and install the side crossbars perpendicular to them. We make connections using the already familiar method with samples and nails.
Upper harness
Laying floor beams
As a result, our frame will be divided into a number of rectangular sections. To strengthen the structure, we connect the opposite lower and upper corners of each such section with jibs made of boards.
We attach the rafter beams to the top roof sheathing. We use the boards that are as even as possible to make lathing easier in the future. We install the rafters in increments of about 500-600 mm. We pay special attention to the strength of connections on roof beams.
Rafter beams
Rafters of a lean-to cabin
Rafter pitch
We construct the roof so that it protrudes slightly beyond the boundaries of the frame. This will allow us to arrange a base for drainage on the back side of the cabin, and mount a canopy on the front part.
Ondulin roof
Ondulin installation instructions
Ondulin installation instructions
We choose the material for the finishing roofing at our discretion. For example, ondulin is good. We lay it with an overlap, starting from the bottom of the slope. Before laying ondulin, you should lay out a continuous sheathing of boards and attach a waterproofing film on top of them. Instead of ondulin, you can use slate or other material of your choice.
Prices for various types of timber
timber
Construction materials
For a wooden change house you will need a board and timber to install the frame.
To create the base you will need a 10x5 cm beam for strapping beams or racks. To insulate the rack - timber up to 15 cm.
For rafters and joists you will need a 50x100 mm edged board. For lintels - timber with a section of 50x50 mm. For sheathing under the roof, boards of 25x100 mm are used.
OSB is used as sheathing, and insulation is used under the sheathing.
You will also need mineral wool for insulation and a wind barrier for protection from the outside. Exterior finishing is often done with corrugated board, clapboard or block house. Inside they use plastic panels or other options to taste. For the roof, you can choose ondulin, slate, corrugated board and other materials.
The amount of materials depends on the construction scheme.
Shelter scheme
We offer a standard 6x3 shed layout for DIY construction.
A typical frame diagram would be something like this:
The internal arrangement can be organized according to the following standard scheme:
A typical cabin consists of 3 rooms:
- room 3x4.5 with heating and amenities,
- a 1.5x1.5 room is used as a corridor and serves as a temperature gateway,
- another room 1.5x1.5 is used for a storage room and toilet.
Much depends on the purpose for which the change house is used: each case requires its own project, but most often it will not differ much from the one proposed - only additional openings and partitions will be added.