Popular brands: Praktika, Wortex, SIBRTECH and others
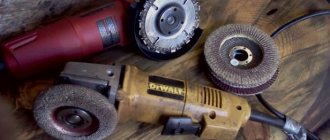
Radial soft brush with an angle for angle grinders. Photo Practice
There are a large number of Russian and foreign enterprises on the market for the production and sale of cord brushes:
- Bison;
- Practice;
- SIBRTECH;
- Anchor;
- DEXX;
- FIT;
- MATRIX;
- Wortex;
- Lessmann.
All manufacturers offer several types of brushes, giving customers a choice.
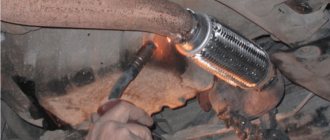
If the grinder smokes during operation
When you are engrossed in stone processing or metal grinding, it is easy to not notice how the tool has overheated. If the work is not stopped, very soon acrid, stinking smoke will begin to emerge from under the casing. This is the armature windings burning, in which, unable to withstand the thermal load, the insulating layer melts. If you do not interrupt the work, the grinder may burn out.
If you notice an unpleasant odor, you should immediately turn off the angle grinder and unplug the power cord from the outlet.
You can begin disassembling the instrument only after the housing has completely cooled down and the emission of caustic fumes has stopped.
The grinder gets very hot
Most often, the body of an angle grinder gets very hot due to improper operation of the device. Since the angle grinder is equipped with an asynchronous electric motor, an increase in the workload on it does not affect the rotation speed in any way. This can be misleading for an inexperienced user, as a result of which he continues to work without interruption for an unlimited time. But this cannot be done. The passport of each tool indicates the optimal operating time of an angle grinder under load, usually it is 5–7 minutes. After this, it is recommended to take a break of 1 minute or let the grinder idle.
When working with a tool, it is important to follow the correct order of stopping the grinder. After turning off the start button, you need to wait until the engine stops completely. If the rotating angle grinder is placed on the ground or a dusty floor, small particles of sand will be sucked through the ventilation holes. They will get inside the engine and will erase the protective insulating layer.
Replacing brushes in an angle grinder.
The angle grinder works in fits and starts and does not develop full power
The angle grinder motor operates jerkily if an interturn short circuit occurs in the rotor coils. The most common reason is irregular use of the tool, which results in overheating of the motor. Rewinding armature coils is a rather complicated and painstaking task, doomed to failure without certain skills. Therefore, if the armature fails, it is recommended to replace the entire part, along with the bearings. The value of the spare part must exactly match the value of the original.
Repair - how to remove and connect the Interskol grinder button
The following diagram will help you understand the structure of the angle grinder button:
- Specifically, the start button is located at position 41, which is built into the body (position 47).
- The start button is supplied with voltage from the power cable (pos. 53).
- To control the start button (pos. 41), the angle grinder is equipped with a lever (pos. 46).
- Also connected to it are electric brushes (pos. 55) and special brush holders (pos. 44).
- The rotor (pos. 31) and stator (pos. 42) also go into the electrical part of the angle grinder, where the power button goes.
From the diagram it becomes clear that you can get to the start button only by removing the handle on the back of the angle grinder body.
To repair the Interskol , we will need:
- Two screwdrivers – Phillips and flathead;
- New power button.
- Using a Phillips screwdriver, unscrew the screws on both sides of the handle and remove it;
- We remove the platform for adjusting the speed, using a flat screwdriver to pry up its latches;
- Using a Phillips screwdriver, disconnect the contacts of the power cord from the power button, having previously removed the clamp;
- We disconnect the four wires from the start button that go from the motor and capacitor to its contacts;
- We remove the broken button from the case.
To make sure that the contacts in it have burned out, just remove the collapsible cover.
- We connect the removed motor and capacitor wiring back to the button contacts - they should be placed in the same sequence as on the old button;
- We insert the button back into the body;
- We fix the speed controller pad back;
- We screw the contacts of the power cord and the clamp;
- We check the operation of the angle grinder at idle speed;
- Screw the handle cover with self-tapping screws.
- The grinder is assembled, and the button works properly.
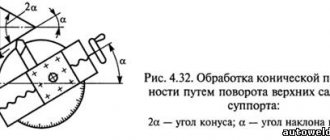
Conical pair. Places worth paying attention to:
Integrity of teeth. with a tangential profile (inclined), the loss of a fragment of one tooth is not critical, i.e. It will work, but ideally, replace it, especially pairs with straight teeth. Pay attention to wear on the surface of the teeth. Over time, the tooth “stretches”, becoming sharper towards the top. The edges usually work less, you can roughly focus on them. Such defects are accompanied by increased noise during operation.
As a budget solution (TEMPORARY, although nothing lasts forever.), I practice changing the installation of the run-up washer from the upper part (under the locking ring) to the lower part (under the planetary gear). This action will reduce the gap between the driven and driving gears, thereby increasing the contact patch. In some angle grinders, especially those from Bosch, there is a metal seal (a few tenths of a mm thick) between the flange and the gear housing; removing it, the same effect is achieved.
READ How to install a brush on an angle grinder
Key groove. Over time, wear appears on the key, shaft and mounting hole of the large gear. The nominal gap should be within a few tenths of mm (the so-called thermal gap). It can be checked simply by putting the gear on the shaft using radial movements from side to side. Usually, the key itself wears out first and it is enough to replace a cheap part. But it is worth carefully examining the grooves on the gear and shaft. When replacing the spindle shaft bearing in the housing flange, I also recommend checking the condition of the copper-graphite bushing, which is also responsible for the alignment of the mechanism and the nominal position of the spindle shaft. The removed shaft can be conveniently installed in the bushing and used as a lever to assess wear. When “cold”, the bushing always has a small thermal gap (about 0.1-0.4 mm), which partially decreases at operating temperature (a feature of copper-graphite bushings, described in more detail in the category). If the displacement of the shaft in the bushing significantly exceeds the range, replacement in this situation (the mechanism is disassembled and the lubricant and shaft bearing are replaced) will be more than appropriate, given the low cost of the bushing.
When assembling the gearbox housing and installing the flange, it is worth turning the mechanism by the spindle shaft. This action prevents tooth-to-tooth contact. Otherwise, by tightening the flange with screws, you can literally squeeze out fragments of the aluminum alloy of the housing with a press. Also, do not overtighten the nut securing the drive gear, due to the direction of rotation, it tends to self-tighten in most angle grinders with a tangential tooth profile (oblique)
It is recommended to replace the lubricant, just replace it and not add or partially change it (it’s like changing dirty socks from your left to your right foot or vice versa). An easy-to-follow interval: two brush replacements. replacement of lubricant. Surely everyone knows that when worn, the lubricant loses its properties, and the mechanism will wear out faster. Also, the result of any gearbox operation. metal microchips. The design of the case is not sealed, the smallest dust also penetrates and settles in the lubricant, which in total creates an abrasive environment, but it does its job 100%, mercilessly wearing out even the highest quality hardened metal. It is worth thoroughly cleaning the remains of old grease from all surfaces, taking the time to get to hard-to-reach places. A fragment of a chipped tooth, retaining ring, key, body, etc. and the above-mentioned abrasive can be mixed into a new lubricant and it will be annoying when such a trifle as a small fragment, falling between the teeth of a conical pair, causes irreparable harm.
Lubricant should be purchased based on the manufacturer’s recommendations (in the instructions for the angle grinder or the manufacturer’s website.) In most cases, a lithium-based lubricant will be appropriate. Personally, I assemble the gear mechanism with high-consistency lithium-based grease NL Gi 2 for high-speed gears. It is sticky, which means it stays on the contact patch, even at high temperatures, without draining like most analogues. The modern market offers many options, everyone will find one that suits their requirements. Also follow the “golden mean” rule for determining the amount of lubricant (too much leads to wear, and too much leads to overheating during operation (it’s worth adding approximately 1/2 of the free space))
What is angle grinder used for and how is it designed?
The angle grinder (angle grinder), or “grinder”, has firmly entered the everyday and industrial life of not only the craftsman, but also the common man who likes to comfortably solve plumbing and carpentry tasks. The popularity of this power tool is due to its simplicity, versatility and multifunctionality of use.
With the help of various additional attachments, the grinder can cut metal, grind various surfaces, and clean them of rust or old paintwork. The angle grinder's arsenal includes such functions as sharpening cutting tools, chipping concrete walls, cutting ceramic tiles or stone.
The device of the grinder
Structurally, the grinder is an electric motor with a power of 500 to 2000 W, which converts the power of electric current into rotational motion. A planetary gearbox, consisting of two main gears with a straight or bevel gear, serves the same purpose. The rotation of the spindle of the working shaft is carried out in direct transmission mode, the speed is determined by the ratio of the number of gear teeth. Some angle grinders are equipped with an electronic engine soft start unit and rotation speed control.
Professional angle grinder with engine speed control
Electric motor type: asynchronous, single-phase. Electromotive force arises when the rotor winding interacts with the magnetic field of the stator, which is fixedly fixed in the housing. Thanks to the angular transmission of torque, the level of safety during operation is significantly increased. If the disk jams in a viscous material, the tool body does not rotate reactively, which prevents possible injury to the operator.
Many have experienced in their own practice the phenomenon of reactivity when operating an electric drill. When a drill bit jams, for example, in hard wood, the body of the device begins to forcefully rotate in the opposite direction, is torn out of the hands and can lead to injury or even disfigurement.
Bearing check
For objective diagnostics of bearings, we disassembled each unit down to the detail. We evaluate the condition based on several factors:
- Axial play. To check, it is enough to move the outer ring relative to the inner one diagonally from side to side, relative to the axis (or vice versa, depending on the installation), and also parallel to the axis.
- Radial play. move the outer ring relative to the inner one perpendicular to the axis
- Noise during operation. pulse the bearing to rotate quickly, listening for defects.
Even with very small deviations from the norm, it is recommended to replace the bearings, all at the same time. A defect identified manually is amplified by an order of magnitude during operation. A new bearing that is replaced tends to have a wear level equal to that of the non-replaced bearing within the same shaft.
In exceptional cases, when there is no play (more than nominal), and by all indications the noise has appeared quite recently, bearings with metal-rubber collars (designated RS) can be serviced by replacing the lubricant, which will slightly delay their replacement. The cuffs can be pryed with a needle or a knife blade (they are very easily deformed). Use a highly penetrating lubricant (WD-40 or analogues) to clean the internal surfaces, blow them off and apply new grease for the bearings, preferably with a metal conditioner or revitalizant. The amount of lubrication is also important. A deficiency leads to wear, and an excess leads to overheating during operation (it is worth adding approximately 1/2 of the free space). It is important to understand the responsibility of this procedure, immediately reacting in the future to the slightest change in the sound of the work.
What it is?
The electrical circuit of the grinder is simple. Due to the potential difference between the “phase” and “neutral” wires, an electric current with a frequency of 50 Hz flows through the switch to the windings in the order “stator - rotor - rotor - stator”. All the bells and whistles designed to expand the functions of the angle grinder, such as the system for maintaining speed regardless of the load, do not change the circuit diagram.
Note. Let's agree to call a spade a spade. The rotor is the rotating part of the electric machine, the stator is the stationary part. The winding in which the EMF is induced and the load current flows - the armature.
Those who doubt the definitions can look at GOST 24471-87.
The stator , the stationary part of the engine, consists of two cores made of sheets of special steel, on which windings of copper wire are laid turn to turn.
The winding wire, which initially has varnish insulation, is additionally insulated layer by layer with varnish during the manufacture of the windings, the finished winding is “armored” with a special fabric and again impregnated with varnish. When the machine is operating, the stator is motionless and does not take mechanical loads, being continuously cooled by the air flow from the fan. There is every reason to consider the stator an “eternal” unit. This is true if your grinder is produced by a reputable company, for which its own reputation is no less important than profit.
The rotor is a structurally complex unit, its purpose is to convert the interaction of electromagnetic fields into rotation and torque and transmit their power through a gearbox to a working tool, a cutting wheel or, say, a cord brush.
All components of the rotor: armature core with windings, commutator, fan - are assembled on a common shaft mounted in bearings. The drive gear of the gearbox is attached to the working end of the shaft.
The armature core is made of individual steel shaped plates pressed onto the shaft splines. The winding turns are laid in layers in the armature grooves. On the outer cylindrical surface of the rotor, the windings are protected by inserts made of insulating material.
The collector is cylindrical in shape, consists of individual parts called lamellas, made of copper (copper alloy), trapezoidal in cross-section, on the armature side they have protrusions with a slot - “cockerels”. The ends of the copper wire are soldered to the “cockerels”, from which individual sections of the armature winding are assembled. The turns of the sections are placed in the grooves of the armature in strict order. The winding direction of the turns and their connection to the commutator lamellas are carefully controlled. Thin insulating plates are installed between the lamellas. (The Proto-Bulgarian Eltos used mica, a natural mineral, as an insulating material).
Just like the stator, the armature windings are repeatedly coated with insulating varnish and “armored” . On some models, the winding on the collector side is protected by thermally conductive insulating material to protect against wear by microparticles moving with the air flow.
After the rotor is assembled, the outer surfaces of the armature and commutator are machined, the commutator is ground and polished, after which the rotor is balanced.
A properly designed and manufactured rotor will withstand for a long time all thermal, dynamic and electrical loads and overloads that an angle grinder may encounter in its difficult work.
The life of the rotor is limited only by commutator wear caused by the brushes.
So, brushes.
Bosch carbon brushes for angle grinders GWS 20, 21, 24, 26. Photo VseInstruments.ru
Their job is to transfer electrical power (amps times volts) from a stationary stator to a wildly rotating rotor commutator, and to do this without electrical, mechanical or thermal losses, and with minimal damage to the commutator.
The brush is a removable sliding-type electrical contact. All grinders have two brush units.
The designs of brushes for generators, motors and reversible electric machines are varied, but fairly unified.
Grinder brushes are part of a large group of brushes for single-phase commutator motors with power from 400 to 2500 watts, used in hand-held power tools (drills, hammer drills, saws, planes) and other types of equipment with similar electric drives: pumps, fans, lawn mowers, vacuum cleaners.
Structurally, electric brushes belonging to this group are a prismatic part of a rectangular cross-section (the “body” of the brush), to which a conductor (current conductor) is attached, ending with a contact tip for connection to an electrical circuit.
The current conductor is secured in the body of the brush by flaring or pressing, sometimes using electrically conductive glue.
Carbon brushes for angle grinders Interskol 115/900 and 125/900. Photo 220Volt
Current conductors are made only from bare copper wires of the Shch type (brush):
- stranded, MPShch grade;
- braided, in the form of a round or flat rope, brand PSH;
- from a special wire of increased flexibility, ПШШС.
Contact tips of current conductors are made either “bolt-on” or in the form of knife (“plug-in”) straight and flag terminals, depending on the design of the grinder’s brush holder.
For some models of angle grinders, the brush holder is a socket made in the plastic body of the angle grinder. For such options, brushes are produced assembled with a pressure spring and a round contact to which the current conductor is attached.
Cleaning an angle grinder during preventive disassembly
Almost any mechanism loves: CARE, CLEANNESS and LUBRICATION! The instrument in general, and the grinder in particular, is no exception. The first step after disassembly is cleaning! Ideally, it serves as compressed air and a purge nozzle for compressors, which speeds up and simplifies the process. Moreover, it is worth considering that the main cooling of the angle grinder occurs through the gap between the armature and the stator (well, it’s usually relatively clean there) and the shimmed rotor frame between the windings from the collector. Hot air comes out through the holes of the gearbox housing, which, by the way, serves as a heat exchanger (a kind of radiator), and a coating of grease with dust and a layer of various substances on the surface worsens heat transfer.
A deposit of dust and small particles on the motor windings and other parts of the grinder’s internals affects a decrease in heat transfer due to its insulating properties, which inevitably leads to an increase in operating temperature, even to overheating.
The best is the enemy of the good, or not everyone has a compressor in their arsenal. In such cases, you can use a clean brush and a vacuum cleaner with a narrowed nozzle for crevices (it helps when cleaning computers), and to increase the flow, the nozzle can be further narrowed using masking or other tape as a temporary measure. The brush lifts particles, and the vacuum cleaner nozzle removes them, including from hard-to-reach places. Using these methods, it is worth cleaning all parts, internal cavities and surfaces of the case.
READ How to Change the Cable on a Chainsaw
After particularly dusty work (drilling channels, working with stone or concrete, etc.), it is recommended to blow the tool externally (without disassembling) through the ventilation holes. Abrasive dust, as it passes, “exposes” the motor windings, removing piece by piece the protective varnish coating. Many models of angle grinders are equipped with an “armored” layer that protects the windings, but not all, it’s worth taking this into account. When working with metal, especially when cleaning, metal dust has conductive properties, which interferes with the adequate operation of buttons and controls, and over time, also confidently renders the tracks and contacts of their boards unusable. Advanced LNA models are equipped with air intake filters or a “labyrinth” channel structure that prevents or delays the entry of large particles. For LNAs that are not equipped with filters, you can use a life hack by putting a woman's stocking on the back of the case and closing the air intake holes (use only for particularly dusty work, as this is a compromise between the obstruction of the air flow and the dust in it). Also blow out the tool after grinding work.
Useful instructions - how to replace the brushes and cord of an angle grinder
Often an Interskol stops working due to the cord failing or the brushes wearing out, which is why they barely reach the stator and the device does not work at full power.
You already understand how to remove the cord from the previous instructions on removing the angle grinder button (from points 1 to points 3). All that remains is to figure out how to get to the brushes and change them for new ones.
After disassembling the angle grinder, it is recommended to blow off dust using a compressor.
Also check the armature commutator, which may be scratched from worn brushes. Scratches can be smoothed out with fine-grade sandpaper.
VIDEO REVIEW » alt=»» If your angle grinder stops turning on when you press start, don’t rush to throw it in the trash and get a new one. Most likely, it’s all about the start button, which doesn’t require any special abilities or knowledge to repair. Replacing a button for an angle grinder from Interskol and other companies is much cheaper than buying the latest angle grinder.
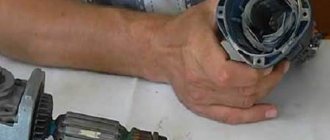
Collector-brush unit
Before you start disassembling the angle grinder, the first step is to remove the brushes, which are pressed to the commutator by a spring. Otherwise, damage to the brushes and cheek holders is possible when removing the rotor (armature). If the remaining graphite body of the brushes is less than 50% of new ones, it makes sense to replace them.
The old set, with a balance of at least 30%, should be saved in NZ for backup. They will be useful in cases of long searches and time for delivery of a new set or other force majeure situations. If the brushes are not equipped with an auto-stop function (“shot or groove with a mating pin in the brush holder”), critical wear will most likely lead to the destruction of the commutator, up to and including replacement of the entire armature. IT IS IMPOSSIBLE TO SAVE ON BRUSHES!
Replacing brushes in an angle grinder
In cases of extreme necessity and the impossibility of choosing the right size brushes (described in more detail in the category) and the willingness to adjust the size, do it correctly!:
- If you choose, then it is desirable that only one side does not match, preferably the smaller one (width).
- Treat with a fine-grained abrasive cloth (sandpaper no larger than 1000 grit, the brush is very fragile and brittle).
- Work on a flat surface (eg glass), without pressure. After every few cycles of movements, check the size with a caliper, and also check that the planes of the brush body are parallel.
During service, the brush wears out, leaving a graphite-carbon deposit on the parts of the entire assembly. I have a separate post and video on how to clean the commutator and prepare it for installing a new set of brushes. It is difficult to overestimate the importance of this procedure.
Also, it is worth paying attention to the brush holder shafts. A layer of graphite particles and dust impedes nominal advancement, which can cause the brush to “hang”, causing a disruption of contact with the commutator, accompanied by increased sparking, even up to breaking the circuit, i.e. stopping the engine, and in rare cases, burning out the lamellas and the known outcome of the armature. Cleaning only takes a couple of minutes. If the shaft is slightly dirty, then a dry rag will suffice (it is convenient to use a small flat-head screwdriver, the edge of which is wrapped in several layers of rags, as a guide). Sometimes it’s worth using additional alcohol on rags;)
Replacing bearings
Most likely, everyone knows the rule for installing bearings on a shaft or seat in housings, but I will outline it anyway. Installation on the shaft is carried out through the inner race of the bearing with a spacer of equal diameter. Fitting into the body, on the contrary, occurs through the end of the outer race also with a spacer equal to the thickness of the end of the race. Otherwise, ignoring these rules, the cage, balls and bearing tracks are damaged during installation. Such a bearing will immediately experience vibration, rapid wear and a very short service life.
In domestic conditions, it is practical to use socket heads, because... It is not difficult to choose the required diameter. The bearings are pressed in with short blows with little force through the spacer with a hammer. For removal, I strongly recommend using a special puller. Low cost, almost endless resource and unconditional benefits, 100% justify the purchase of this special tool. If there is no puller, then you can use two thrust plates and a vice to squeeze out the shaft.
The bearing shock absorber can also be installed incorrectly, after which the rotor installation axis is disrupted and, as a result, rubs against the stator with the most dire consequences. Alexandra's video reveals this topic in detail.
In situations where the user of an angle grinder is desperate and, despite obvious sound signs of a critical condition of the bearings, continues to work, a completely worn-out bearing may “fall apart” (separator, then cuffs, and then balls), but there are also cases when both races jam relatively each other and rotation occurs by the clip on the seat, naturally not without consequences in the form of an increased diameter. Ideally, replace the housing! Also, sometimes it is possible to select a bearing for the “new” seat size. And as always, a budget solution out of despair. If the wear is not critical, you can tighten the fit by capping the gearbox housing with aluminum alloy, but without fanaticism. Take this into account! The part will not survive the next bearing failure, 99% will need replacement.
One of the most common causes of gearbox housing casting failure is a consequence of incorrect use of the locking mechanism. Overestimating the strength of the mechanism and the design of the stiffening ribs and the thickness of the casting, when unscrewing the equipment (“bitten disk”), operators use the locking function, which breaks out a fragment of the metal body. In such cases, it makes sense to replace the housing.
READ How to cut triplex glass with a grinder
But if this is currently impossible for objective reasons, and performance needs to be restored, then take the time to disassemble the gearbox and thoroughly clean the old lubricant, replacing it with a new one (it may contain metal fragments), evaluate the integrity of the bushing/shaft bearing seat, as well as the resulting the holes must be sealed (with epoxy resin, sealant or other component). Otherwise, dust getting into the lubricant will create an aggressive environment that destroys the mechanism, and as a result, will lead to the replacement of the entire gearbox, calling into question the feasibility of restoring the angle grinder in general.
On almost any angle grinder, the spindle shaft is equipped with a slot for holding with an open-end wrench (thin, often 17 mm). In case of excessive loads when unscrewing, I strongly RECOMMEND using this method of changing equipment.
How to replace brushes on an angle grinder
24.12.2017
Very often, the manufacturer of angle grinders completes their products with a spare pair of brushes (graphite contacts that allow the transmission of electric current to the rotating rotor).
Is this part really wearing out so intensively that it’s the only thing that needs to be added? If the tool is used occasionally, the brushes will outlive the owner. But if you use the grinder every day, then, indeed, their wear will be significant. And the day will come when a several-centimeter graphite rod will be worn down to a thin plate. It is impossible to allow extreme wear of the brushes, so as not to damage the rotor contacts. The condition of the rods must be checked periodically, after tens of hours of operation.
Replacing brushes
This is where a sensible question arises for the manufacturers of grinders: why not make a window in the case from transparent plastic in order to visually assess the condition of the graphite contacts without disassembling the power tool (in some models of grinders there is no need to unscrew the case)?
Attention! When starting to replace brushes, as with any penetration into the body of a power tool, it is necessary to turn off the power supply by removing the plug from the socket.
Due to the design diversity of angle grinders, replacing graphite contacts for each tool model may have its own characteristics.
The most basic way, without disassembling the case
Some manufacturers approached the possibility of replacing brushes very rationally. There are screw plugs in the machine body. And the entire test or “repair” process takes two minutes (for both graphite contacts):
- Unscrew the plug with a screwdriver.
- Use a thin screwdriver to pry off the pressure cap and remove the brush.
- If the brush has lost 70–80% of its length compared to the new one, then it should be replaced. Otherwise, the old graphite contact must be placed on the same side as it was before removal in order to eliminate the grinding process. After all, brushes wear unevenly due to the fact that they come into contact with a rotating cylindrical surface.
- Screw the plug until it stops. Attention! The cork can also be screwed upside down. Therefore, you need to make sure that there is a groove for a screwdriver on top. Otherwise, difficulties will arise the next time you unscrew it.
- Repeat all steps with the brush located on the back side of the grinder body.
This is the easiest way to replace brushes on an angle grinder and does not involve disassembling the body. Therefore, when purchasing a new tool, this nuance can be taken into account.
Grinders without rear handle
For grinders that do not have a rear handle, brushes are replaced in the following sequence:
- Unscrew the self-tapping screw from the end of the angle grinder.
- Pull off the protective cylindrical casing.
- Pull the cover off the contact block.
- Use a thin screwdriver to pry off the pressure cap of the brush and pull out the graphite rod.
- Insert a new brush and close the contact block with the lid.
- Repeat all steps with another brush.
- Place the casing on the angle grinder and secure it with a self-tapping screw.
Another method of attaching brushes is often found. In this case, the sequence of actions will be as follows:
- Remove the casing by first unscrewing the screw.
- Release the brush from the pressure band spring by prying it out with a screwdriver.
- Remove the brush from the guide block by prying it out with a screwdriver.
- Remove the brush contact from the connector. Also by picking with a screwdriver.
- Connect the contact of the new graphite rod with the connector, insert the brush into the guide block and press it with a spring.
- Repeat all steps with the second brush, close the housing with a casing and screw it on with a self-tapping screw.
These are the two most common ways to replace graphite contacts. Although other options for grinder designs are not excluded.
Grinders with rear handle
Grinders with a rear handle allow you to get to the brushes in a slightly different, simpler way:
- Near the handle you need to find a small repair window, closed with a plastic plate, which is fixed with a self-tapping screw.
- You need to unscrew the screw, pry the plastic plate into the groove with a screwdriver, remove it from the case, opening the repair window.
- The following steps for replacing brushes are the same as for low-power angle grinders: release the band spring (1), release the plug (2), remove the brush from the guide block by the wire.
- Then insert a new brush, connect the plugs, secure the graphite rod with a ribbon spring, close the repair window with a plastic plate and screw in the self-tapping screw.
- Repeat all steps with the second brush located on the opposite side of the body.
It is quite possible that there may be other ways to replace graphite brushes, depending on the design features of the grinders.
Conclusion
Structurally, grinders differ from each other, so the method of replacing brushes may differ slightly from the basic methods described above. But common features are still visible:
- The brushes are located near the rear handle or the area of the body that is designed to hold the tool.
- The most common designs of graphite brushes: with and without a spring.
The first type of design involves a simplified replacement method, because it has a wire, a contact plate, and a pressure spring.
Springless brushes require a slightly more labor-intensive replacement process, because the retaining spring is attached to the body and is more rigid, and the wire is attached in a separate place using a plug.
How to replace brushes on an angle grinder Link to main publication
instrumentiks.ru
Checklist of necessary work when servicing grinders:
- Defective gearbox
- inspection of the condition of the tooth profile. Inspection for the moment of loss of fragments and chips of the teeth of the conical pair
- checking the graphite-copper bushing for play
- inspection of the seats for the keys and the keys themselves on the shafts and gears
- checking bearings for play and lubrication
- replacing bushings, bearings and grease
- Rotor defect
- Inspection of the rotor and stator windings for the moment of interturn short circuit and signs of overheating (darkened fragments, damage to the varnish coating)
- Checking bearings for play and lubrication
- Assess the condition of the collector
- Inspect the wiring for pinching by the housing or damage to the insulation. Make sure that the pants are positioned correctly. Status of contact groups
- Reassembly in reverse order of disassembly
- 2-3 minutes idling.
Maintenance of angle grinders (grinders) with your own hands. Tips for repair and prevention
Working with an instrument brings me pleasure, I am guided by the rule: “you want to do it well. do it yourself!" This post is more like my notes, so to speak, a reminder and a checklist of necessary work during maintenance, which may be useful not only to me. The article is based on my personal experience and knowledge highlighted by authoritative sources, so I do not pretend to be a guru or the only correct opinion.
Prevention. It’s all up to you!)) Timely maintenance of the instrument, I think is no longer news to anyone, saves money and minimizes the likelihood of sudden breakdown and a number of inconveniences.
I think by analogy with medicine: “the main thing is to do no harm!” Initially, it is correct to understand the variant of the result of a manual repair as the last one for a given instrument, i.e. understand the risks and readiness to purchase a new angle grinder, but this is under the most unfavorable circumstances. Because as in any other business, there are a number of nuances and subtleties; without experience, it is very easy to make mistakes that will lead to additional costs for spare parts or even destroy several expensive components, making repairs unprofitable. On the other hand, not all repair shops are. panacea. There are not many professionals and good craftsmen, but a negative “aftertaste” after contacting a service center is far from uncommon. Here is just a post in which I will try as much as possible to highlight the knowledge and advice that can help with independent maintenance and repair of angle grinders.
Tips for assembling an angle grinder
Perhaps this is banal or too superficial, but still. Before work, I download the original “explosion diagram” of this model to my smartphone or laptop, it won’t hurt. When disassembling a previously unfamiliar mechanism or device, I place hardware that will not interfere in the future in its standard places, if possible. For other situations, I use several containers, grouping hardware and small parts into units and parts. During the disassembly process, according to the order in which the parts were removed, I place them in the appropriate order on the free edge of the workbench. Such mowing lines determine the order during assembly. Also, before disconnecting components such as buttons, regulators, stators, etc., where there is a high probability of disrupting the correct connection, before removing, I take a photo with my phone for a “cheat sheet”; you can also mark pairs of connections. These decisions have repeatedly saved me time and nerves, and were found in the form of correctly drawn conclusions, analyzing my mistakes, but you are wiser and will learn from mine.
After assembly, I fix the start button and place the working angle grinder on a flat, smooth surface for a couple of minutes. At idle, the brushes will properly rub against the commutator, taking on its circumferential shape, the surface of the lamellas will finally form, the balls of the new bearings will rub against their tracks, and the warm lubricant will be evenly distributed over all surfaces. By the behavior of a working angle grinder on the surface, vibration can be judged. A moving angle grinder makes you aware of vibration, and a smoothly working one in a static place indicates minimal beating, i.e. humming) Also, after this test, the sound of operation should normalize, otherwise you need to look for the problem and check the correctness of your repair.
In fact, maintenance work on an angle grinder does not take much time (even if you read this entire post), taking into account the fact that everything you need is available. But every minute spent will be rewarded with thorium.
Wisdom of fasting: “Timely prevention. delays repairs,” “If you’re not sure, don’t bother,” “If you want to do it well. do it yourself", "Krailovo. attracts people to misfortune”, “Try to do it perfectly, it turns out poorly”, “Saving money. earned"
Sources:
https://detals.tools/blog/obslujivanie-ushm/