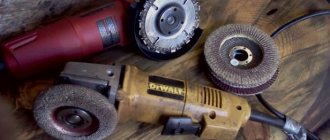
Nowadays, almost everyone who loves and knows how to make things has a tool such as a grinder at home. The correct name for this tool is an angle grinder (angle grinder). It is called the Bulgarian because the first mechanisms of this type were brought to the Soviet Union from Bulgaria.
In its classic version, an angle grinder is a hand-held power tool with an abrasive wheel for processing the joints of flat metal surfaces. But with the help of this simple mechanism you can also cut sheet metal, fittings, and ceramic tiles.
What to do if the nut is stuck?
A common problem when operating an angle grinder is a jammed nut. The first thing to do in such a situation is to determine the direction of rotation of the disk. It is recommended to unscrew the jammed nut in the same direction. There are several most effective ways to solve this problem.
- Use an open-end wrench and a socket head. To do this, it is necessary to grind off the surface of the open-end wrench by 4 millimeters, which is 17 millimeters. On the head of the 24 mm end, grind four protrusions that will align with the holes of the flange nut. The open-end wrench is then positioned under the disc and the socket head is placed on the nut of the angle grinder. After this, the ratchet should be turned in the direction of rotation of the disk.
- Use the gas key. Knowing the laws of physics and using a gas wrench, you can increase the moment of force, as the length of the arm increases.
But you shouldn’t use too much force, as you can dent the flange and damage the spindle rotation lock.
An angle grinder, or grinder, is a universal tool with which you can perform a wide range of actions. It has a simple mechanism of action based on shaft rotation by an electric motor. Necessary for cutting metal parts, polishing surfaces and grinding various materials. One of the common problems when using an angle grinder is the nut that holds the disc getting stuck. This does not allow you to replace the nozzle, and with strong impact you can damage its threads, break the key or break the case.
Notes and Tips
To reduce the likelihood of clamping the working disk on the angle grinder, you should load the tool smoothly to prevent the disk from braking when it comes into contact with the material being processed. The disk should be installed on the spindle with the pattern (marking) facing outwards (towards the clamping nut), since it is on this side that there is a wide metal washer on the disk.
If the disk jams or breaks, the movable clamp will be easier to handle since it will slide on the metal washer rather than on the rough surface of the disk. It helps to place a washer made of cardboard or other not too hard material under the nut. But this method is not specified by the tool manufacturer, since this may disrupt the balancing and does not guarantee the reliability of fastening the disk to the spindle. You can heat the locking nut using a blowtorch or gas torch. The heat source in this case does not matter. The main thing is not to overdo it with heating, so as not to damage the spindle bearing.
Source: SdelaySam-SvoimiRukami.ru
Reasons for snacking
As a rule, this problem occurs on angle grinders with a working surface diameter in the range of 150-180 mm. When a strong torque occurs, the disc bites. This leads to the fact that the nozzle cannot be removed using a regular wrench, even with serious physical effort.
The second common reason is the use of a grinder disc that does not correspond to the factory parameters of the tool. This leads to disruption of the entire mechanism and jamming. In rare cases, a nut cannot be unscrewed when rust appears on its thread. This most often occurs when the tool is used for a long time or stored without changing the attachment.
Important ! Discs for angle grinders are available in standard sizes, the diameter varies from 115 to 230 mm. The landing shaft itself is available with a diameter of 22.2 mm; when using older models, an adapter is required.
Chuck for an angle grinder, using an adapter
The angle grinder (grinder) has become an integral part of both home workshops and large enterprises. No wonder. High productivity, wide functionality, high spindle speeds and relatively low weight have made angle grinders a leader in processing metal and other materials.
But progress does not stand still. New devices to expand the capabilities of the device are constantly appearing on sale. One of these adapters allows you to install a clamping chuck on an angle grinder. What will come of this and how to safely use such a tool is proposed to be considered in more detail in the context of this article.
- Adapter device
- Installing a cartridge on an angle grinder
- What you need to know about the grinder to use it in conjunction with the cartridge
- Areas of application for an angle grinder
- Safety precautions
Adapter device
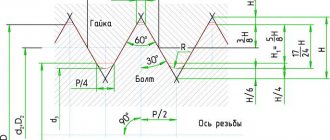
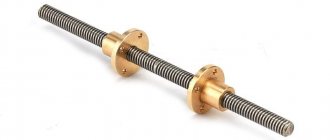
Actually, the adapter itself does not present any particular structural complexity. As a rule, it is machined from a hexagon for easy fixation with an open-end wrench during installation, and especially removal. On one side there is an M14 internal thread. It is designed to be screwed onto the external thread of the spindle of an angle grinder. The other end is machined with a standard M12 external thread corresponding to the thread of the clamping chuck. A hole was drilled at the end and a left-hand thread was cut for a bolt for additional fastening.
Attention! The M12 cartridge thread standard, although the most common, is far from the only one. When choosing an adapter, pay attention to the markings of the selected cartridge; at least you may come across a couple of standard thread types: M12×1.25 and 1/2 - 20 UNF.
There are also conical drill-angle grinder adapters for the corresponding chucks with conical fixation.
Installing a cartridge on an angle grinder
To install the cartridge on the angle grinder, you must perform the following steps:
- An adapter is screwed onto the “bare” spindle of the angle grinder
- A cartridge is screwed onto the other end of the adapter
- Having previously loosened the jaws of the drill clamp, screw in the additional fixation bolt. This operation can be conveniently performed with a screwdriver with a magnetized tip.
Note! All threaded connections must be tightened immediately. Since the system “self-tightens” during rotation, it is necessary to exclude free movement along the thread during the starting jerk. Otherwise, a high-speed machine is capable of tightening the threads to such an extent that the lock on the angle grinder can be broken when unscrewing. If excessive clamping occurs, then it is better to disassemble the angle grinder gearbox and unscrew it, having first clamped the gear in a vice.
What you need to know about the grinder to use it in conjunction with the cartridge
Before ordering this adapter, it is advisable to familiarize yourself with some features of angle grinders:
Depending on the model, the rotation speed on the angle grinder spindle can range from 6 thousand to 12 thousand rpm. Compared to a conventional drill, this is, to put it mildly, a lot. For normal operation of the drill, an average of 300–900 rpm is required.
- Availability of speed controller
Many manufacturers equip their products with a speed controller. In some cases this is simply necessary. For example, when using a Velcro disc for fabric-based abrasive wheels or when working with fiber wheels. Such modifications are the most suitable for installing a drill chuck.
If you decide to install a cartridge, then these features must be taken into account. Without a speed controller, using an angle grinder instead of a drill, we get an excellent “drill killer”. By the way, if you have the necessary knowledge and skills, it is possible to install the speed controller yourself.
Areas of application for an angle grinder
At first glance, this “application” may seem completely unnecessary, since it has very limited functionality. But is it? We present to your attention ways to use an angle grinder with a chuck.
- Drilling in hard-to-reach places is possible thanks to the angle grinder gearbox. An angle grinder complete with a chuck requires much less working space compared to a drill.
- If you have a speed regulator, you can attach a screwdriver bit to the chuck, which will also allow you to reach hard-to-reach places.
- By clamping the socket wrench holder into the chuck, we get a good impact wrench. A speed controller is required.
- If you attach an abrasive cutter in the cartridge, you can clean hard-to-reach places. It is noteworthy that this device will work much more efficiently than with a simple drill. In this case, high speeds decide everything; the device can be used without a speed controller.
- If you attach a flexible sleeve with a collet under the engraving cutters, you will get a powerful drill. You can attach engraving attachments directly to the chuck, without using a flexible extension.
- The chuck can also be used to fix a woodworking rolling cutter. There are several options: a) you can additionally make a movable base plate - as a result, we get a full-fledged manual rolling machine; b) in addition to the above improvements, you can rigidly fix the angle grinder with the chuck facing upwards - you will get a stationary router. 10 thousand rpm is the optimal indicator for a milling machine.
- By clamping the diamond cutter, you can process the stone, but then you will definitely need to adjust the speed.
The listed use cases are far from the limit. Here the master’s ingenuity comes first. But, as you can see, the speed controller is very useful for this layout. Often, regulators installed on angle grinders at low speeds do not ensure stable operation of the power tool.
It is advisable to purchase a universal regulator (dimmer) combined with a power outlet. Moreover, this device does not have a high price. For those who are comfortable with a soldering iron and have basic knowledge of electronics, there are many simple and original circuits.
conclusions
An angle grinder is a simple and useful tool for home or professional use. The most common problem when working with it is the biting of the nut that holds the disc. This can be dealt with using mechanical action on the mechanism (hitting the fastener, using a lever and grinding off the disk), or by chemical means - treating the threads with oil or a rust solvent.
This simple operation sometimes baffles even experienced mechanics or grinder users. The reason is that the disc is secured with a special nut. The nut has 2 or 4 holes into which a special key is inserted. This key was always included when purchasing an angle grinder. Perhaps it is still included in the kits.
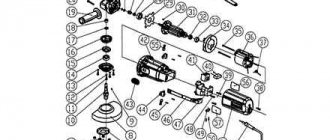
According to the instructions for the grinder, you need to press the latch, which is located on the back of the gearbox. When the shaft is fixed, use a special wrench to unscrew the nut and change the disk. But it is difficult to unscrew the nut if it is not clamped. And he almost always clamps it with such a nut. An attempt to unscrew the disk leads to breakage of the latch behind the gearbox.
Purpose of discs and attachments
Grinder circles differ in purpose for:
Cutting discs
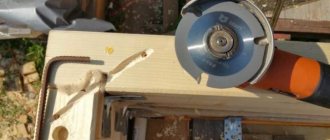
The most common task performed with a grinder is cutting various materials. The choice of tool material also depends on what material will need to be cut.
- Metal cutting. The metal cutting disc is made from crystalline alumina corundum, as well as from synthetic corundum called electrocorundum. The main color of metal cutting wheels is blue.
- Cutting stone and concrete. To cut stone, you should choose a disk made of another abrasive material - silicon carbide. This abrasive easily cuts white brick (silicate) and slate. But to cut red brick, some types of concrete or ceramic tiles, this wheel material is not suitable. Stone discs are available in green.
- Cutting ceramic tiles, red brick, porcelain tiles and concrete. A diamond disc is already used for these purposes.
This attachment is made of metal; an abrasive mass with diamond chips is applied to the cutting edge. The picture above shows a segmented saw blade designed for dry cutting of material. All-metal discs require water cooling during operation.
Read also: Machine for the production of air ducts
- Wood cutting. Although there are saw blades for wood on sale that are no different from circular saw blades, it is better not to use them for safety reasons. When working with such a tool, the user often suffers serious injuries due to jamming, rebounding, accidental slipping of the tool, etc.
Therefore, if you are still going to use a saw blade on wood, you should adhere to safety precautions. The grinder must have a protective casing and handle installed, and the user must wear a protective mask or goggles. In addition, you cannot cut materials with this tool that are not intended for it.
The safest are considered to be wood discs with a chainsaw chain installed at the end. If the tool jams, the chain remains in place and the disc rotates idle, which reduces the likelihood of injury to the user.
Roughing
If it is necessary to remove a layer of paint or other application, as well as rust from any surface, brushes are used. They come in disc form or in the form of a bowl with built-in metal wire.
The wire in these nozzles can be twisted or loose. Its thickness can also vary. The thicker the wire, the coarser the stripping, the stripping disc or cup-shaped attachment is used, and vice versa.
Grinding
Sanding discs and attachments are used for grinding and polishing various surfaces (metal, wood, plastic and others). Often a flap type grinding wheel is used for grinding. It consists of many “petals” made of sandpaper. The grit of sandpaper can be selected based on the required type of processing (finishing or roughing).
The sandpaper can also be attached to the nozzle using Velcro. Such a tool is screwed onto the angle grinder spindle.
For polishing surfaces, special wheels and attachments are produced that look like felt pads or fabric discs.
Sharpening
To sharpen a tool, sharpening machines (sharpeners) are usually used. But if you don’t have the latter, but have a grinder, then you can purchase a sharpening (grinding) wheel for it, which can easily sharpen almost any cutting tool.
The main difference between grinding wheels and cutting wheels is their thickness (at least 5 mm).
What solution to the problem is offered by specialists and amateurs + (Video)
- Install a newspaper gasket under the nut;
- Place a gasket from a plastic bottle under the nut;
- Replace the nut with a nut of a different design.
What is a newspaper gasket? This is a paper washer the size of a nut. It is put on the installed disk, and a nut is screwed on top. This piece of paper was a stumbling point, because the safety inspection always spoke about the harmfulness of such a decision.
Representatives of safety authorities treat the installation of gaskets made of any other materials in the same way:
- Cardboard;
- Paronitis;
- Gaskets made of various plastics;
- Rubber gaskets of various thicknesses.
But there is a solution that does not contradict safety requirements and allows you to install and remove the disk normally. This is a special nut that consists of two elements - a nut and a pressure washer. The use of such a nut does not require any shims, because with it the disk does not jam.
If you don’t have a special key at hand, then craftsmen suggest doing without a key. This does not mean that you can do without a key at all, but use a “gas key” or other device. To do this, you need to hold the latch, tighten the nut with a gas wrench and unscrew it. This way you can replace a jammed disk, but this is a very inconvenient operation for one person.
There are also suggestions to hold the disk with your hand and unscrew it. Maybe, but it’s unlikely that you’ll be able to change broken disks this way. It is better to use wrenches that are designed for removing and installing disks.
What thread is on the grinder?
› Other
articles (: 1 , average rating: 5.00 out of 5) Loading…
I'm interested because You need to explain to the turner through third parties (who don’t always understand) what thread to cut in the chuck. And is it the same for all Bulgarians (mainly interested in small ones)?
The thread is the same everywhere - M14 with a standard pitch.
2IS Thank you, otherwise I already bought a cartridge that says M12x2.5 (I’m writing from memory), so I thought about the step, and I measured the M14 with a caliper!
2Peter M. You can tell the turner M14x2, that will be enough, plus the length.
to Peter M.> cartridge with M12x2.5 written on it (I’m writing from memory)
Should be M12*1.25.
Is there really a 2mm pitch? I know for sure that the standard pitch for M12 is 1.75 mm, and for M16 – 2 mm, but I don’t remember for M14. But the fact that the angle grinder’s pitch is M14 is standard, that’s for sure.
2IS I just measured 100% with a special thread gauge. Grinder mil AG9-125MX, domestic thread gauge.
Dr.NO wrote: 2Peter M.
You can tell the turner M14x2, that will be enough, plus the length.
Thanks again for the comprehensive information! But it’s not me who will be speaking, but a woman, so it would be better to write it all down on a piece of paper.
And another question for reference. Will the drill chuck crumble at 10,000 rpm? which the Bulgarian develops? Otherwise, I’m planning all this to a greater extent to use the existing flexible drive with Dremel accessories.
Peter M. Are you afraid of getting wrapped around this cable later?
M12*1.25 is a small thread (for car spark plugs), but I don’t really believe in 2 mm, most likely it should be 1.75.
tsn wrote: most likely it should be 1.75.
she's not there, but there are 2
Well, two is two.
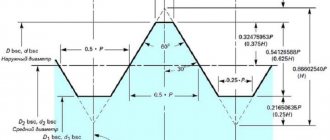
I got to the directory. Standard pitch: M10*1.5, M12*1.75, M14*2, M16*2. Moreover, according to GOST, M10, M12 and M16 are the first row (preferred), and M14 is the second row (there is also a third row, there are exotic ones like M11 and M15). For spark plugs, M14 is used with a fine pitch: M14*1.25. Standard of domestic drill chucks M12*1.25.
tsn wrote: M12*1.25 is a small thread (for car spark plugs), but I don’t really believe in 2 mm, most likely it should be 1.75.
Dr.NO is ABSOLUTELY RIGHT on the spindle of the angle grinder the thread is M14x2 (main) And for car spark plugs (it’s a shame not to know) M14x1.25
Sorry, about the candles - of course 14 mm, Ivan just wrote M12*1.25 - I thought that he attributed it to the grinder and stupidly copied it, paying attention only to the pitch, but did not look at the diameter.
There is also a third row, there are exotics like M11 and M15).
which need to be turned with keys of 15 and 20. I would kill these standardizers. Keys for 5.5, 7, 8, 9, 10, 11, 12, 13, 14, 15, 17, 18, 19, 20, 21, 22, 24! Seventeen varieties, and all are found, all must be had. This series would be halved. Sorry for the off
Peter M. wrote: Will the drill chuck crumble at 10,000 rpm? which the Bulgarian develops?
Of course not. I checked it myself.
2Serg Thank you, I was expecting exactly your answer! Now the question is removed, you can contact the turner with peace of mind.
Did you cut the thread?? How has the instrument performed over the years?
I will also give the chuck to a turner for thread cutting.
They say the chuck is slightly loose, so it won’t be possible to make an analogue of a wood router. Instead of an angle drill, I have a grinder with a native M12*1.25 thread, I’ll take a look there, but I haven’t gotten around to it yet
Crazyalone wrote: they say the cartridge is slightly loose
The adapter needs to be sharpened. And a smart turner should do it. -In the blank, an internal thread is cut for the grinder spindle. -The thread is turned with a cutter, the blank is tightly screwed on and the outer one is turned to fit the cartridge.
It won't hit you like that.
I understand everything - I don’t collect everything.
The essence of the idea is to put the chuck on an angle grinder and drill in inconvenient places due to its short length. All adapters are completely missing. It’s easier to buy a drill or router outright. The internal thread for the spindle is fine and is cut into the chuck, the problem is that the metric threads have tolerances that are not the same as the fine threads on which chucks and collets are screwed. simply because it is designed for dismountable fasteners, which may be subject to corrosion. And it still has to unscrew and tighten. A thread made too tightly will simply not fit in this case.
Adapter for installing a chuck on an angle grinder
The angle grinder (grinder) has become an integral part of both home workshops and large enterprises. No wonder. High productivity, wide functionality, high spindle speeds and relatively low weight have made angle grinders a leader in processing metal and other materials.
But progress does not stand still. New devices to expand the capabilities of the device are constantly appearing on sale. One of these adapters allows you to install a clamping chuck on an angle grinder. What will come of this and how to safely use such a tool is proposed to be considered in more detail in the context of this article.
- Adapter device
- Installing a cartridge on an angle grinder
- What you need to know about the grinder to use it in conjunction with the cartridge
- Areas of application for an angle grinder
- Safety precautions
How to remove a bitten disc from an angle grinder + (Video)
The use of new nuts solves the problem of removing the disk, but what to do with an already bitten disk? Even if the disk was installed correctly, it is not always possible to remove it. Practice suggests different ways to solve a problem. You can clamp the clamp and hit the nut holes through the extension in the direction of unwinding. This option is only possible with a working latch. But the latch may not withstand such a solution to the problem and break.
The second method is more logical. Under the clamping nut and lower support washer there is a gearbox shaft with machined chamfers. The lower support washer is put on them. A standard wrench cannot be installed there - it is very narrow. But you can take a regular open-end wrench set to “17” and sharpen it on both sides.
The turned key will fit into the gap, fit onto the chamfer of the shaft and secure it. Now, using any wrench, any nut will be unscrewed, and the disk or its remains will be removed from the angle grinder.

