Semi-automatic welding machine: operating principle
In order not to “kill” the device when using a semi-automatic welding machine.
To avoid injury, you should know about the safety rules and the operating principle of the device. The semiautomatic welding machine consists of:
- housing containing a powerful transformer;
- hose for supplying current and gas to the burner;
- cables for connecting to ground and the electrical network;
- wire feed mechanism.
The operating principle of the semi-automatic device is as follows:
- The welding current is supplied to the torch simultaneously with the shielding gas.
- The torch uses a welding wire as an electrode, which is fed automatically using a special mechanism.
- An electric arc is formed between the product being welded and the wire, which melts the metal in a protective gas environment, which allows you to obtain a high-quality weld without oxides.
The basic safety rules when working with semi-automatic welding machines are as follows:
- the body of the welding machine must be grounded;
- it is prohibited to use the device even with minor mechanical damage or any other malfunctions;
- in case of significant interruptions in work, be sure to disconnect the device from the electrical network and turn off the supply of protective gas;
- do not work near flammable and explosive substances;
- Use a protective mask and gloves while working.
Kaliostr0 › Blog › What a beginner needs to start welding work on a body
ATTENTION!
This note outlines one of the many options available to beginners when starting welding work on a car body. This option is based on the author’s experience and is intended to demonstrate the solution to two main problems facing a beginner: 1) what equipment and equipment to purchase in order to complete the work and not spend too much money. 2) how to perform welding work. SPECIAL ATTENTION! This note describes what the author himself uses (that is, I personally). Anyone who tries to accuse me of advertising - go... past!
Part 1. Equipment and equipment.
The minimum set of equipment will be: 1) A grinder with a circle diameter of 115 mm and a power of 300 - 450 Watt. It’s not worth taking a larger one, because... It will not be convenient to make cuts in local areas of the body. The circles for it have a thickness of 1 (for most panels) and 2 mm (for spars). Round brush. Cleaning disk (shaped) 5-6 mm thick (for grinding off excess welding. 2) Attachment for an angle grinder such as a belt grinder (file) for cleaning/grinding in narrow places
, and tapes for it. 3) Aurora Overman 160 or 180 welding machine and a spool of self-shielded flux-cored wire E71T-GS.
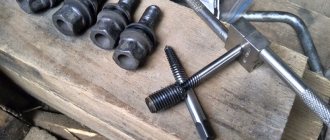
And drills for spot welding. You can read how to make these yourself from metal drills HERE 5) Hand tools: bench hammer, chisel, set of metal drills, hand brush with metal bristles. 6) Set of straightening tools for rough work
 Respirator with filter elements
9) Welding clamps (pliers)
Questions to answer from the list above.
Question: Why Aurora Overman 160 or 180 welding machine?
Answer: This is one of the few devices of professional quality and purpose, available at budget prices, i.e.
up to 30,000 rub. The device is simple to use, reliable, and does not require welder experience. Allows you to adapt to different tasks.
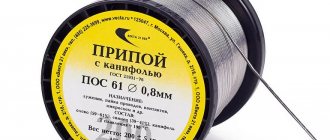
Q: Why E71T-GS self shielding cored wire? Answer: Self-shielding flux cored wire is essentially very similar to a consumable coated electrode, only the compound that generates the shielding gas around the arc is placed inside the wire. This wire can be used for welding under the same conditions as with a consumable coated electrode, i.e. even in the open air and in light winds. A gas cylinder, a gas reducer with a pressure gauge and flow meter, and a CO2 heater are not needed. This saves about 15,000 rubles
. But such wire smokes, and the welding site becomes covered with slag, which needs to be cleaned. 3) IMPORTANT! a) Welding must be carried out with straight polarity, i.e. “-“ must be connected to the burner. This mode provides maximum heat input into the body panel material, which allows welding at lower currents and in a more gentle (in the metal annealing zone) mode. b) Welding must be performed at an angle backwards, pushing the slag to the tail of the pool. Otherwise, slag will get into the weld pool, and the seam will turn out porous!
Universal self-shielding wire for body work - E71T-GS 0.8 mm thick. This wire is intended for welding low-carbon and low-alloy steels, which means that the strength of the weld material is higher than that of body panel steel, and is close to the strength of steel side members and other body elements made of low-alloy steels. Example: ESAB CORESHIELD 15 Don't skimp on wire quality! One reel of 5 kg. will allow you not only to master the welding process, but also to carry out repair work on about 50% of the body of a class C car, including a station wagon. An advantage will be the elimination of the influence of wire quality on the welding process, which will allow for faster mastery of the process.
Part 2. Training to work with a semi-automatic welding machine Aurora Overman 160 or 180 At the very beginning, watch the following videos (and don’t listen to the advisers who say that the middle knob on the Overman regulates the current strength!):
To practice, find pieces of metal 0.8 - 1 mm thick and try welding at the butt, through a cut-out hole, overlapping, experimenting (within small limits) with the settings. Before welding, the metal must be cleaned to a shine of paint and zinc coatings, grease, dirt and rust. Use a round grinder brush. E71T-GS wire tolerates small traces of rust or zinc coating easily. It is better to cook thin metal in spots with a step of 2.5 cm, with a cooling interval of several minutes before the next pass. With each new pass, the points are placed centrally between the previously marked points. After each pass, clean the points and spaces between them with a brush until shiny! What should be the result? 1. The sound of welding should be heard as a uniform hissing/buzzing sound. 2. The welding seam should be round and slightly convex, no more than 3 - 5 mm wide, covered with an even thin layer of slag/carbon deposits, and should not have pores/craters/holes. 3. When butt welding, the seam bead should be on both sides (thinner and less convex on the reverse side).
4. When butt welding and through a cut hole on the reverse side, the penetration of the metal should be clearly visible (a thin line of the back seam, or a bump for spot welding). 5. Welded parts should not separate easily when bending along a seam or moving parts apart after spot welding or overlapping. The metal rupture should occur along the edge of the seam (point), but not along the seam itself
.
Good luck, and don't be afraid to get started! But you shouldn’t rush straight into a car with a tool, without training.