Walking around someone’s dacha, you can hear an admiring exclamation: “look, what a cute and beautiful gabion”! What is hidden under this concept?
Gabions are light and transparent mesh boxes made of rigid wire, which are filled to the top with filler, usually natural or artificial stone. These practical and elegant containers made of metal and stone have several advantages :
- easy to install,
- durable and stable,
- compact,
- are not afraid of soil shrinkage and follow all the contours of the soil,
- environmentally friendly,
- with good sound insulation,
- waterproof,
- goes well with any country landscape,
- of course - very beautiful.
Thanks to these properties, gabions are used in landscape design for constructing fences, parapets, retaining walls, for decorating ponds, installing garden furniture, and also as a variety of picturesque decorative elements in personal plots.
Types of gabions
Most often, a gabion has the shape of a spacious box in the form of a regular rectangle with a length of 1.0-6.0 m, a height of 0.5-2.2 m and a width of 0.1-1.0 m. For example, gabions are sold 1x0.5x0 .5 m; 4x1x1 m; 1.5x1x1; 3x2x0.3m; 6x2x0.5 m; 1.5x1x0.5 m, etc. Such containers are great for fencing a flower bed, lawn or recreation area, as a “leg” for garden furniture, for delimiting an area or constructing an entrance area, building a fireplace, a mini-waterfall, a retaining wall, a fence, etc. etc.
There are also so-called flat (“mattress”) gabions , which are usually used to strengthen the bottom of a pond, a strip of coastline or a slope. Their traditional filler is river pebbles of all shapes and types. Due to their small height - up to 30 cm - such structures easily follow the curves of the ground surface.
Finally, there are also cylindrical baskets , which are suitable for strengthening various retaining walls, for laying out the bottom foundation, as well as for decorative purposes (“columns”, “legs”, “columns”, etc.).
Use in landscape design
Do-it-yourself gabions in landscape design will help:
- level the site by creating a multi-stage terrace;
- make retaining walls if the site has large elevation differences;
- fences and enclosures - you can completely, you can only the basement part, and fill the rest with other material or even boxes with vegetation;
- decorate the edges of the reservoir;
- make outdoor fireplaces, barbecues;
- make garden furniture from small gabions;
- accent flower beds;
- frame paths and stairs;
- form sculptures.
General design of gabions
For mesh boxes, special galvanized or galfan wire is used with a coating strength 4-5 times higher than that of a conventional mesh - chain-link (the latter is not suitable for gabions!). Also, sometimes the wire under gabions is covered with a layer of PVC, especially for underwater structures, to protect them from corrosion. The thickness of the wire, taking into account the coating, is usually 2-6 mm.
Container cells have the form of a rectangle or hexagon. Additionally, the strength of the basket is achieved through double torsion technology or welding. In the first option, double-twisted steel wire is attached to a rigid frame, and in the second, the rods are welded at their intersection at an angle of 90 degrees.
The opposite sides of one gabion are fastened with special strong braces. If there are several containers, they are linked into one monolithic structure using staples or a spiral. Large containers can be equipped with intermediate diaphragm compartments, which reduce the risk of swelling.
Ideas and techniques for making gabions - video
If you understand the intricacies of installation, it is possible to create gabions yourself. When choosing materials, many factors are taken into account: financial and labor costs, service life, aesthetics, combination with other elements of garden design. Frames made of welded gabion mesh are recognized as the easiest to install and the most attractive in appearance. However, such structures will undergo deformation if the walls are not reinforced inside with jumpers.
- Author: Natalia Bliznyuk
Hello! My name is Natalia. I live on land with a vegetable garden, a garden and seven cats. I have been growing plants since childhood. I started with cacti, then became interested in flowers, medicinal herbs and vegetables. Rate this article:
- 5
- 4
- 3
- 2
- 1
(3 votes, average: 5 out of 5)
Share with your friends!
Filler selection
Most often, various rocks are chosen as a filler for a gabion in the country , both natural and artificial formations. Suitable:
- granite,
- basalt,
- limestone,
- marble,
- diorite,
- pebbles,
- travertine, etc.
The main colors of this filler are grey, black and white, but you can also get red boulders or colored glass stones to achieve a beautiful decorative effect.
The optimal size of stones is within 7-20 cm. The main thing is that the stones do not fall out of the mesh. For “land” containers, it is recommended to choose stones whose size is approximately 30% larger than the size of the gabion cell, and for underwater structures - 50%.
It is also very important that the filler is durable (grade of stone - not lower than 400M, optimally - 1000M), frost-resistant (from 200-300F) and does not erode (not lower than 0.6% of weight), has a specific gravity of 17.5 kN/cube .m.
For fences or walls, it is recommended to select a stone with good sound-absorbing properties, but, for example, for an outdoor fireplace, the fire resistance and heat resistance of the filler should be taken into account.
As an alternative, for purely decorative purposes, brick, paving stones, wood, glass, broken tiles, concrete, etc. can be used to fill gabions. For example, installing gabions with imitation logs underneath is very popular.
Let's now take a closer look at installing gabions at home .
Advantages of built structures
Due to their weight, gabions are stable and do not undergo deformation, even in the presence of significant soil movements. Over time, they shrink, become thickened with soil particles, and overgrow with vegetation, which makes them more reliable and durable.
Some advantages of gabions:
- Gabions are much more economical than monolithic fixed slabs.
- It is easier to work with gabions than with a slab.
- Gabions provide the opportunity to show more creative imagination. Thus, the fixed panel has any prepared configuration, and the network can be created of any size and type and adapted to the shape.
- Due to the fact that iron mesh bends very well, the gabion takes on the configuration of the plane in which it is located. As a result, even during a rainstorm, the building will stand stably without supports.
- The block itself is very durable: the stones and metal hardly deteriorate from humidity and temperature fluctuations.
- There is no need for a special drainage system to drain the water.
- Such systems also do not require maintenance - it is quite easy to control external cleanliness.
- Gabion structures used as a fence absorb noise well and perfectly retain dust from the road that settles on the intersected relief plane of pebbles.
- Gabions can secure the base well in place if the structure is placed around its perimeter - pebbles are more reliable than textile fiber, sand, etc. Drainage is protected from corrosion.
- A gabion fence or structure is actually a safe product from an environmental point of view: stone and metal do not pose a threat to health and do not pollute the environment.
Gabions are iron grids that are filled with stones and other improvised materials. You can assemble the gabions yourself; the step-by-step instructions are quite simple.
Installation of gabions
Tools and materials:
- shovel;
- level;
- wire cutters and pliers;
- bucket;
- a flat board and a pole or crowbar for leveling stones;
- gabions;
- supports, sand, cement (for high gabions);
- long, straight rail;
- reinforcement for corners and bracing cables;
- metal spiral or wire crimps;
- geotextiles;
- filler for gabion;
- small crushed stone for filling the base.
Step 1. Preparing the base on the site
Clean up the site of the future gabion well. The site must be planned, without strong unevenness. Approximately the length of a shovel or a little less, remove the turf, making a small, even trench the width of the container, trim and compact it.
It is recommended to lay geofabric under the gabion at the bottom, sprinkle it with fine gravel on top, compacting everything. Of course, if desired, the site can be concreted, but this is not necessary.
Step 2. Folding the box
Unpack the package, lay the gabion horizontally on a flat area and make sure that it is free of defects. Then bend all the walls and collect the gabion into a container.
First, wire the corners of the box together, making sure that all the tops of the sides of the container are in line. Then “tie” the ribs with wire. Reinforcement must be driven, welded or inserted into the corners.
You can also buy more durable structures ready-made in the form of welded sections.
Step 3. Installing an empty box
Install the gabions evenly, without distortions, controlling everything level. It is allowed to slightly deepen the box by 5-10 cm into the prepared groove - the container will then sag under the weight of the stones and “fix”.
But for high fences or retaining walls, as a rule, support columns (for example, 60*40 mm) are set up and concreted in advance. Then a gabion mesh is “dressed” on top of them, which is secured to the supports using assembly pins with bolts or by welding. It is recommended to concrete the supports to a depth of approximately 50-70 cm with an interval of 1-1.5 m based on the length of the basket. To lower the gabion, the mesh from below must be cut in advance. After filling the stone, the support pipes will not be visible.
For standard gabions, you can weld longer reinforcement pins in the corners, which are then dug in or even concreted - this way the box will stand more securely. The empty box is temporarily supported with wooden spacers while the concrete hardens.
Step 4. Installation of subsequent blocks (if necessary)
To connect individual blocks, use a metal spiral or crimp brackets, thanks to which all your baskets will become one solid structure. After joining, be sure to check the straightness of adjacent edges and faces.
Temporarily attach a piece of wood to the outside of several empty containers to ensure the face of all gabions is level while the stone is laid. At the end of the work, the slats are removed.
Step 5. Filling with filler and installing braces
First, line the box with stones up to half its height. To do this, lower stone by stone one at a time, or even better, using a small board, trimming them with a pole. For smaller fractions, you can pour the filler out of the bucket, leveling it right in the basket with a crowbar and your hands. Select stones according to their shape so that when laid, they fill all the voids to the maximum and fit as tightly as possible.
After filling the lower half of the box, tighten the opposite walls of the gabion with special bracing cables in the form of stiffening ribs to prevent further swelling of the container walls under the weight of the stones. Place horizontal braces evenly in 4-5 cells across the entire width of the basket in increments of approximately 25-40 cm.
Then proceed to further filling the remaining half of the mesh with filler to the very top of the container.
It is recommended to fill taller gabions by a third first. That is, in this case, for tall structures, everything is done in three approaches: backfilling stones to a third, then placing braces, filling again to 2/3 of the container, ropes again, and finally stones to the top.
Invisible places of the gabion, its middle, but not more than 15-20% of the total volume, can be carefully laid out with smaller stones or even construction waste, having previously covered the slag or waste with geotextile. This does not deteriorate the properties of the container, but you can save money and time.
It is recommended to top up the gabion with a finer fraction 2-4 cm above the “horizon” of the top edge - this is necessary for further shrinkage of the stone.
Finally, close the lid of the mesh box by pulling it tightly and securing it with wire. First, pre-tie the corners of the lid, checking that the sides fit evenly everywhere, and then secure the ribs.
After installation, hose down the cobblestones to remove dust.
Step 6. Finishing the top of the gabion
Most often, the top of the container is left to “breathe”. If desired, the upper part of the structure can be trimmed with wood or various decorative boards. For example, metal brackets are placed in advance on the back side of the decorative panel, and after filling the stone, they are attached to the top of the container using wire.
To refresh the gabion and give it a natural style, you can plant green climbing plants in the space between the pebbles - it will turn out very picturesque.
At this point the work is completed. As a result, gabions will serve for many years as a practical and very beautiful decoration of the landscape of your dacha, adding a touch of aristocracy and elegance to it!
Nikolay Prilutsky, ©
How to make a small gabion from mesh for a summer residence: step-by-step instructions
Operating procedure:
- The construction site is cleared and leveled: the turf is removed and the weeds are dug out.
- Gabion walls are installed from meshes at the selected location, with a distance between them of 10–15 cm.
- Initially, plastic ties are used to fix the meshes together to estimate what the gabion will look like and correct any shortcomings. At the end of the work they are cut off.
- If the appearance of the structure is satisfactory, the bottom and sections of the gabion are connected with wire spirals.
- Geotextiles are placed on the bottom of the frame.
- The gabion is filled with stones in a layer of 7–10 cm, then a wire jumper is attached inside the walls. This algorithm is repeated until the top of the gabion.
- The gabion cover is secured with spirals or staples.
- The walls and bottom of the flower bed are covered with geotextiles. Then fertile soil is filled in.
In addition to evergreens, herbs and lavender grow well in raised gabions
How to make a flowerbed from gabion - video
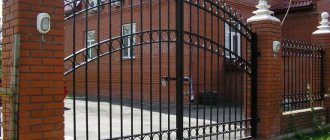
Installing a mesh fence with stones
The advantage of fences made from mesh frames is that they are erected without pouring a concrete foundation. And laying stones does not require cement mortar. Concrete will only be needed to install the support pillars. After drawing up a drawing of the fence, calculating and purchasing materials, the preparatory stage begins.
A drawing of a gabion fence is needed to accurately calculate the most expensive part of the costs - stones
Marking and preparation of the site:
- The turf and fertile layer of soil are removed.
- Pegs are installed and a cord is pulled to mark the outer perimeter of the fence.
- A trench of the required size is dug.
A gabion trench 15–25 cm deep, filled with sand or gravel, is necessary for the stability of the fence
The basic package of the gabion from which the fence is made includes:
- side and end walls - 2 pcs.;
- bottom and cover - 1 pc.;
- tightening jumpers - from 2 to 6 pcs. depending on the design of the fence;
- wire spirals for connecting the walls.
Step-by-step instruction:
- Digging holes for supports. Recommended depth is 40–50 cm.
- Pillars are installed in the dug holes and filled with concrete.
- After the solution has dried, the trench is lined with geotextile covering the bottom and walls and filled with sand. Each new layer is spilled with water to shrink.
- The fence frame is mounted, starting from the bottom. The sections are connected to the supporting pillars using clamps.
- The ends of the wire are treated with an anti-corrosion compound.
- Filler is placed inside the walls of the fence. Layers of stone alternate with lintels.
- The frame cover is installed and secured using wire spirals.
The disadvantage of a solid gabion fence is monotony, so it is recommended to use multi-colored stones
I have been looking at gabion fences for a long time, because at the dacha I want to isolate myself from the road. However, a builder I know criticized the idea. If you make a stone fence, then it should be on cement and with a foundation. The professional believes that gabions are a quick but temporary solution. Even galvanized wire rusts from damage that inevitably occurs during installation and laying of stones . A rusty fence will spoil the appearance of the site in a few years.
In addition, in Crimea, where we live, the authorities do not use gabions, although they are cheaper than an ordinary stone fence. Mountain roads are fenced with stone walls built using cement mortar. The fact is that gabions are short-lived, especially in humid climates. The use of mesh blocks is justified when you need to quickly solve a problem. And for the average summer resident, a gabion fence will not be cheap. This is the opinion of an experienced builder.