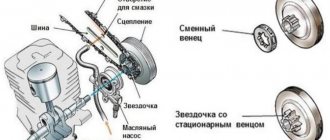
Varieties and main differences
A chain with a guide bar is replaceable equipment, which means, for example, when deciding which chain for a budget-class Stihl chainsaw is better, you can also consider carved elements of a different class. In other words, owners of budget gasoline chainsaws can choose a durable saw kit for their tool that is more wear-resistant.
When trying to figure out which chains are best for a chainsaw, you can rely on reviews from owners of different power units. You can do it differently by turning to specialists for professional advice. It is possible to make the right choice, focusing on the rating and characteristics of the replacement equipment. To select the ideal components that do not reduce the performance of the tool and cause its malfunctions, take into account a number of criteria, according to which the carved element differs:
- the quality of the material from which the chain is made;
- chain length;
- chain pitch;
- thickness of the replacement headset;
- groove features;
- features of the links (there are two types in total).
In a number of characteristics, branded and budget chains differ significantly. Nevertheless, some operators of fairly powerful budget gasoline saws manage to combine the unit with a perfect saw set produced by the companies Oregon, Husqvarna, Shtil. If you believe unofficial data, recently the Hammer and Power Sharp models have taken leading positions in consumer demand ratings for such products.
The higher the price range, the greater the likelihood that a branded chain will compensate for the technical imperfections of the tool by improving work results even when performing complex sawing work, due to an increased repair life, and due to the stability of a number of operational characteristics.
What to do if the chain sags
If the chain sags, there is a risk of injury to the operator - because the saw blade may break or simply fly off the guide sprockets. Of course, modern chainsaws have safety and emergency stop systems, but these systems do not always work correctly.
It is important not to install a chain with defective or damaged saw links on a chainsaw; in addition to the danger of breaking at any time, such a chain will sharpen the guide grooves of the bar, which will lead to its distortion, uneven cutting and failure of the guide bar.
What can cause a chain to sag during even short-term use?
- There may be problems with the guide bar. Sometimes, due to operator oversight or due to severe wear of the threads of the fixing bolts at the point where the guide bar is attached, vibration may occur, which causes the chain to loosen. It is necessary to check the condition of the fixing bolts and, if necessary, replace them with new ones. When the bolts are sufficiently tightened, such problems do not arise.
- If you handle your chainsaw fairly carefully, any chain can wear out over time. Trying to repair it or assemble one from several is a futile exercise. If the chain set has stretched due to natural reasons, then it would be best to purchase a new one.
- The asterisk is skewed. Misalignment of the sprocket teeth can cause sagging. In this case, it would be best to contact a service center to repair and adjust the position of the drive sprocket. Securing the drive sprocket in the correct position is quite difficult, because you have to dismantle many small parts, remove the guide bar, and then reassemble everything in reverse order.
Basic mistakes beginners make when sharpening
There are a number of recommendations on how to sharpen a chainsaw chain to avoid common mistakes common to beginners:
- you need to make the same number of movements for each tooth;
- equal forces must be applied to all teeth to avoid unevenness;
- if the chain is too dull, then a file will not be suitable for the job and it is recommended to use an electric machine;
- The angle is set taking into account the direction in which the logs will be sawed in the future.
When using a file, you must take into account that it removes metal shavings from the chain as it moves forward.
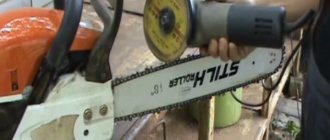
Watch the video on how to sharpen a saw with a grinder:
It is recommended not to touch the surface of the teeth with it when performing a reverse movement. Mostly all chains are sharpened at an angle of 30°, but after completing the procedure you should check them with a template. They do this using the following algorithm:
- the template is applied to the chain;
- check how far the depth limiter protrudes;
- The limiter is trimmed with a flat file.
Typically, the depth distance at the limiter is 0.65 mm, but in general, if necessary, it can be varied within 0.45 - 0.80 mm.
How to sharpen a chain correctlySource mauro-gianvanni.ru
Design features and operating principle
Units such as chainsaw and electric saw are made according to the same principle. They differ only in the design of the drive. In an electric saw, the motor is housed in a PVC casing. It also contains: a gearbox, a container for engine oil, a pump, a chain, etc. This design makes it possible to cope with fairly massive pieces of wood of various types.
In the operation of the unit, the quality of sharpening of the teeth, as well as engine power, is of great importance.
The principle of operation of electric saws is simple, but you should know how the tool works.
The nodes that are in the chain saw:
- working saw chain;
- engine;
- gearbox;
- drives;
- oil tank;
- wiring;
- frame.
A chain is nothing more than a successive number of links that are fastened together. The chain itself moves along a special plate (often called a “bus”). The material for the tire is selected to be of very high quality, with a high strength coefficient. In many ways, the operating life of a chainsaw depends on this unit: the better the tire, the better the electric saw .
Tires come in two different types:
- welded;
- solid ones that have a tip.
The latter are always made from high-strength alloys. In fact, any tire is a “layer cake” of various blocks (at least three), with a driven “star” being inserted into the structure.
A single device containing a tip is very convenient for use in large-sized instruments (where the length of the bar is longer than the standard format). The single, one-piece design significantly reduces friction (up to 12%). A unit with a tire made of heavy-duty alloys is best suited for work: they can withstand high mechanical loads and significant heat. Also, durable high-quality alloys do not react to interaction with mechanical microparticles and can serve for a long time.
When working with a power saw, it is important to understand that this tool represents a source of increased traumatic risk. A “kickback” may occur, that is, in this case the power saw may unexpectedly jump to the side and cause injury. Similar incidents occur when too much force is applied to the end of the saw bar, which rests on the work material. To ensure that such cases occur as rarely as possible, companies equip the units with a special brake: it blocks the chain automatically
READ How to Cut a Thick Board with a Circular Saw
An automatic chain brake also has a second name - inertial drive. Its operation is due to the presence of a protective element (shield). It covers the worker's left hand. During the labor process, the shield is placed in such a way that it covers the hand. During operation, if an impact occurs, the hand rests on this element, the mechanism stops. Such a device significantly reduces the possibility of injury from a working mechanism.
Proper lubrication of the chain itself is very important. As a result of heavy loads during operation of the unit, an inevitably high temperature occurs and the coefficient of friction of the materials increases significantly.
There is a special container on the saw into which machine oil is added. During operation, oil is supplied in portions to the working unit (sprocket, chain ). Expensive units (from Bosch) have a special oil supply dosimeter, which contributes to more rational consumption of the valuable product and increased unit performance.
There are working rules that should be followed by both a novice master and a specialist.
- During operation, the throttle valve must be constantly open.
- Sawing at an angle of 90 degrees away from you is not recommended. The tool should be held at a certain angle from the body.
- You should strictly follow all recommendations that are mentioned in the instructions for using the electric saw.
- Only original components can be used.
- Before starting repairs, the tool must be de-energized.
- It is recommended to carry the tool in a casing.
- You should not lift the electric saw above your shoulder while working: it is life-threatening.
- If the tool is wedged in the material, the saw is removed with the utmost care.
- One should be wary of the return impulse, which poses the greatest danger to the employee. A switched-on electric saw that jumps back can cause injury.
- Particular care should be taken when working with logs that have uncut knots. The probability of jamming in this case is very high.
- You cannot work with a tool that is not in order and adjusted.
- Before starting work, a small test run should be carried out.
- An important component to keep an eye on is the chain. If the chain tension is poor, it will damage the tool and also increase the risk of injury.
Sharpening by machine
The most effective method is considered to be using an electric machine, which allows you to achieve factory accuracy. Let's figure out how to sharpen a chainsaw chain in this way, achieving the desired result with minimal time and labor costs. The saw is placed in a special hole. It is necessary to loosen the screw that clamps the chain and adjust the desired level of sharpening according to the tables or the bluntest tooth. The process is carried out in accordance with the selected parameters, after which the saw is treated with machine oil. You can use two methods when sharpening with a machine:
- Consecutive action on the teeth one after another, changing the polarity from time to time.
- The teeth are sharpened one at a time, first the right and then the left, which makes it possible to do without changing the polarity.
Sharpening a chain with a machine Source instrumentgid.ru
Watch the video for instructions on sharpening a chainsaw chain using a machine:
Tips for use
There is little knowledge about how the chain on a chainsaw is tightened. You need to properly care for the saw, then you will extend the life of not only the chain, but also the entire mechanism. Here are some operating tips :
- Clean the air filter regularly and lubricate it with oil. If necessary, replace the filter with a new one.
- Before starting work, always check that all nuts and bolts are securely tightened so that the mechanism does not malfunction during operation.
- Regularly lubricate the bearings, and also do not forget to clean the spark plug.
- Lubricate the driven sprocket. And after using a chainsaw, do not forget to clean it.
- Always lubricate, sharpen and tension the chain on time, then there will be no problems with the bar and grip.
If you use all of the above tips, your device will last much longer than the warranty period.
Source sampit.ru
Household, semi-professional and professional hand-held chainsaw equipment, regardless of cost and performance characteristics, has an identical design. The cutting set, which includes a chainsaw bar and saw chain, belongs to the category of replacement equipment.
The decision on which tire to put on a chainsaw is made by the owner, taking into account many factors. First of all, this is the compatibility of the seat and the channels for supplying lubricant to the working area, engine power, and the specifics of the work to be done.
Specific assistance in choosing a tire independently can be provided by recommendations from experienced specialists or information from the instructions for use.
In particular, a long saw set is preferable for felling and sawing large-diameter trees, while a short saw set is preferable for crowning trees and preparing for the installation of construction timber.
Why does the chain get dull?
There are several reasons why a chain becomes dull quickly for inexperienced users. This mainly happens for the following reasons:
- Using low-quality oil not recommended by the manufacturer;
- Incorrect setting of parameters, the gap between the edge and the limiter should be 0.7 mm;
- Lack of lubrication of the tool before work. Immediately before each use, lubricate the drive sprocket with M8 oil.
- There is no normal chain tension; during installation, it must be positioned exactly along the grooves located on the bar.
Security measures
Before you start working with an electric saw, you should make sure that there are no foreign solid objects: the presence of hard elements can damage the tool. It is forbidden to eliminate a defect in the soil, particles of which can clog the grooves through which oil enters the operating units. Lack of regular lubrication will “kill” the tool in a very short time. You should carefully monitor the wedge of the tool: overheating of the metal leads to loss of performance characteristics, which means the service life of the tool is sharply reduced. It is very simple to determine that the saw requires sharpening: if the chips “come out” are too small and there is a dark coating on them, then this indicates that the saw is “dull.”
The explanation for this phenomenon is simple: the saw cannot cut the material and crumbles it, so small fragments appear. There should be no radii on the saw part, that is, fragments with torn out areas. The shape of the teeth and the working cutting edge must remain unchanged.
Before starting repair work, it is important to do a preventive inspection and correct diagnosis of the instrument. The complexity of the repair directly depends on the severity of the breakdown. It often happens that it is impossible to “solve the issue” on your own. There are breakdowns where you need to use special equipment. Under such circumstances, the tool must be taken to a specialized service center that has the appropriate approvals and certificates for repairing such equipment.
In the next video you will find repairs to the gearbox of an electric chain saw.
Sources:
https://ingener-pto.ru/2019/12/12/kak-podtjanut-cep-na-pile/ https://fishingsecrets.info/kak-pravilno-tochit-cep-na-pile/ https:// stroy-podskazka.ru/instrumenty/pily/remont-elektro/
PowerSharp technology
If your chain is PowerSharp compatible, you can save time and effort. Sharpening occurs without removal from the tire in just a few seconds. The system includes:
- sharpening device;
- abrasive bar;
- saw bar.
Let's figure out how to sharpen a chainsaw chain using PowerSharp in just three steps:
- Install the chain with the bar;
- Secure the beam installed directly on the tire;
- Place the end of the saw somewhere and run the equipment for a few seconds.
Sharpening with PowerSharp systemSource greenindustrypros.com
Compliance with all recommendations will allow you to avoid damage to the chain and carry out the operation in compliance with technological requirements.
Watch the video on how to sharpen a chainsaw chain using traditional methods:
Causes of uneven cuts
In amateur chainsaw practice, many questions arise related to the cutting going in one direction or another. This malfunction creates significant inconvenience when using a chainsaw in wood construction technologies.
The reason for this phenomenon is the deformation of the tire, which is hardly noticeable to the eye, improper sharpening or uneven wear of the cutting links of the chain. If professional adjustment of the chain does not give a positive result, the problem is eliminated by replacing the entire set.
Source opilah.com
Innovative types of chainsaws enable their owners to perform work without much effort. The work will be completed perfectly and in the shortest possible time if you install the chain on the chainsaw in a timely and efficient manner.
Before you begin assembling the chainsaw, you need to check that all components are present. It is also important to follow safety precautions and be sure to wear gloves for protection. This is a necessary condition for any contact with the saw chain, since there is a risk of injury from the chain teeth.
The saws come with a quick chain tensioner, a side tensioner and a front chain tensioner.
Following the step-by-step instructions, we prepare the saw for work.
Briefly about the main thing
You must constantly monitor the chain and use expert recommendations when sharpening it. This is necessary, since good cutting of wood and ease of use when working with a chainsaw depend on it.
You can understand that the chain has become dull if, when sawing, dust flies from the tree, not wood shavings, as well as the fact that the wood is difficult to saw, the chain is covered with rust and has lost its shine.
Sharpening of a chainsaw chain is done on a special machine or manually, as well as using a grinder. In all these cases, safety precautions must be observed.
Are there ways to extend the life of an existing sprocket?
The main ways to extend the working life of a chainsaw drive sprocket:
- use several chains (preferably three). This method is the most gentle and convenient for the chainsaw owner in that there is no need to constantly tighten a chain worn out by intensive work. Operating three chains in turn will save the life of the sprocket and delay its replacement;
- high-quality maintenance of the drive sprocket bearing. This part plays an important role in the functioning of both the drive sprocket and the engine. For lubrication, it is recommended to use a special lubricant. The sprocket bearing is not constantly engaged, but only at idle speed, and therefore requires periodic lubrication. You can use a tire nose lubricant, such as standard lubricant from Repsol or Husqvarna.
How to properly put a chain on a chainsaw: direction
When considering how to properly install a chain on a chainsaw, we note that the modern version of the tool has a special installation wheel. Due to it, the procedure is significantly simplified. Among its features, we note the following points:
Considering how to properly put a chain on a chainsaw, we note that first you should prepare a flat surface. Due to this, the possibility of damage to the instrument can be eliminated. After this, the main part of the tool, the bar and the chain are laid out separately. The next step is to remove the guard that is designed to protect the sprocket. In most cases, it is fixed using a regular wing nut. On the tire, the tension sprocket turns to the right until it stops. It is in this position that the tool is installed. Next, the chain is gradually applied to the fixing element. A fairly common question is which side this element is placed on. Installation starts from the top, turning the chain so that the bar is on top. Such operations should be performed exclusively with thick gloves that can withstand the impact of the cutting edge. The cutter on the end surface should be positioned forward. Both elements are put on the sprocket. The next step is to reattach the chain sprocket cover
It is important to ensure that the pins align with the holes. Incorrect fixation may cause rattling or other problems. It is necessary to ensure that the guides fall into a special groove. The condition of the chain is checked visually after it is fixed.
The next step is to directly check whether the chain has been overtightened. To do this, release the chain brake and pull it along the line of travel. The inspection is carried out exclusively with special gloves.
In general, we can say that the procedure in question is quite simple to perform and does not require special tools. However, not all chainsaws are as easy to maintain as stated above.
Bus problems
Today, a common problem associated with unreliable fixation of the tire. It is characterized by the following features:
- The housing with the guide element is secured with a bolt.
- The connection is ensured by two plates, one of which is located on the body, the second on the one that is intended to guide the chain during operation.
- The drive sprocket and tire support are protected by a special casing, which eliminates the possibility of damage to the main elements.
- When the locking bolts are loosened, the structural element in question begins to move and vibrate during operation. This problem can be solved by tightening the fasteners.
Other defects simply cannot be resolved. In most cases, defects become the reason why you have to purchase a tire and replace it.
How to install a saw chain and guide bar
Installing the chain involves checking its tension after each threading session. A poorly secured part slides off the surface of the tire and injures the worker. Inspect the tension with your hands, protecting them with gloves. In addition, new chains change their length during operation, so checking should be carried out very often.
Sometimes during the work an important detail arises: it is not possible to install the chain without additional heating and corresponding deformation from the lower part of the bus. No working professional will ignore the tension of the chain in a chainsaw. By pulling back the track slightly, he instantly assesses the amount of chain stretch.
The sound that appears at the moment of impact may be dull and short. The track is tensioned sequentially, performing several simple operations. Inspect the fuel valve. The worker must ensure that the fuel system is blocked. You can remove the spark plug wiring or open the decompression valve. The power saw plug is pulled out of the socket.
The chain is turned in the direction of its rotation during operation. Defects in chain tension are noticeable visually: lower sagging of the caterpillar is formed. Control is carried out by adjusting the circuit at certain time intervals.
There should be a constant reserve in the upper part of the shank that is formed when the chain is pulled. When pulled too hard, the track barely turns and quickly stops moving. Adjustment of the chain in the working position is not allowed. Such negligence leads to deformation of the tire or breakage of the crankshaft. The track tension during operation is carried out without tools. The maximum cutting depth is mm, the weight of the cutting equipment is 9.4 kg.
All that remains is to tighten the nuts and check the tension. If adjustment is necessary, adjust the tension again
What is important to know: when the chain is in operation, due to frictional forces, its metal heats up greatly and expands, and its length increases. Therefore, it is important to regularly check the tension and adjust it in time.
How to install a bar and chain on a chainsaw, see the following video, which presents a clear algorithm of actions: When removing an old chain or putting a new one on the chainsaw guide bar, it may become tangled.
This can also happen due to careless transportation. When the chain is entangled, it curls into rings. Due to the lack of flexibility in the transverse direction, it is very difficult to untangle with bare hands, because when you try to untangle one ring, a new ring will form in another place. You need to place the chainsaw chain on a horizontal surface and untwist the rings in different directions, while pulling the blade in such a direction that the diameter of the rings increases.
Sooner or later the chain will unravel into its natural position. There is another way - you can rivet one link of the chain and straighten it, then connect it into a ring and rivet the riveted links back. Many, even the most experienced users of chainsaws, have encountered in their lives a situation where the chain jumped off the guide bar during operation. The most common cause is insufficient chain tension or wear.
Although sometimes the problem appears due to the incorrect position of the sprocket relative to the axis of rotation or a loose saw bar on the chainsaw.
The chain is an important element in the design of a chainsaw. It bears the greatest load during operation, so high-quality and systematic care is required.
Nowadays there are many models of chainsaw chains on sale. Click to cancel reply. They're discussing it now. A plastic border at the dacha is beautiful, practical and economical!
Why the chain flies, find out the reasons
How does an oscillating spindle machine work? How an oscillating spindle machine works What is tableted salt and what is it used for Surface grinding machine: advantages and disadvantages Eccentric grinder: main points Vitamin greens at any time of the year: vegetable garden on the windowsill How to choose the right electrodes when welding with an inverter.
How to choose a sandblaster for home use. We tell you how to repair an inverter welding machine.
How to lubricate a power saw chain - a procedure for beginners
As a rule, the chain of an electric saw is lubricated with high-quality automotive oil . The only important point. You should not use waste as it will only damage your garden tools.
Before adding oil, disconnect the saw from the power source. If you saw
is equipped with an automatic oil supply system, the lubricating fluid must be poured into a separate container with the tool, after which work should begin.
If you notice that the chain on your electric saw is NOT lubricated, even if there is a large amount of oil in the tank, then first of all you need to check the plunger pump of the tool. In most models, it is made of soft plastic, and teeth on it deteriorate very quickly. In such cases, replacing the part will be quite expensive, so many owners prefer to buy new electric saws.
If there is no such automatic lubrication system in electric saws, then lubrication of the chain is done in a completely different way. To do this, the chain must be immersed in oil and then reinstalled on the saw. The chain must be generously lubricated, otherwise the saw motor experiences heavy loads due to lack of oil.
Installing a chain on a chainsaw, how to pull it correctly and check the tension
If you have a chainsaw at home, you should know that it requires special care. It is necessary to periodically clean and sharpen the chains, clean the air filter, oil supply and tires. And, of course, you need to monitor the tension of the chain, since if the tension is poor, there is a risk of not only damaging the dust, but also your health if the chain flies away at high speed.
Varieties
Hobby class saws are usually equipped with guides of 30-40 cm. Semi-professional saws have tires with a length of 38-45 cm. But on professional powerful models, chain guides from 50 cm to 90 cm are installed. If you have a long chain, the load on the engine increases, and at the same time At the same time, the force of movement on each tooth of the chain decreases.
Tires for chainsaws from Husqvarna and other brands correspond to the installed chains and differ in the following pitch:
- 0.375" pitch guide for low chain profile;
- 0.325" pitch guide;
- 0.375" pitch guide;
- Guide with 0.404 inch pitch.
The thickness of the groove along which the saw chain moves also varies. The following chain guides are available:
- Saw guide with 0.043" slot thickness;
- Saw guide with 0.050" slot thickness;
- Saw guide with 0.058" slot thickness;
- Saw guide with 0.063 inch groove thickness.
Another difference between guides is the number of links in the chain intended for them. They are marked “DL” (from the English drive link - leading link). For fun, you can independently determine the number of links by counting them. The photo shows different types of guides.
Possible faults
There are several possible breakdowns of electric chainsaws that you should definitely be aware of.
- A bad gearbox that has a rigid coupling with the armature of the electric engine. As a result, the entire load goes to the power plant. If the chain becomes dull, the load increases, which increases the risk of engine overheating several times. Also, under such conditions, wear of parts increases sharply. You should sharpen the saw regularly and do not press too hard during the production process.
- Another “weak point” of electric saws is power surges in the network; the engine can be the first to suffer from them. If there is no special protection, then during voltage surges the power plant may simply fail. Too strong protection also negatively affects the performance of the unit - power decreases. The golden mean is important here. Domestic products are good in this regard: they have found a rational solution to this issue.
If the tool does not function, then you must first check the presence of current in the network. You should also check:
- the brake mechanism of the chain itself;
- the possibility of breakage of the inertial canvas;
- clutch and chain tensioner.
Typically, adjusting the shield allows you to eliminate the defect in a short time. The cable is also checked: if it is damaged, the unit does not work.
The power of the saw is significantly reduced if the carbon guards wear out. The chain may work jerkily: it stops, then starts functioning again. If the chain serves for a long time, then the risk of just such a malfunction increases. First of all, in such circumstances, the brake band, which has worn out over a period of long use, is replaced.
If there is any malfunction during operation of the saw, a sharp strange sound appears. It occurs due to a deficiency of lubricating substances and the entry of mechanical microparticles into the working unit. In this case, you should disassemble the tool and thoroughly clean all working elements.
How to properly tension a chain on a chainsaw
Often the engine of the unit heats up too much, the reasons may be:
- poor air exchange, clogged air ducts;
- carburetor malfunction;
- the engine “rests” little during operation;
- gearbox is faulty;
- old grease;
- the winding is shorting.
If the saw makes a “crooked” cut, then this confirms, first of all, that the teeth are dull.
It is also possible that the tire is about to fail. If the chain does not work, then this indicates a defect in the clutch itself or the sprocket.
Please note: it is better not to install Chinese-registered spare parts into a tool produced by the world's leading manufacturers. Sooner or later the device will break down, and it is unlikely that it will be possible to restore it. If the body is severely damaged, it is better to send the electric saw for service, because this damage is very serious.
Measures such as sharpening the saw are also very important. This should be done regularly so that the engine is subjected to minimal stress. If you neglect regular sharpening and do it rarely, then the electric saw blade will inevitably retract, it will be subjected to too much stress and will eventually become unusable ahead of time. You can do the sharpening yourself, but it is best to take the saw to a service center. They do this work using special equipment. This is done as follows:
- the chain is removed from the bus and mounted on the equipment guide unit;
- the chain is tensioned using a ratchet, which fixes its cutting tooth;
- There is a device on the unit that allows you to determine the correct angle (protractor);
- using an abrasive device, a small layer is removed, which is the final goal of all work;
- After processing the first tooth, work on the second tooth follows, and so on.
Functions and structure of a chainsaw
In order to understand the features of the procedure in question, you should consider in detail the devices of the chainsaw. Among the features, the following points can be noted:
- The main part is represented by the engine. In most cases, a structure with one cylinder is installed, since this is quite sufficient for cutting.
- The piston system is two-stroke and air-cooled. During operation, a relatively small amount of thermal energy is released, so blowing is sufficient to remove heat.
- As in many other designs, this one requires oil, which ensures smooth movement of the moving element. Oil is added directly to the fuel. Depending on the design features, oil and fuel are mixed in the range of 1:20 or 1:50.
- The air filter can also be called an important structural element. Fuel is mixed with air to produce a specific mixture, which is fed into the combustion chamber. If you do not regularly clean the filter element, there is a possibility that debris will get into the cylinder block. This will cause rapid wear or even jamming of the device.
- A special design is presented as a starter, which is driven by a rope with a handle. If the rope is pulled strongly, the flywheel is set in motion.
- The main working mechanism is represented by a tire with a fastener. It is designed to guide the chain and secure it.
- A classic chain consists of three teeth: driving, cutting, connecting. The cutting edge is secured using rivets.
A fairly common situation is when you have to pull the handle for a long time. It is due to the fact that the carburetor does not mix fuel with air correctly. In most cases, it is enough to configure the device in accordance with the operating conditions. A chainsaw will not last long if proper maintenance is not provided.
Check the stretch
It is important to check the voltage in time. As noted earlier, the cutting edge can wear out quickly if it sag or pulls too hard. The work to check the condition of the circuit is carried out as follows:
- To begin with, the braking system is disabled.
- With gloves, the chain on the horizontal bar is held manually.
- If it goes to the right and does not sag, then everything is fine.
- If it passes from one end to the other, then the tension should be slightly reduced, since there is a possibility of rupture during operation.
Proper use of your chainsaw will significantly extend its service life. Basic recommendations:
- The spark plug should be cleaned periodically to ensure easy starting. Over time, carbon deposits may appear on the surface, making it much more difficult for the fuel mixture to ignite.
- Bearings are regularly lubricated. For this, a special substance or motor oil is used. If the device is operated in dry mode, there is a possibility of significant wear. Adding oil solves quite a lot of problems.
- The air filter must be lubricated regularly and, in some cases, lubricated with oil. If necessary, the filter is replaced with a new one. Do not forget that the filter element eliminates the possibility of contamination entering the cylinder block.
- Before actual work, make sure that all fasteners are well tightened. To do this, you need to carry out a visual inspection every time before using the chainsaw.
- The driven sprocket must also be constantly lubricated. In addition, there is the possibility of clogging. Otherwise, the element will wear out quickly.
- The chain should be periodically sharpened and coated with oil. Operation with significant defects is not recommended, as this significantly increases the degree of wear.
In conclusion, we note that it is necessary to carry out timely maintenance, since otherwise even a high-quality tool will not last for a long period. In some cases, you have to take pollen from special companies that provide the appropriate services.
How to Tighten: Installing a Chainsaw Cutter
We have dismantled the main causes of chain sagging. How to install a chain on a chainsaw is described in the paragraph above. Now you need to properly tighten the chain and check that it is tight.
Tools required for work
When starting riveting, the first thing you need to do is remove the link from the chain; for this you will need to rivet the rivets. For riveting, you will need an anvil, a hammer, a thin bit, a vice, a grinder with a grinding wheel or emery cloth. These tools do not allow for quality work, but everyone has them. A more cultured and gentle way is to remove the rivets using a special punch.
There are several designs of punches; we’ll tell you about the most popular.
Rivet punch
A punch is a machine that is used to remove rivets.
It is mechanical and works on the principle of a press. The kit includes a special anvil, in which grooves are selected for installing the headset with different pitches. There are also replaceable tips with which the rivets are extruded.
We invite you to watch a video that shows how to rivet a saw chain using a mechanical punch.
After the chain is riveted, it is necessary to remove the old link, install a new one and rivet it. For this purpose, a riveting-rolling machine is used. It is electric, so it costs much more than a punching machine.
Riveting and rolling machine
The machine is equipped with a gear motor with high torque.
Used for riveting and rolling headsets in increments from 1/4″ to 0.404″. The cutting depth of chains that can be riveted using this machine is from 1.1 mm to 2 mm (0.043″ - 0.080″). Special rotating inserts and anvils for different types are supplied with the machine. Inserts and anvils are marked. Marking “A” means that the inserts are designed for a headset with a pitch of 3/8″ and 0.404″. “B” is for 1/4″ and 0.325″.
The machine works as follows. The saw chain with a new link and rivets is installed in the guide inserts. The repair link with the rivets installed in it is pressed by the working roller against the anvil, after which the engine is turned on and the roller begins to rotate, gradually crushing the rivet, at this moment the machine operator slightly increases the pressing force of the roller by tightening the adjusting screw. For clarity, we suggest watching a video about the operation of a riveting-rolling machine.
It is not profitable to use such a machine for riveting houses, because it is expensive. If you do not need to rivet regularly, you can do without it. Let's look at how to shorten a chainsaw chain with your own hands without using expensive machines. You need to start by riveting and removing the link.
The advantage of the machine is that the rivets riveted with its help are practically no different in quality from those riveted in the factory.
Design problems, differences between different models
Branded chainsaws have a special design that does not allow changing a worn-out drive without removing the clutch and other parts of the chainsaw. That is, the saw needs to be almost completely disassembled. More modern models of expensive chainsaws are always equipped with a special key.
Also, the owner of a chainsaw may encounter the following nuance: on Chinese imported chainsaws or electric saws, the sprocket on the clutch mechanism may be located in an unusual way. On older models, when the chain teeth wear out, you need to unscrew and replace the one-piece drum with the drive. On newer models, the sprocket can be replaced separately.
The main signs that the sprocket needs to be changed:
- The chain on your chainsaw has been replaced twice (one of the current operating rules for chainsaws and electric saws is that if you use the tool frequently and actively, after two chain changes you should replace the drive sprocket);
- the quality of sawing deteriorated, the chain began to need tightening more often;
- you have installed a new chain to which the old drive sprocket does not fit (this part is not universal, and also has its own pitch, in addition, the pitches of the drive and driven chain sprockets must match, otherwise the tool will not work);
- you are using a different tire, shorter or longer.
When to tighten the chain
You can determine that the main part of the chainsaw needs to be tightened by its appearance. At the bottom it hangs freely, but at the top it can become tilted to the side. If you continue to work with such a cloth, it begins to wear unevenly, gives an uneven cut and may tear during work.
Algorithm for tensioning a chain on a chainsaw
To adjust the shape of the web, tension the chain. The procedure is possible in several ways, quick and more complex. To make this easier, you need to move the tightening bolt clockwise until the chain slack is eliminated. A more complex method requires more time:
- Find the place where the tire is attached to the body.
- Unscrew the nuts and loosen the links by pulling the top edge.
- Using a chain tensioner on a chainsaw, you need to tighten it to the desired level.
- Check the tension level.
- Secure the tire.
To replace the chain with a new one, place the tool on a table or workbench. Next, unscrew the tire, remove the old blade, and clean the base. The new structure is placed so that the links go in the opposite direction from the body. Then, using a tightening wrench, you need to tighten it to the desired level.
Checking and adjusting the mechanism should be carried out when the structure is cold. If you try to tighten it after work, the sprocket becomes deformed or other elements of the system fail.
Ways to check the degree of tension
After installing the chain or already during sawing, the master should periodically check how the chain is tensioned. There are several ways to do this. You need to try to manually move the links in a circle. They should move in both directions without effort or with slight resistance, but without signs of jamming or extraneous sounds. If the blade sticks, makes a creaking sound, or makes a friction sound, you can judge that it is tightened too tightly or is not working properly.
The second way to check the degree of chain tension is to, after adjusting in the middle of the bar, pull the link up. It should tighten, but come out of the groove where it is installed in the gutter by no more than 2/3 (3-4 mm). The canvas should not sag at the bottom.
If the tensioned chain passes all checks, you need to start the engine and let the saw idle. Then turn off the saw and check the tension again. If there is no sagging or jamming, the tool can be used for its intended purpose.
When to shorten or stretch a chain
If the test determines that the element is so slack that the adjusting screw does not help return it to normal, the only way to correct the situation is to shorten the chain. The specialist removes several links, no more than 2, until he reaches the desired length.
It may be necessary to stretch the chain, that is, add new links to it, if it is torn and some of the elements are lost. You can buy elements in the store or using a donor, an old chain
It is important to ensure that it is similar in thickness, link pitch and shape
It is not necessary to contact a specialized service for this purpose. You can also do extensions or shortening at home if you have the appropriate equipment. To work, you need a riveting and riveting machine, spare links, and rivets.
There are many reasons for chain stretching on a chainsaw, from breakdown of other elements of the system to violation of operating rules
In order not to bring the condition of the mechanism to a critical point, when expensive repairs are required, it is important to periodically check the degree of fit of the blade and eliminate defects at the initial stage. If necessary, you can extend or shorten the chain at home if you buy the appropriate equipment
Poorly fixed drive sprocket
One of the possible options for sagging on your device is the drive sprocket . Most often, everything happens because the star is poorly recorded. Now we will tell you how to properly secure the chain and then put the chain on the chainsaw.
First you need to remove the engine cover. Then remove the spark plug cap and remove the air filter. Then you need to unscrew the spark plug using a special key. A special plug is installed in its place, which fixes the piston in a certain position. Using a special wrench (you can use a universal wrench for an angle grinder), turn the clutch plate clockwise until the piston reaches the top position. If you look through the hole in the plug, the piston should remain down. You can use a thick rope as a cork; it needs to be made several times. Once locked, the gear can be secured by rotating the clutch plate counterclockwise.
After clamping, you need to do everything in the reverse order, that is, assemble the chainsaw. A chain is put on the bar, it should go to the drive sprocket that contains it. The tire is placed in special holes for fastening and fastening. Then lay protection.
READ Chainsaw Carver 246 Carburetor Adjustment
Do-it-yourself chain shortening
You can shorten the chainsaw chain with your own hands using simple tools. This method is less reliable, but easy to use and does not require special skills in working with riveting equipment. Disadvantage - you cannot control the strength and quality of crushing of rivets. This may cause the tool to break under heavy loads.
What tools will you need for home repairs?
The work can be done using the most accessible tools. Depending on your skills and abilities, you may be required to:
- vice;
- Bulgarian;
- hammer;
- chisel;
- needle file;
- beard;
- pliers or passages.
Some craftsmen also use an electric welding machine. It is not recommended to use it, since the seams after welding quickly become unusable under the influence of vibration during intensive operation of the chainsaw. This method is only suitable for gear chains that transmit force to the drive sprocket.
Removing rivets
To separate the links, physical force is required, since high-quality steel is used to manufacture the headset. Before starting work, secure the chain firmly in a vice to avoid injury during removal. Grind off the protruding part with a needle or file. The rivet itself can be removed with your own hands in the following ways:
Continue sanding until the bridge shows through. Attach the beard and gouge out the metal with a hammer. Grind down the rivets with a grinder. The disadvantage of this method is that you can damage the chain itself.
The work must be carried out carefully, periodically wetting the area with water. After holding the chain in a vice by the guides, cut off the rivets with a chisel.
If it is necessary to increase the number of links or remove one of them, then it is necessary to remove at least two rivets (left and right). When using a grinder, the metal can heat up, so after grinding you need to wait until it cools down or work with protective gloves.
Connection of links
You can purchase a new link for any chainsaw model in any specialized store, remove it from the old headset. The use of donor spare parts is not recommended, as this reduces the quality of the cutting blade. Installation technology:
- Install the link with new rivets on the chain. Place open side up on an anvil.
- Place the top plate on the rivets and tap with a hammer several times to ensure a tight connection.
- Place the beard on the rivet and give 1-2 strong blows with a hammer. Achieve pronounced thickening and flattening of the metal. Repeat the operation on both sides of the link.
After work, you should check that the chain is movable and that all its elements move freely in different directions. This avoids jamming during the sawing process.
How to properly put on and tension a chain?
Before starting work, you should wear gloves to avoid cuts from sharp teeth. You can only tension a cold chain - after cooling it can burst from overvoltage, damaging the mechanism
Remove the protective cover from the chainsaw and carefully place it on the bar
Depending on the configuration of the tool model, tension is applied manually or using a special regulator. In the first case, you need to loosen the bolts on the bus, and after installing the chain, apply tension using a slotted screwdriver. If there is an adjusting bolt, turn it all the way until there is sufficient blade tension. After work, check for sagging; be sure to tighten it after the first use.
What to do if the chain sags?
If the chain sags, there is a risk of injury to the operator - because the saw blade may break or simply fly off the guide sprockets. Of course, modern chainsaws have safety and emergency stop systems, but these systems do not always work correctly.
You should not install a chain with defective or damaged saw links on a chainsaw; in addition to the danger of breaking at any time, such a chain will sharpen the guide grooves of the bar, which will lead to its distortion, uneven cutting and failure of the guide bar.
The photo above shows a chain with normal chain tension, and below with a loose chain that requires tension.
What can cause a chain to sag during even short-term use?
- There may be problems with the guide bar. Sometimes, due to operator oversight or due to severe wear of the threads of the fixing bolts at the point where the guide bar is attached, vibration may occur, which causes the chain to loosen. It is necessary to check the condition of the fixing bolts and, if necessary, replace them with new ones. When the bolts are sufficiently tightened, such problems do not arise.
- If you handle the chainsaw fairly carefully, any chain can wear out over time. Trying to repair a chain or assemble one from several is a futile exercise. If the chain set has stretched due to natural reasons, then it would be best to purchase a new one.
- The asterisk is skewed. Misalignment of the sprocket teeth can cause sagging. In this case, it would be best to contact a service center to repair and adjust the position of the drive sprocket. Securing the drive sprocket in the correct position is quite difficult, because you have to dismantle many small parts, remove the guide bar, and then reassemble everything in reverse order.
Problems with the chain can also occur due to improper sharpening, no matter how you do it with a sharpening machine or a regular file. There is a whole section dedicated to this section on our website, you can go to it using this link.
Removing the handle
Specific disassembly of the Stihl 100 eighty begins with removing the handle, which is attached to the chainsaw body using 3 rubber shock absorbers. To pull it out, you need to pull out the plastic plugs from the internal cavity of the shock absorbers, then, using a strong screwdriver, first squeeze out the upper shock absorber, then the one closest to the rear handle.
On the back of the handle there is a throttle trigger, which is connected to the carburetor using a wire rod, in order to disconnect the throttle trigger from the throttle trigger, you need to unscrew two screws and disassemble the handle.
When the handle remains on one shock absorber, you should unscrew the chainsaw body from the inside of the handle and bend it to the side, remove the body from the last rubber band.
What parameters should you use to choose a chainsaw chain?
Depending on the main characteristics of the chainsaw, craftsmen choose a chain
. Work devices also differ in their features, because they are designed to perform different tasks. That is why the replacement chain must be selected correctly, as well as the equipment for sharpening it. What characteristics need to be taken into account in all this?
Pitch is one of the most important characteristics. It is precisely this that is usually used as a guide when choosing chains for chainsaws, in contrast to round-link chains, in which the caliber is of greatest importance. It is possible to measure your step without the help of others. To do this, you need to apply a ruler in the direction from the first to the third link of rivets. Data is expressed in inches. Probable output, and therefore productivity, are directly dependent on the set value.
Standard step sizes determine the purpose of the tools and their scope of use (see table).
Using this table, you can understand what type of saw set the user needs at this point in time, based on the pitch of the tool.
Buying a tire is not an easy task
When purchasing a tire that is not bad from a unique model, there is a high possibility that the old chain and the new tire will not fit together in any way. Ideal option: try on all three main components - a bar/ chain
and, practically, the gas-powered tool itself. The length of the chainsaw bar is the length of the saw bar, as is important when choosing a chain. A slight difference, sometimes not even noticeable to the eye, of just one link can be critical for the entire assembly: the chain either won’t fit at all or will sag.
The next point: different chainsaws are designed for different widths of tire grooves, and accordingly, the drive links are designed for use with different tires. The wide grooves of the chainsaw are designed for a chain that can withstand important loads, characterized by high quality workmanship and operating efficiency. When choosing a chain, it is important to check the possible width for a given chainsaw model.
Shank thickness - width of drive links
The tail part is the section of the chain that is located in the inner part of the tire. The tail section comes in different thicknesses, so it should be selected depending on the size of the tire groove. The lower the power of the chainsaw, the smaller the thickness of the tail part of the chain is needed. The following thickness dimensions of the tail parts of the chains are distinguished:
For household chainsaws, devices with a shank size of 1.1-1.3 mm are suitable, and for professional ones, materials with a shank thickness of 1.6 mm are used. Thickness 1.5 mm is used for semi-professional and professional units. The 2mm tail section of the links means that these devices are designed for specialist professional chainsaws that are used in harsh conditions. For electric saws you need to buy chains with a shank size of 1.1 mm.
How to choose a device based on the thickness of the tail section
Depth of cut - a parameter depending on the tooth profile
The larger the tooth profile (size), the greater the depth of cut in one pass. The higher the cutting depth value, the greater the tool performance value. It is important that the higher the cutting depth of chainsaw chains, the greater the load on the tool’s engine.
Determining cutting depth
The height of the links also affects the strength of the teeth, and the larger they are, the lower the strength index. Standard models of saw sets are available in two tooth heights - 0.635 and 0.762 mm. Products with a smaller profile height are called low-profile, and products with a larger profile are called high-profile. The cutting depth affects the time it takes to cut the wood.
Types of links - design or shape of the link
There are two types of modern saw sets in shape - chipper and chisel. Each type is structurally different, affecting performance parameters and sharpening features.
- Chipper links look like a sickle and have poor performance. Their main advantage is the ease of sharpening with a file. It is precisely due to the ease of sharpening that many sawmills prefer to choose models with chipper or crescent-shaped links.
- Chisel links have teeth shaped like a number "7" with a pointed corner. These teeth on the chain show high performance, but at the same time they are difficult to sharpen with a file.
Read also: Connect the connector to the network cable
Chisel and chipper link types - please note
