Cultivator from a lawn mower
Materials and tools used by the author:
List of materials:
— sheet steel for the disk; - bolts, nuts and washers.
Homemade manufacturing process:
Step one. Cutting out the base
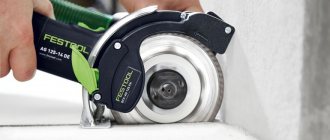
First of all, you need to cut out the base; it is a piece of sheet steel; it is better to choose a stronger metal, such as stainless steel, so that it does not bend when hitting a stone, and so on. We drill a hole in the center of the sheet and tighten the bolt and nut, and then use a string with a marker instead of a compass and draw a circle. You need to experiment with the diameter of the circle; a circle that is too large may not fit between the beds and will be difficult to maneuver. However, you can make several attachments of different diameters for different jobs; with small discs you can easily pass between potato bushes and completely forget about the hoe, all that remains is to hill up the potatoes. The author cuts out the disc with a grinder, and then trims it using a petal attachment. By the way, you can use a concrete disc for a grinder or a disc from a circular saw as a finished disc.
Step two. We tighten the bolts
Next, we make markings on the disk so that all the bolts are at the same distance from each other, otherwise there will be strong beats due to imbalance. We drill holes for the bolts and secure the bolts with nuts and washers. The nuts must be tightened well and they must be self-locking; in extreme cases, you can put a grommet under regular nuts. The bolts can be completely welded, but then they will be more difficult to replace if something happens.
The bolts can be sharpened to improve efficiency. As a result, all that remains is to drill out the central hole for attaching the nozzle to the shaft of the lawn mower.
How to make a weeder-cultivator from a brush cutter
First of all, you will need to cut a plate from a piece of metal, approximately 15-20 cm long and 5-7 cm wide. The plate must be made of fairly thick metal, at least 3 mm thick. The load on the plate with bolts in the process of weeding the beds will be quite large, so it is better not to skimp on the thickness of the metal for making this homemade product.
After the plate is cut, a hole is drilled strictly in the center for the shaft of the brush cutter. Here it is very important to drill a hole exactly in the center of the plate, since, otherwise, strong vibration and beating of the nozzle will occur during operation. The diameter of the hole should be slightly larger than the washer that is installed on the trimmer shaft.
Then, using welding, you will need to weld nuts along the edges of the plate (at the same distance from the edge and also in the center). The nuts will be needed to screw long bolts into them, which, in turn, will act as spikes for the cultivator attachment on the brush cutter. In principle, if you don’t have a welding inverter at hand, then you can screw the bolts to the plate through through holes, there’s nothing complicated about it.
At this point, the homemade cultivator attachment for the lawn mower is almost ready; all that remains is to make a protective casing from a piece of thick tin or metal. To do this, you first need to cut a circle of metal, which will be slightly larger in diameter than the plate with bolts, and then weld a metal strip 7-10 cm wide to it in a circle. To attach the protection to the brush cutter, you need to use a homemade clamp.
Now all that remains is to carry out the tests after the cultivator attachment is screwed to the mower shaft with a nut. And, as practice shows, this device has proven itself to be quite effective when weeding not too hard ground. With its help, you can quickly get rid of vegetation in the garden, and also easily loosen the beds.
Today you can purchase ready-made versions of weeders.
Source
Types and principle of operation of cultivators
The principle of operation of the cultivator is simple: the element that loosens the soil begins to work after the mechanical part of the device starts. Depending on the external size, engine power and performance, cultivators are divided into three types: light, medium and heavy equipment.
- Light equipment is used in small areas with soft soil (flower beds, greenhouses).
- Medium weight is used on clay soils.
- Heavy equipment refers to universal equipment. It can be used for any soil.
There are different types of cultivators: disc, rotary, tine and milling.
In terms of operation, they can be: manual, electrically driven and gasoline-powered, as well as trailed, mounted, and process one or several rows. When cultivating a plot of land, everyone chooses the model they need. Hand cultivators are good because you can make them yourself with minimal cash outlay .
Advantages and disadvantages
Each cultivator, regardless of whether it is manual or electric, has its pros and cons..
- Hand cultivator . Easy to use and much more convenient than a shovel, compact. Doesn't put any strain on the lower back. It loosens the soil well and does not spread roots throughout the area. But this technique cannot cope with unplowed land, as it has low productivity. It is best used in small areas such as flower beds or greenhouses.
- Electric cultivator . Lightweight and compact equipment, powered by mains. Easy to maintain. The only downside to this technology is the electrical cord. It can interfere during work, and due to its length, there is a limitation in the area to be processed. It has low power and low tillage depth. Not intended for attachments.
- Gasoline cultivator . Thanks to the attachments, it has many functions. It is not connected to electricity, so it can move around the entire site. Suitable for processing small areas. Weighs much more than electrical equipment. It is difficult to maintain and requires fuel to refill.
Tips and warnings
Fastening the footrest, handles and valve is best done by welding. Fastening structural elements with bolts or self-tapping screws may be no less strong, but in those places where their ends stick out inside the body, obstacles will form for the passage of potato tubers.
Before assembling the entire structure, make sure that the total weight of all elements will not pose a problem for you during operation.
The device should not be too heavy, otherwise you risk not making your work easier by slightly mechanizing and speeding up the process of planting potatoes, but on the contrary, complicating your life by moving a non-lifting device.
At the same time, the pipe body must be strong enough to withstand many cycles of inserting and removing the device from the ground. Depending on the preferences of a particular designer, individual design elements of a manual potato planter can be made in different ways.
Some equip the valve mechanism with an additional hook so that you can reliably control the process of opening and closing with your foot. This is, of course, the simplest and most primitive agricultural tool. However, this is where its beauty lies.
Anyone can make a potato planter; the material for this will probably be found in any household, and the efficiency of the device is very impressive.
Potato planter made from two-wheeled trolley
Separately, I would like to talk about another design of a homemade apparatus for planting potatoes. This is a two-wheeled cart, on top of which there is a box for tubers prepared for planting.
In the lower part, between two running wheels, there is a device for uniform feeding of potatoes into a pre-prepared furrow. Such a cart rides over the furrow and, while moving, lays out potato tubers at regular intervals.
A shield covering the furrow can be located behind such a device, but in this case, moving the cart will require more effort, or the help of a second person.
Types of cultivators
Tornado
Tornado is the simplest version of a cultivator that you can make with your own hands . Outwardly, it looks like a corkscrew, which is mounted on a vertical tripod. The design is equipped with a horizontal handle on top. To make it, use a simple pitchfork and a handle attachment. You can buy an attachment at a hardware store. It has the shape of a handle and is used to work with forks and shovels.
- The handle of a cultivator should be long. Therefore, the nozzle must be increased. For extension, use a plastic pipe with a slightly larger diameter than the thickness of the plastic nozzle. The length of the pipe should be about 0.5 m. So that the pipe can be put on the handle of the handle, it is carefully cut lengthwise and turned inside out.
- The pipe is wrapped with electrical tape. Fixed, during operation it will not slide or jump out of its place. The finished handle will have protrusions about 25 cm long on both sides.
- Using a simple hammer, change the fork teeth to the shape of a corkscrew. By delivering strong blows to the metal teeth, they will begin to bend in the required direction. An original photo of the cultivator will help you replicate its exact curves.
Bicycle cultivator
The design of this manual cultivator is more complex. It is made from bicycle parts: frame and wheels.
How to make a manual cultivator for cultivating row spacing
To cultivate narrow spaces between rows, first of all, the cultivator must be compact. A hand-held device called “Hedgehog” is well suited for this type of work. Having all the necessary parts, it is easy to make it yourself. To assemble the “Hedgehog” you will need: a U-shaped bracket with holes, a shaft, a handle and wheels with metal spikes.
- In order for the walk-behind tractor to move easily around the site, you need good wheels. To do this, take medium-sized steel pancakes and weld metal spikes to them. Spikes are easy to make; you just need to sharpen the reinforcement into a cone shape.
- Ready-made cutters are put on the axis.
- The axle is inserted into the bracket and fixed on both sides.
- A fastener is welded to the end of the bracket and the handle is inserted.
The equipment is assembled and ready for cultivation and weeding between the rows.
From the trimmer
A DIY cultivator made from a trimmer will help you quickly and easily cultivate a small area. You can assemble it from available materials: a working gasoline trimmer, an angle grinder or welding tool, a garden fork, a steel pipe .
- To make a cutter, teeth from a fork are used, which are bent into the desired shape. Usually the soil is loosened to a depth of 10 to 15 cm, so the length of the teeth should be no more than 15 cm.
- Next, we do the working part. The tines of the fork are flattened to a width of about 1 cm.
- The cutters are sharpened with emery and secured to a round penny.
- A nickel with a diameter of 10 cm should be perfectly even in shape. Three cutters are placed evenly on the heel. If you put more than three pieces, the device will be severely overloaded.
- The final part is connecting the base with the cutters and the trimmer. It is good if the shaft tip has a thread. Then the trimmer is simply screwed to it.
The equipment is designed for loosening soil at shallow depths.
How to make a snow blower from a trimmer + drawings
Snow removal equipment in stores is expensive and not everyone can afford it. A way out of the situation can be found by assembling a homemade snow blower from a trimmer, which will help clear the yard of freshly fallen snow.
Converting a trimmer to a snow blower
The design of such a homemade product is so simple that you don’t have to make complex drawings and grind out parts. You just need to make an impeller, which is attached to the trimmer instead of a knife, and place this entire structure in the casing.
Snow Blower Assembly Guide
Not every trimmer is suitable for making a snow blower. If the farm has an electric or brush cutter with a curved bar, in which the torque is transmitted to the blade by a flexible cable, then the conversion process does not even need to begin. The fact is that such models of trimmers are low-power. The performance of the snow blower will be weak, and the engine will constantly overheat.
A good snow blower will come from a powerful trimmer with a level shaft. Such an electric or gasoline scythe is characterized by the transmission of torque to the knife through a rigid shaft and gearbox.
The construction of snow removal equipment is simple. The working element is a nozzle, which is placed instead of a knife. It is an impeller with blades. To make this part you will need steel 1.5 mm thick. The impeller must be placed in a casing - a volute. For its manufacture, a piece of large diameter pipe is taken, usually within 300 mm.
Converting a trimmer into a snow blower with your own hands will do without complex drawings, but you need to have at least a simple diagram on hand. It will help create a general idea of the design.
Now let's take a step-by-step look at how to make a snow blower with your own hands from an electric or lawn mower:
- Making a snow blower begins with the body. If you are lucky enough to get a beer barrel, then you need to cut a piece 150 mm long from it. The workpiece is needed together with the bottom, since the trimmer gearbox will be attached to it.
- A hole is drilled in the center of the bottom. Its diameter should be enough to accommodate the trimmer's working shaft, onto which the impeller-shaped attachment will be placed. Around the large hole you need to mark the mounting locations for the gearbox. Usually these are three dots. Holes for bolts are drilled according to the markings.
- Now you need to make an exit for the snow blower - a deflector through which the snow will be thrown out. A hole is cut in the side shelf of the case. It can be made square or round at your discretion. Hole diameter – 100 mm. The pipe is welded to it later. Now you need to cut a half-circle shape from a sheet of steel. This plug is used to weld 1/3 of the end of the front part of the snail body. The plug will prevent snow from flying forward from the snail, but will direct it into the deflector. The deflector hole should be located in the center of the front plug.
- Next, you need to make a rotor for the snow blower, that is, the impeller itself, which will throw out snow. The trimmer's disc blade is used as a basis. But first, four blades measuring 250x100 mm are cut out of steel. The blanks are made perfectly the same size to avoid imbalance. The finished blades are welded crosswise to the disk.
- Now it's time to finish the deflector. The hole on the body is already ready, now you need to attach the pipe to it. It can be bent from galvanized steel. The pipe is made 100 mm high and welded to the body. An elbow of similar length is attached to it so that the snow is thrown to the side. It is better to make the deflector round. You don’t have to make an elbow for such a pipe yourself. It can be taken from a plastic sewer with a diameter of 100 mm.
- The last part left to make is the guide vane. It is cut from a sheet of steel. The result should be a workpiece measuring 300x400 mm. Sides with a height of 20 mm are folded on the sides. The finished blade is welded to the bottom of the body from the front side.
- All the parts of the snow blower are ready, all that remains is to assemble them into a single structure. First, the trimmer gearbox is bolted to the volute. A shaft comes out inside the housing. They put a homemade nozzle with blades on it.
A do-it-yourself snow removal unit from a trimmer will be considered ready when the rotor structure is installed on the frame. It is enough to weld a regular rectangle from the corners. Wooden runners are attached to the frame from below. Skis make it easier to push a snow blower through the snow. The control handle is the trimmer's original rod.
The video shows an example of a snow removal unit from a trimmer:
What is better to attach to the trimmer: an auger or a rotor?
When making a snow blower from a trimmer, there are two options for installing the working mechanism: an auger and a rotor. Let's look at the differences between the designs, as well as their positive and negative sides.
Screw mechanism
In terms of efficiency, the auger outperforms the rotor. The mechanism consists of screw disk knives. Rotating, they cut even stale, wet and icy cover. The spiral turns move the collected mass to the center of the body, where the blades push it through the deflector. If you connect such an attachment to the trimmer, it will be able to throw snow to the side at a distance of up to 3 m. However, you need to take into account that the auger mechanism creates a large load on the engine. This is especially true when clearing hard snow. For this attachment, you can only use a powerful trimmer.
It is difficult to make a nozzle yourself due to the design of the auger. You will need to accurately measure the distance between each turn. If it is different, the snow blower will throw to the sides while working. A lot of turning work will still be required. The auger rotates on bearings, so you need to grind out the axles and hubs. Alternatively, you can buy an auger shovel in a store, and at home you can adapt it to the trimmer.
Rotary mechanism
The advantage of the rotary mechanism is its ease of assembly. After all, the mechanical part remains practically original. The impeller is made of a disc blade that fits onto the trimmer head. The snow throw range of this design can reach 6 m.
The disadvantage of the rotor is its use only on loose and freshly fallen cover. Wet snow will stick to the snail, and pieces of ice may get stuck between the blades.
You can choose any mechanical part of the snow blower as you wish. But in any case, you need to remember that the trimmer is not designed for such a large load. The engine needs to take a break during operation so that it does not overheat.
Cultivator attachment
The cultivator attachment on a petrol trimmer is used to loosen the soil in small areas, such as a flower bed, greenhouse or around bushes and trees. The tool can be:
- Toothed, it has cutters located on both sides of the drive shaft.
- Disc, when cutting discs are used instead of a cutter.
The difference in these two units is only in their design and names; the essence of the work they perform is the same - loosen the ground.
Important! Toothed models are lighter in weight, therefore, it is best to process light soils with them, unlike disc ones.
This attachment is powered by a motor using a special rod (sold separately). There are slots on the rod, there can be from 7 to 9 of them. That is, you need to know exactly which attachment to buy, since it may not fit from one model to another.
When the cutters and discs are fixed with splines, the cutting elements will move freely, and you can loosen the soil to a width of 20-25 centimeters.
Note! Long beds are more convenient to process than short ones. In the first case, you need to make fewer turns.
When choosing an attachment, you need to take into account the power of the trimmer. If the power of the device is no more than 1500 W, then you can only process already loosened soil. For example, you can only hill potatoes.
Hedgehog cultivator for weeding
They remove grass with roots, unlike flat cutters, which only cut the stems. Hedgehogs rake the soil between the rows, which creates distinct rows and beautiful beds. Loose soil allows oxygen and liquid to pass through well, which increases the growth of potato roots, and this is a guarantee of an excellent harvest.
Hedgehogs for weeding potatoes
Weeding with a walk-behind tractor is done using certain paws or a rotating cutter . The cutter is rotated by the power take-off shaft. The advantage of the paws is ease of installation and thoroughness in loosening the soil. They loosen the soil at a depth of 4-7 centimeters, depending on its condition.
To operate, the presser feet need to be secured in certain fasteners at a distance equal to the width of the row. The fastener should have a slight overlap that will cover both legs. Devices can be either single-sided or double-sided. If the device is one-sided, then the legs must be attached so that the blades are located towards the row spacing.
There are manual and electric cultivators with a gasoline engine. For weeding, devices with 2 knives are used, which are attached at an angle of 45°. It is best to carry out weeding with a cultivator, which has three-pronged mini forks installed instead of knives.
For comfort, these devices are installed on wheels: the summer resident pushes it, pressing it as close to the garden bed as possible.
Weeding cultivator on wheels with two blades
Using a device with a hedgehog attachment, they immediately weed and hill up the potatoes. The hedgehog consists of 2 cones mounted on a frame. The cone is made of 3 steel wheels of different diameters. Pointed spikes are welded onto the wheels. 2 hedgehogs are attached to the frame, spinning, they hook the grass in parallel and rake the soil from row to row.
Cultivator with hedgehog attachment
Electric cultivators are more dynamic and are used for small gardens. Their main drawback is the need to pull the cable from the outlet, which is not always comfortable. It is more rational to use cultivators with a gasoline engine. But such cultivators are less dynamic than manual ones, but the most productive. All types of cultivators are equipped with hedgehog attachments. The strength of the engine is selected depending on the condition of the earth; the heavier it is, the stronger the device.
DIY universal cultivator for trimmer
If you have a summer cottage, then the presence of a cultivator attachment will greatly facilitate the work of cultivating the soil (working with a hoe requires a lot of effort and time). Special factory equipment is not cheap, which means you need to assemble the cultivator attachment for the lawn mower yourself.
The following is a simple example of how to make a cultivator based on a trimmer. To do this you will need the following tools and materials:
- grinder with metal discs;
- drill complete with drills;
- welding machine;
- electrodes;
- hacksaw for metal;
- emery machine;
- garden forks;
- steel tube for the trimmer shaft;
- hammer, pliers, tape measure, etc.;
- Metal sheet.
Cultivator attachment for brush cutter (petrol mower)
Manufacturing begins with a loosening element. To do this, you need to bend the rods of the garden forks. Their length should be about 15 cm.
Then a working nozzle is made. To do this, the fork teeth need to be flattened to a width of 1 cm, then the resulting cutters should be sharpened using emery. After this, cut a circle of durable metal with a diameter of about 10 cm and weld cutters to it, preferably 3 pieces.
The next step is to attach the weeding bit to the trimmer. If there is a reverse thread at the end of the trimmer shaft, then the resulting part is simply screwed on. It is enough to weld a tube with a nut to the cutter. That's it, the do-it-yourself trimmer ripper is ready.
How to make hedgehogs with your own hands, drawings
If a summer resident likes to work with tools and save a lot of money, then you can make hedgehogs for weeding with your own hands or order them from a metal working organization.
First of all, you need to understand how the hedgehogs will work, draw a few drawings. They can be used both on a cultivator and for manual work. Hedgehogs for manual work can consist of a loosening device, a frame and a holder. The ripper is a hollow pipe with steel teeth welded to it. It is secured to a spacer frame and a wooden handle is attached. Using it you need to roll the soil back and forth, which requires certain physical strength.
There are many versions of hedgehogs for walk-behind tractors and cultivators. Many developers made their own individual devices. The traditional version of the hedgehog is made using steel discs. You will need 3 disks of different diameters:
The device is assembled on a pipe Ø25 millimeters. Using jumpers, steel disks are fastened together, starting with the largest and ending with the smallest. There are developers who use 5- and 6-sided disks instead of disks. The distance between them should be 18 centimeters, and the maximum disc Ø 36 centimeters. For the teeth, a steel rod is used, cut into 40 pieces.
Approximately for the design you will need 5 pieces of spikes for a small disk, 10 pieces for a medium one, 15 pieces for a maximum one. It happens that welding of auxiliary studs onto the axle is required. The length of one spike is 14 centimeters.
Today there are several varieties of hedgehogs:
- Rotary. The main task of such hedgehogs is weeding and hilling. They will suit any device.
- Conical. Required to remove grass before germination.
To sum up the results, it can be noted that the use of devices for planting, harrowing, weeding and hilling potatoes in a summer cottage will make this process easy and not labor-intensive
. By using a variety of samples, we can say with confidence that the harvest will be plentiful and will delight the gardener.
Chopper for trimmer
For many summer residents, weeding is problem No. 1. Especially if the plot was purchased recently, and before that it had not been cultivated for a couple of years. And gardeners often dream of a mechanical hoe. It won't be difficult to do if you have a trimmer available. This attachment is attached to the trimmer according to the principle of a trimmer knife.
Making a hoe attachment
Cut a circle out of a thick sheet of iron (preferably stainless steel), there should be a landing hole in the center, and holes should be drilled on the entire surface. Secure the sharpened bolts in them using a washer and nut. The result is a design that resembles a hedgehog. It is with these very thorny bolts that weeding will be done.
Advantages and disadvantages of the cultivator attachment
The cultivator attachment for trimmers is becoming increasingly popular among buyers. Here are some advantages of this device:
- Easy to maintain.
- Significantly cheaper compared to equipment for a motor cultivator.
- This cultivator is simply irreplaceable for those people who have a lot of greenhouses. Using this device, you can quickly loosen the soil in a greenhouse and saturate it with oxygen.
- The design is made of very high quality, which makes it possible to use the cultivator for a long time.
- Protective shield. Protects operator from debris.
There are not many disadvantages:
- Each attachment makes the structure heavier; during prolonged use, a person will feel tired.
- It is necessary to select a nozzle and a trimmer with the same connecting nodes.
- Due to vibration, operating the trimmer switch button and holding a heavy unit suspended is often inconvenient.
Important! The model of the cultivator attachment must be manufactured by the same company as the trimmer. If the loosening tool is made by Husqvarna, and the brush cutter is made by Oleo-Mac, then you won’t be able to till the soil: you simply won’t be able to attach the attachment.
Additional attachments
In addition to the cultivator attachment, stores have many other devices that are mounted on the trimmer, these include:
- Drill. When installed on a gasoline trimmer, you can work without electricity.
- Lopper. It works on the principle of a hacksaw.
- Gardening scissors. With their help, it is easy to trim bushes, trees and tidy up hedges.
- Aerator. Destroys the crust on the surface of the lawn.
- Height cutter. Using this attachment you can remove branches at a height of up to 4 meters.
- Snow blower. Designed for removing snow from garden paths and areas.
The downside of all these useful attachments is their high price. Also, when equipped with any attachment, the weight of the trimmer will increase by 5-6 kg; not everyone will be able to work with such a tool.
To make your gardening easier, you need to purchase several different trimmer attachments. If your budget is limited, then you can make accessories for brush cutters yourself.
Types of cultivator attachments for trimmers
Cultivator attachments are good for cultivating small plots of land. Often there are several cutting parts at once. The cutting width of the cutters can be adjusted in the range of 130–250 mm. To prevent debris from getting in, they have a protective shield. Usage options:
- weeding of small areas;
- digging up the garden and flower beds;
- loosening the soil near trees;
- hilling carrots, potatoes, etc.
Cultivator attachments
The torque from the unit’s engine is transmitted to the cultivator attachment via a shaft in a special rod - it must be purchased separately. This unit differs in the number of splines on the end of the rod. There can be 7 or 9 of them. For example, the Oleo-Mac cultivator attachment will not fit the Husqvarna trimmer.
Spline connection of cutters or disks to the shaft is convenient. It allows free movement of the cutting parts, which is ideal for cultivation. The soil can be loosened with a wide grip - up to 200–250 mm per pass. When choosing a nozzle, you need to take into account mechanical limitations on drive power. If the device is designed for a power of up to 1.5 thousand W, then the cultivator is suitable only for the purpose of cultivating loosened soil or hilling beds and potato bushes.
Varieties of design
Trimmer attachments differ in the type of cutting mechanism. The efficiency and quality of work to be performed using a gasoline unit depends on it. The cultivator attachment for the trimmer comes in two types:
- Serrated. This type includes a straight row consisting of several curved and pointed knives. They turn up the earth and open it up. The toothed nozzle can be heavy – its weight reaches 5 kg.
- Disk. These cultivating devices are equipped with several discs that have fixed knives. The ends of the blades are curved in a certain direction. A protective flap is installed on top of them, thanks to which the soil does not fly out during the working process.
Weeding attachments using a trimmer
Bedroom shelves above the bed
For weeding, use a trimmer with an electric motor located on top. Between the rows they are often weeded with a trimmer head and fishing line.
It happens that a knife with 3 blades is used to remove grass. Steel knives are mounted on a trimmer with a level stand. If the stand is crooked, then plastic attachments are attached. If the knife hits any obstacle, the device will be thrown back or broken.
3 blade blade for electric trimmer
On the market or in a store you can buy trimmer attachments with earth cutters, which are shaped like disks with curved blades and are attached to a single axis. More often there are 4 cutters in one attachment.
Earth cutters for trimmer
The size, diameter and number of cutters depend on the power of the brush cutter engine. The instructions for use for the attachment indicate which lawn mowers it is suitable for.
You cannot make the attachment yourself, because... it is difficult to choose the width and diameter so that it does not break the device. You cannot weed with a trimmer on difficult, clayey soils.
Before using the trimmer, professional summer residents treat all rubbing elements with silicone lubricant.
Rules for processing potatoes using a trimmer:
- Before processing, you need to protect your eyes and nose, since during weeding the cutters rotate at high speed, raising dust and dirt into the air.
- You need to treat the area for weeds when the grass is still small. Treatment should be done once every two weeks.
- It is better to weed in the morning, then during the day the grass will dry out and turn into straw.
- There is no need to immerse the cutters to a depth of more than one and a half centimeters. With this technique, the land is cultivated, and the soil receives oxygen and nitrogen, which has a great effect on potatoes.
- You should also not immerse the cutters because this can lead to damage to the device.
- If the engine on the device is not very powerful, then you need to take a break every quarter of an hour.
- At the end of the summer season, the nozzles must be treated with a disinfectant to remove all germs.
Weeding potatoes with a brush cutter
A broken cutter can be replaced with a cutter made by yourself. To do this, you need to carve a circle from a steel sheet and bend the cavities. The diameter cannot be larger than that of the cutters used. It is prohibited to put additional cutters on the trimmer axis.
How to make hedgehogs with your own hands, drawings
If a summer resident likes to work with tools and save a lot of money, then you can make hedgehogs for weeding with your own hands or order them from a metal working organization. First of all, you need to understand how the hedgehogs will work, draw a few drawings. They can be used both on a cultivator and for manual work.
Hedgehogs for manual work can consist of a loosening device, a frame and a holder. The ripper is a hollow pipe with steel teeth welded to it. It is secured to a spacer frame and a wooden handle is attached. Using it you need to roll the soil back and forth, which requires certain physical strength.
There are many versions of hedgehogs for walk-behind tractors and cultivators. Many developers made their own individual devices. The traditional version of the hedgehog is made using steel discs. You will need 3 disks of different diameters:
- 100, 200, 300 mm;
- 240, 180, 100 mm.
The device is assembled on a pipe Ø25 millimeters. Using jumpers, steel disks are fastened together, starting with the largest and ending with the smallest. There are developers who use 5- and 6-sided disks instead of disks. The distance between them should be 18 centimeters, and the maximum disc Ø 36 centimeters. For the teeth, a steel rod is used, cut into 40 pieces.
Homemade hedgehogs for weeding
Approximately for the design you will need 5 pieces of spikes for a small disk, 10 pieces for a medium one, 15 pieces for a maximum one. It happens that welding of auxiliary studs onto the axle is required. The length of one spike is 14 centimeters.
Today there are several varieties of hedgehogs:
- Rotary. The main task of such hedgehogs is weeding and hilling. They will suit any device.
- Conical. Required to remove grass before germination.
To sum up the results, it can be noted that the use of devices for planting, harrowing, weeding and hilling potatoes in a summer cottage will make this process easy and not labor-intensive
. By using a variety of samples, we can say with confidence that the harvest will be plentiful and will delight the gardener.
The post Making devices for planting and weeding potatoes with your own hands first appeared About the farm.
Top 5 best gas trimmer attachments for weeding
Before ordering a trimmer attachment, read the description and characteristics of the top designs. Study their advantages and disadvantages, value for money. Well-known manufacturers: Bosch, Echo, Elitech, Husqvarna, Patriot, Oleo-Mac, Stihl, etc. The best attachments for gasoline trimmers are:
- KAAZ Kat-MC250P for VSP255S;
- ECHO PAS-Tiller Cultivator for PAS-265ES;
- KR400MP MAKITA 195710-3;
- Oleo-Mac CULT;
- for TAC petrol mowers.
KAAZ Kat-MC250P for petrol mowers VSP255S (244G03)
The cultivator attachment for the VSP255S trimmer has a subsoiler, thanks to which you can change the plowing depth. Suitable for processing small gardens. Due to its compact size, the nozzle is suitable for cultivating soil cultivated around flowers in flower beds, loosening the soil around trees and in hard-to-reach places. It effectively fights weeds. More details:
- price: 9990 rub.;
- characteristics: suitable for Caiman VSP255S, knife material – high-strength steel, working width – 240 mm, depth – 360 mm, manufacturer – Kaaz (Japan);
- advantages: wide range of action, ability to adjust plowing depth, strength;
- cons: fits only on one trimmer model.
ECHO PAS-Tiller Cultivator for brush cutters PAS-265ES
This attachment was created specifically for the PAS-265ES brush cutter for the purpose of processing small areas, flower beds and lawns. It is compact, but not effective for weeding large areas. The design is characterized by good strength and durability. It can replace a whole range of working tools for the garden. Weeding will be quick and effective. Options:
- price: 17800 rub.
- characteristics: manufacturer – ECHO (Japan), compatibility – with PAS-265ES, gross weight – 3.36 kg;
- pros: compact, maneuverable, high quality workmanship, easy installation;
- cons: expensive, suitable for one brush cutter.
KR400MP MAKITA 195710-3
The trimmer attachment from the Japanese manufacturer will greatly simplify the care of your summer cottage, small garden or garden. It is also well suited for landscaping lawns and flower beds. Weighs slightly less than other analogues for weeding. The design is generally reliable, made of metal. The cutting element is cutters. Options:
- price: 17160 rub.
- characteristics: tool model – EX2650LH, DUX60Z, width – 16 cm, cutter diameter – 23.2 cm, manufacturer – MAKITA (Japan);
- pros: good efficiency, high reliability, ideal for weeding small areas;
- cons: high cost.
Oleo-Mac CULT
A cultivating addition to the trimmer, designed for processing small vegetable gardens, beds, flower beds and even greenhouses. The tool has the ability to adjust the plowing depth, because it is equipped with a subsoiler. The knives are made of high-strength steel, which can indicate their reliability and durability. Detailed parameters:
- price: 12990 rub.
- characteristics: brand – Oleo-Mac (Italy), knife material – steel, cutter width – 200 mm, weight – 6 kg, suitable for Oleo-Mac 740T, 746T, 753T, 755 Master models;
- pros: you can adjust the plowing depth, durable knives, good efficiency in small areas, wide cutters;
- Cons: heavy, slightly larger than analogues.
Attachment for TAC lawn mowers (shaft – 7 splines, rod 26 mm)
This is a weeding trimmer attachment that thoroughly digs up the soil, facilitating the penetration of moisture and nutrients and saturating it with oxygen. The device is securely attached to the trimmer. In order to quickly and easily loosen the soil in a small area, the cultivator has rotating cutters. A protective shield, like other models, will help prevent debris from entering the operator. Detailed parameters:
- price: 7900 rub.;
- characteristics: manufacturer – Taiwan, power – gasoline engine, cutting element – knife, cutter diameter – 200 mm, passage width – 120–240 mm, rotation speed – up to 180 rpm, internal shaft – 7 splines, outer diameter rods – 28 mm, weight – 5 kg;
- pros: reasonable price, durable design, efficient, wide passage, quickly and easily loosens the soil;
- cons: heavier than analogues.
Trimmer attachment for weeding, other attachments for brush cutters, their advantages
Necessary wheels for car polishing
Owners of summer cottages and country houses, by purchasing a gasoline trimmer, become the owners of a powerful autonomous tool that can be used to perform a variety of agricultural work. After all, manufacturers offer them a fairly wide range of attachments designed for pruning bushes, chopping dead wood, and removing snow.
Benefits of weeding with a trimmer attachment
There are many methods of weeding, both traditional and mechanical. Everyone has positive and negative sides. Experienced gardeners believe that their complex use is required, so that the processing efficiency will be of a fairly high quality.
Weeding can also be done with a brush cutter - a trimmer driven by burning liquid fuel. This tool is most often used by adherents of organic farming, who tend to believe that frequently hilling and loosening the soil is harmful.
In addition, weeded weeds cannot be removed from the beds, because the nutrients taken by the weeds from the soil are also removed with them. According to the principles of organic farming, it is believed that cut weeds should be left in the garden bed.
They help retain moisture and prevent the growth of new weeds. In addition, they promote the proliferation of microorganisms and worms, which process the remains of weeds into nutrients and help fertilize the soil.
Weeding rules
It is necessary to use a trimmer for weeding when the weeds have not yet grown too much and are quite easy to cut off.
It is important to follow the rules:
- when working, you need to use a respirator and safety glasses, because during operation of the brush cutter, dust is generated and small pebbles fly away;
- it is forbidden to work if there are people in front of the scythe;
- It is recommended to bury the trimmer blade into the ground no more than 1.5 centimeters;
- It is possible to start weeding when the seedlings appear, so as not to accidentally weed them;
- with low engine power, you need to take breaks every 15 minutes, allowing the engine to cool;
- At the end of the season, all working surfaces and brush cutter blades must be treated with fungicidal agents; they will help get rid of pathogenic microflora.
Methods for attaching attachments
Attachment of attachments can be done in three ways:
- instead of a gearbox at the bottom of the rod;
- near the engine instead of a rod;
- a method in which the rod is disconnected in the middle.
The scythe motor is capable of operating in different positions and has a high power density, small dimensions and is reliable. This allows it to be used with any attachment.
Options for attachments, attachments for Chinese lawn mowers
Manufacturers offer a wide variety of trimmer attachments, but in order to choose the right one, you need to know the number of teeth on the splines. There may be 7 or 9 of them. Be careful, because attachments for Chinese brush cutters may not fit tools from European manufacturers and vice versa.
Let's look at a few options.
Drill
An excellent addition to a petrol brush cutter. Such a drill, powered by gasoline, has high power, reliability, and durability.
Running wheels
Use with other attachments as needed, such as a blower, sweeper or roller. Thanks to the wheels, the working body can be raised slightly, this will help reduce its friction on the surface, which will make work easier, reduce wear, improve quality, and bring pleasure from doing the work.
Gardening scissors
They will help you trim hedges or curly bushes beautifully. There are two models with different rod lengths. The choice must be made depending on the situation.
Lawn aerator
Designed to saturate the upper layers of soil with air by piercing it. This procedure is very necessary for lawns that are more than 5 years old and the root system is sufficiently thick.
In addition, it can be used to destroy the crust on beds and lawns after watering, rain, or trampling, which helps to increase the air permeability of the soil.
Water pump
It will help to supply water for irrigation and domestic needs from a well, any container, lake or river. It will also help pump out water from a cellar or pool.
boat motor
For all types of boats with a transom height of up to 36 centimeters. It is capable of providing the boat with a travel speed of up to 20 kilometers per hour, albeit with a tailwind and no countercurrent.
