Manual hiller: how to make it yourself at home
A potato hiller is an indispensable thing on the farm. Technological progress has long stepped forward; many devices for hilling have appeared. It can be done manually and using devices. Hillers allow you to loosen the soil, making the process of growing potatoes better. Loosening the soil provides a place for potato tubers to grow with a large amount of air and moisture.
Description and types
A potato hiller is a device that can be used either separately or attached to a walk-behind tractor. In the second case, this makes the process quick, but it is recommended to use this method when processing large areas of land. The device itself operates using manual traction and helps to hill potatoes without any noticeable expenditure of effort or time.
Potato hillers are available in two types: disk and plow. But both require the effort of two people.
A manual disk hiller is a design with disks installed at a specific angle to each other. It consists of:
It is suitable for the moments before planting potatoes and when the harvest is harvested. It is possible to change the rotation of the disks, then the distance between the rows will change.
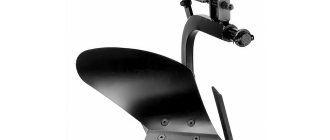
A plow hiller is a convenient device that will allow you to cultivate a small area of land in a short period of time. In this case, the strength of two people is required. Because of this, they prefer to install this type of homemade device directly to the walk-behind tractor. There is an option to regulate the depth and width of plowing.
A homemade potato hiller has positive aspects.
At first glance, everything is perfect, but there are drawbacks:
Master class: potato hiller
In stores you will find hillers that are designed for agricultural machinery. You will have to make manual models yourself if you want to make it easier to grow vegetables in the country. Hillers are divided into two types:
The plow is designed in the form of a small plow with long handles, and the disk one is in the form of two disks, narrowed downwards, also with two long handles. The design of such a hiller is pushed forward, and the discs or plow turn out the layer of earth. It is better to work with these devices together. Experienced gardeners advise using a disc hiller, because... it forms better and more accurate land swaths.
Comparison of hilling tools
Let's take as a base 3 devices for hilling potatoes: hoes or hoes, a manual hiller, a walk-behind tractor.
A hoe or chopper requires a lot of labor and time. Not very comfortable. But at the same time they are safe and available at a very low price. The manual hiller is convenient. There is little human effort involved here. Safety, with minimal compliance with safety regulations, is one of the main advantages. But at the same time, large areas of land are not amenable to manual hilling, as this will take too much time.
Regarding the above devices, the walk-behind tractor requires minimal effort. Due to lack of experience, incidents are possible: damage to humans, tubers. Strict adherence to safety precautions is required. However, its high price is not its most striking feature. It is possible to attach a tool for hilling potatoes to the walk-behind tractor.
Helpful tips for proper hilling:
- The procedure must be done at a certain time. Ideally - 2 times in 1 season. The first time is when the potatoes grow by about 10 cm. The second time is already about 20 cm. The flowers should not be open.
- Give preference to cloudy weather. If this is a rare occurrence in your area, then choose early morning and late evening. Ideal after rain or watering.
- Forget about the rake and hoe. Trust a modern tool - a potato hiller.
So, without such a procedure you will not see a good result. And without the right device, you won’t be able to make it as easy and effective as possible.
Homemade disk hiller: instructions and drawings
Before manufacturing, you need to make sure that you have the tools: welding machine, sharpener, drill, angle grinder, gas torch.
A manual disk hiller for potatoes will require the following parts:
To make disks you will need:
Then make the handle:
The bridge part is made from a d32 pipe with a length of 590 mm. It is necessary to drill two holes with a gap of 50 mm.
Then you can start assembling the manual hiller:
Thus, the manual disk hiller for potatoes with your own hands will be ready.
Step-by-step instructions for making a disk hiller
Before creating a manual disk hiller for potatoes with your own hands, you need to prepare a working tool: an angle grinder, a drill or drilling machine, a welding machine, a set of wrenches. You will also need various materials.
Table 3. List of blanks for preparing a disk hiller.
| Materials | Size, mm | Quantity, pcs. | |
| Electric-welded steel pipe by standard size | 21 x 2.2 | 50 | 1 |
| 450 | 1 | ||
| 700 | 1 | ||
| 1400 | 2 | ||
| 32 x 2.5 | 45 | 2 | |
| 250 | 2 | ||
| 590 | 1 | ||
| 45 x 6.5 | 55 | 6 | |
| 120 | 1 | ||
| Steel sheet 2 mm thick | 440 x 440 | 2 | |
| Electrodes E46-ANO | 3 (diameter) | 1 kg | |
| Hub with bearing No. 204 | — | 2 | |
| M10 bolts | 25 | 8 | |
| Nuts M10 | — | 8 | |
Structurally, the cultivator consists of: two discs with hubs, racks, a cross beam, and a handle. They are made in several stages:
- Two disks with a diameter of 440 mm are cut from a steel sheet 2 mm thick. The edges are sharpened at an angle of 45° with a grinder or sharpening machine. The hubs are welded in the center. The mounting brackets for the latter are made from pipes 32 x 45 and 45 x 55 mm (hereinafter diameter x length). To do this, the smaller one is welded perpendicularly to the middle of the larger one. A Ø12 mm hole is drilled in a pipe with a diameter of 45 mm. A nut is attached to it by welding so that the bolt can be screwed in freely over its entire length.
- Making a stand. Bend two jumpers at an angle of 30 ° from pipes 32 x 250 mm. Bushings 45 x 55 mm are butt welded from one edge, and from the other - perpendicular to the end. Drill holes and attach nuts to them by welding.
- The handle is assembled from thin pipes and a sleeve 45 x 120 mm. Two holes are made in the latter and nuts are attached to them. Pipes are welded together.
- The cross beam is made from a pipe 32 x 590 mm. Holes Ø12 mm are drilled in it, in increments of 50 mm.
For your information!
As cutting discs, you can use parts from agricultural machinery or the convex bottom and lid from an old gas cylinder.
After completing the welding work, assembly begins. Operations must be performed in a certain sequence:
- To prevent corrosion, metal surfaces are painted and allowed to dry.
- A transverse beam is inserted into the handle sleeve. It is secured with locking bolts.
- The disc hubs are secured to the racks. Screw the bolts in so that they fit into the holes in the bushing.
- Racks with disks are placed on the cross beam. They are secured with bolts.
Reviews
Making a manual hiller for potatoes is not difficult, after studying all the necessary information. This is not only saving money, but also conscientious work that will be paid. Here are the reviews people leave.
Recently I came across a problem that I don’t have anything at hand other than a walk-behind tractor. Sometimes there is a need to quickly plow a small area to renew the access of air flow and moisture. I came across this copy. After 3 days, my dad made a disk hiller for potatoes, and we immediately decided to try it out. The result was amazing! Everything is adjustable, there is no need to take out the walk-behind tractor again, the effect is identical. In general, I recommend it to everyone!
Advantages and features of different types of hillers
A potato hiller is an indispensable equipment necessary for proper potato care and increasing crop yields. To use the device effectively, you need to choose a hiller. The following types are distinguished:
- Lister version - characterized by a monolithic design that does not allow adjusting the width or depth of hilling beds. The hiller is easy to use, easy to maintain and compatible with walk-behind tractors;
- Disc hiller - features a row of disc blades, which increases the speed of hilling and also allows you to plow problem areas of land. The disk-type design is suitable for manual operation or on low-power walk-behind tractors;
- The variable grip width option is an advanced type of lister design that allows the grip of the cutting blades to be adjusted. The model allows you to increase the accuracy of processing beds planted by hand or under a walk-behind tractor. The disadvantage of the device is the low service life of the grip calibration mechanism, which requires regular cleaning of dirt and treatment with anti-corrosion compounds;
- A single-row model for a walk-behind tractor is usually an attachment for a specific walk-behind tractor, sold both separately and as a complete set with the equipment. The device allows you to hill only 1 row per trip, but is easy to maintain and durable. The single-row option is suitable for low-power models, as it does not load the walk-behind tractor even when buried deep in the ground;
- Propeller type - a solution for a walk-behind tractor with a gear selector. Models with one speed cannot cope with embossed blades, which increases the risk of engine overheating or locking of the walk-behind tractor's crankshaft. The design of the blades is similar to a disk blade, but has a curved cutting edge, due to which it performs two actions at once: first it plows the soil, and then pulls out weed rhizomes.
Advantages and disadvantages
The cost of a hiller depends on the complexity of the design and the power of the device - models that allow plowing several rows can reach the cost of a walk-behind tractor on the secondary market. Due to the high cost of attachments, it is easier to make a manual potato hiller with your own hands. All work can be done by one person and requires a minimum of investment. A do-it-yourself hiller can be made in 4-5 hours of free time and does not require specialized equipment other than an angle grinder and a welding machine.
Do-it-yourself hiller for walk-behind tractor
Hilling up plant crops is an agrotechnical measure that improves yields and reduces the cost of pesticides and irrigation. This procedure is effective on small farms where the soil is depleted but is intensively used. Without such treatment, it is difficult to obtain a high yield of a number of crops, especially potatoes. Hilling up beds with a hoe is a troublesome and time-consuming job. Therefore, additional attachments are used on mini tractors or walk-behind tractors.
Additional units are not included in the scope of delivery of agricultural machines. The equipment of the latter can be expanded by purchasing additional equipment. However, the price of ready-made kits is unreasonably high, or they are made of metal of inappropriate quality. This forces craftsmen to look for alternative options. It is better to make a hiller for a walk-behind tractor with your own hands.
Homemade options
The Neva walk-behind tractor is compatible with any attachment. All that is necessary is to couple it with the equipment body.
The hiller is a relatively simple structure that many people can assemble at home.
The simplest type of hiller to assemble at home is a disk hiller. All they need is:
Any steel with a thickness of 2 mm or more is suitable for making discs. But they will need to be given a convex shape.
Holes are made on the frame that will be necessary to change the distance between the disk racks. They are attached to the frame with special bolts.
Here is a detailed video instruction that will help you figure out how to make a hiller for the Neva walk-behind tractor with your own hands:
Types of attachments for walk-behind tractors
The hiller demonstrates effectiveness when planting potatoes. This attachment is used on walk-behind tractors, which reduces the labor intensity and time of planting potatoes. Tillage tools come in various designs and are suitable for any planting conditions. Potato hillers for walk-behind tractors are not included in the standard equipment of the unit, but you can make them yourself.
Lister hiller
This species is widespread among farmers. Its wide blades give it an external resemblance to a butterfly. The latter are made of steel sheet. They are located on both sides of the axis. During operation, the equipment lifts the soil with a cutter, and the dumps distribute the soil from the center to the edges, forming a ridge. The tip of the device is lowered below the soil level to a preset depth. The latter is set using a retractable leg located at the rear of the mechanism.
In the factory design, the width of the soil collapse has a fixed value (on average 25-30 cm). Limiting the processing distance complicates the hilling of crops with row spacing of 40 cm or more. To change sizes, a movable structure is used. The variable-width attachment has an adjustment mechanism that expands or contracts the blades. This allows you to adjust the tool to the desired row spacing. However, a larger processing area leads to increased power consumption.
If the working width increases, a weak unit will not be able to form a ridge of the required height in one pass. One bed will require several treatments.
Disc hiller
Universal disc weeder for processing the arable layer. The working body is concave disks made of sheet steel. They enter the ground at a given distance, loosen it and form a ridge. For effective use, it is necessary to install the discs at an angle in the vertical plane, as well as relative to the direction of movement. Positive sides:
Principle of operation
Gardeners know that hilling potatoes should be carried out several times a season. If the soil on the site is well-cultivated and loose, this contributes to a better process of oxygen exchange. The air entering the soil has a positive effect on the development and growth of plants. Timely loosening increases yield by 30–60%. Thanks to the design of the working body of the hiller, furrows with the required depth are obtained. The loosened soil falls off on both sides of the resulting ditch. Tubers are placed in it, and then the grooves are filled with earth. As the potatoes grow, you need to add a thick layer on top. This contributes to the formation of a large number of tubers. This addition is again ensured by loosening with the formation of a groove along the planted seedlings. This is achieved by the fact that the working parts of the hiller, when moving between the rows, cut off the top layer of soil.
Thanks to the wing-shaped device, the dumps fall onto the crop row and lightly cover it. Weeds are removed along with the cut soil.
In addition to potatoes, other crops that are planted in rows and require hilling, for example, tomatoes, eggplants, peppers, can be processed with a hiller. Tool designs differ in grip width, manual or mechanized operating principle. The first option is quite primitive, requiring two operators, one of whom takes the front handle, and the other presses on the rear link. As a result of the efforts, the device goes deep into the ground, cuts the soil, and when moving inside the formation, leaves a noticeable trail of earth. The automated version is attached to a tractor or walk-behind tractor and is controlled by one operator.
Manual and automated hillers can be divided into the following types:
- disc is a simple tool suitable for one person;
- garden plow is a universal plow that requires the presence of two operators.
It is clear that disc options are easier to use; they are also often automated by coupling with motor vehicles. The ridges of the earth after the disc hillers are higher. There is also a negative point in these devices - the price. Compared to a plow hiller, it is four times higher. Externally, the tool looks like a frame with wheels on which disks are suspended. The distance between them can be changed in accordance with the width of the rows. The discs are set at a certain angle, which is not recommended to be adjusted relative to the vertical. Without a constant equal distance between the circles, the tool will pull sideways.
Automation of the hiller is possible if the farm has a walk-behind tractor or cultivator. To fasten the tool, a bracket, a stopper, two bolts and washers are enough. When moving, the discs will grip the soil, creating a roller. To increase traction, the walk-behind tractor must operate in first low gear. By rotating the discs, the earth is crushed and loosened, covering the plants in the rows.
The simplest type of hand plow has a predetermined working width, wings (ploughs) shifted relative to each other, which are motionless. This is convenient if the row spacing has already been determined and the tool fits them. Another advantage of hillers with a fixed working width is the ability to use them with light cultivators weighing up to 30 kg. The advantage lies in its compactness, and the negative side lies in the limited work in wet areas. Here the tool will stick in the soil.
Read also: 220 volt reverse circuit
A hiller with variable working width is the most common option. The adjustment mechanism is simple, but it allows you to move or extend the wings, adjusting them to the desired width to the row spacing. The tool can also be automated, but only with heavy walk-behind tractors. The wings of such a hiller push the earth in both directions at once. After the tool passes, the part falls back into the line that it cuts. For a more efficient harrowing process, a more powerful walk-behind tractor is required, otherwise pulling the hiller will seem harder than working with a hoe or hoe.
A Dutch-type hiller is more convenient in this regard. This species differs from the previous one in the ability to move the wings not only to the sides, but also upwards. As a result, the tool itself adapts to the soil conditions. The hiller is more convenient for cultivating furrows for planting potatoes. This option is simpler and cheaper to make yourself.
Lister model
This homemade hiller for a walk-behind tractor is interesting because it is easy to make in a rigid, non-sliding version. Here is a photo of such a hiller:
Lister hiller
In order to do this, you need little time and material. Cut a blank from 2 mm steel according to the drawing, a certain configuration. Let's sharpen the future bottom edge. Let's bend it in the middle. How to bend? Through a fixed pipe. Complete the fold by punching the leading edge with a hammer. Then we spread the wings of the hiller. We fix the width between the wings with a steel cross member welded between them at the back. We punch through the bottom of the product so that the wings turn out to be ploughshare-like.
From the inside in front of the hiller, we weld a stand with several holes drilled so that you can adjust the depth (higher, lower) of the hiller’s immersion in the soil. We bolt the rod going to the walk-behind tractor to the stand. We attach the bar to the walk-behind tractor.
The same list model, made in a sliding version:
Sliding lister hiller
The hiller lies bottom up, so its structure is visible. Apparently, the hiller is factory-made. You can do exactly the same thing manually. Instead of a cross member tightly connecting the wings, three connection elements are used here: in the middle, welded in front, a rod with holes; two cross members from the wings, overlapping onto the middle rod. The connection point is secured with a bolt and nut.
The diagonal cross members are attached to the fenders using a welded eye, so the cross members can be moved. By moving the bolt closer or further along the rod, you can adjust the width of the wings. Everything else with a sliding lister hiller is done in the same way as with a non-sliding one. Of course, a sliding one is better. It turns out that you can adjust not only the depth, but also the width of the hilling.
Technology for planting potatoes with a walk-behind tractor
Tips for correct landing of Pro, Viking, Crosser, Patriot, Cayman walk-behind tractors:
- The row spacing when planting potatoes with a walk-behind tractor should be from 55 to 65 centimeters.
- The furrows must be made even, this will simplify the care of the root crop.
- Before planting, you can fertilize the soil.
- The distance between tubers is 25-30 cm.
The depth of planting potatoes under a walk-behind tractor is 10-12 cm.
When planting potatoes with a walk-behind tractor, make the distance between the rows the same. Watch the track width, it should be uniform. When cutting furrows, try to make them even. If necessary, pull the ropes to navigate along them.
Let's consider the main methods of planting: using a hiller, a mounted element - a potato planter, planting under a plow, planting in a ridge.
How to plant correctly with a hiller, at what distance and depth
To plant using a hiller, wheels with lug elements are placed on the motor cultivator. A Tarpan motor cultivator is a good choice. The furrows are being cut. Potatoes will have to be planted manually. After disembarking, replace the lugs with standard rubber wheels.
Rearranging the wheels is necessary in order not to injure the seed. The track width is left the same - 55-65 centimeters, and walk along the furrows again. The walk-behind tractor will fill the row with soil and compact the seed.
Planting with a hiller is a less expensive option. The unit should only include metal and rubber wheels and the hiller itself. The inconvenience lies in manual planting of potatoes. For large sown areas, a mounted planter for a walk-behind tractor is used.
This method is considered the least labor-intensive. The unit includes:
- A conveyor is a kind of conveyor that supplies seed.
- Furrow maker, for laying furrows.
- Dispenser for feeding potatoes at certain intervals.
- Disc hiller that lays and fills furrows.
How to plant with a potato planter
By planting potatoes with a walk-behind planter, you can save three times as much time as when planting with a hiller. The process is completely mechanized. Potatoes are planted and hilled at the same time. The potato planter has its disadvantages.
Firstly, seed material should be selected more carefully. The tubers should be the same in size. Young shoots are not very long. Otherwise, the seed will be injured during planting. Secondly, this planting method is more expensive.
Together with a walk-behind planter, you can use a special device to simultaneously apply fertilizer to the hole, along with the seed.
Planting with a plow
You need to install lug wheels and a plow on the walk-behind tractor. The soil is prepared by loosening using a milling cutter. The plow for planting is inserted into the ground to the depth of the spade bayonet.
It is more efficient for two people to board. The first one controls the walk-behind tractor, and the second one places the potatoes in the furrow. The work is done promptly. During the first passage of the row, seed material is laid. And during the return journey, the sown furrow is covered with soil from the newly plowed one.
Landing on ridges
Planting potatoes in ridges with a walk-behind tractor is practiced in areas where groundwater is located very close to the surface. To do this, you should use a walk-behind tractor to form ridges 15–20 cm high. The tubers are planted in the ridge. This option is only suitable for well-moistened soils.
Nuances of single- and double-row devices
You can install one or two hillers on a walk-behind tractor. Single-row ones include lister and propeller, while all types can be used in pairs. Depending on their quantity, the nature of cultivation changes. When processing a bed with one hiller, the passage is made on each side, and the wheels of the walk-behind tractor are placed in the rut between the plants. This method of cultivation does not allow obtaining high productivity.
Double-row hillers for walk-behind tractors increase cultivation efficiency. In one pass, a ridge is formed on both sides of the bed. However, during operation, the user has to control the contact area from both sides. This often leads to damage to plant roots. The convenience of such models is the ability to adjust the width of the hilling, which allows you to adjust it to the desired parameters.
For winding beds, the use of a single-row processing method is more suitable.
Varieties of manual hillers for potatoes: diagrams and step-by-step assembly
Depending on the design, there are the following types of manual hillers: lister (ploughshares with a fixed working width), disk, furrow makers (markers).
Lister mechanisms
Potato lister hiller is made as follows:
- A sheet of metal is cleaned of rust using a special attachment on a drill.
- On the cleaned surface, using a special pattern, two blanks are outlined.
- The blanks are cut out with a grinder and processed on an emery machine.
- The wide ends of the workpieces are bent in a vice so that the distance between them is equal to the row spacing.
- Two workpieces are welded with their front, non-curved edges.
- The working part of the body is reinforced with a corner.
- At one end of a thick steel strip, make 2-3 holes with an 8 mm drill.
- The second end of the steel strip is welded to the inner surface in the working part of the body.
- A small cut is made on a round pipe with a diameter of 25 mm and a length of 2-2.5 meters at a distance of 60-80 cm from one of its ends.
- At the place of the cut, a bend is made so that the angle between the pieces of pipe is 100-105.
- A fork with a wheel from a folding bicycle is attached to the end of the pipe.
- At a short distance from the fork, a long through cut is made along the pipe.
- Just above the bend, parallel to the cut, two strips with several adjustment holes are welded.
- The housing with the stand is inserted into the cut, fixed in the adjustment holes using a bolt and nut.
- A bicycle handlebar is attached to the long part of the pipe using a clamp.
- After checking the functionality of the assembled hiller, all its components are cleaned, degreased, primed and covered with 2 layers of dark oil paint.
The process of assembling and testing such a hiller can be seen in the following video:
Disc hillers
Homemade disc hillers are made as follows:
- Disks from a harrow or potato digger with bearing units are fixed on L-shaped posts.
- Two pieces are cut from the channel, and a through hole is drilled into its flanges, having the same diameter as the L-shaped disk stand.
- After this, a piece of thick-walled tube is welded between the shelves.
- A hole with a diameter of 12 mm is drilled in the middle of the tube, a nut is welded to it, into which a long bolt with a hex head is screwed.
- A hole is drilled at the base of each channel section, a nut is also welded to it, and a hex head bolt is screwed in.
- Racks with disks attached to them are inserted into brackets made of channels and tubes.
- A handle is welded to a square profile pipe (frame) on one side, and a fork for the support wheel on the other.
- A piece of square pipe is welded 20-30 cm from the fork across the frame.
- Brackets made of channels with racks with disks fixed in them are placed on the welded square pipe on both sides.
- A support wheel is installed in the fork.
- The depth is adjusted by vertically moving the stand in the bracket and fixing it with a screw screwed into the nut.
See also: How long do potatoes grow from sowing to full ripening?
You can see how a disk hiller assembled using this technology looks and works in the following video:
Manual potato hiller
The manufacturing process of the simplest manual hiller consists of the following operations:
- Applying the contours of two blank parts of the dump onto a sheet of rust-free metal.
- Sawing blanks with a grinder, processing them on an emery machine.
- Bending the wide ends of the workpieces at a certain angle.
- Welding workpieces, cleaning the weld seam.
- Welding between two parts of the moldboard of a reinforcement bar.
- Attaching a tube with a hole to a reinforcement rod.
- Cleaning, degreasing, priming the hiller.
- Fastening the handle in the tube, fixing it with a small self-tapping screw.
- This type of furrow maker is used for cutting planting furrows and hilling potatoes in small areas.
Hiller for tractor
A homemade hiller for tractors T-40, T-25 is a more labor-intensive and costly unit. Unlike hand tools, it is equipped with more durable and reliable factory hiller bodies with paws
Simplified, the manufacturing process consists of the following steps:
- Welding a frame from a square profile pipe 50×50×2 mm.
- Attaching support wheels to the frame with rods and adjusting screws.
- Attaching racks with hiller bodies to the frame.
After final assembly, all parts of such a home-made unit are cleaned, degreased and painted with oil paint. In this case, the racks with working parts are painted orange or yellow, and the frame itself is painted blue or dark blue.
You can clearly see the design of one of the homemade units of this type in the following video:
We manufacture a product for a walk-behind tractor
The simplest disk hiller can be made using the following video instructions:
In the form of a plow
A plow-shaped hiller is made in the same way as a lister hiller. The only difference in the design of this unit is the presence of a special adjustment of the distance between the blade wings.
Hilling potatoes with a plow
If you have a walk-behind tractor, potato hilling can be done using a special single-row or double-row plow.
When using a two-row plow, the lugs of the minitractor are connected through extensions. The design of the wheels should be larger than those used for plowing the soil. This technical solution to increase the diameter is necessary to prevent damage to the bushes during hilling with the bottom of the walk-behind tractor.
Plows must be adjusted so that they are in the working position in the middle between the rows of potatoes. Then each element of the plow is buried in the soil to the required depth and the axis of the mechanism is aligned vertically to the soil surface. This is done so that the stems are covered more with soil during the work process. Hilling with a double-row plow should be done through a row, since furrows are formed on both sides.
When using a single-row plow, it is necessary to install the lugs closer to each other. This is necessary because hilling will be carried out one row at a time, and if this requirement is not met, the walk-behind tractor may not be able to pass without damaging the bushes.
In addition to the methods presented, weeding and hilling with an active cutter are possible when extensions for lugs are also used on the walk-behind tractor.
How to mount a hilling implement on a walk-behind tractor?
Installing a hilling implement on a motorized cultivator requires proper adjustment of the tilt of the field board and the depth of immersion, which must be less than that of a plow. Before you start using the hiller, you need to do the following.
- Mount the coupling device and wheels on the motorcycle, then add a hiller.
- The walk-behind tractor is installed on an equal plane, and the hilling implement is lowered to the ground and fixed to the coupling device.
- When installing equipment, make sure that the stand of the agricultural implement is in a vertical position. This will ensure the required tilt of the field board is adjusted.
- Then the equipment lands or is slightly immersed in the soil so that it is below the supporting plane of the lugs.
It is necessary to do a test hilling and see: if the equipment is buried in the soil, move the stand forward, raising the toe slightly. When leaving the ground, the stand is retracted back by lowering the toe
The main thing is to take into account the width between the rows, adjusting the existing structural elements
Making your own hiller
Instructions will help you make a hiller with your own hands, as well as clear sketches of parts with the required dimensions. They are fairly simple designs. Any subtleties and features can always be seen in the photo or video of the manufacturing process. This will allow you to install all components correctly and quickly, so as not to have to redo the work later.
Required tools and materials
For work, you should prepare a number of tools: metalworking (vise, hammer, chisel, wrenches), electric (grinder, electric drill with a set of drills, welding machine), marking (tape measure, caliper). You also need to stock up on consumables: abrasive wheels, welding electrodes. Markings are applied with chalk, pencil or felt-tip pen. It is convenient to use a text proofreader in the form of a ballpoint pen for these purposes. It is easy to apply, and due to the formation of a thin line, cutting accuracy increases.
Homemade lister hiller
To make a homemade manual or automated hiller for any type of potato, you first need to draw a scale drawing of the mechanism on paper and indicate the required dimensions of the device.
Manufacturing equipment
In order for the work to be done quickly and efficiently, you must first prepare the tool. For this you will need:
A grinder and a welding machine are needed to make a hiller
From the materials you need to prepare:
Progress
How to install equipment on a walk-behind tractor
When installing a hiller with your own hands to a walk-behind tractor, you need to orient it correctly so that it is directed parallel to the line of the beds in the garden with the optimal angle of attack and furrow width. Then the furrow will be deep and symmetrical, and the ridges will be the same in shape. Therefore, the device must be adjusted. Before work, it is installed in the walk-behind tractor hitch and secured with pins or bolts.
For quick installation of attachments, it is convenient to use hollow axles with cotter pins.
You can adjust the angle of attack of the disc hiller by tilting its frame in relation to the cultivator. This indirectly affects the depth of cultivation. The latter is adjusted by moving the sole in a vertical plane through mounting holes drilled in the rack. By moving the brackets you can adjust the width of the passage between the furrows. If sliding blades are installed, they are used to adjust the furrow parameters and ridge height.
Types of manual hiller
There are two types of such tools for hilling potatoes: disk and plow (lister). They differ in the method of tillage. In a disc type, the formation of a ridge occurs during the rotation of two working bodies resembling plates. The beds are processed on both sides. In a plow - a mound of earth, side dumps are produced.
Disk
It looks like a U-shaped frame with disks suspended on it. The latter are secured in such a way that it is possible to rotate them around a vertical axis and move them apart. This is necessary to adjust the cultivation depth and width. By changing the angle of attack by rotating the working elements, the height of the ridge is increased or decreased. By moving the discs to the side, the width of the bed is set.
In the form of a plow
This type is also widely used by farmers. The working body - the ploughshare - cuts and loosens the soil, and the curved side blades throw it to the sides. The all-welded design has a fixed processing width (25-30 cm). Hillers with sliding blades are more complex to manufacture, but they can be used for various planting schemes. The depth of cultivation is adjusted by moving the support leg in a vertical plane.
Advantages and disadvantages
Homemade potato hillers make the farmer’s work easier, but in some cases they cause more harm. There are a number of features of using hand tools.
Table 1. Pros and cons of using hillers.
| Advantages | Flaws |
| Facilitation of physical labor | The beds should be level with row spacing of the same width |
| One worker service | Designs that process several rows at once are difficult to manufacture |
| Minimum cash costs | Operation of tillage tools is associated with increased risk of injury |
For your information! When processing beds with a hiller, as well as planning them, it is necessary to create wide row spacing.
Comparison of hilling devices
Analysis of technical data will tell the farmer which mechanism is suitable for cultivating the soil on his site. A brief description of soil-cultivating devices will help to carry it out.
Table 2. Comparison of hilling tools
| Tool | Usage | Safety | Price |
| Chopper or hoe | Requires a lot of physical effort, processing takes a long time | Does not require compliance with strict safety requirements. It is enough to work in closed shoes and thick clothing | Minimum |
| Manual hiller | Has a good cultivation speed with average labor costs | Sharp edges of cutting tools can cause injury. You should cultivate the soil wearing thick clothing and sturdy shoes. | Low |
| Walk-behind tractor with attachments | A minimum of physical effort is required. Requires constant maintenance and fuel refilling | Represents an increased risk of injury. When working, you must follow safety precautions | High |
Processing a potato bed
Now let's look at how to hill potatoes using a walk-behind tractor. Before you start hilling potatoes, you must correctly install the mechanism on the bed.
Unlike the lister device, for the disk device the processed potato bed must be between the disks.
Advice! The cultivator must be driven carefully along the rows so as not to damage the potato plants. The discs will automatically loosen, pick up and shovel the soil into ridges.
After the first row has been processed, the walk-behind tractor or cultivator is deployed and reinstalled so that the bush is located between the discs. With the help of a disk hiller, you can process potato beds in the forward and reverse directions using the reverse motion of the walk-behind tractor.
To increase the power of the walk-behind tractor when hilling on heavy soils, an additional creeper is installed on it. In this case, the increase in power occurs due to a decrease in the speed of movement of the mechanism and an increase in torque. Fix it on the body of the walk-behind tractor. This device will be especially in demand if an air-cooled walk-behind tractor is used.
The use of a hiller for processing potatoes significantly reduces human labor and time costs. A properly selected hiller configured for specific tasks will allow you to quickly hill up a potato plot of any size.
Watch the video: Disc hiller for walk-behind tractor
To make a potato hiller, you need to follow these steps:
If the hiller is assembled to be controlled by one person, then it is weighted on top and a skimmer wedge is installed on it in order to steer when pulled towards itself. Various fasteners, cam mechanism, brackets, and other parts will be useful for the job.
The given drawings and models of a potato hiller are conditional, because each craftsman will assemble the structure according to his own needs and convenience. When working with a manual potato hiller, you need to get used to it, calculate the force of pressure in order to turn out the layer of soil to the required height. It should also be noted that hilling is best done after precipitation. This hiller can also be used for digging furrows for planting potatoes.
Tips for using equipment
Before work, it is necessary to check the tightness of bolt connections and the settings of the unit. To do this, treat an area free of plants. During the test run, the operation of individual components is closely monitored. If deviations are detected, loose connections are tightened or the attachments are re-adjusted. All problems must be corrected immediately.
Before you begin, you must study the operating instructions and safety recommendations for using the walk-behind tractor. When processing beds, observe the following rules:
Do-it-yourself manual plow drawings. DIY hand plow
When planning to make a plow, you must first decide what type of soil you will have to plow with the unit and the type of crop you are going to grow.
It is advisable to provide a removable design of the ploughshare, so that it can be sharpened.
The unit body is made of sheet steel with a thickness of at least 3 mm.
Experienced craftsmen recommend cutting out all the parts from cardboard and gluing them together, maintaining all sizes and angles. Only after you are completely satisfied with the cardboard model can you begin metal work.
Reviews
I have been using a walk-behind tractor for 5 years. During this time, I managed to make more than 10 devices to make gardening easier. Among them is a 2-sliding disk-type hiller. Using old gas cylinders as blanks is an interesting idea to reduce the cost of purchasing materials.
I have been using this technique for cultivating my garden for a long time. A walk-behind tractor is a good assistant when planting and harvesting crops. This is especially true for potatoes. I have tried more than 6 hillers alone. Now I use a lister with adjustable blade width.
A self-made tool has an advantage over purchased models: it can be easily assembled, upgraded and repaired. In addition, the cost of its production is an order of magnitude lower.
Source
