Features and design options
A miracle shovel is a convenient device for digging earth that you can make with your own hands. The device allows you not only to dig up the soil, but also to loosen it. This saves a lot of effort, since when working with a regular shovel you have to periodically break up large clods of earth.
Principle of operation
The miracle digging shovel is a ripper consisting of two forks:
- The workers (the main ones) stick into the ground under the pressure of their feet. They are mobile, so they can enter the ground at any angle.
- The front support forks are stationary and run parallel to the surface. They produce additional loosening, due to which the earth is crushed, becomes uniform in density and is well saturated with oxygen.
The body is a metal frame with front and rear stops that contact directly with the ground surface. The main forks are equipped with a lever mechanism, which allows you to press them at a convenient angle when digging and then pull them out of the soil.
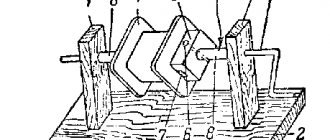
The schematic diagram of a miracle shovel for digging will allow you to easily make it yourself
Thanks to the presence of two forks, the device, along with its main task, also performs a number of other functions:
- Loosening the soil, saturating it with oxygen.
- Breaking up clods.
- Removing weed roots.
- Digging various root vegetables - potatoes, beets, carrots and others.
The described design is not the only one. There are several types of equipment, the most common are a ripper without a front stop, a digger and a light digger.
Ripper without front stop
The design is completely identical to the one described above, but it lacks the front stop. On the one hand, it provides reliability during operation - the tool lies well on the ground when digging, so all that remains is to press with your foot and stick the forks into the ground. On the other hand, due to the absence of a front stop, the design becomes noticeably lighter.
A miracle shovel without a front stop is less stable when digging, but not as bulky and heavy as the basic one
Digger
The digger is another “light” version. These are wide-spaced forks that are connected to the body. By pressing them, you can loosen the soil, but not so finely.
Digger - a simplified version of the miracle shovel
This design has its own advantage - with the help of bolts you can raise or lower the main axis to any height, focusing on the height of a particular person.
The stop is movable, since the shovel is not rigidly connected to the body. Therefore, first they press on it, and after the pins enter the ground, they turn it out. This device is suitable for digging light soils, for example, sandy or loamy soils. But it is not suitable for heavy, lumpy soil - in this case it is better to use the classic design with a front and rear stop.
Lightcop
A lightweight shovel is the simplest version of a miracle shovel. The design features a lighter, rounded stop. At the same time, it will not be possible to adjust the height of the handle, so when making it you need to immediately focus on height. The device is smaller in size and quite lightweight, but its stability (compared to the basic design) is less.
The lightweight digger is suitable for working on non-clayey soils
With extended and shortened bayonets
When drawing up drawings, special attention is paid to the length of the pins of the miracle shovel for digging. It depends on the density of the earth:
- 10–15 cm – for loose sandy soils that are easy to dig and loosen. Such an instrument is called “Plowman”;
- 15–20 cm: universal shovels for digging medium-density soil (loam);
- 25 cm or more - for heavy, rocky (clayey) compounds. This tool is called “Mole”.
“Plowman”, “Mole” and a universal shovel can be made of any design: classic, without a front stop, in the form of a light digger and others. They differ only in the length of the pins, and in all other respects they are completely the same.
Kinds
The classic version is a device in which “forks” are located on a metal panel, attached to it using hinged joints. Translational and rotational movements are performed: pointed rods plunge into the ground, digging it up. When the “forks” are pulled out of the soil, lumps remain, which additionally have to be broken up with a rake.
Improved ripper shovels are models that have an auxiliary element in the form of a crossbar, onto which the same pointed pins are welded as on the main part. The “forks” plunge into and out of the ground, passing through the gaps between the crossbar bars, crushing large lumps into small fractions. The roots of the grass cling to the pins; all that remains is to pull them to the surface.
In addition to the “Mole” and “Plowman”, the “Vyatka Plowman” model is known, the drawing of which was developed by the monk Father Gennady. Due to his state of health, the clergyman found it very difficult to work on his personal plot. He came up with a convenient and simple miracle shovel. Its manufacture requires a minimum of parts, and the performance of the tool exceeds all expectations. An arched steel plate is attached to the metal pipe on the left or right (depending on whether it is made for left- or right-handed people) (in homemade devices, the main part of a bayonet shovel can be used instead).
At the end of the pipe there is a pin that immerses the plate to the depth of the soil being excavated. Then a rotational movement is made, the clod of earth is easily thrown to the side with a shovel. If you dig up an area, taking steps backwards in a straight line, a smooth furrow will remain. Potato tubers and root crop seeds are left in it. When the gardener begins to cultivate the next row, the fresh soil will lie evenly in the furrow dug earlier. The homemade shovel of Gennady’s father was taken as the basis for similar models that are now produced by well-known manufacturers. Taking into account the physical characteristics of a person and his state of health, it is not difficult to choose the appropriate version of the miracle shovel.
Drawings, diagrams and dimensions of a miracle shovel for digging a vegetable garden
The drawings presented below allow you to make a reliable and durable miracle shovel with your own hands, as shown in the video.
When designing the device, it is recommended to proceed from the following dimensions:
- The width is in the range of 45–60 cm. You should not do less, since you need to cover as much soil as possible. But it is no longer recommended, because digging will be harder, the structure will be bulky and massive.
- The length of the fork pins is from 22 to 33 cm.
- The interval between the pins is from 7 to 8 cm.
- The length of the handle is according to height (aligned to the shoulder for ease of use).
Important! The interval between the forks should be the same, since they will fit into each other when digging. They are placed so that the pins do not touch in any way.
The most popular schemes:
- Drawing of a miracle shovel for digging with recommended dimensions.
Particular attention is paid to the length, number of pins and the spacing between them - Working forks - miracle shovels for digging.
- Complete design.
Dimensions and drawings depend on the types of apparatus. Below are several options.
Miracle shovel with support at the back (only one fork)
There is another popular option - a light cop. It features a lightweight design that is easier to move around the site.
The easy-digger diagram will allow you to assemble it at home
What and how to make it from
The designs, as you have seen, are different, but the set of materials will be approximately the same. Their number differs, but the cross-section and characteristics remain unchanged.
You can use a round or profiled pipe, metal rods or “parts” from forks
Materials for production
They usually start with making the frame. It is often made from a profiled pipe, the optimal cross-section is 30*30 mm or so. The wall thickness is important - at least 3 mm. Some models used a corner. The shelf width is also about 30 mm, the metal thickness is at least 3 mm.
The handle can be made from the same profile pipe, or you can use a round one. The thickness of the walls is also important. In principle, having made a latch, you can use a wooden shovel holder. Some purchased models provide for the installation of a wooden holder.
Corner frame
The main attention should be paid to the material that is used for the teeth of the working forks. It must be good structural steel. The forks are made from a rod of at least 8 mm in diameter.
What craftsmen make them from:
- They cut it off from an ordinary fork and weld it onto a miracle shovel.
- Straighten the suspension springs.
- Car springs are sawn into narrow strips.
If you can find a good rod - round, square or hexagonal - it doesn't matter, it will be much easier for you. Not a bad option, by the way, with a pitchfork. But you have to buy good ones, and this is not cheap. And one more thing: calculate the dimensions of the miracle shovel so that the working forks have 8 pins. Then you will need to buy two jokes of ordinary pitchforks.
If the design is chosen with two forks - working and thrust, you can place pieces of a suitable length of metal rod on the thrust forks. The loads here are not so high, so the strength should be enough. The diameter of the rod is 10 mm; you can use ribbed reinforcement, which is used to reinforce the foundation.
Dimensions
Most companies that produce miracle shovels have a range of sizes for this product. Our people are different in build and physical fitness. For men, you can make more massive models, and for women and older people, smaller and lighter ones. The average sizes are:
- The width of the working part is from 45 cm to 60 cm. There is no need to do more: it will be difficult to dig and productivity will only decrease, not increase.
- The length of the working fork pins is 220-300 mm.
- The distance between the pins is 70-80 mm.
- The length of the handle is according to your height; it is more convenient if it ends near the shoulder. The dimensions of the miracle shovel can be selected “to suit you” - it is important that it is convenient to work
All other sizes are selected depending on the design and material used.
Blueprints
Miracle shovel working forks
Detailing of the stop and forks
Full design with front stop
Option with single forks and rear support frame
Other dimensions of the digger and different design of the stop
Lightweight digger with solid bent handle
What tools and materials will be required for manufacturing
To make a miracle shovel for digging, you need to stock up on the following materials and tools:
- welding machine;
- sharpening machine;
- metal rod;
- 2 metal corners 50 and 60 cm long;
- pipe with a diameter of 15 mm;
- M10 bolts (2 pcs.).
All materials are standard. But it is especially important to find a good rod. It can be hexagonal, square or round - it doesn't matter. The main requirement is a diameter of 10 mm. Then the entire design of the miracle shovel will be reliable, which will allow you to dig even dense soil.
Step-by-step manufacturing instructions
You can make a pitchfork for digging potatoes yourself . To do this, you should carefully read the instructions, select tools and materials and begin the process.
Tools
If you want to make a pitchfork entirely with your own hands, then for manufacturing you will need the following tools:
Materials
To make your own forks for digging potatoes, you will need the following materials :
The handle is best made from birch or oak. It is not recommended to use pine, as it does not have sufficient material strength.
How to make a miracle shovel with your own hands
Making a miracle shovel for personal needs is quite simple if you have the skills to work with electric welding: it is with its help that you can weld all structural elements. The sequence of actions is as follows:
- Make 15 identical sections, each 30 mm long. Sharpen 8 of the 30 segments on one side using a sharpening machine (they are shown in the photo below).
- To construct the base of a miracle shovel fork for digging, you will need to take a metal corner 60 cm long and mark 8 identical parts on it (there will be 8 pins).
- On a 50 cm corner, mark 7 parts. You will need 7 pins.
- Weld the rods to the corners. To the smaller of them (50 cm) also attach metal corners (length 35 cm).
- Make round holes and loops at the edges. 14
- 2 identical fragments (length 125 cm) are cut from a metal pipe (Ø15 mm). They are slightly bent at the edges.
- Then you will need to weld the pipe sections. Secure them to the edges of the top corner.
- Weld the handle to the pipes.
The homemade shovel is ready. All that remains is to experience it in action.
Forks can also be made using a ready-made tool by simply straightening the pins. But this option is less durable, since the metal can be very thin, and the diameter of the rod must be at least 8 mm. Another option is to design forks based on suspension springs (straighten) or car springs (cut).
Important! When carrying out welding work, you must strictly adhere to safety requirements.
If you don’t have the skills, it’s better to buy a ready-made miracle shovel: it’s not worth the risk.
How to make your own miracle pitchfork to make digging easier
DIY electronics in a Chinese store.
Miracle forks are a tool used for gardening. It is a non-inversion, aerating tool, which means it opens the soil but does not turn it over. The wide fork allows air and water into the soil and promotes biological life in the soil, which in the top few inches consists primarily of aerobic organisms. A number of studies have been conducted on the importance of microorganisms that live in soil.
Miracle pitchforks can be purchased, but they can be quite expensive. They come in different sizes and styles. My goal was to make a spin fork from scrap materials and items I already had. This gardening unit weighs about 8 kg.
Step 1: Materials
Metal frame channel
2x4" x 60" Flat Steel Bars (2)
Mounting accessory
The following tools :
Angle grinder (cutting, polishing and grinding wheels) Hacksaw Vise
Safety equipment : leather gloves, goggle protection, welding mask, appropriate clothing
Step 2:
I cut a 22 inch (56 cm) section using a saw. I wanted the step to be wide enough to fit between the handles. Next I marked where I should place the five prongs. I spaced them 5.5 (14 cm) apart. Finally, I cut five notches wide enough for each of the prongs to fit through. *Five prongs is a good number for my needs. More than five will be better for established garden beds. Fewer tines will be more suitable for preparing new beds.
Step 3: Teeth
First, I used an angle grinder with a cutting wheel to cut 15-inch (38 cm) sections from salvaged steel lattice (x5). Secondly, the rust and burrs were removed using a grinding wheel. I then sketched out and cut out a knife-like point on the bottom end of the tooth. Finally, the top end of the tooth was cut at a 30 degree angle. Angled fingers are designed to reduce stress on the user's lower back. I then sketched out and cut out a knife-like point on the bottom end of the tooth. Finally, the top end of the tooth was cut at a 30 degree angle. Angled fingers are designed to reduce stress on the user's lower back. I then sketched out and cut out a knife-like point on the bottom end of the tooth. Finally, the top end of the tooth was cut at a 30 degree angle. Angled fingers are designed to reduce stress on the user's lower back. Angled fingers are designed to reduce stress on the user's lower back. Angled fingers are designed to reduce stress on the user's lower back.
Step 4: Fork
It is important to note that the material has a galvanized coating. It should be sanded or brushed with a metal wire (a few inches from the weld area) before welding. Grinding and welding can release zinc dust and fumes, which if inhaled can make you very sick. Not to mention, you'll get a better weld with fresh, bare metal. I added a prong to the slot and welded the prong in place. I repeated until all 5 prongs were welded in place. I then tried to clean up my weld using angle grinders. I added a prong to the slot and welded the prong in place. I repeated until all 5 prongs were welded in place. I then tried to clean up my weld using angle grinders. I added a prong to the slot and welded the prong in place. I repeated until all 5 prongs were welded in place. I then tried to clean up my weld using angle grinders.
Step 5: Collar and Handles
I needed a way to attach the handles to the step. I decided to use a welded spring support typically used for a trailer. First I cut two 2x4x8s to 60" (152cm). I then ripped two 60” 2x4s to fit snugly on the spring mount. The mounting hole is 1 7/8" (47.5mm), so I ran a 2x4 down the table saw. I used my drill press to create the hole for the bolt. Finally, I welded the handles and collars to each end of the step. This was one of the most difficult parts of the entire build. I wanted to make sure my handles were parallel so I couldn't just weld the mount and then add the handles. I had to weld the mount with the handles already screwed on (I wish I had a photo, but I didn't have a hand available for photos). I secured a 22″ section of 2x4 (the same length as the step) at the top of the handles to ensure the handles were parallel. *I originally chose the slipper spring support because a wheelbarrow handle would fit perfectly. Ultimately, I couldn't bring myself to spend $30.00 on two new handles when I have the option of tearing up a 2x4 already in the scrap pile.
Step 6: Test the miracle pitchfork in the garden
I started by testing in a raised bed that I have used for the past two seasons.
The bed had become compacted in the off-season and there was a layer of riprap that prevented me from getting the teeth to their full depth. I'm happy to report that the DIY Miracle Fork exceeded my expectations and was much easier than using my grape hoe to prepare the beds. It was nice to see earthworms as I lifted the soil (worms that would most likely have been killed if I had used a simple shovel). Now that I know the welds are strong, I'm going to paint the rod with a paint that will stick to the metal and prevent corrosion. I will also be shaping the handles to make them easier to work with in all the beds I plan to work on. Thanks for searching. Let me know if you decide to build your own happy planting! Source
Advantages and disadvantages of the tool
The miracle shovel has proven itself well, since it significantly facilitates work in the field and in the garden. The tool combines digging with loosening, which saves time and effort. Therefore, using such a shovel provides quite a lot of tangible advantages:
- The digging process is noticeably easier, since the main load falls on the legs and arms, while the back remains almost straight (unlike a regular shovel).
- Not only energy is saved, but also time. A vegetable garden can be dug up 1.5–2 times faster.
- Weeds are removed very easily and effectively. Their roots are torn out almost intact. Therefore, the land can be thoroughly cleared of weeds.
- The miracle shovel allows you to dig up root crops, which again makes your work easier.
However, this tool also has a drawback - it is much heavier than a regular shovel. Although there is no need to lift it when working. The front stop is placed at the beginning of the row, the main forks are pressed with your foot, after which the shovel is dragged (on the ground) one step closer (and so on until the end of the row). Over time, the movement of the tool across the soil will become almost invisible.
Forks with a spade tip
This tool is literally indispensable when digging up heavy types of soil, since its design makes it possible not to exert too much effort during work. The spade fork has, in addition to the usual fork teeth, one bayonet located on the edge. This protrusion differs from others in its greater sharpness and width. The bayonet of this device penetrates the soil layer without much effort, and the remaining teeth can easily be placed behind it.
When digging up potatoes, for example, the fruit will remain on the fork and the soil will slide back. In this case, you don’t have to bend over and pick up the tubers manually. They can be easily transferred from the unit to the wheelbarrow in one movement. In addition, vegetables are not damaged, as happens when working with a shovel.
Read also: How to pull out a car using a hand winch
As a rule, work in suburban areas , that is, people who are not young and do not always have good health, for this reason the question of what is the best way to dig up the earth becomes acute.
When using such forks, there is no need to bend and turn repeatedly. The work mainly involves the muscles of the shoulders and arms, while the lower back is practically freed from the load . For older people this is an extremely important point . The less they get tired, the more work they can do.
Using the fixture
It should be noted that this unit is very convenient to use: you don’t have to bend over, which significantly reduces the risk of injuring your back, which is very important for those who suffer from radiculitis. In addition, the degree of physical effort exerted also decreases, while the speed of work increases significantly.
The shovel works as follows: you need to press your foot on a special platform, plunging the tool into the ground. Then, without removing your feet from the platform, you need to take a step back with your free leg, while tilting the shovel in your direction. Thus, a lump of earth falls on the teeth. With light hand movements you need to shake off the soil, thereby loosening it. You can also turn it over, thanks to a sharp upward movement of the hand, while moving the tool back by 10-15 cm.
After treating the area in this way several times, it is worth walking over it with a rake, breaking up lumps of earth.
It is interesting to know that in the old days a shovel was called a spade. This name was born from the nature of the action - to step on the foot, or to step in, which means pressing on a metal bayonet.
It is noteworthy that factory-made models of shovels are often clogged with earth and perform their function worse. In addition, wooden handles inserted into special sockets also tend to break. Unlike these devices, in home-made units the connection of all parts is usually more rigid, which is why jamming and breakage occur extremely rarely.
However, this does not mean that a shovel made at home does not have its drawbacks. The possibility of deformation of sealed or welded seams, as well as breakage of plastic parts (if any), cannot be ruled out. However, the good news is that such flaws can only manifest themselves after many years of active use of the instrument.
Tips and tricks
Experienced gardeners who know how to make and modernize gardening equipment with their own hands give the following recommendations:
- in order not to load the back, the end of the handle when installing the forks vertically should be at the level of the digger’s chest;
- instead of a wooden handle, it is better to use a metal (ideally thick-walled aluminum) pipe, as it is more durable;
- in some homemade forks, craftsmen advise using a bicycle handlebar as the end of the handle, which increases comfort when working;
- cuttings made from high-quality polymer do not require maintenance and are lightweight, but are not suitable for working on heavy, dense soil.
The number of teeth on a classic fork is 4, but for digging potatoes it is desirable to have more (5 or 6) with a minimum crossbar length of 30 cm.
How to choose ready-made
There are a lot of gardening tools in stores, so it is often difficult for vegetable growers to navigate when choosing a tool. It is important to understand which forks are suitable for the site, given that the number of teeth must be at least 4, and their thickness must correspond to the density of the soil.
It is desirable to have a forged working part made from a single piece of metal.
Reference. Despite the high price, telescopic forks are very convenient to use, with adjustable handle lengths made of aluminum and durable plastic.
When choosing a conventional tool with a welding work base, it is recommended to pay attention to the following:
- quality of welds;
- steel of the working part (it must have an anti-corrosion coating);
- the teeth, if not provided for by the design, must have the same size and distance between each other;
- The handle is metal (the best option is aluminum), oak and birch are preferred from wood.
The best companies producing high-quality gardening tools are:
- from foreign - Grinda, Topex, Fiskars, Gardena;
- from domestic ones - “and “Bison”.
Rules for using garden equipment
Any tool must be used skillfully so that it lasts as long as possible. The operation of a hand cultivator is based on the principle of leverage. By pressing the foot pedal, a person helps to drive the working teeth into the soil. By lowering the lever with his hands, the summer resident forces the earthen layer to rise. In this case, the soil layer is broken by opposing teeth. Without turning over the entire layer, the device loosens the soil without depleting its fertile layer.
The peculiarity of the tool is that it can only be used on wet soils. It will not loosen dry soil. The best time to use unusual equipment is considered to be the beginning of spring and mid-autumn. But too moist soil is difficult to work with a miracle shovel. During the period of preparing the soil for planting, large areas are dug up with tools.
Caring for the tool is the same as for gardening equipment. It is stored under a canopy, protecting it from rain. For the winter, clean the teeth from soil and wipe all parts of the structure with a dry cloth. You can lubricate the metal parts of the shovel with machine oil to prevent rust.
Alternative drawings or “what can be replaced”
Above we described a drawing of a ripper, but there are also very practical models of shovels that can significantly simplify work in the garden. Such a tool will be especially relevant during harvesting, where you need to turn the soil over, and not loosen it.
If you need just such a miracle shovel, its drawings and dimensions will differ significantly. Firstly, the working area will be a metal plane, rather than pointed segments for loosening. The counters are removed. All that remains is the mechanism itself for reducing the effort to turn over the earth clod. That is, its advantage will only be in the absence of back strain - the earth is lifted by pulling the handle of the shovel.
Another very popular miracle shovel design is a tool with a triangular support. Its essence is to significantly reduce the effort when digging out a clod of earth. Its subsequent transportation is carried out using the spinal muscles, which will not satisfy the requirements of many builders. This design is perfect for working in very hard soil, where it is necessary to apply very high pressure precisely in the process of undermining the coma.
