Every person who grows and harvests various vegetable crops faces the question of storing it and preserving it for the winter. Most often, cellars were always used for this, but unlike modern options, they previously resorted to using ordinary pits lined with bricks. But today, more convenient and profitable solutions to such problems have appeared, and they are caissons for the cellar. What kind of device is this, and how is it more profitable than a regular pit? What types of caissons are there, and how to make them yourself?
Caisson. What is this?
The storage of pickles, vegetables, root vegetables and fruits is usually carried out in basements, cellars, sheds and storage facilities. Preference is still given to cellars, the construction options for which have always been quite numerous, but each of them has its own disadvantages. Whether the pit is made of brick, wood or concrete, the durability and tightness of these materials leaves much to be desired. Over time, brick and concrete lose their properties and deteriorate, and wood is exposed to mold and mildew. And often there is a problem with groundwater, which can penetrate into the cellar and spoil supplies.
But the modern world does not stand still, and today an excellent solution and a worthy alternative to old structures has been invented - a caisson for the cellar. It is a completely sealed dry chamber, which, being in soil saturated with water, or completely under water, creates an air pocket.
A caisson for a cellar can be round or rectangular in shape with a neck and hatch. To withstand groundwater and soil influence, the thickness of the caisson walls can reach sixteen millimeters. Ventilation is installed inside the structures to protect against excess moisture and dampness.
Advantages of a caisson
Caissons have a number of advantages:
- complete tightness, which allows you to install the device even in a place with high groundwater, without fear for the safety of products;
- are not subject to the development of fungus, which constantly happens with ordinary cellars;
- do not impart a specific odor to the products stored inside.
The caisson for the cellar can be installed anywhere, both under the house, barn and garage, and in the open air. Properly carried out waterproofing will guarantee protection from rain, sewerage or water supply accidents and groundwater. The caisson also has a more reliable level of protection against theft than a conventional cellar.
Types of caissons
So, there are several types of caissons:
- The caisson made of reinforced concrete rings is rightfully considered the most expensive and labor-intensive. To install such a structure you need a good foundation. Next, the rings are placed and the top cover is installed. Excellent waterproofing must be achieved. The main disadvantage is the heavy weight, which makes installation and waterproofing difficult, and the considerable price.
- The most popular option was the metal caisson. Such structures are made from steel sheets, welded into a sealed device with a ladder and a hatch. Such caissons must be treated with an anti-corrosion coating and equipped with a bypass valve in case groundwater enters the pit. This design always maintains the optimal temperature for storing pickles and harvests.
- A plastic cellar caisson does not require anti-corrosion treatment. Due to the fact that the structure is lightweight, no equipment is required for installation. Plastic caisson models are exceptionally tight and do not require waterproofing protection. A plastic cellar caisson will serve its owners for more than fifty years.
Which caisson to choose for a cellar
Currently, there are several types of caissons for cellars. Reinforced concrete structures made of concrete rings. It is worth saying that before making a caisson from concrete rings, you need to prepare a reliable foundation. After placing the rings, a durable cover is installed. If the cellar is made of reinforced concrete, high-quality waterproofing should be carried out on the water pressure side. The disadvantages of this design can be considered the large weight, which significantly complicates installation and the need for waterproofing. In addition, caissons made of reinforced concrete are quite expensive. From an economic point of view, it makes more sense to choose another option, for example, a plastic or metal structure.
DIY cellar layout in the garage.
Metal cellars are the most popular. They are made from steel sheets about 2 cm thick, from which a sealed cube with a built-in hatch and ladder is welded. Before making a caisson from metal, all parts must be coated with an anti-corrosion compound. In such a cellar, the optimal temperature for storing food is maintained. Groundwater may enter the pit, so special bypass valves should be provided. Plastic cellars do not require additional processing; they are light in weight, which allows them to be installed without the use of special equipment. Plastic models are highly airtight, so waterproofing is not required. Such a cellar can serve without fail for 50 years.
Do-it-yourself caisson for a cellar
Gaining popularity and fame, the caisson is increasingly used by summer residents. Since the groundwater level may periodically rise and threaten the safety of the crop, the owners build caissons for reliable protection from water. And besides, proper storage of the harvest will allow it to remain in its original form until the next season, and pickles will be stored for more than one year. The caisson can be purchased as a finished product along with installation services, or you can make and install it yourself. For those who are inclined to make their own decisions, we will tell you how to make a caisson for a cellar.
Choosing a place for a cellar
The optimal place for a cellar is on a natural or man-made hill. If there are no differences in the area, you need to find the “dryest” area with low groundwater. You can tell by the vegetation - where it is the shortest, the water is far away.
Ideal if you have a geological study of the site (ordered when planning a house). The location of aquifers is indicated there with sufficient accuracy. If there is no such study, the approximate groundwater level can be determined by the depth at which the water surface is located in the wells.
The best place to make a cellar is on a natural hill
Another option is to drill a well about 2.5 meters deep in the proposed location. If there is no water in it, you can make a cellar buried 2 meters or a little more. It is necessary to drill either in the spring, after the snow melts, or in the fall after heavy rains. At this time, the groundwater level is at its highest and you won’t have to worry about surprises in the form of flooding.
Based on the research results, the type of cellar is determined:
- If the groundwater level is below 1.5 meters from the surface, you can make a deep cellar.
- If the water is at a level of 80 cm, you can make it semi-buried.
- An above-ground cellar is more of a vegetable storage facility. It requires a large amount of work and is rarely done in private households.
There is another type of cellar - an underground floor, which is installed under the house if the house has a high enough base (1.5 meters or higher). Then they dig a small pit about 2*2 meters in size, going no more than a meter deep. At the bottom, extending onto the walls of the pit, waterproofing is laid, gravel (10-15 cm) is poured, and a plank floor is laid. If the water is already close, it is better to pour the concrete slab using standard technology.
By going slightly deeper into the ground, you can make an underground floor for storing canned goods and vegetables.
The walls are laid with bricks or a frame is made of impregnated timber, and the outside is well insulated. The roof of the cellar under the house is made below floor level and is also insulated. A slightly larger lid is installed in the floor. At this point, the construction of the underground floor is completed. This type of cellar makes sense only in a permanent home - it will always have a positive temperature. In seasonal homes without heating, it will freeze in winter, so it makes no sense to cost such a cellar at the dacha.
Caisson location
When choosing a location for the caisson, you should remember that in order to constantly blow fresh air onto the walls, it is advisable to place the device in the middle of the underground. A more common option is an underground space under the kitchen, with entry through the floor. Please note in advance that the caisson hatch must be closed with a tight lid placed flush with the floor.
It is most successful to install a caisson on the site before the construction of the main room. It is necessary to carefully study the place where you plan to install the caisson with your own hands. If the area on which the site is located is elevated and dry, there should be no problems with the arrangement. If the soil of the site is swampy, you will have to make an effort and work hard. Recommendations from experts favor the installation of metal caissons due to their greater reliability. But a large number of owners choose a plastic caisson for the cellar, which also has good user reviews.
How are caissons classified?
At the moment, several types of such cellar devices are being manufactured.
- Reinforced concrete structures . Their features are:
- Concrete rings are used for the manufacture of such products;
- before starting the installation of the caisson, it is necessary to prepare a high-quality foundation;
- A durable cover is installed on top of the device;
- This design requires high-quality waterproofing carried out on the water pressure side.
The disadvantages of this option may be:
- large mass, which significantly complicates the installation and implementation of waterproofing in the caisson.
- high price of the product.
- Metal caissons. These are the most popular cellars. In this case:
- for their manufacture, steel sheets up to 20 millimeters thick are selected;
- cube-shaped products are welded from them;
- a ladder is installed inside the device;
- A hatch is mounted on top, treated with a special anti-corrosion coating.
Inside the metal caisson, the optimal temperature required for storage of collected vegetables and preservation is maintained. To prevent groundwater from entering, a special bypass valve should be welded.
- Plastic construction. The features of such a caisson cellar are:
- it does not need anti-corrosion treatment;
- the device is lightweight, which does not require the use of additional equipment when installing it;
- the plastic model is highly airtight and does not require additional waterproofing protection;
- A plastic caisson can operate trouble-free for more than fifty years. The photo shows a plastic caisson prepared for shipment to the consumer.
Production of plastic caissons
Manufacturing caissons for metal cellars
To become the owner of a good caisson for storing crops, there are two solutions. In specialized stores you can purchase a ready-made metal caisson. You can also order a model according to your sizes. But if you have certain skills and abilities, it is quite possible to make a metal caisson for the cellar yourself. There are many options for the shape of the future caisson. The main thing is to remember that all seams must be welded inside and outside to exclude the possibility of water ingress. Poorly welded seams threaten rapid corrosive destruction and labor-intensive repairs. The walls and floor of the caisson must be made of metal, and the upper part can be made of concrete or wood.
Caisson pit
After the caisson is ready, you need to calculate the dimensions of the pit and make markings on the territory. The metal caisson is installed to a depth of at least 2.5 meters. When making markings, it is worth considering that between the walls of the caisson and the pit there should be a distance of 0.5 meters along the entire perimeter.
To avoid shedding of the walls of the pit, you should try to preserve the turf when digging. During work, after removing the top layer, problems with groundwater may arise in the clay. If this happens, a hole the depth of a shovel bayonet is dug in the middle of the pit to collect water. After digging is completed, the bottom of the pit is covered with sand in a layer of 10 centimeters. Tar, spread on the walls and bottom of the pit, will serve as additional protection.
Options
First way
- Place the metal caisson on a clay bedding 200-250 mm high, coat the outer walls with crumpled fat clay.
- Plaster the walls with your own hands and the floor with cement mortar on the inside with a layer of 20 mm. To do this, first make a frame from wire Ø 6-8 mm, stretch a steel mesh on it and secure it, the mesh cells are 30x50 mm.
- Prepare concrete and fill the floor with it to a height of 30-40 mm, level and smooth.
- Dry the plaster thoroughly.
- Coat the steel walls outside the metal cellar with molten bitumen to protect them from damage and rust.
Installation of metal vegetable storage in the garage
To enter the cellar, make a hatch at the top, 1 m wide, and install a ladder made of metal or wood, about 500 mm wide, underneath it. Cut the last steps into the bowstring, and use nails with a wide head for fastening.
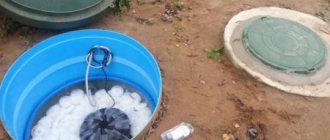
Caisson with ventilation in a suburban area
Tip: in the summer, the metal caisson must be dried.
Second way
You can also use old synthetic blankets for thermal insulation, which will keep the cost of the cellar to a minimum.
Slag wool, glass wool or other materials that do not rot are placed inside them.
- Securely secure the heat-insulating material with hooks on the surface of the box, which are made of soft iron. Cut strips from a sheet 2-3 mm thick: width 20-30 mm, length 100-150 mm.
- Bend one end of them so that the result is a hook. Drill a hole at the other end of the strip. Select the number of hooks depending on the size of the metal cellar.
Dimensions of a metal caisson box
Clean the prepared box from rust and cover all sides with bitumen mastic or molten bitumen.
- Dry the coating and install the box in the prepared pit. In this case, a distance of about 500 mm should remain from the walls of the latter to the walls of the cellar.
- Before installation, compact and level the bottom of the pit, then place a 200-250 mm layer of waterproofing on it made of crumpled fatty clay.
- Fill the clay with cement mortar to a height of 25-35 mm and level it.
- Place boards in the space between the walls of the caisson and the pit, retreating 200-250 mm from the walls of the box.
- Drive 2-3 pegs from the back of the boards and press the boards to them.
- Place clay between the walls of the caisson and the boards, cutting it into layers of the required width.
Shelves inside the caisson and stairs
- Fill the soil between the boards and the walls of the pit, compact it, then raise the boards to the level of the laid clay.
- Pour soil onto this layer of clay up to the edge of the board and compact it. Continue laying layer by layer, insulating the metal cellar caisson.
- Insulate the inside using expanded clay or slag. Make formwork from the boards and secure the posts to it with hooks, and then cover them with boards.
- Fill the space (50-100 mm) between the formwork and the wall with expanded clay or slag.
Installation of a caisson in a pit
How to make a caisson from metal yourself
As mentioned above, many owners of summer cottages are not able to make a full-fledged cellar, since the groundwater level often reaches the surface of the earth in spring and autumn. The situation is typical, so many have already solved it in their own way, for example, by digging a metal tank into the ground.
It is not necessary to make it too large, just enough so that it can accommodate all the necessary supplies.
Below are installation instructions.
- Making a tank . If you do not have metal welding skills, it is better to invite a professional welder to do this. The material will be a steel sheet, the thickness of which cannot be less than 0.4 mm.
For reliability, equip the tank with stiffeners. Then it will withstand the pressure of increased groundwater levels in the autumn-spring period.
Install a pipe at the bottom designed to collect groundwater during the first year of operation. Treat the walls of the finished tank with waterproofing materials on both sides.
The photo shows the manufacture of a metal tank for vegetable storage.
- We are preparing a foundation pit . While digging a pit, groundwater may seep into it. Their negative impact can be reduced by digging a hole in the middle to the depth of a spade bayonet to collect all the water. Then fill the hole with sand.
- We install the tank . Installation is best done in the fall, during the period of low groundwater levels. Place the tank in the pit and do not close the pipe on the bottom.
Groundwater must be given free access inside. It is clear that nothing can be stored in the cellar at this time.
It should not be used for its intended purpose for a year. Wait until it sits firmly in the ground. After a year, clear it of groundwater, plug the pipe, dry it, paint the interior walls again and install drawers and shelves for storing the harvest.
Advice: if you plan to make an entrance to the caisson from the house, it must be installed before building the house.
Caisson waterproofing
Since the metal is susceptible to corrosion, before installing the caisson in the pit, it must be treated with an anti-corrosion coating. Or, by purchasing a special composition, use paint-based waterproofing. Afterwards it is necessary to cover the caisson with bitumen. To do this, you can cook bitumen mastic in a boiler yourself. Taking an amount of bitumen equal to one third of the volume of the boiler, set it on fire. After the bitumen has stopped foaming, pour it in a thin stream into a previously prepared container with gasoline and mix. To treat external walls, the proportions of one part bitumen to three parts gasoline must be observed. For primary painting - in equal parts, for repeated painting - three parts bitumen to one part gasoline. The coating of the caisson with such a composition should be continuous, with an emphasis on sharp places.
Thermal insulation of the caisson
So, the caisson is protected from water penetration, but now it has a high temperature, which means that water will drain from its walls, which will cause the crops in the caisson to rot. To overcome this problem, installing thermal insulation is necessary. It is necessary to insulate the walls and bottom of the cellar as best as possible.
To make the caisson structure for the cellar as ideal as possible, it is recommended to make its insulating layer of clay at least 20 centimeters thick. The outer sides should also be insulated with the same layer of clay. To achieve better reliability, using cement mortar, the floor and internal walls of the cellar are plastered with a layer of 2 centimeters. To do this, a steel mesh with cells is installed on a frame made of steel wire with a diameter of 0.06 centimeters, fixed and plastered. Next, cover the floor with a layer of 3.5 centimeters and allow the composition to dry. Interior walls can be insulated with glass wool or warm blankets.
Features of using a caisson cellar
Tip: When choosing a place to install a caisson, you must take into account that it should be built in the middle of the underground, so that the walls of the device are constantly blown with fresh air.
Home owners should know that:
- When arranging a caisson cellar, it is most convenient to install it in the kitchen underground.
- It is better to enter it through the floor of the room.
- For the cellar, the hatch cover should be easy to open and close, and placed flush with the floor.
- The material for making the lid is taken the same as the floor.
- It is necessary to provide in advance for the installation of stairs to descend to the basement.
- The caisson should be installed before the construction of the main room.
- It is better to give preference to a welded metal device - it is more reliable. But you can also choose a plastic model.
- The design form can be:
- round;
- square;
- hexagonal;
- elliptical;
- rectangular.
Tip: When making a caisson, you should pay attention to the quality of the welds. They must be outside and inside the body with full penetration, which will protect the structure from water penetration.
- The floor and walls of the structure are made of metal, and the upper part can be made of wood or concrete.
How to arrange a pit and a catch basin
Taking into account all the recommendations, you can begin the construction of the caisson.
For this:
- The dimensions of the future pit are calculated.
- The area for development is being marked out.
- A hole is dug, at least 2.5 meters deep.
- The pit is marked so that between the walls of the caisson and it there is a distance along the entire perimeter of no less than half a meter.
Advice: When carrying out work, you must try to preserve the turf, which will protect the walls of the pit from crumbling.
- In the center of the pit, you need to dig a hole with the bayonet of a shovel, which will serve as a catch basin when liquid appears.
- The bottom is covered with sand in a layer 10 centimeters thick, which will serve as a cushion for the structure.
- The walls and bottom of the device can be coated with tar for reliability.
How to waterproof a caisson cellar
Advice: Before installing a metal caisson, all elements should be treated with special anti-corrosion compounds or special paint waterproofing.
Metal caisson with anti-corrosion coating.
You can purchase a special composition as a solution or weld bitumen mastic yourself in a boiler.
In this case:
- Bitumen is loaded into the boiler to approximately a third of its volume.
- Place on the fire until the moisture disappears, which can be detected when the mass does not foam.
- Molten bitumen is poured in a thin stream into a container with gasoline and the composition is thoroughly mixed.
External walls are primed with a solution consisting of bitumen and gasoline in a ratio of 1:3, the first layer of painting is carried out with a solution in a ratio of 1:1, all subsequent layers are 3:1. This composition is covered with a continuous layer, reinforced in sharp areas.
How to arrange thermal insulation of a caisson
The absence of water in the caisson does not prevent it from developing very high temperatures, which leads to water draining from the metal walls and rapid rotting of food. In order to get rid of this problem, it is necessary to build good thermal insulation of the bottom and walls of the cellar.
For this:
- It is better to install the caisson on an insulating layer of clay with a thickness of 200 to 250 millimeters.
- The outer sides of the cellar are insulated with thick, thick clay of the same thickness.
- The floor and internal walls of the cellar are plastered with cement mortar, a layer of up to 20 millimeters, which increases the reliability of the device.
Caisson installation
After preparation is completed, you can lower the caisson for the cellar into the pit. To install the caisson in the center of the pit, logs are first lowered vertically into it on both sides, which will act as limiters and guides for the caisson. Installation can be carried out using a winch, the cable of which must be constantly loosened and controlled by one person. The remaining participants in the process guide the caisson and keep it from swinging.
If the installation takes place in an area with constantly flowing water, the caisson will float. To overcome this problem, install a water seal. Fill the distance from the walls of the caisson to the cellar with clay, compacting it well. The water seal device must be below the soil freezing level. But even its installation does not provide a complete guarantee.
Arrangement of the caisson
After the caisson is installed, it needs to be equipped for ease of use. The modern market is replete with a variety of all kinds of boxes and shelves for storing food. The installation location will depend only on the preferences and imagination of the owners. You can also make your own wooden racks that are installed on racks made of timber.
In addition to equipping the caisson with various shelves and drawers, you need to take care of its ventilation. Therefore, ventilation pipes must be installed in each metal caisson to prevent dampness in the device.
To make access to the caisson convenient, you must use a ladder. It can be made of metal or wood, the main thing is that it is well strengthened on both sides, protecting it from movement and swaying.
Of course, for the convenience of using the caisson, it must have lighting. It can be electric or using candles, a lantern or a kerosene lamp. The main thing is not to forget about fire safety, and if a kerosene lamp is chosen as the lighting method, it is advisable to remove it from the caisson after use in order to avoid the specific smell of the products.
After filling the caisson with harvest and pickles, it is recommended to fill the top of the caisson with a material intended for thermal insulation, for example, slag or expanded clay. If moss, peat or sawdust is chosen for this purpose, they should be covered with a layer of earth or sand on top, since they are highly flammable.
How to arrange a caisson cellar
The instructions for equipping the caisson suggest:
- Install drawers and shelves for storing food along the perimeter of the caisson.
- To store root crops, such as potatoes, beets, carrots, special fences with a floor and walls are installed along one wall. Fences should be approximately one meter wide.
- Along the other wall you can mount special wooden racks with several tiers, with a distance between them of approximately 0.5 meters. They are convenient for storing fruits, various vegetables, pickles, juices and other preserves.
- In addition to drawers and shelves, pipes for ventilation should be placed in the metal caisson to prevent the occurrence of dampness.
- Here you can install a ventilation pipe with wind catching, which will be enough to ventilate a small room.
- Absorbent materials are used to absorb moisture.
- To make it easier to enter the cellar, you should install a metal or wooden ladder.
- The lighting of the cellar is being arranged. At the same time, you need to remember about fire safety.
- After filling the basement with products, the top of the caisson is covered with thermal insulation material. It can be: peat, sawdust, moss, slag or expanded clay. The photo shows the caisson equipment.
Arranging the caisson
After arranging the structure, you should keep it clean and periodically ventilate it. There should be enough oxygen inside the room and as little toxic gases as possible. In summer, the cellar should be dried.
The video shows how to properly set up a caisson and care for it during operation.