Plumbing
Workplace organization
A workplace is a part of the production area of a workshop or site with all the necessary equipment, tools, devices that are used by an individual worker or team to complete a production task. Each workplace is allocated an area of 6 - 10 m2.
The organization of a mechanic's workplace means the correct arrangement of equipment, the most advantageous arrangement of tools and parts in the workplace, and the systematic supply of parts and spare parts.
Currently, standard designs for a mechanic's workplace have been developed, based on the principles of scientific organization of labor.
The main equipment and permanent workplace of a mechanic is a workbench with a vice installed on it. The workbench is made strong and stable, well lit, covered with a metal sheet. The height of the workbench is considered correct if the mechanic standing straight has his arm bent at an angle of 90° and is at the level of the jaws of the vice. The workbench drawers store all the necessary tools, which are grouped by purpose (i.e. files should be stored in one place, measuring tools in another, etc.).
Each workplace is provided with a platform on which racks, stands and pyramids are placed for storing parts and spare parts with good access to them.
The necessary tools and devices should be positioned so that you can quickly and conveniently take what you need.
1. At the workplace there should be only what is required for work;
2. Tools and parts are located at arm's length on the left and right or in front, depending on which hand the tool is taken with;
3. Tools and parts are laid out in the strict sequence of their use;
4. Files, drills, taps and other cutting tools are placed on wooden stands to protect them from damage.
1.1. Metalwork markings.
Marking
is the process of transferring the shape and dimensions of a part or part of it from a drawing to a workpiece in order to indicate the places and boundaries of processing on the workpiece. Processing boundaries separate the material that must be removed from the material that forms the part.
Marking is carried out using various tools, which are divided into the following types:
1) for marking and making indentations (scribers, compasses, center punches);
2) for measuring and monitoring linear and angular quantities (metal rulers, calipers, squares, micrometers, protractors, etc.);
3) combined, allowing for measurements and marking (marking calipers, height gauges, etc.).
Scribblers
are used to apply marks on the surface of workpieces.
Marking compasses
in design and purpose they correspond to the drawings and are used for drawing circles and transferring linear dimensions.
The steel legs of scribers and compasses are made from U7 and U8 steels; the working ends of scribers and compasses are sharply sharpened.
Kerner
serves for making indentations on marking marks so that during processing the marking marks, even when erased, are visible. A center punch is a steel round rod, made of alloy (7ХФ, 8ХФ) or carbon steel (У7А, У8А) steel. Its working part is hardened and sharpened at an angle of 60°.
Squares
used for drawing lines, angles and checking them
.
Marking caliper
serves for measuring the dimensions of external and internal surfaces and for marking marks. It differs from a conventional caliper by the presence of sharply sharpened carbide tips on its jaws.
1.2. Chopping
Chopping —
a method of machining workpieces using a chisel or cross-cutting machine. Chopping removes excess metal, cuts off burrs on parts, cuts out cavities, non-metallic inclusions, lubrication and key grooves, cleans welds, etc.
Chopping is carried out in cases where special processing precision is not required and a small layer of metal needs to be removed from the part. This work is labor-intensive and low-productivity, requiring a lot of physical strength; it is performed using a chisel, a cross-cutting tool and a hammer, and is used only in cases where it is impossible to use machine processing.
During the chopping process, the cutting tool is held in the middle part with the left hand, and the hammer in the right, and the hammer is struck with such force that the chisel blade cuts into the metal.
To increase the productivity (6-8 times) of the cutting process, pneumatic and electric chipping hammers are used. Due to air pressure P = 5-6 atm. and electric magnetic field ensures the reciprocating movement of the striker.
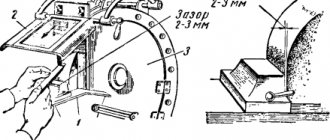
Bench chisels
(GOST 7211-94) are used for cutting metals and are available in lengths and widths of 100 (5), 125 (10), 150 (15), 175 (20) and 200 (25) mm, respectively. The angle of the tip is selected: for hard metal 70°, for medium metal - 60° and for soft metal - 45°.
Kreutzmeisel -
used for cutting out narrow grooves and keyways and differs from a chisel in having a narrower cutting part. The sharpening angles and hardening are similar to those of a chisel.
Chisels and cross mixers are made of alloy steel (7ХФ and 8ХФ) or carbon steel (У7А and У8А).
Locksmith's hammers
(GOST 2310-94) are available with round and square strikers. They are made from steels U7 and U8, steel 50 and have numbers from 1 to 8 with a weight of 50 grams. up to 1 kg. The length of the hammer handle is 250 - 450 mm; they are made of hornbeam, maple, ash, birch, oak and other durable materials.
1.3. Metal cutting
Sharp
is the process of dividing a workpiece into parts of given sizes and shapes, based on various methods of destruction of the workpiece material at the cut site. Cutting is used in cases where it is necessary to separate some part of a piece of metal, as well as when cutting corners, grooves, etc. in metal.
The following cutting methods are distinguished.
1. Sawing with hacksaws, band saws or circular saws. Used for cutting long products.
2. Cutting with scissors. Used for cutting sheet metal.
3. Cutting on metal-cutting machines (lathes, milling, etc.).
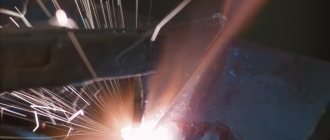
4. Oxy-acetylene cutting, used for cutting carbon steel workpieces of considerable thickness. It does not provide high accuracy, but is widely used due to its simplicity, high performance and versatility.
5. Anodic-mechanical, laser cutting, used for cutting high-strength materials when other methods do not provide the required productivity and quality.
Metal cutting can be done with wire cutters (wire cutting), scissors (sheets), hacksaws (profile metal), pipe cutters (pipes).
Hacksaws (hand saw)
are used for cutting pipes of small diameter, various profiles and are solid and sliding. Hacksaw blades are made from steel grades U10, U10A, U12 and U12A, alloy steels (Х6ВФ, В2Ф) with fine teeth in the form of wedges on one or both sides. Dimensions of blades for hand hacksaws: distance between centers - 300 mm, width -15; thickness - 0.8 mm.
The number of teeth for every 25 mm of working length of the blade is 16,19,22. Blades with large teeth are used for cutting soft metals, with medium ones - for tempered steel, with small teeth - for steel and cast iron.
During the cutting process, you should press the hacksaw only when moving forward (working stroke); when moving backward, metal cutting does not occur.
Large factories use special mechanical scissors, mechanized hacksaws, mechanical circular saws, gas cutters, abrasive wheels (grinders), etc., which increase the productivity of cutting operations by 8-10 times and significantly facilitate work.
A pipe cutter is used to cut pipes of various diameters, which greatly facilitates and speeds up the pipe cutting process.
Editing
is a method of processing workpieces with hammers or using special devices in order to eliminate deviations from the shape (warping, dents, bends, twisting) that occur during chopping and cutting of the material, during heat treatment, welding, or as a result of improper storage and transportation.
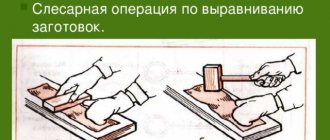
Straightening is done on straight slabs with hammer blows.
When editing
sheet with local convexities, blows should be applied from the periphery to the center of the convexity; When editing a sheet that has wavy edges, strikes with a hammer are applied in the middle.
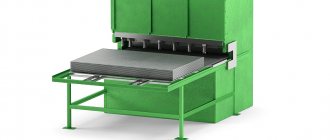
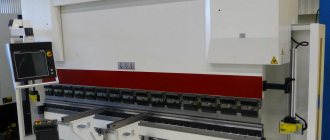
Mechanized straightening of metal is achieved using various devices, straightening rolls, multi-roll sheet straightening and angle straightening machines. The sheets are passed between the rollers several times until any bulges or depressions disappear.
Flexible -
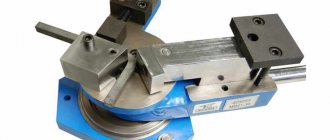
is a metalworking method in which the geometric shape of the workpiece changes as a result of plastic deformation in a cold or hot state. Parts of complex spatial shapes (clamps, brackets, pipeline elements, etc.) are produced by bending. Bending is used to give the required shape to sheet metal, as well as material of round, square and rectangular cross-section. Bending is done manually with hammer blows in a vice, in clamps, using special devices (universal bending machines). Pipe bending is usually done with fillers to avoid the formation of folds and flattening of the walls (sand, lead, rosin are used).
For bending pipes, manual pipe benders (up to d = 20 mm) and mechanical benders (up to d = 100 mm) with a wall thickness of up to 4 mm are used.
1.5. Filing
By filing -
is a method of processing workpieces with a file to obtain the required shape, size, and surface roughness.
Filing
metal is produced with a file, in a vice and is based on the destruction of the surface layer of the workpiece material by the cutting elements of the tool (file).
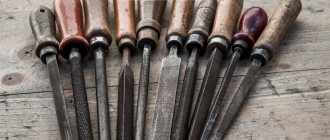
Files
(GOST 1465-93) are a multi-blade cutting tool whose teeth are located on the surface of hardened steel bars having different cross-sectional profiles and lengths. Files are divided according to the cross-sectional shape into flat, square, triangular, hacksaw, rhombic, semicircular and round, and according to the number of notches per unit length - into bastard files, having from 4 to 12 notches, personal files - 13 - 24 notches and velvet files, having 30 -80 notches per 10 mm length.
File length from 100 to 450 mm (every 50 mm).
Brushed files are used to remove a layer of metal up to 0.7-1 mm from a part; personal files are used after bastard files.
Files are made from steel grades U12, U12A, U13, U13A, 14ХФ and 13Х, as well as from high-speed steel.
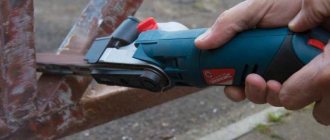
Mechanization of the filing operation is achieved by using filing machines, grinders, and special devices.
Material cutting
One of the most common processing operations that allows you to divide the workpiece into separate parts. Cutting can be done either manually or mechanized. In the case of a manual approach, hacksaws, scissors, gas-flame torches and pipe cutters can be used. But this tool is not able to cope with thick and high-strength workpieces. At the very least, the process will be labor-intensive and will not produce a high-quality product. For this reason, straightening, bending, cutting metal and other metalworking operations are often performed on machines. In particular, turning models of equipment are used for cutting. The highest quality cutting is provided by plasma and waterjet machines. The direction of the sandblasting flow onto the material ensures high-precision cutting of thick workpieces, regardless of the quality of the alloy.
1.6. Hole machining
Holes in the metal body for fasteners (bolts, studs, screws), as well as for subsequent processing (drilling, countersinking, reaming, threading and boring) are achieved by drilling. Standard drills made of high-speed steel with a diameter of 0.3 - 80 mm are used as a tool for drilling. According to the design and nature of the work performed, drills are divided into feather, spiral, centering, drills for deep holes, etc.
Feathers
-(flat) are easy to manufacture, durable, but do not provide high accuracy and cleanliness of the hole. Used for drilling shallow holes.
Spiral -
perfect in design, easily remove chips through screw channels, low friction force on the hole wall, do not require additional processing of the hole, allow a large number of regrinds.
Drills are made with cylindrical (up to d=12 mm), conical (6 - 60 mm) shanks. Drills are made of high-speed steel grades P18, P9, U10-U12 (small drills) and with hard surfacing of carbide plates.
Reaming
designed to increase the diameter of the hole in workpieces and is used when processing holes with a diameter of over 30 mm. First, drill a hole with a diameter of (0.2 - 0.3) D, and then drill this hole to a given diameter D.
Countersinking -
used for chamfering holes, producing cylindrical and conical recesses for screw heads and rivets.
Countersinking -
used for boring a hole and preparing it for reaming. Standard high-speed steel countersinks machine holes with a diameter of 3 - 100 mm. A countersink has a larger number of cutting teeth than a drill, so processing with it is more productive than drilling, and the quality of countersinking is higher than with drilling.
Deployment -
used for finishing a pre-drilled hole and obtaining precise geometric shape, dimensions and high purity
surfaces using cylindrical or conical reamers. Standard reamers are used for machining holes with a diameter of 1 - 300 mm in workpieces made of various materials.
For mechanical processing of holes by drilling and countersinking, pneumatic-electric machines and machines are used.
Metal straightening and bending
The installation drawings indicate the construction lengths of the pipe parts, which are the distance from the pipe axis to the center of the fittings or fittings located at the ends of the pipe parts. The installation length is the length of the pipeline part without fittings or fittings screwed onto it. It is less than the construction length by a segment equal to the distance from the center of the fitting or fittings to the end of the pipe, called the skid. When determining the blank lengths of bent pipes, skids are taken according to special tables.
Assembly and blank lengths of pipe parts are determined on the basis of construction lengths, depending on the skids of the installed fittings and connecting parts, as well as the bending radius of the pipes.
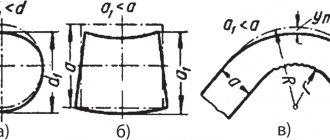
Pipe bending. When choosing a method for producing bending work, it is necessary to take into account that the thickness of a curved wall decreases, and that of a concave wall increases. In this case, the ovality of the curved part should not exceed 10% of the bending diameter, and the waviness of the concave part should not exceed 3% of the bending diameter.
Pipe bending is carried out in a cold or hot state on manual and driven machines of various designs.
Cold bending of pipes is carried out on a manual Volnova machine, which allows bending pipes with a diameter of up to 20 mm with a bending radius of more than 50 mm. When bending, the pipe is inserted between the rollers so that its end fits into the clamp. By turning the handle with the movable roller, the pipe is bent around the fixed roller at a given angle. After this, the handle is returned to its original position and the pipe is removed. It is recommended to clamp the long end of the pipe into a clamp and bend the short one. Combined Volnova machines with triple rollers are also used for bending pipes with a diameter of 15, 20 and 25 mm on one machine. For more precise bending, it is advisable to equip the machine with a circle with 5° divisions.
Pipe bending machines with screw and hydraulic drives reduce the muscular effort required for bending. For bending pipes of various diameters (up to 40 mm), they are equipped with replaceable sectors.
The STD-439 pipe bending machine is designed for bending steel water and gas pipes with a diameter of 15-32 mm. In the upper part of the machine body there is a working mechanism on which movable and stationary rollers are installed pyramidally. Each pair of fixed and movable rollers is used to bend pipes of a certain diameter. The pipe intended for bending is inserted into a clamp that corresponds to its diameter. When the machine is turned on, the movable roller moves around the stationary one and bends the pipe.
The multi-position high-speed mechanism VMS-26A is used for bending bends, wefts, staples from water-gas pipes with a diameter of 15 and 20 mm, and the STD-102 mechanism is used for bending bends and half-bends from water-gas pipes with a diameter of 25-50 mm.
In order to improve quality and reduce labor costs, standard parts of sanitary systems are manufactured using the stamping method. To do this, first cut the pipe to the required length and cut a thread on it. Then the prepared pipes (up to 15 pieces) are laid on the matrix of a hydraulic press. The press is put into operation and the pipes are given the required shape by pressing them with a punch. Stamped parts have the same dimensions of individual parts and a better appearance than similar parts processed on pipe bending machines. Using the stamping method, steeply curved bends with a radius of curvature equal to 1.5-2 pipe diameters are made from seamless steel pipes. After making the bends, their ends are processed for welding.
Hot bending of pipes is done by heating the bend and then rotating the end of the pipe around a mandrel. In this case, the bent pipe is filled with sand and secured at one end in a clamp or vice. The bending radius must be no less than the diameter of the pipe, and the length of the heated part at a 90° bend must be at least 6 diameters; when bending 60° - 4 diameters; when bending 45° - 3 diameters. When bending large-diameter pipelines (more than 50 mm), in some cases folded bends are used, which are manufactured on the construction site. To do this, places of heating and formation of folds are marked on the pipe. Then both ends of the pipe are closed with wooden plugs, the pipe is placed on a stand, the place of the first fold is heated, and then the pipe is bent until the first fold is formed. The resulting fold is cooled and the formation of the next fold begins; This continues until the required withdrawal is obtained.
Bending of plastic pipes is carried out in a heated (softened) state on pipe bending machines or templates fixed in fixtures. When bending pipes on pipe bending machines, the gap between the crimping roller and the pipe should be no more than 10% of the outer diameter of the pipe. The pipes are heated with air in electric furnaces or baths filled with glycerin. The heating mode is set depending on the pipe material and wall thickness. To prevent the walls of plastic pipes from becoming wrinkled when bending, a filler is placed in the pipe before heating, for example a rubber band, a flexible metal or rubber hose filled with sand. The outer diameter of the bundle or hose should be 1-2 mm less than the inner diameter of the pipe being bent. A rubber hose filled with sand is recommended for bending pipes with a diameter of more than 50 mm. You should not fill the pipes with sand, since in the future you will need to clean the inner surface of the pipes from adhering sand. Bending pipes without filler is allowed if the ratio of the pipe wall thickness to its outer diameter is at least 0.06, and also if the bending radius is more than 3.5-4 outer diameters of the pipe. When making bends, the bending angle is taken to be 9-10° greater than required, since the pipe bends somewhat after removing it from the template or fixture. Plastic pipes subjected to bending are cooled to a temperature of 28 ° C with compressed air or water in a fixed position.
Other operations
Of course, the range of processing procedures is much larger. For example, there is a whole layer of corrective methods that allow you to accurately model the shape of a product. Similar operations are performed with files, needle files and rasps. An even more important segment of work is represented by installation operations, which are performed after cutting, straightening and bending the metal. Plumbing in this area involves the operations of connecting, tightening, installation manipulations, etc. In installation work, pliers, ratchets, screwdrivers, the same hammers with pliers, as well as small fasteners and consumables are used. After all, we should not forget that the listed processing operations are carried out for specific purposes for the further use of the product - this can be in production areas, auto repair shops, and household use. For example, at home, a restored section of a deformed plumbing pipe or cutting a profile for a roof can be used.
Chopping
In some ways, this is a type of cutting, but of a different nature of execution. Also, the working tool in this case differs from standard cutting. Chisels, groovers and cross-cutters are used for cutting. For example, using a chisel, you can separate a layer of a metal surface, cut a workpiece into pieces, make grooves or make a hole. However, the possibilities for realizing complex forms of harvesting through cutting are limited. In this sense, straightening and bending of metals are more productive operations. Cutting is used in situations where, for various reasons, it is impossible to use machine processing and high demands are not placed on the workpiece in terms of the accuracy of the parameters. For example, if it is necessary to remove excess mass for subsequent processing with files, the sharpening tool will, if necessary, correct the shape formed by the same chisel.
Editing operation
Using straightening, the master changes the shape of the metal workpiece, restoring its previous appearance after damage. For example, the entire complex of straightening work in auto repair shops can be attributed to the operations of straightening and bending metals, during which curvatures, dents, swelling, warping and other defects are eliminated. Carrying out such work is possible both under the condition of thermal influence on the workpiece and in its cold state. However, heat softens the metal, which gives the performer an advantage. As for the tools, in the manual format, hammers, anvils, pliers, mallets, hydraulic presses and clamping mechanisms are used.
The mechanized method is implemented using machine presses and straightening rollers. Separately, it is worth noting the straightening stand (slipway), which, due to its great effort, allows for the correction of massive structures. Manual straightening and bending of metal can also be done on the stocks. Tools in the form of a vice and clamping mechanisms make it possible to eliminate complex deformations when interacting with the complete equipment of the stand. Such complex operations are usually performed at the sites of the same auto repair shops.
