Requirements for homemade structures
When making furniture at home, the craftsman must remember that the design must meet a number of requirements:
Sufficient strength, both fastenings and the shelves themselves. The best option would be a preliminary calculation of the maximum permissible load on the structure.
Compact dimensions must be optimally combined with sufficient capacity. In addition, it is better to make the shelves themselves at a slight slope to prevent books, toys, and souvenirs from falling.
Resistance of surfaces to moisture, detergents and abrasives. Preliminary impregnation of wooden parts with moisture-resistant oil will provide reliable protection of wood from rotting, and, consequently, from the development of pathogenic fungus.
When preparing for the construction of home furniture, you should definitely take into account the purpose of the future structure.
The rack can be used in the bathroom, hallway, kitchen and pantry. Homemade multi-tiered shelves are very popular in garages, workshops, and in a barn on a summer cottage.
As part of a modern interior, multifunctional furniture with sufficient mobility is welcome. To comply with this requirement, you should consider additional hooks, umbrella stands, and towel hangers for the design (for example, for a bathroom).
The presence of wheels will make the new bookcase movable, which will greatly facilitate wet cleaning or repairs.
Where to use a corner shelf
There are a huge number of options for arranging corner shelves in a house or apartment. Wall-mounted and floor-mounted structures can be placed:
This DIY corner shelf can be used in the kitchen and pantry. In such premises, every square meter is taken into account to organize storage areas. Such shelves can be placed in the most non-standard places (under a corner sink, above the junction of an L-shaped kitchen unit).
In the bathroom above the washbasin, a hanging shelf will find its application (location of personal hygiene items, organizers with decorative cosmetics). Some models of corner shelving can be additionally equipped with hooks and towel rails, a mirror facade, and lighting.
Very often, shelves up to the ceiling are used in the hallway and on the balcony. In these rooms, additional space for storing small items, bags, and boxes is very necessary.
Multi-tiered flower shelves are popular among zealous housewives. The convenient shape and size allow you to care for vegetation and store care, watering, and fertilizing products there.
Some craftsmen additionally think through designs for fixing fluorescent lamps (a light source to stimulate plant growth).
L-shaped structures can be used for any room where there is a shortage of free space or a room with non-standard sizes and shapes.
Selecting material for work
Thanks to the availability of building materials, every craftsman has the opportunity to make a wide variety of shelving with his own hands. The following materials are considered the most optimal:
Wood. As a rule, shelves are made of wood, and the supporting structures are made of metal profiles. Wood is an environmentally friendly material, characterized by sufficient strength and a beautiful natural shade. However, to protect against moisture, it is necessary to carry out high-quality treatment with moisture-resistant oil.
Chipboard panels, MDF, plywood are more affordable materials. The strength is in no way inferior to solid wood. Just like wooden beams, panels made from pressed shavings are absolutely safe and do not cause allergic reactions, but require additional protection from moisture.
Metal constructions. Racks made entirely from profiles with your own hands are particularly durable, beautiful in appearance, and resistant to moisture (especially after being coated with an anti-corrosion compound).
Rarer models of shelving are built from a combination of wood and plastic, metal supports and tempered glass.
What you need to create the perfect shelving
- Decide what you will store there. If these are heavy things, then a rack reinforced with a cross or a back wall is more suitable for you, but not a structure with ropes.
- Be sure to measure the place where the shelving will stand. This advice may seem obvious to you, but it will allow you to use the space as efficiently as possible. Mark the dimensions with masking tape directly on the wall to get an idea of what size shelving you need.
- Make a drawing or at least a quick pencil sketch if you don't fully understand the design. This way you will better understand the structure of parts and connections. It's easier to redraw than to redo the entire rack.
- Stock up on tools . Think about what you can borrow from friends or rent.
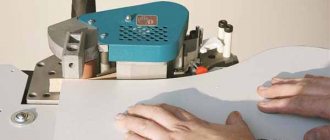
- Cut boards and other materials directly at a hardware store if you don't have a circular saw. Many large sites provide this service. It is impossible to make a long cut perfectly evenly with a hacksaw.
- When choosing a workplace, keep in mind that power tools make a lot of noise . Make sure that angry neighbors don't start banging on the wall.
- Cover things that should not get dirty with a covering film. After all, the dust from sanding wood will settle in an even layer on all surfaces in the room.
- Use a vacuum cleaner to reduce mess when drilling holes in wood and walls.
- Do not forget to use protective equipment when working: a respirator, safety glasses and gloves.
- Call an assistant . It's convenient to have someone hold the shelving wall while you screw it on. If you still want to work alone, get a couple of clamps.
- Attach the shelving unit to the wall with anchor bolts if you have an uneven floor or have small children or pets at home. Details are below, in the instructions for the rack on ropes.
Please remember that the following are just examples of work. You can change sizes and materials. Please note that the load must match the design. Check with the store to see if the size and type of material you choose is suitable for the weight of the items you will be storing there.
Step-by-step production of a wooden rack
Shelving at home can be built even from scrap materials; it all depends on the purpose of the future structure. For the living room or hallway, or children's bedroom, it is better to take a new piece of wood of sufficient cross-section.
Tool you will need:
- Jigsaw.
- Drill.
- Metal corners, screws.
- Planer for grinding surfaces and cuts.
Impregnation compositions and decorating coatings will be useful.
How to properly place shelving in a greenhouse
Approximate layout of shelving for a standard size greenhouse
There must be aisles between the racks; there can be one or several. The width of the passage depends on whether you will use additional equipment, such as a wheelbarrow.
For normal walking, 50 cm is enough, and for a wheelbarrow - about 60 cm. When also arranging shelving, it is worth taking into account the watering system, which needs access to the plants, and the placement of additional lighting.
In greenhouses equipped with shelving, it is necessary to designate a separate area for plants that require insulation. For example, a new plant that has just been purchased is not placed next to the others, since there is no guarantee that the soil is not contaminated with parasite eggs or that the plant is not sick.
Usually, for such needs, one shelf on a rack is allocated, where no more than 3-4 plants should be placed. It is additionally fenced on all sides with glass, and care is taken to ensure that the lighting in the quarantine area is not too strong. If no negative changes occur in the new plants, then after a few weeks they can be transplanted to the main racks.
Preparation of the drawing
The most crucial moment in all independent work is preparing the drawing. The following parameters must be displayed on the diagram of shelves and racks:
- Design dimensions.
- Depth of shelves.
- Distance between adjacent shelves.
- The width of the retaining sides (as a rule, their role is played by metal corners).
All available additional parts (hooks, wheels) must be indicated on the diagram in the appropriate scale. Ready-made drawings and designs for interesting shelving can be found and printed before starting work.
Manufacturing of shelving structures
Almost every person can construct a rack on their own; you just need to have at your disposal a drawing of the future design, the required wood, fasteners and tools.
How to choose the right material
Natural wood is the most suitable material for the manufacture of shelving structures of various types. When designing them, it is preferable to choose pine, oak or mahogany.
Attention: The use of particle boards is undesirable, since they do not have the required level of reliability.
When choosing wood, you should pay attention to its moisture content. Standard indicators usually do not exceed 10-15%. Before you begin assembling the rack, you should carry out an antiseptic treatment of the material, and then keep it in a warm room for several days.
To assemble the rack, the following tools are required:
- Pencil;
- Measuring tape;
- Electric jigsaw;
- Machine for grinding the surface of the rack;
- Hammer;
- Drill.
Regarding the material used, it is limited to the following points:
- Plywood board;
- Wooden beams;
- Brackets;
- Metal corners;
- Self-tapping screws;
- Furniture legs with fine teeth.
Glue is often used to fasten individual parts of a rack structure. The last stage of designing a rack is to coat its surface with varnish.
Preparing the main elements for assembly
Work should begin with the manufacture of the base of the rack. To do this you need to use a thick board.
- The length of the base must be equal to the length of the entire structure. Cross beams are nailed to the bottom surface of the board, which will strengthen the structure, making it more stable and durable.
- For the manufacture of side parts, it is recommended to use multi-layer plywood or natural wood.
- The next stage is applying markings. On the sidewalls it is necessary to mark the levels at which the shelves will be fixed with a width corresponding to the depth of the rack.
- To make shelves, you should choose a board with a thickness of at least 25 mm.
- To further strengthen the structure, some craftsmen recommend using cross bars, attaching them to the underside of the shelves.
Attention: If desired or necessary, it is possible to install a rear wall made of fiberboard or plywood, made taking into account the dimensions of the rack.
Preparing parts for assembly
The next, no less important stage of work is preparing the parts for assembly:
- The metal profile (or PVC pipes, or other material used for support posts) is coated with an anti-corrosion compound, protecting the surface from rust.
- Blanks for future shelves are cut out of wood using a jigsaw. All sharp cuts are carefully ground with a plane and sandpaper. Moisture-resistant oil is applied to the surface of the wood, the exposure time is maintained, and the remaining oil is removed with a dry rag.
After the oily composition has dried on the surface of the wood, you can begin to decorate the shelves (coating with PVC films or decorative veneer).
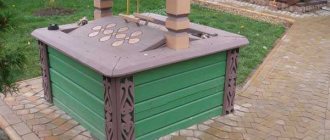
Nissan Almera >› Logbook › Garage. Part 9. Wooden rack.
I’ve been toying with the idea of building a wooden rack for storing items for a long time, and this weekend I decided to bring the idea to life. I bought a total of 30 meters of 50x50 mm timber, which turned out to be not enough, but I compensated for the shortage with the available building material and this is what I got:
Well, a general photo
Continuation. I bought the missing part of the lining and completed the shelves of the rack.
Spent: - for a frame 50x50 timber 35 meters (taking into account what was not enough for me) approximately 1400 ₽; - 11 cm wide lining for shelves. Approximately 50-55 m, approximately 1000-1200 ₽. — I had self-tapping screws for the frame and nails for the shelves, but I don’t count them. You can also strengthen the metal if you wish. corners, about 300 ₽ for a pack of 20 pieces, but I don’t see the point yet. Total 2500 ₽ + about 8 hours of leisurely work and you are the owner of a wooden shelving unit.
Issue price: 2,500 ₽
Final assembly of the structure
The phased assembly of the structure is a strict sequence of actions. How to make a rack with your own hands:
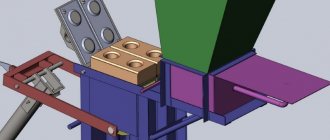
- Metal racks are welded in such a way that supports of the required size are formed.
- At the points where the shelves will be located, metal corners are welded, which will later hold the wooden panels.
The panels are laid on the corners and screwed with self-tapping screws. All welding seams, nicks, and irregularities are cleaned off so as not to spoil the appearance of the product.
Classification of wooden shelving
There is a generally accepted classification of shelving made of wood:
- A wall rack is a collection of several shelves that are a single structure. This solution allows you to make the most efficient use of the available space.
- The rotating rack is designed mainly for small items that are used every day. These can be both personal items and kitchen utensils.
- A mobile shelving unit is ideal for people who have not yet decided on the location of this structure. The presence of wheels allows you to move the rack without first unloading its contents.
- The stationary rack consists of vertical racks with crossbars and shelves attached to them. To give additional strength, the structure can be attached to the wall.
Photos of DIY shelving
Types of racks
The list of species with descriptions is below.
Frame
These products require a supporting base in the form of a wooden frame or metal. The required number of shelves can be attached to it. This is the most convenient option to install.
The frame rack is the easiest to assemble.
Beam
According to the scheme, they resemble the first manufacturing method, but have a more complex design and more materials. Suitable for household needs.
Beam racks are often used for household needs.
Modular
These are racks consisting of a ladder, a box, and a lattice. They can be of various shapes, attached to the wall, or have a free-standing structure.
Modular shelving often consists of boxes.
Console
This type of product does not have side walls, while the shelves are attached to the rear wall. Ideal for hallways and closets.
The cantilever rack has no side walls.
Rope
It should also not have sidewalls. This is a decorative type of shelving in which the shelves are attached to ropes. You should not store heavy things in this design. Can be used for a nursery, as a stand for souvenirs and toys.
Rope racking uses ropes instead of sides.
Cantilever racks
They are difficult to make on your own. They have a curved shape. They can perform a decorative function. Cannot withstand heavy loads.
The shelving of a cantilever structure performs a decorative function.
Bridge circuit
This type of design is not as practical at home. It is mainly used in production. Inside it there are partitions, which are made of boards similar to shelves.
The bridge circuit is used in production.
Where to start
Of course, the size of the shelving depends on the available space, but if you are not limited by the existing walls, it is better to build a structure of a certain size. The boards used should be no thinner than 20 millimeters; the width of the shelf depends on what will be stored on it.
For books or flower pots, a width of 30 centimeters is sufficient; the length of the shelf should not exceed one meter. If the length is longer, the shelf will simply sag under load, and such a product will not have longevity.
We would like to tell you good news - long TV stands from the manufacturer are a reality.
If the rack is needed to store tools, tires or something else, the width of the shelf should increase. In addition to the width of the shelf, the need to determine the intended purpose of the structure is necessary to calculate the load on the fasteners.
Lightweight structures are secured using conventional self-tapping screws, but heavier structures require the use of anchors and hooks.
Final decor of the rack
The finished structure must be painted. Of the various options, the simplest are coating with water-based acrylic paint or varnishing the product.
The advantage of acrylic paint is that it dries quickly and has virtually no odor. It can even be used indoors, although the room will still need to be ventilated. Varnishing is preferable if you want to preserve the structure or slightly tint the surface of the wood. Clear or tinted varnish to resemble oak, walnut, ash and other wood species should be applied two to three times. Each new layer is applied after the previous one has dried.
Before painting the rack, it is necessary to prime the surfaces to be painted, unless two-in-one paint is used. Priming the surface will ensure a good result and will ensure that the paint does not peel or crack over time. If you intend to paint with oil paints, it is recommended to do this in advance outside the living space. We bring all painted parts into the house for subsequent assembly only after complete drying.
So, once the shelving unit is assembled and painted, you can stand back and admire your work. However, your furniture will look more presentable when books, figurines, framed photographs and other household items for which it was made appear on the shelves.