Most home craftsmen or professionals involved in the independent manufacture of furniture, as individual entrepreneurs, know very well that they cannot do without a certain minimum of specialized tools.
Of course, for the production of small batches you will not need expensive stationary equipment intended for professional use, however, it is at least stupid to start cutting out the body parts of a kitchen pencil case when I only have a hand saw at my disposal.
To independently manufacture furniture products in a small workshop or garage, you need a certain tool arsenal, the cost of which can pay off after the manufacture of the first few cabinets, cabinets or pencil cases. Those for whom wishing is a hobby usually do not pay special attention to issues of payback and are ready to purchase an expanded set for their convenience. Let's look specifically at what you need to have on hand first, grouping all the tool items into categories.
Hand tool
The set of hand tools includes not only specialized accessories necessary for performing various operations in the manufacture and assembly of furniture, but also tools that are useful for performing other types of work.
This category should include:
- a tape measure with a measuring tape length of 5.0 meters, which can be fixed permanently;
- to mark the right angles of doors and parts of furniture cases and pencil cases, you will need a metal square, the size of the long side of which should be equal to 250.0...300.0 millimeters;
- a metal, flexible ruler 50.0...100.0 centimeters long will be required for marking parts with a curved perimeter and is a measuring accessory that complements the square and tape measure;
- a thick awl with a rubber handle, necessary for marking holes and used as a “scriber” - if it is not available for sale, you can purchase a screwdriver with a Phillips tip and sharpen its tip to a cone;
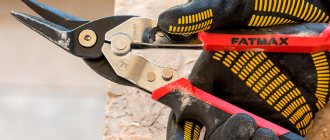
- a shoe knife, which will be needed for trimming furniture edges, cutting film coverings and cutting veneer;
- hammers with a metal and rubber head, the first will be used traditionally for driving fasteners, and the second will be used for joining parts, hammering plastic profiles, connecting furniture elements using wooden dowels (pins);
- three clamps with a grip size of 100.0 millimeters, which will be required when gluing parts, gluing decorative elements, and fixing individual elements to each other at right angles;
- a set of screwdrivers of different sizes, having different tip shapes (working edges) or a universal screwdriver with a set of different tips, which will be required for finishing work when screwing fasteners, as well as when performing delicate operations when installing furniture fittings;
- pliers with wire cutters are auxiliary tools, but they are often required for unscrewing incorrectly screwed fasteners, removing screws with a broken slot, or dismantling defective wooden dowels and plastic insert shelf holders.
Measuring tool for furniture making
At all stages of making furniture with your own hands, you will need a measuring tool. Even if you just wanted to assemble ready-made IKEA furniture, you can’t do without measurements.
- Markers and pencils. Markers come in different thicknesses, mostly alcohol-based, which can be easily erased when the mark is no longer needed.
- Tape measure and square. It is worth taking a responsible approach to the choice of this measuring instrument and giving preference to those options where there will be no doubt about the accuracy of the calibration.
- Awl. Using an awl and a pencil, it is convenient to mark the places for screwing in self-tapping screws and holes for confirmations, shelf holders and other fasteners.
- Level. Strictly speaking, this tool for making furniture with your own hands will only be needed at the very initial stage - measurements. In order to correctly develop a design project for a built-in wardrobe, it is important to take into account the curvature of the walls and the difference in horizontal and vertical planes. You will also need a level when installing already assembled modules.
- Furniture templates and conductors. Ready-made furniture jigs for marking holes for guides, hinges, handles and other fasteners make the process much easier. After all, in fact, all connecting holes in furniture are applied in the same way, according to the well-known “System 32”.
Furniture templates for marking furniture parts can be purchased ready-made.
Or make it yourself from thick cardboard, leftovers and scraps of thin plastic, fiberboard, HDF.
Electric drill
An electric drill is one of the main tools when making any furniture products yourself. When choosing it, preference should be given to products with speed control and reverse.
When choosing a specific model, you can use the following recommendations:
- the power of an electric drill should be in the range of 0.5...0.75 kilowatts;
- It is advisable to purchase a drill equipped with two chucks - a quick-release chuck and a cam chuck, in which the drill is clamped using a toothed wrench;
- To install furniture, you will need a drill with an impact mechanism, which will greatly facilitate drilling holes in concrete walls when hanging cabinets, pencil cases, shelves, and racks.
Some nuances of choosing an electric drill:
- it is advisable to purchase a drill in a “suitcase” - this kit is usually supplemented with sets of drills, bits and other drilling accessories;
- It is not at all necessary to purchase expensive MAKITA or BOSCH devices - for independent production of most furniture items, Russian, inexpensive, but no less functional power tools, produced under the Interskol or Fiolent brands, are quite suitable.
Selecting a screwdriver
Despite the fact that many operations for screwing fasteners can be performed using an electric drill, if you have the financial means, it is advisable to purchase a screwdriver, which will not be superfluous in the arsenal of an amateur furniture maker.
The advantages of a screwdriver compared to most widely used models of electric drills include:
- autonomy of drilling and fastening operations;
- possibility of working at minimum spindle (chuck) speeds;
- The compactness of some types of screwdrivers, called “electric screwdrivers” in furniture makers’ slang, allows you to perform operations in hard-to-reach places in the internal compartments of cabinets, cabinets and pencil cases.
When choosing a screwdriver, you should adhere to the following recommendations:
- this type of power tool should be light, small-sized, maximally ergonomic and convenient to use;
- It is desirable to have a replaceable (spare) battery;
- the presence of spindle (chuck) reverse is mandatory;
- when choosing a screwdriver, it is advisable to give preference to models equipped with a quick-release chuck;
- in addition to an electric drill, only cordless models should be purchased;
Features of choosing a battery:
- Despite the high cost, preference should be given to screwdrivers equipped with lithium-ion (Li-Ion) batteries, which, compared to the widespread nickel-cadmium (Ni-Cd) and nickel-metal hydride (Ni-MH) batteries, do not have " memory effect";
- the screwdriver must have a battery “zeroing” button, which helps reduce the negative consequences of the “memory effect”;
- Screwdrivers with nickel-metal hydride (Ni-MH) batteries allow a greater number of charge-discharge cycles.
Choosing a jigsaw
An electric jigsaw will be needed for:
- figured cutting of the perimeter of parts;
- cutting out holes for a sink, hob, counter and other built-in appliances;
- processing edges for gluing melamine film.
When choosing a specific model, you can use the following recommendations:
- The power of the jigsaw should be more than 450.0...500.0 watts - with a lower value, the hacksaw blade cannot be ruled out when cutting parts of complex, curved shapes;
- the presence of a pendulum motion and the speed of movement of the hacksaw blade is mandatory;
- the choice should be made on samples that have a universal clamp that allows you to secure a file of any type;
- it is desirable to have protective glass and an inclined platform that allows you to make an angled edge;
- this type should be light in weight, its handle should fit comfortably in the hand, and the product as a whole should be as ergonomic as possible.
Nuances of choice
You should not strive to purchase a jigsaw from well-known brands. The Fiolent model line produced in Russia is very popular among professional furniture makers, in which you can find samples of electric jigsaws of varying power and functionality.
Grinder
In individual furniture production, a belt sander (sander) will be required when performing operations together with a jigsaw. For example, when cutting out curved parts with an electric jigsaw, the cut of the particle board and MDF board must be additionally sanded before gluing the furniture edge.
When choosing a specific belt sander, you should adhere to the following recommendations:
- the power of this type of power tool must be at least 500.0...650.0 watts;
- the machine must allow the use of sanding tape up to 100.0...125.0 millimeters wide;
- preference should be given to products equipped with a dust collector;
- It is advisable to purchase a sanding machine that has a smooth or stepped (multi-speed model) adjustment of the speed of the sanding belt;
- your choice should be on sanders with the function of centering the sanding belt;
- this type of power tool, just like a jigsaw, should be light in weight and equipped with a comfortable ergonomic handle.
On a note!
The most versatile and easy to use are various samples of belt sanding machines from the MAKITA brand. Despite their high cost, their versatility, functionality and ease of use are significantly superior not only to their Russian counterparts, but also to products from BOSH.
Choosing power tools for a carpentry workshop
If there are usually no problems with choosing a hand tool, then when it comes to choosing a power tool, a lot of questions arise. Therefore, it is important to make a basic list of the essentials.
To the so-called Basic power tools, without which it is impossible or difficult to make furniture, include:
- Electric drill;
- Electric screwdriver;
- Jigsaw;
- Belt sander.
This set is enough to start making, albeit not the most complex, but high-quality products. In the future, as skill grows and work becomes more complex, the list of the best tools will be replenished.
When choosing a power tool for a novice craftsman, the main thing is not to go to extremes, buying only the cheapest models or chasing expensive professional products from one high-quality manufacturer. It is worth sticking to the golden mean of “price/quality” and choosing a tool not according to its cost, but one that will be convenient for you to use.
This article explains in detail how amateur power tools differ from professional ones.
Beginner carpenters often have a question: do they need power tools such as a milling machine, jointer, surface planer, or circular electric saws in the workshop, and at what stage should they be purchased and what should be considered when purchasing, except for the price.
ArchimedUser FORUMHOUSE
I thought about equipping my workshop. I need to process the boards for wall cladding, and in the future I plan to make furniture. With a good hand tool everything is clear, but there are a lot of questions about using an electric one, and you have to “fit into the budget.” I need expert advice on what I should buy and what I will need in the future. So far my rating is:
- drill;
- screwdriver;
- grinder;
- jigsaw;
- electric plane;
- circular saw;
- manual frezer;
- thickness planer.
The topic, created by Archimed, received a wide response. Many professional craftsmen offered their own options for equipping the workshop.
SitnikoffFORUMHOUSE user
When I first started carpentry, I needed to make a simple workbench, and all I had was a bow saw, a drill, an old plane, several chisels, Forstner drills and a shoe knife. All. But I made a workbench. Now, after 10 years of carpentry, my ranking of the best tools is as follows:
- Milling table with router;
- Manual frezer;
- Belt and eccentric sander;
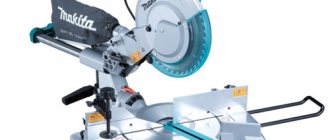
- Miter saw;
- Table saw;
- Several electric planers;
- Electric jigsaw, electric drills and screwdrivers;
- Dust removal system;
- Grinder;
- Compressor for a carpentry workshop with a spray gun;
- Thicknesser machine.
This is not the entire list of power tools. Plus, I had to pick up a lot of hand tools.
Moreover, Sitnikoff does not plan to stop there and is thinking of acquiring:
- Joiner;
- Band saw;
- Drilling machine;
- Wood lathe;
- Install a chip removal and air ventilation system.
This is the choice of a tool for a “pro” who knows well what he needs and how he will use it.
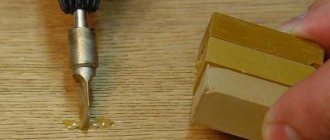
Using an iron and hair dryer to glue the edge
Do not confuse a household and an industrial hair dryer. For self-made furniture, the presence of this industrial device is, if not necessary, then desirable. It will be required when gluing melamine edges to the cut of chipboard parts. Many home craftsmen use an iron to perform this operation. But when lining sections of parts with complex shapes, using an iron does not always allow you to glue the edge lining beautifully and efficiently.
When using an iron, you can choose any household electrical appliance whose working surface you don’t mind making unusable for further ironing. It is advisable to choose a model that is not afraid of overheating and is capable of maintaining the desired temperature for a long time. Any cheap, no-frills, Chinese-made iron that has a thermostat meets these conditions.
An industrial hair dryer is used for gluing melamine edges onto parts of complex, shaped shapes. Of course, there is no point in purchasing it to make one table or wall of furniture. In this case, you can rent a hair dryer or borrow it for temporary use from friends. However, it is advisable for an individual entrepreneur specializing in the production of small batches of furniture to have this device on hand.
When purchasing it, preference can be given to inexpensive Russian samples and you should listen to the following advice:
- the device must have a heat power regulator (you can take a device with a two-position heating switch);
- the electrical power of the device can be in the range of 1.5…2.2 kilowatts;
- for small-scale wholesale furniture production in garage conditions or unsuitable premises, you can abandon models with ceramic inserts and purchase a conventional device, which will have to be periodically disconnected from the network to avoid overheating.
Subtleties of choice
During operation, the nozzle of cheap industrial hair dryers quickly heats up to high temperatures, so it is advisable to equip the device with a separate stand in advance to prevent contact with other objects. When deciding on a specific sample, you should not chase prestigious, branded devices. Today, inexpensive Chinese devices perform their functions quite reliably, and are much cheaper than their German and Japanese counterparts.
Tool for cutting and edging furniture parts
Cutting parts to size and then gluing the visible ends is rarely done at home. It is much easier to order cutting and edging in a workshop. Many companies that supply chipboards offer these services locally. It's very convenient and ultimately cheaper. If you take into account your own labor costs for the need to transport entire sheets of chipboard, their loading and unloading, the cutting itself, sanding the ends and covering them with melamine tape, as well as all the costs of electricity and consumables. Value your time.
In addition, cutting on a wide-format machine is much more accurate and of higher quality than manual cutting, and PVC edges are many times superior to melamine edges in terms of durability and aesthetics.
But there are some designs of built-in furniture (in particular wardrobes) that require adjustment and sawing in place. Some beveled and radius shelves are also designed during installation. This is how hobs and sinks are embedded into kitchen countertops.
In these cases, you should ensure that you have the following tools for making furniture:
- Jigsaw with wood files . The main electric tool for making furniture with your own hands, if you need to saw parts at home. The length of the file is selected according to the thickness of the material (it can be fiberboard with a thickness of 4-5mm, chipboard with a thickness of 10-25mm, postforming with a thickness of 26-38mm). As well as narrow files for decorating radii with reverse and straight teeth without streaking.
- Manual router for removing edge overhang . It will be needed when gluing and subsequent processing of PVC edges with a thickness of 1-2mm. The technology requires a certain skill and additional study to carry out at home.
- Grinder machine. An indispensable tool when installing built-in wardrobes. Using a sander, you can adjust the parts to fit the unevenness on the wall, for a tighter and more aesthetic connection without gaps. The grinder is also used to smooth the ends after cutting with a jigsaw, in order to glue the melamine edge more accurately and evenly.
- Iron or hair dryer. The melamine tape is glued with a regular iron and gently pressed until it is completely glued. You can use a hair dryer for these purposes, manually pressing the edge with a rag. Wear gloves, otherwise you may get burned.
- A stationery knife and a blunt knife, sandpaper 40, 60, “one” and “zero”. Excess glue and edges are carefully cut off with knives, then the cut edges are sanded to a visually aesthetic appearance.
- Silicone sealant or wax, wax restoration crayons, touch-ups for masking defects and scratches . This set of consumables cannot be classified as a tool for assembling furniture with your own hands, but in the process you will definitely need it for processing cuts, accidental defects, etc.
Additional tool
In addition to the tools described above, additional equipment may be required to carry out work on manufacturing, updating and assembling products.
The furniture stapler will find application not only in the manufacture and draping of upholstered furniture, but also in the production of cabinet objects. Using a fairly powerful mechanical tool, you can nail the backs or bottoms of fiberboard drawers. This device is indispensable when updating furniture items when drapery replacement is required. Preference is given to samples that have a push metal handle and an adjusting screw that allows the use of different sized paper clips.
A hex key for screwing confirmat (euro screws) is a fairly popular hand tool today. It is indispensable for tightening screws with a hexagonal internal slot in hard-to-reach places where it is difficult to get to with a screwdriver or screwdriver. Of course, this accessory is not suitable for regular use. After screwing in a couple of dozen European screws, the hand ceases to “feel” the tool. In addition, modern products are made of soft (unhardened) metal and their edges quickly wear off.
Consumables and replacement attachments
For normal operation of any type of tool, periodic replacement of various attachments, working parts and other attributes is required. Therefore, for normal, rhythmic operation, it is advisable to provide a certain supply of them, so that if replacement is necessary, you do not have to promise the store.
Jigsaw files designed for working with chipboard and MDF boards are available in several varieties. Blades for fast, rough cutting have a large tooth and are designated "T101B". For shape cutting you will need blades designated “T101AO”. Other types of files (hacksaw blades) are also produced for cutting plexiglass, metal and other materials, but they are used quite rarely and do not require frequent replacement.
Sanding belts of various abrasiveness are used for rough and finishing of edges and surfaces. However, the most popular sanding materials are those with an abrasiveness of 80 (rough grinding) and 120 (finishing work) units per inch. Tapes with diagonal gluing are more reliable. When purchasing a belt, you should check its unfolded length, which is suitable for use on a specific sander.
Bits for tightening fasteners have different tip shapes.
Today, to distinguish them, the following marking has been adopted, under which they are commercially available in the form of single samples or sets:
- the profile “PZ” (“Pozidriv”) or “PH” (“Phillips”) is designed for fasteners with a cross-shaped slot - for self-manufacturing furniture you will need standard sizes “PZ1/PH1” and “PZ2/PH2”;
- bits designated “T” (“Torx”) or “HEX” are intended for screwing European fasteners (confirmed) - the latter type, despite its higher cost, is preferable;
- bits with a straight slot do not have a designation, but they are quite easy to select visually;
- There are combination bits, one end of which has a “HEX” profile and the other “PZ/H” profile, but their use is only possible in devices equipped with a chuck.
The magnetic holder is an optional accessory that comes with some screwdrivers. It can be purchased separately, checking the possibility of installation on a specific model. The use of a magnetic holder greatly increases the ease of use of this power tool, especially when working with bits.
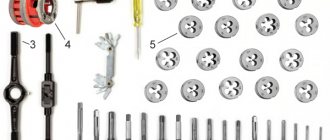
In addition to the accessories described above, when making furniture you will need a set of twist drills, straight and edge rebate cutters.
To perform specific operations for drilling recesses for hinges, drilling stepped holes, countersinks, you may need:
- confirmation drill;
- Forstner drill;
- bimetallic core drill.
Star Bits (Torx)
Star-shaped nozzles are used in the mechanical engineering field and in the production of household appliances for tightening fasteners with the appropriate head shape. They are called Torx and are designated by the letters TX or T. Next to the letter is a number that indicates the size of the nozzle. It corresponds to the distance between the rays of a hexagonal star.
Torx was first used in 1967 by Textron in America. Today, different types of bits are used for this type of screwdriver. So, there is a vandal-proof version equipped with an internal hole. It is designated by the letters TR, which stands for Torx Tamper Resistant. Five-point bits called Torx Brigadier Pentahedron are also used.
Classic bit "Star" (Torx)
In European countries and the USA, the Torx nozzle is the most popular of all existing slot shapes. This is due to its high performance. This bit is distinguished by the presence of six edges, with the help of which contact with a screw or screw occurs.
The design feature of the nozzle improves adhesion to the surface of the fastener. Thanks to this, you do not need to exert much effort to create torque. The likelihood of the device slipping is also reduced, since the load is distributed across 6 edges at once. In turn, this reduces their wear. Consequently, the service life of the bit increases significantly. “Star” nozzles are available in different sizes. The most common models are from T8 to T40. However, there are also smaller bits.
Star bit Torx Plus
Torx Plus is different in that its sprocket has less sharp rays, which are also shorter. These types of screwdriver bits require the master to have increased precision when performing work. High-hardness steel is used for their manufacture. The sizes of these nozzles are T10 - T40.
Star bit with TIN coating
Thanks to the presence of a coating based on titanium nitride, the nozzle has increased wear resistance. Its surface is rough and adheres well to steel. The nozzle is also more durable because it is made of hard material. The nozzle is sold in sizes from T10 to T40.
Star bit with a hole inside
This bit is often used in assembly plants. When tightening the fastener, the bit fits tightly into the fastener. As a result, the reliability of the tightening process increases, for the implementation of which no special effort is required. Bit sizes range from T10 to T40.
Extended bit "Star"
This attachment is convenient to use when performing certain types of work. Its dimensions are the same: from T10 to T40, length can be from 50 mm to 100 mm.