What ingredients and tools are needed to make polyurethane products with your own hands?
Polyurethane products and coatings are characterized by higher strength and durability compared to rubber ones.
You can not only purchase products from this material from manufacturers or on the market, but also make them in an artisanal way, that is, with your own hands. You will need the following ingredients:
In addition, you will need scales, preferably with weights, tin cans (coffee containers will do) or any other shapes that can be heated, a hair dryer (preferably a construction one, but a household model will also work).
When working with polymer, it is necessary to limit contact with water as much as possible so that the material hardens as much as possible during storage. Therefore, take this feature into account when you prepare the room and work surface. Next, we prepare the mold for casting the future part. If you plan to reuse it, then its surface must be pre-treated with lubricant.
Custom casting in 3DVision
The 3dVision company is engaged in casting from two- and three-component polyurethanes by casting them into silicone molds.
The company has at its disposal not only a large fleet of equipment, but also an experienced staff of workers. The company's employees will quickly process your order, and within a few days you will be able to receive a small batch of finished polyurethane products.
You can rest assured that you will receive products of the highest quality on time, and we, in your person, will receive a new regular client for a large number of projects.
Polymer melting procedure
To make durable and high-quality products, you need to know how to properly melt polyurethane at home in order to avoid mistakes and spoil the final result.
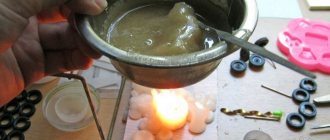
First you need to warm up and then cool a couple of tin cans or other forms. We pour the polymer into one of them and be sure to weigh it, while subtracting the weight of the container. In the other, add hardener. Its amount should be approximately 16-17% by weight of the polymer.
Then we begin to heat the two containers using a hairdryer. The melting point is at least 120 degrees, so it is better to use industrial models rather than household ones to speed up the process. To understand whether the temperature regime is sufficiently maintained, pay attention to the state of the polymer - it should be in a liquid state and slightly float. If smoke and a too strong odor appear, then you have overheated the raw materials. Heating should take approximately 30-40 minutes. Afterwards it is necessary to cool the material to approximately 60 degrees.
Heating is necessary to evaporate moisture from the polymer. At 60 degrees, the material remains liquid, but the risk of burns when working with it is reduced.
The temperature of the hardener must be constantly maintained with a hairdryer, but overheating must be avoided!
Then mix the ingredients together. Please note that you need to pour the completely melted hardener into the polymer, and not vice versa. This must be done slowly and constantly stirring the solution. For this you will need a wooden stick. You have a maximum of 10 minutes to complete the process, but you shouldn’t rush too much to avoid foaming, which will negatively affect the quality of the future product.
After obtaining a homogeneous mass, you need to let it stand for a couple of minutes. This is necessary so that the remaining bubbles come out of the solution. Then heat the remaining molds to about 80 degrees and pour the mixture into it. After letting them stand for 30 minutes, begin the process of heating with a hairdryer to a temperature of 100°C. Future parts should remain heated for 2 to 6 hours. The bigger, the better! Afterwards, they must be cooled to a comfortable 40°C and then they can be taken out.
Operation is allowed to begin within a day, but experts recommend waiting a week. All this time, polyurethane products must be kept warm. In this case, even parts with bubbles inside will be as strong as possible and retain their elasticity.
Source
Material characteristics
Forms made from this material have good flexibility and reliability, and due to special fillers, excellent wear resistance. Frames will allow you to create products from all kinds of building materials.
Structures made from liquid polyurethane foam are characterized by performance for 2 years. Among the advantages it should be noted:
Important! Forms from such material will allow you to create many different products: a brick wall, stone cladding, 3D panels, large-format panels, very thin and flexible stone wallpaper.
In terms of its own quality parameters, such a material will be superior to metal and rubber. Brittleness occurs at a temperature of -60 degrees. The material is destroyed during heating above 100 degrees (a number of brands at + 150).
Features of polyurethane manufacturing
The use of non-natural stone in the exterior cladding of buildings and in the interior is popular. A large number of different forms for its preparation and special construction mixtures allow you to create unusual design solutions. To make a stone from polyurethane, you need to read the instructions.
Important! For high-quality templates that can accurately convey the texture of natural material, liquid polyurethane foam is used. It is a unique material that is resistant to wear, corrosion and elasticity. It can also withstand significant mechanical loads.
Polyurethane products are made through cold polymerization. A solution is used to form 2-component compounds. Despite the relative simplicity of the method, creating a reliable model will require certain skills. To obtain molded polyurethane products yourself, you will need:
To make the frame, you will need to prepare a section of MDF or chipboard according to the dimensions and patterns of the side wall elements. Plumbing silicone is mounted on the cover of the plate, copying the texture. The distance from the sample to the walls is at least 1 cm. The assembled formwork is then sealed using a silicone frame and grouted.
Making polyurethane molds with your own hands
To know how to make a polyurethane mold with your own hands, you need to:
Clean and dry the product. When it has a porous structure, the pores are closed with a thin layer of wax or sealant. The product is placed on the stand and the seam is closed. The product and stand are coated with anti-adhesive. The frame-frame is fixed near the product (the outline of the manufactured polyurethane foam product is indicated). The polyurethane compound for molds must be at room temperature. The exact amount of prepolymer and hardener is weighed into dry buckets. Then the ingredients are poured into the third bucket and mixed thoroughly until smooth. Particular emphasis is placed on the walls of the bucket and the bottom. Using a brush, apply a small layer of mass to the original. This reduces the number of bubbles on the mold coating. Liquid polyurethane foam is poured into the formwork. Start from the corner to evenly raise the solution from below
It is optimal to raise the angle of pouring the formwork. It is necessary to wait for the polymerization period - approximately 1 day, then the mold is removed. The formwork is disassembled, the corner is carefully lifted and the product is removed. Accuracy is necessary, since polymerization lasts about 3 days or more.
Polyurethane production at home
Making molds at home
To obtain a quality casting, you must follow the following guidelines:
Important! When independently preparing forms from polyurethane foam, you need to follow the production technology: observe the temperature regime, exclude contact of reagents with moisture, mix the elements before weighing at the end of the connection.
Polyurethane foam for the production of molds is a polymer material that is obtained by mixing polyol and isocyanate. Elastic and solid, it is popular in construction and restoration work. The main emphasis is on basic safety rules. It is necessary to prevent penetration of the compound onto the open surface of the skin and into the eyes.
Source
Features of receiving
The process of making polyurethane is labor-intensive. Using expensive equipment, the following components are heat treated and mixed:
- polyol;
- isocyanate;
- polyetheramines.
The material is made by casting, pressing, extrusion. Raw materials for it can be found only in some countries: Russia, Italy, USA and Germany.
It is used to provide people with tires, mattresses, insulation, bags, shoes, finishing elements (cornices, ceiling plinths, stucco) and many other necessary things.
BMW 7 series 730. Beautiful infection! › Logbook › Making polyurethane!
In general, the main thing is already written in the topic. Because it’s easier to change silent blocks to polyurethane ones than to change roads...
I came to this simply - I began to “flatten” and “turn out” the lower silent blocks on the rear shock absorbers. For a long time I couldn’t understand the reason, but then we found out that there were bent rear arms, which of course were repaired and the story about it can be read here: Repair of rear arms - or don’t try to deal with rear tire fat in the “wrong” ways!
They didn’t advise me of any replacement options, but I decided firmly and irrevocably - I’ll make polyurethane silent blocks. I went to my dad’s friend with a question: “Who is pouring and where?” It turned out that he has a syringe press in his garage, on which various things were cast at one time... But casting silent blocks from thermo-extruded polyurethane is an expensive business. Because any silent block automatically requires its own injection mold! Costing from 500 USD up to 5 kilobucks depending on complexity...
But there is always an easy way out! And we found it. Cast the rods, then sharpen silent blocks from them and press them into place. I'm calling my turner. I order a mold for the rod, a few days later I pick up the mold, cast the rod, sharpen it, press it in and...
... look at the results of the replacement work for me:
More examples of work for some friends:
But further - more! I came across silencers for sale from, so to speak, “competitors”:
First driving impressions:
“Where the hell did the rails go, which I cross every day several times a day when leaving my street?”
Well, nothing hums, nothing grunts! The second impression from driving them
is unrealistically pleasant braking!
It's just crazy how complete the car has become with brakes and wheels! The bites have been reduced to a minimum! The feeling of braking is similar to what you experience while sitting on express trains - progressive and inexorably confident deceleration! Then I was only surprised at the changed handling and the overall ride of the car on uneven surfaces!
Especially the “mother-in-law’s language” type... Where everyone has already slammed on the brakes and began to disappear in the rearview mirror, I continue to WAAAAAAALY! And it pleases! And immediately after a month or a month and a half of operation, problems appeared with the products of “competitors”! The silent blocks of this company are too soft... When diagnosing new sounds in the chassis (arising from wear of the front left hub bearing), the levers were also pulled. There is a lot of play at the bottom! The reason is that they are so soft that on the lower arms it is overkill.
Results and conclusions about the operation of an almost complete set of everything made of polyurethane in the chassis of a car: 1.
The polyurethane that I poured on my rear shock absorbers has a maximum Shore hardness of 95 units. Honestly, it's a bit harsh. It could have been done as a front end. You can do 95, but for cars that either race on tracks, but are also used as street cars and do not want to part with 100% comfort, or for cars that only drive along the highway.
2.
What I cast and installed on the front silents is 85 units. That's it! City + heavy car weight + 85th stiffness = ideal ratio.
3.
What the competitors have done is pressed with a finger and pushed through so easily that it seems to me that it’s not that there aren’t 85 units, the question is - is there 75 there?!
Most likely even lower. In general, competitors save on raw materials. I will be replacing their silent blocks with my own at the next change of levers (that is, now whichever will die first - either the ball joint or the silent blocks of competitors). Conclusion - they are not my competitors!
You can, of course, install silent blocks like theirs. Only for cars weighing up to a ton. Toyota Korola, Dacha Logan, Hyundai Solaris there, Kia Rio, TAZs... Well, you understand.
Well, whoever is interested, please contact me in a personal message. Sending throughout Ukraine by postal services. The prices are more than humane! But today, at this price, not everyone can do it. Or rather, not only can everyone do it, few people can do it. =)
Source
Making polyurethane with your own hands - we explain in order
Recently I wrote an article about making a mold for artificial decorative stone from silicone, but today I want to tell you how to make a polyurethane mold with your own hands, because... the process is a little different. When pouring silicone molds, everything always turned out smoothly - the molds came out without bubbles. With polyurethane it’s the other way around, and before I started getting high-quality forms, I screwed up about 10 forms.
What is needed to make a mold
To make a polyurethane mold of high quality, you need to make a good matrix. You can read how to assemble the matrix here. You will also need the polyurethane itself for filling the molds, a bucket, a kneading stick (or a screwdriver with a mixer), a plastic spatula (I made it from the lid of a plastic bucket), scales and lubricant. I use BC-M wax release agent as a lubricant. You can also take a soap solution, shake it to form foam and use it to treat the matrix, but personally, I like BC-M better.
And of course, you need a room with low humidity and room temperature. Although, to be honest, I filled the molds at only +5 degrees. Polyurethane is not as fluid at this temperature, but I had no other conditions.
Or how to make a mold from liquid polyurethane yourself
It is no secret that polyurethane forms are widely used in modern construction. This is done due to the ease of use of these matrices in the production of artificial stone, building blocks, and decorative stone. Polyurethane forms have proven themselves to be a quality aid in any construction matter. However, polyurethane form is not a tool exclusively for professional construction. Polyurethane matrices and forms for stone, for example, are widely used in everyday life. Of course, you can buy a polyurethane mold. However, will such a matrix fully meet your requirements and expectations?
We suggest the following: make a polyurethane mold with your own hands. Firstly, this event will cost you much less than buying a ready-made mold for stone - according to our calculations, standard polyurethane for 10 kg molds, packaged in kits, is on average enough for 2 large and 1 small mold. This is despite the fact that the price of this kit will cost a little more than the finished form. And secondly, a polyurethane mold made by yourself will be pure exclusive, which you will make exclusively to suit your needs and requirements.
What ingredients and tools are needed to make polyurethane products with your own hands?
Polyurethane products and coatings are characterized by higher strength and durability compared to rubber ones. You can not only purchase products from this material from manufacturers or on the market, but also make them in an artisanal way, that is, with your own hands.
You will need the following ingredients:
In addition, you will need scales, preferably with weights, tin cans (coffee containers will do) or any other shapes that can be heated, a hair dryer (preferably a construction one, but a household model will also work).
When working with polymer, it is necessary to limit contact with water as much as possible so that the material hardens as much as possible during storage. Therefore, take this feature into account when you prepare the room and work surface. Next, we prepare the mold for casting the future part. If you plan to reuse it, then its surface must be pre-treated with lubricant.
Description of material
Two-component polyurethane composition
Before we begin to directly consider the process, it is necessary to talk a little about what a polyurethane floor is, since the perception of the nuances of the upcoming work directly depends on understanding this issue.
Polyurethane flooring is usually called one of the varieties of self-leveling flooring. On the market you can find both ready-made liquid mixtures and dry options that require additional preparation. The self-leveling floor “works,” oddly enough, thanks to the gravity of the planet. The point is that, as we know from a school physics course, a liquid takes the shape of the vessel in which it is placed, and under the influence of gravity it is distributed evenly and its surface is always smooth and perfectly horizontal. In the case under consideration, the room acts as a vessel, and the self-leveling floor, due to its fluidity, is evenly distributed over the entire surface area, forming the most even and uniform coating. Among the undeniable advantages of polyurethane flooring are:
- Excellent resistance to external influences. Here it is necessary to additionally mention that we are talking not only about the mechanical strength of the coating, but also about the fact that it will successfully withstand chemicals and moisture.
- The combination of the above properties directly results in a very long service life of the coating.
- Among other things, it is worth remembering that from an installation point of view, self-leveling flooring is extremely simple and you can carry out the work yourself.
- Well, another advantage of polyurethane is its chemical neutrality and non-toxicity. This floor can be safely used in any type of premises, both residential and industrial.
- It is especially worth highlighting the attractive appearance of the self-leveling floor. On the market you can find options both completely transparent and filled with color, which, combined with a perfectly flat surface and seamlessness, makes the polyurethane floor very aesthetic.
Polyurethane self-leveling floors have one significant drawback - the price of the material is quite high, which, combined with the cost of services, gives a decent estimate. To some extent, this disadvantage is offset by carrying out the work independently.
Making polyurethane molds at home
As we wrote above, many private craftsmen have a misconception about flexible matrices for stone, namely, they think that a polyurethane mold is not a tool that can be made independently. We hasten to dissuade you of this. Such matrices are much easier to make than you previously imagined. In this regard, below we post step-by-step instructions in which we will be happy to describe how to make a polyurethane mold with your own hands at home.
Polymer melting procedure
To make durable and high-quality products, you need to know how to properly melt polyurethane at home in order to avoid mistakes and spoil the final result.
First you need to warm up and then cool a couple of tin cans or other forms. We pour the polymer into one of them and be sure to weigh it, while subtracting the weight of the container. In the other, add hardener. Its amount should be approximately 16-17% by weight of the polymer.
Then we begin to heat the two containers using a hairdryer. The melting point is at least 120 degrees, so it is better to use industrial models rather than household ones to speed up the process. To understand whether the temperature regime is sufficiently maintained, pay attention to the state of the polymer - it should be in a liquid state and slightly float. If smoke and a too strong odor appear, then you have overheated the raw materials. Heating should take approximately 30-40 minutes. Afterwards it is necessary to cool the material to approximately 60 degrees.
Heating is necessary to evaporate moisture from the polymer. At 60 degrees, the material remains liquid, but the risk of burns when working with it is reduced.
The temperature of the hardener must be constantly maintained with a hairdryer, but overheating must be avoided!
Then mix the ingredients together. Please note that you need to pour the completely melted hardener into the polymer, and not vice versa. This must be done slowly and constantly stirring the solution. For this you will need a wooden stick. You have a maximum of 10 minutes to complete the process, but you shouldn’t rush too much to avoid foaming, which will negatively affect the quality of the future product.
After obtaining a homogeneous mass, you need to let it stand for a couple of minutes. This is necessary so that the remaining bubbles come out of the solution. Then heat the remaining molds to about 80 degrees and pour the mixture into it. After letting them stand for 30 minutes, begin the process of heating with a hairdryer to a temperature of 100°C. Future parts should remain heated for 2 to 6 hours. The bigger, the better! Afterwards, they must be cooled to a comfortable 40°C and then they can be taken out.
Operation is allowed to begin within a day, but experts recommend waiting a week. All this time, polyurethane products must be kept warm. In this case, even parts with bubbles inside will be as strong as possible and retain their elasticity.
Recommendations for working with polyurethane
Finally
This could have been the end of writing the instructions, but it happens that air constantly escapes in 1-2 places, the balloon bursts, but inflates again. This can happen because either there is a small gap under the stone, or there is a “shell” in the stone itself. In this case, I take a regular needle, insert it into the place where the air is coming from and sharply pull it out. If necessary, you can do it several times. Sometimes it helps, sometimes it doesn’t. It is better, of course, to use a vacuum chamber when filling to avoid defects, but this is an expensive pleasure. And it’s only suitable for those who make molds for sale. Well, I want to give one piece of advice: if you are going to make yourself a decorative stone and the question arises about the shapes, whether to buy it or make it yourself, then I would recommend buying it, because... When manufactured without a vacuum chamber, there is a high probability of defects. If you plan to produce and need a lot of molds, you can make it yourself, but I assure you, there will be 100% defects. Read on: how to make a dryer for decorative stone
Parts manufacturing technology
The production of polyurethane parts is carried out in several ways. There are different technologies: casting, extrusion, pressing and pouring.
By far the most common is casting. Using this technology, manufacturers create a wide variety of parts. The pouring method is popular due to the low cost of forms. As a result, the resulting product has a low price.
Using rotational casting, polyurethane raw materials are used to cover large areas or cylindrical parts. Using computerized equipment, this polymer is applied to a shaft that rotates. The process occurs without heating, leaving virtually no waste.
With free casting it is possible to create more complex shapes. Computerized control is also used here. The raw materials enter the mold subject to careful control of dosage, temperature, and pressure. The products are of high quality. Silicone molds are used here; using this technology, limited series of parts are mainly created. The advantages are the speed of production and the low cost of the product in the end.
The use of injection molding significantly speeds up the production itself - this technology is needed when producing large quantities of products.
Making a polyurethane mold at the formwork stage
The prepared master models of stones must be tightly glued to any surface that will be filled with liquid polyurethane. This base can be a table, a sheet of chipboard, an ordinary wooden board of optimal size, or something else. Stone samples are placed on this surface using glue or other sealant, after which you need to give it time to dry. After our stones are securely fixed to the surface, cut off the excess edges of the base and make sides, as you would make them for formwork. The beads can also be attached to the base using caulk or glue. Make sure that there are no gaps or cracks in the formwork.
Liquid two-component polyurethane casting process
When manually pouring two-component liquid polyurethane, there are a few simple rules that will help you get a high-quality final product. The casting of the material itself must be done on a surface treated with lubricant. Polyurethane should be poured at one point, slowly, so that the raw material can spread, pushing out excess air with its own mass.
Polyurethane casting for molds for the production of a flexible matrix
When all preparations are completed, first of all, do not forget to treat the master model and the internal surfaces of the formwork with lubricants that will prevent the polyurethane mold from sticking.
And now, finally, you can start casting. In this instruction, the casting material we use is polyurethane for cold-curing molds. Based on this, we will rely on this material in the descriptions. We prepare the casting mixture from polyurethane components as indicated in the instructions.
For example, liquid polyurethane for Advaform forms is a very fluid material, so it does not require additional degassing, but if you are not working with Advaform, then after mixing, the liquid polyurethane must be degassed. This can be done in a vacuum chamber or on a vibrating table.
When this stage is completed, you can begin casting our polyurethane. Carefully pour the mixture into the formwork so that the stones are hidden under a layer of material and leave the polyurethane to harden.
After a day, the form can be removed from the formwork.
That's all the simple science of how to properly make a polyurethane mold with your own hands. Inspiration to you, masters.
Source


