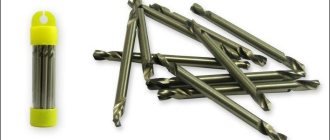
What kind of work can be done with sandpaper?
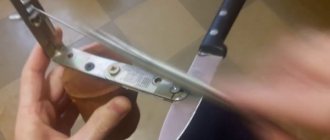
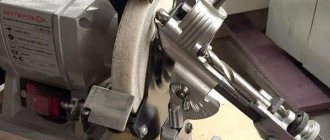
This question is asked by home craftsmen who are not yet completely sure of the advisability of creating emery. Depending on the rotation speed and grain size of the abrasive, sandpaper can be used to perform both rough processing of metals and their grinding and finishing. If there is a stop with adjustable angle of installation, it is easy to accurately sharpen cutters, chisels and drills. You can sharpen an ordinary kitchen knife on this machine in just a few seconds, without much effort.
If your hobby is working with metal, grinding it or forging knives, then using sandpaper and a set of circles of different grain sizes, you can polish the surface of the material to a mirror shine.
Rest assured, having emery in your home will greatly expand your capabilities.
DIY emery tool - Metalworker's Guide
Making emery with your own hands is not at all difficult, especially considering that the components for it are available and inexpensive. Such a device will become indispensable in the household, as it allows you to quickly and efficiently sharpen tools, kitchen knives, and grind surfaces made of various materials.
The cost of finished emery is quite high, especially for professional equipment. In most cases, parts of a homemade device can be obtained for free or for a purely symbolic price.
Creating such a device from scratch will allow you not only to save money, but also to prove yourself as a true master!
Emery can be used for roughing metal, as well as grinding and sharpening tools.
The engine is the main part of the emery
Homemade emery device.
The main working tool of an emery machine is a whetstone, but without a powerful electric motor you can’t get much use out of it. An engine of optimal size and power can be obtained from an old Soviet-made washing machine; fortunately, they can easily be found at the nearest market or in newspaper advertisements under the “I’ll give it away for free” section. Most washing machines of this type, despite their rather advanced age, have a fully working engine. Its power is about 100-200 W depending on the model. This is quite enough for home emery. The rotor rotation speed should be no more than 1500, and preferably 1000 revolutions per minute, otherwise the risk of destruction of the grindstone during operation increases, which leads to tragic consequences.
Motors of old-style washing machines are represented mainly by asynchronous models. This means that a simple modification of the device will allow you to change the direction of rotation of the rotor. To do this, swap the connection points of the starting or operating winding.
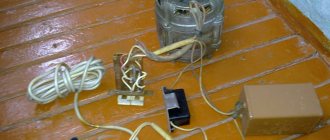
A standard washing machine motor has 4 outputs: two of them are for connecting to the network, two more are for connecting the starter. They can be distinguished from each other by their resistance. Arm yourself with a regular tester and take resistance measurements. For the working winding, which is connected to the network, it will be 12 Ohms, while for the starting winding this parameter is 30 Ohms. By swapping the connection points of one of the windings, we will result in the rotor rotating in the opposite direction.
Making your own emery
You can make emery with your own hands; if you have an engine from an old household appliance, you can use it. First you need to choose an electric motor that would be suitable for the manufacture of the described equipment. Quite often, motors from old washing machines like “Vyatka”, “Volga” or “Siberia” are used for design. This technique has a fairly powerful motor.
Among other things, you can borrow a switch from the washing machine that has a starter. Despite the fact that carrying out this work may seem quite simple, it is very difficult to make emery with your own hands. For example, one of the main questions is how a sharpening stone can be mounted on the motor shaft. This is due to the fact that there is not always a thread there. In addition, the diameter of the stone hole may not coincide with the diameter of the shaft. For this reason, you need to prepare a special turned part.
How to assemble emery
Diagram of sandpaper from a washing machine motor.
Homemade emery may have a different appearance from the standard one, but the main components are always the same. These include:
- Electrical engine;
- sharpening stone with lock;
- bed;
- protective casing;
- handyman
Assembling all the parts together begins with choosing the material for the base - the bed. It can be made of sheet metal, wood or durable thick plastic. Preference should be given to metal, as it has high reliability, fire safety and, due to its weight, ensures the stability of the device on any surface. If the device is mounted with bolts, rubber gaskets can be used at the fastening points. They reduce the vibration that occurs when sanding. Also, the collapsible design allows you to transport the tool to another place of work at any time.
If you choose not a metal base, but a plastic or wooden base, its surface in the working area should be covered with a layer of galvanized iron 0.5-1 mm thick. This will protect the workplace from fire due to hot sparks hitting a flammable surface.
Figure 1. Shaft adapter diagram.
The electric motor has 4 long mounting pins in its housing, the presence of which greatly facilitates the installation of the motor on the frame. To do this, two iron corners are welded or bolted to the metal surface, placing them parallel. Two holes are made in them, to which the pins will be attached. The installation of the motor can be done by slightly re-equipping it or leaving the original motor bracket, which attaches it to the body of the washing machine, in its original form.
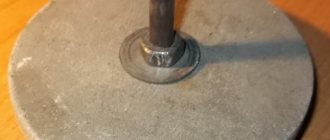
The most difficult stage of assembling a homemade device is finding or making a clamp for the grinding wheel. Due to the fact that the rotor shaft is smaller than the diameter of the hole in the grindstone, a special adapter may be needed (Fig. 1). It allows you to securely fix the stone, preventing it from slipping. On the reverse side, the sharpening stone is attached to the adapter with a nut, under which a cardboard spacer is installed. The thread of the nut is selected right or left, depending on the direction of movement of the grinding wheel: when moving clockwise, the nut is installed with a left-hand thread, otherwise - with a right-hand thread. The cardboard spacer is used to prevent excessive clamping force from breaking the abrasive stone.
Read also: What does a welding electrode consist of?
The most important indicator that a homemade emery should have is safety.
Figure 2. For sharpening corners, it is better to make an adjustable tool rest.
Therefore, such a device must be equipped with a protective casing, which can save not only from small metal particles and sparks, but also minimize the risk of injury in the event of an unexpected split of the sharpening stone. For ease of use, the casing can be made of transparent impact-resistant plastic. In addition to plastic, you can use sheet iron with a thickness of 2-2.5 mm. Do not forget about the constant use of personal protective equipment for eyes and hands.
A small metal plate called a tool rest allows you to correctly distribute the load on the material. It is designed to rest tools or materials on it during processing. The tool rest can be made adjustable (Fig. 2), so the sharpener can be optimally used for sharpening cutters and other tools for which the angle of the working surface is important.
Manufacturing options
Whatever device or machine is used to sharpen a drill for metal, its quality must be controlled. For this, a special template is used, which can also be serial or made by hand. This template is necessary primarily to control the accuracy of the angles of the cutting part, which are formed during the process of sharpening the drill. The tools used to work with different materials differ from each other, including the magnitude of such angles. You can find out the exact values of the latter from the reference table.
Table 1. Drill sharpening angles
Working with different materials and knowing the angles of the cutting part of drills for such materials, you can make several templates at once and use them to control the correct sharpening of the same drill, which in this case acts as a universal tool.
As the simplest device for sharpening drills, you can use a sleeve with an internal diameter corresponding to the transverse size of the drill, rigidly fixed to a reliable base at a certain angle. When selecting a sleeve for such a device, you must ensure that the diameter of its internal hole strictly corresponds to the transverse size of the drill being sharpened. The tool being processed should not be allowed to dangle in such a hole, since even a 1–2° deviation of its axis from the required value can seriously reduce the quality and accuracy of the sharpening performed.
Drill sharpening device
It is better to immediately equip a homemade device for sharpening drills with a holder made of copper or aluminum tubes, the internal diameters of which correspond to the standard sizes of the drills you most often use. You can do it simpler and supplement such a device used for sharpening drills with a wooden block. Holes must be drilled in the block corresponding to the sizes of tools of various diameters. The most important design element of such a device is the tool rest, which simultaneously solves several important problems:
- ensures correct fixation of the drill and its precise movement in relation to the surface of the grinding wheel;
- acts as a reliable support for the tool being processed.
Diagram of the simplest device made from a wooden block
A similar device based on an oak block with holes of different diameters was used by our grandfathers, who used it to sharpen drills with high quality and precision. The main task that a homemade machine or device used for sharpening drills must solve is to correctly orient the cutting part of the drill being processed in relation to the working surface of the grinding wheel.
To make a homemade machine for sharpening drills, you can use various designs of such devices. The corresponding drawings are easy to find on the Internet. Moreover, if you understand the operating principle of such a device, then you can make your own sharpening machine according to your own design.
Quite a serious device that provides good sharpening accuracy
Drawings of fixture parts
There is an important rule that must be observed when working with such a device: during its use, the drill being sharpened should not rotate around its axis. If the tool rotates even at a small angle, sharpening will have to be done again.
After sharpening the drill, it should be allowed to cool. Then you need to check its restored geometric parameters using a template. It must be borne in mind that the cutting edges of the tool may differ from each other in length by no more than tenths of a millimeter. It is especially important to comply with this requirement for drills with a small diameter.
Among the mistakes made when sharpening drills using such a device, two of the most typical ones stand out.
- The length of the cutting edges, even with their symmetry and correctly selected angles, is not the same; accordingly, the drilling center is shifted relative to the tool axis. A drill that was sharpened with such an error will create a strong runout during the drilling process, and it will be quite difficult to get it into the center of the future hole on the surface of the workpiece. A tool sharpened in this way is highly likely to break during further use.
- When the drill is accurately centered, the angles at which its cutting edges are located are asymmetrical. Since this causes only one cutting edge to work, drilling will occur slowly, while the tip of the tool will actively heat up. This will lead to the tempering of the metal from which the drill is made, and the hole created will be broken (will have a diameter greater than the transverse size of the tool itself).
Safety when working with sharpening tools
Although the described sharpener has low power and is intended for home use, in terms of safety it requires no less care than professional equipment. By adhering to the following rules, you will protect yourself and others from the risk of injury while working:
- Even for short and simple work, use safety glasses. They will reliably protect your eyes from hot scale and abrasive fragments.
- Before starting work, check the stone for tight fit on the shaft, absence of cracks and chips. If necessary, replace the stone.
- Do not touch work surfaces or moving parts with your hands.
- The device you will be working with is an electrical device and therefore there is a constant risk of electric shock. Therefore, check the integrity of the wire braid; if any malfunctions are detected, you should immediately stop working.
- Be sure to use a protective cover when working. Yes, it reduces visibility and is not so convenient to work with, but the level of safety with its use increases significantly.
About the safety of a homemade sharpening machine
We read the theory - we know.
The casing of my emery machine is not closed on one side - for safety reasons this is not possible, the casing should cover the stone as much as possible, but I decided for myself that sometimes it is convenient for me to sharpen something on the side of the stone, although this is not recommended. And in general, I usually finish my machines gradually, I think in the future, when I want, I will still make a cover for the casing so that it covers the sharpening stone on all sides.
Also, in terms of safety, it is recommended that the steel thickness for the protective casing be greater than 1 mm - I will also consider this in the future.
But my machine also has safety advantages:
- the protective glass on Chinese machines is much thinner than I used;
- The machine speed is 1380 rpm, although the whetstone is designed for 3000 rpm. per minute This means my stone will have a very small chance of breaking.
Principle of operation
You can make your own emery from a washing machine and other household appliances. More precisely, from their engines. It is he who will launch the device. A shaft is mounted to the engine, to which nozzles are selected. The bits can be sharpened on a lathe. The installed sanding wheel is securely fixed. A motor connected to an electrical network rotates a shaft, which transmits rotation to the emery wheel.
Motor selection
Most often, sandpaper from a washing machine engine is used as a strength element. A self-assembled device does not require new devices. There are enough old-style cars (for example, “Vyatka”, “Sibir”, “Volga” and so on). The devices of those times were equipped with durable, high-quality engines. From the same machine, a switch with a manual starter is also useful.
It is best to choose an engine for the device whose speed is in the range from 1 to 1.5 thousand rpm. It is strictly forbidden to use a motor whose rotation speed exceeds 3 thousand rpm. Otherwise, the sanding wheel may not hold up and break. High speed is suitable for polishing the surface, but not sharpening it. Therefore, if the engine has increased speed, it is necessary to use a durable stone.
The motor power should be in the range of 100-200 W. This will be enough to make homemade emery with your own hands. But this value can be increased by 2 times (and amount to 400 W).
Such indicators are taken for a reason. The fact is that the characteristics of washing machine motors are similar to those of factory-made emery. But other devices with the same power and rotation speed can be used. The motor can be single-phase or three-phase.
The electric motor used is connected to the electrical network through a capacitor.
Defining parameters
In order to make emery with your own hands, you need to first determine its parameters. Quite often, asynchronous motors are used to make such an installation at home. For emery, you can use the maximum speed, which is equal to 3000 rpm. If you use a more impressive rotation speed, you may encounter the problem of the grindstone breaking. It is preferable to use a motor at home that has a speed of 1000-1500. If you use an electric motor at 3000 rpm, you need to prepare a fairly strong stone. Among other things, a high-quality flange will be needed. Most often, high engine speeds are used not for sharpening, but for polishing parts.
In order to make emery with your own hands, it is not necessary to use a powerful electric motor. For a homemade sharpening machine, a more acceptable power limit is 100-200 W. Three-phase and single-phase electric motors can be used.
Flange preparation
The emery, made with your own hands, provides for connecting the electric motor to the stone circle via a flange. It must be machined from metal. For this purpose, they usually turn to a specialist (turner). You will need to know the parameters of the device, the diameter of the internal hole of the emery wheel, and the diameter of the shaft.
The flange is attached to the shaft using a nut, bolt and washer. They also need to be prepared. The threads on the nut and flange must take into account the direction of movement of the shaft coming from the electric motor. If you plan to rotate the stone clockwise, then the thread must be cut to the left. When the shaft rotates counterclockwise, the thread must be right-handed. This is necessary to comply with safety regulations. The fact is that with this direction of the thread, the nut will tighten under the influence of vibration during operation, preventing the circle from breaking off. If the thread is in the other direction, the nut will unscrew. If it unscrews completely, the sanding wheel will fly off. And this is dangerous.
It is not always possible to find a turner. Therefore, it is not always possible to grind the flange. In this case, you can resort to an alternative solution. In such a situation, homemade emery is made with your own hands using pipes of a suitable diameter. If there is a gap between the bushing and the shaft, it can be eliminated with fabric insulating tape. If there is a large gap, you can put one bushing on another.
Read also: How to weld a fillet weld with an inverter
Direction of movement of the emery
First you need to determine which winding is intended for starting the engine, and which for the main work. To do this, you will need a tester that will help measure the resistance. In the first case, the value should reach 30 Ohms. The resistance in the working winding is much lower and is 12 ohms.
The winding responsible for the working process is connected to the electrical network. The starting winding is connected on one side to the coil. On the second side it is connected for a short period to the winding terminal. A relay is used for this. The engine starts.
In this simple way, by changing the ends of the winding necessary to start the motor, the direction of movement of the rotor changes. You can even do without a relay. In this case, you need to manually turn the sanding wheel in the desired direction.
Safety precautions when working on the machine
Emery (made with your own hands or purchased in a store - it doesn’t matter) can harm human health or surrounding material values. Therefore, it is necessary to work with emery in compliance with safety precautions. While working, you must wear protective plastic glasses.
A protective casing is made from a sheet of metal with a thickness of 2-2.5 mm. It will prevent debris from flying away when the wheel, chips and other small particles are damaged. A metal sheet is placed under the machine, which will serve as protection against flying sparks.
During operation, the emery wheel is subject to strong vibration and is subject to inertial forces. Therefore, there are times when discs simply break and fly apart. Before starting work, you need to check the circle for cracks and make sure it is installed correctly.
When sharpening a tool, it is recommended to stand to the side of the wheel. This will reduce the likelihood of injury if the disk fails.
Carrying out the installation of emery
Let's look at how to make emery from a washing machine with your own hands. First you will need to determine how to properly install it on the workbench. This can be done using a bracket that is removed from the washing machine. Fastening can be done using bolts. The motor, on the other hand, rests on an angle that holds it in a horizontal position. Among other things, it has a cutout that completely follows the outline of the motor housing.
In order to reduce the force of vibration, you need to put an edging made of a rubber piece of hose on the corner. You can avoid injury from a working saw and flying debris from the abrasive wheel when using the machine by making a casing. It is preferable to make it from steel. For this you need to choose a canvas whose thickness is 2.5 millimeters. This could be a strip of metal that needs to be rolled into a half ring shape. Under the working surface of the emery wheel, it will be necessary to mount a galvanized sheet element, which will protect the workbench from the effects of flying sparks formed during work. All actions for your own safety should be performed using special glasses.
Features of sharpening drills
Drills are inexpensive devices, especially if we talk about those that are widely used for household needs. However, if possible, then after they become dull, it is better to sharpen the tools than to buy new ones.
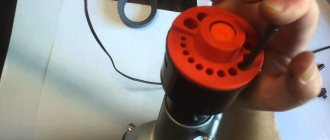
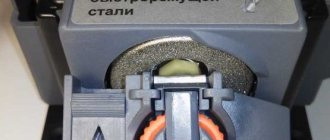
There are factory-made devices designed for sharpening, but buying them will cost you a lot, and this will not make up for the savings from not purchasing new tools. That is why many craftsmen assemble sharpening machines .
It is worth noting that dulling concerns metal drills, since wood tools are practically not susceptible to this, except when used at high speeds with resinous workpieces. Also, pobedit tips for stone or concrete cannot be sharpened
But many people sharpen metal drills using all the additional devices with their own hands, but the accuracy of such work is far from always ideal, so it is advisable to use at least a minimum of mechanics.
How to make a machine for sharpening twist drills
As a basis for the manufacture of a sharpening machine for spiral-type drills, you can use any serial sharpening unit that can operate without runout and withstand significant loads. When equipping such a machine with additional devices, the following requirements must be met.
- The axis of the tool rest must coincide with the axis of rotation of the grinding wheel, and it can be located with it in the same horizontal plane or be higher than it.
- All elements of the structure being created must be securely fixed to ensure the safety of sharpening work.
- The design of the device must allow sharpening of drills both manually and semi-automatically.
- The device of the tool rest should allow the drill shank to be positioned at any angle.
How to properly make a tool for sharpening drills with your own hands: training video
To make such a device yourself, you will need a control tool (template). No matter how the drill is sharpened, the accuracy is checked with a special template.
Simple ferrous metal drills have an edge angle of 115 to 120 degrees. If the metal is different, then the sharpening angles will also be different:
- for carbide bronze, steel or cast iron it is also from 115 to 120 degrees;
- for soft bronze or brass alloys - from 125 to 135, respectively;
- for red copper 125 degrees;
- for aluminum and soft aluminum alloys, granite, ceramics and wood – 135 degrees;
- for magnesium and its alloys – 85 degrees;
- for plastic, textolite and silumin - from 90 to 100 degrees.
You can prepare several templates depending on the listed values and, in accordance with them, sharpen them yourself. The same drill can be used for different types of workpieces; you just need to change the angles of the top of the workbench.
A simple but very convenient pulling device consists of bushings of different sizes that are attached to the base. You can make them yourself, based on special drawings. Remember that the tool should not be loose in the sleeve, and the quality of drilling may deteriorate even if the error is only one degree.
You can make a large clip based on aluminum or copper tubes, depending on the standard parameters of the drills, or you can take a block of soft material and make many holes in it. It is very important to place a convenient support in the sharpener, thanks to which you can move the sharpening device at the desired angle and hold the stop.
Read also: Types of coffee machines for home and prices
The listed sharpening devices have been manufactured for many decades in a row and are still in demand. To assemble a sharpening machine with your own hands, you can take an oak block instead of a corner.
The simplest sharpening machine can be assembled by simply installing a workbench or table opposite the side of the emery. Even such a simple device ensures high quality and accuracy of work.
Features of sharpening on a simple device
On the Internet you can find ready-made drawings of devices for sharpening drills, or sketch them yourself, but to do this you need to understand the principle of working with a drill.
During operation, it is strictly forbidden to allow the drill to move around its axis. If it turns at least a millimeter, it will be damaged, and you will have to grind off a small distance to re-process it.
After finishing work, the drill should cool down , also take measurements with templates. The edges must be perfectly symmetrical down to tenths of a millimeter. This is especially important if the drill has a minimum diameter.
Sharpening may be accompanied by the following errors:
- the angles will be regular and symmetrical, but the length of the cutting edges will not. In this case, the drilling center will shift relative to the axis, as a result of which beats appear. At the very beginning of work, it will be difficult to hit the markings, and the drill itself may break;
- When the angles of the cutting edge are asymmetrical to each other, the alignment is accurate. When creating holes, only one cutting part works, the work occurs very slowly and the tip heats up quickly. There may be “releasing” of the hardened metal due to heating, the hole may be broken, and the diameter will exceed the diameter of the drill.
to assemble a sharpening machine for twist drills for metal with your own hands using available materials
For the basis of the device, you can take any sharpening machine that is capable of working properly, there is no axis runout, and it maintains speed under load.
The task looks like this:
- the tool rest must stand strictly horizontally on the same axis with the rotation of the emery;
- the design must be safe, reliable and durable;
- it should be possible to sharpen both manually and semi-automatically;
- the shape of the tool rest should facilitate the free lowering of the drill shank to the desired angle.
No specific parts are required to make this device; every home craftsman has almost everything he needs. The workpieces are processed with a grinder , welding or sharpening .
For semi-automatic mode, a swing stop is assumed, so you need to make a loop connection. Accurately select the holes of the bolt, bracket and tube there are no backlashes
The platform must move along a vertical axis so that you can change the sharpening angle of the drill. This axis can be fixed, and the tool rest should swing, while resting on the horizontal axis, which, when sharpening, provides the necessary articulation.
The base plate is made of metal 4 mm thick, and the main parts of the structure should have a thickness of 3 mm respectively. This ensures its high strength. The tool rest is rigidly connected to the emery body. It cannot be attached to the protective casing, so screw the bracket using the metal “cheek”.
Then we screw the guide plate itself for drills with a thickness of 5 mm to the support plate. A triangular groove is sawn into it to secure the drill during processing .
The design has a rotation angle of 90 degrees, which allows sharpening using different methods . Starting from the Leontiev method and ending with pressing at a certain angle and creating an acute angle of the edge due to the curvature of the sandpaper.
During processing, the drill will not only stand firmly in the groove , it can also be fed along the groove to the abrasive, and the sharpening angle will not deviate. Due to the partial excess of the plane of the support plate above the axis of movement of the disk, it is possible to achieve the desired shape of sharpening the back of the edge.
Before performing work, the drill should be pressed against the plate and the cutting edge should be aligned parallel to it. The adjustment is now complete and you can bring the tool to the sandpaper. Sharpening must be done slowly and carefully, carefully monitoring the angle.
Thanks to this homemade tool, high sharpening accuracy and there is virtually no need for a template. True, it will take time to install the machine and adjust the angle, but then you can easily quickly sharpen the drills in the required quantity.
But if you need to sharpen a drill equipped with a carbide attachment, you can attach a swinging plate to a fixed angle. To do this, place several washers under the axle nut.
DIY emery tool - Metals, equipment, instructions
Many business people wouldn't mind having a functional sharpening machine on hand. Equipment of this type from a good manufacturer is not cheap. It is not at all necessary to spend money on buying a new machine, since it is quite possible to make emery with your own hands, spending a minimum of money and effort.
Among the many power tools needed in the household, emery takes pride of place in demand. It will be useful in the garage for sharpening knives, in the country; will be indispensable for any craftsman.
Guided by the photo and video materials in the article, possessing the necessary set of materials and tools, and with minimal skills, you can easily make homemade emery. The design of the future machine will include: an emery stone (sharpener), a support frame, an auxiliary table, and electrical equipment.
Homemade emery from a washing machine engine
The task: how to make emery with your own hands will be greatly simplified by having an old washing machine with a working electric motor on the household.
The operating characteristics of the electric motor should be as follows: voltage - 220 Volts, power - 370 Watts, speed - 2800 rpm.
By removing the engine from a washing machine that has become unnecessary, you can solve the problem of providing the future emery with an electric drive.
Necessary materials
To make a sharpener, you need to have the following list of materials and structural elements available.
1. Electrical equipment set:
- a capacitor for starting the engine (you can use the one that was in the washing machine);
- switch;
- wires;
- plug with cable.
2. Engine elements:
- flange for attaching an emery wheel;
- grinding wheel for the sharpener (as an option, you can purchase several wheels with different degrees of grain);
- a piece of galvanized sheet.
3.Materials for support frame:
- 2 corners;
- a piece of pipe with a large rectangular cross-section;
- 2 pieces of pipe with a smaller rectangular cross-section;
- rubber shock absorbers.
4. Materials for the auxiliary table:
- 2 metal plates;
- a piece of square pipe;
- set of bolts and nuts.
5. Auxiliary materials:
- primer paint for metal.
Required Tools
Among the tools and devices for making emery, it is advisable to acquire:
- an angle grinder with a cutting wheel for metal and a brush for cleaning metal;
- welding machine;
- drill with a set of drills;
- a set of files;
- vice;
- screwdriver;
- a set of keys;
- tape measure;
- hammer;
- ruler;
- pencil;
- with brushes.
Stages of work on making emery
1. Initially, it is necessary to decide on the dimensions of the future emery machine, develop its diagram, drawings of structural elements. If you wish, you can use the drawings published in the article. The dimensions of the future emery must be brought into line with the dimensions of the available electric motor.
2. It is advisable to order a special flange from a turning workshop for attaching an emery wheel to the electric motor shaft with a set of fastening nuts, since independent production of this element requires special machines, as well as appropriate professional experience.
3. Manufacturing of the support frame.
3.1. Using an angle grinder, on the wide edge of a large rectangular pipe, according to the drawing, a groove should be cut into which the capacitor will subsequently be placed. Also, you will need to cut appropriate recesses in the corners for future installation of the electric motor.
3.2. From the available pipe blanks and corners, it is necessary to weld the frame using a welding machine.
3.3. Using a drill, you need to drill a specified number of holes for mounting the washing machine motor.
4. Making an auxiliary table.
4.1. On the horizontal surface of one of the metal plates, it is necessary to drill longitudinal grooves with a drill, which will serve as guides for moving the table to a certain working position. The surface of the second (top) plate is left smooth.
4.2. Using a welding machine, the elements of the table are welded: 2 metal plates, a square pipe.
5. Due to the bolted connection, the table is fastened to the frame.
6. Using a metal brush attached to a grinder, all roughness and irregularities in the resulting structure are cleaned.
7. All metal parts of the structure are coated with metal paint.
8. Rubber shock absorbers are attached to the lower part of the frame using self-tapping screws.
9. The electrical circuit is assembled and the switch is attached to the frame.
10. A protective apron is made and installed on the engine from a piece of galvanized sheet.
11. The sharpener structure is completely assembled, with all electrical elements connected. The collected emery is ready for use.
The process of making a sharpening machine yourself is guaranteed to be simple even for a person who has little skills in working with metal and has basic knowledge of electrical engineering. This type of emery will be a good auxiliary equipment for every business person who prefers to solve everyday problems on their own.
making emery with your own hands
A tool for sharpening drills should be in the arsenal of any home craftsman.
When working with hard workpieces, the working surface of the drill wears out quickly. A dull drill becomes very hot and loses strength. This occurs due to the “releasing” of the metal. The tool must be sharpened periodically. However, this applies not only to drills.
Drills are inexpensive devices. In any case, those models that are used in the household. However, it is wasteful to buy a new tip every time it becomes dull.
There are factory-made sharpening devices, but this violates the concept of economical use of home tools.
Wood drills practically do not become dull, except that the tool can be “driven” at high speeds into a resinous workpiece. Pobedit tips for concrete and stone cannot be sharpened. All that remains is to sharpen the drill for metal. Many experienced locksmiths carry out this procedure with their own hands, without any equipment.
However, the accuracy of the work leaves much to be desired, and not every home craftsman has such a professionally developed eye. In any case, minimal mechanization is necessary.
How to make a homemade device for sharpening drills?
First of all, you need to acquire a means of control. No matter how you sharpen the drill, you need a template to check the accuracy of the work.
Conventional drills for working with ferrous metals have an edge angle of 115-120 degrees. If you have to work with different materials, check out the table of angles:
| Processed material | sharpening angle |
| Steel, cast iron, carbide bronze | 115-120 |
| Brass alloys, soft bronze | 125-135 |
| Red copper | 125 |
| Aluminum and soft alloys based on it | 135 |
| Ceramics, granite | 135 |
| Wood of any species | 135 |
| Magnesium and alloys based on it | 85 |
| Silumin | 90-100 |
| Plastic, textolite | 90-100 |
Knowing these values, you can prepare several templates and, in accordance with them, sharpen yourself. In this case, you can use the same drill for different workpieces, you just need to change the angle of the top of the working area.
Popular: How to use a tile cutter, and is it possible to do without it?
The simplest, but very effective sharpening device is bushings of different diameters, mounted on some kind of base. Schematic drawing of the device in the illustration:
It is best to make a whole clip of copper or aluminum tubes, to fit standard drill sizes. Or drill a sufficient number of holes in a block of soft material. The main thing is to install a comfortable tool rest on your sharpener, which will allow you to move the sharpening device at the right angle and serve as a reliable support.
Our grandfathers used this method. Only an oak block was used as a material for the manufacture of a sharpening machine - an angle.
In principle, it was enough to place a table or workbench opposite the side surface of the emery - and the sharpening machine was ready. At the same time, the quality and accuracy of processing was at a high level.
There are different drawings of sharpening devices.
You can use a ready-made one, or develop it yourself. The main thing is to understand the principle of working with a drill.
